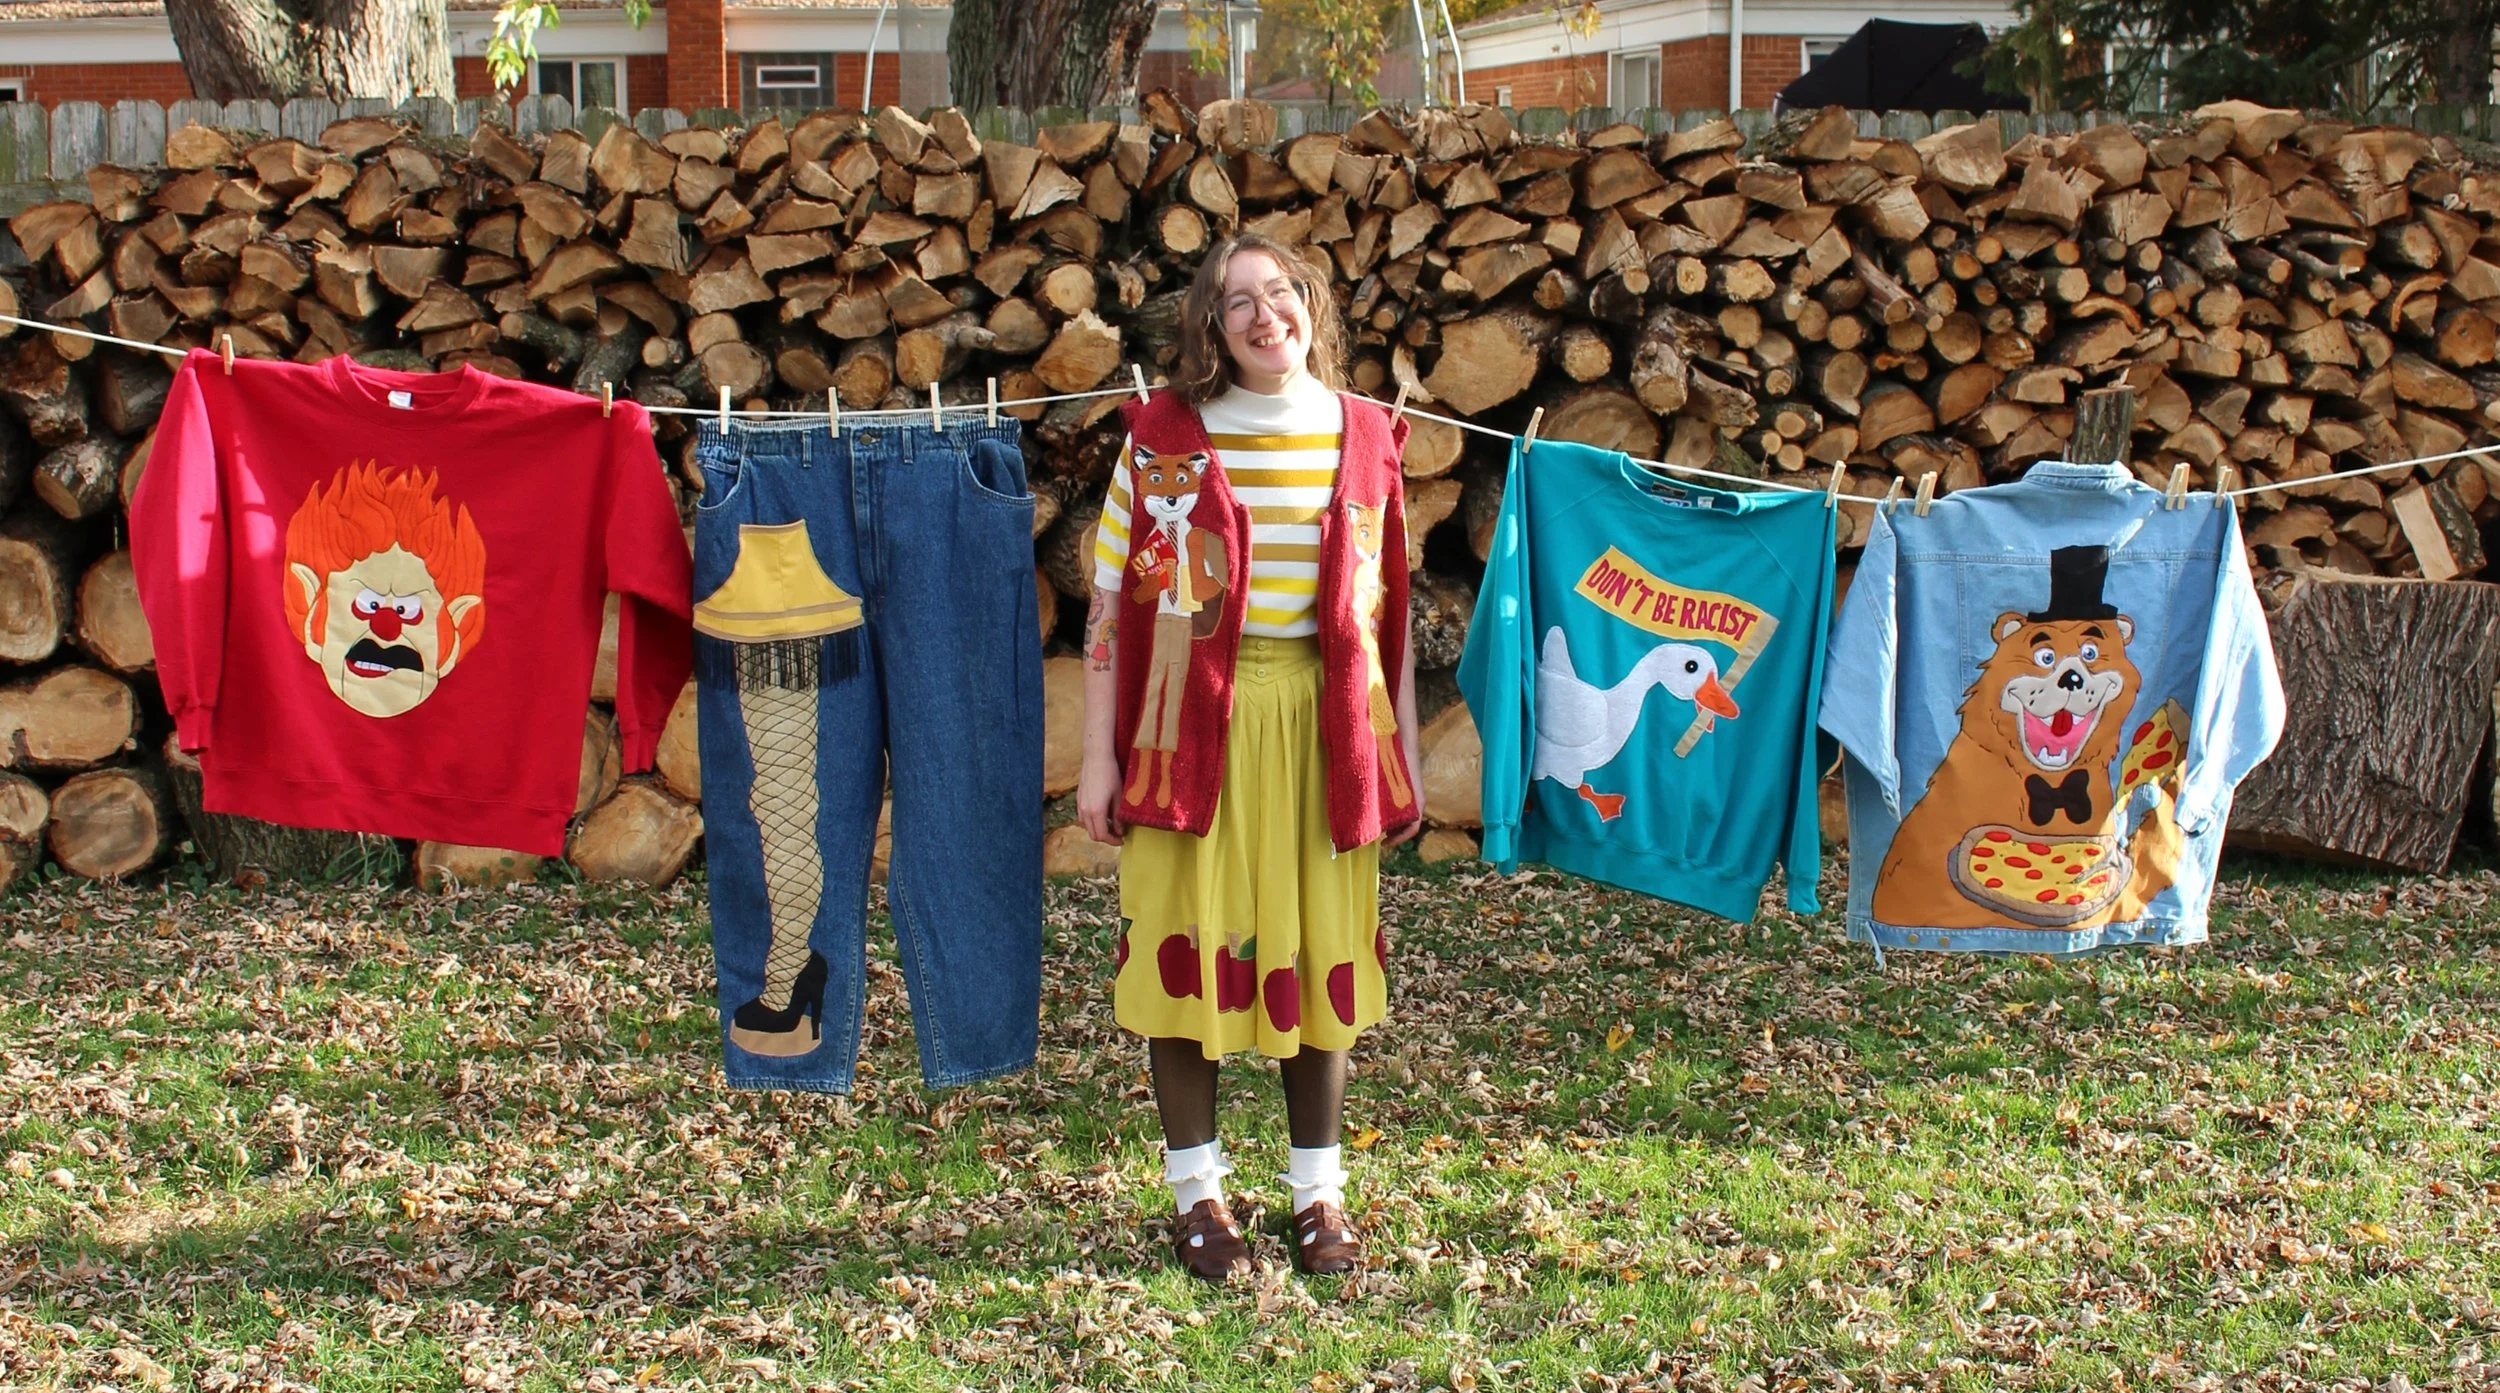
Some of my favorite tools and techniques to creating applique on clothing!
Want to support me? I have some stickers and art!
I recommend viewing this on a computer for the easiest experience :)
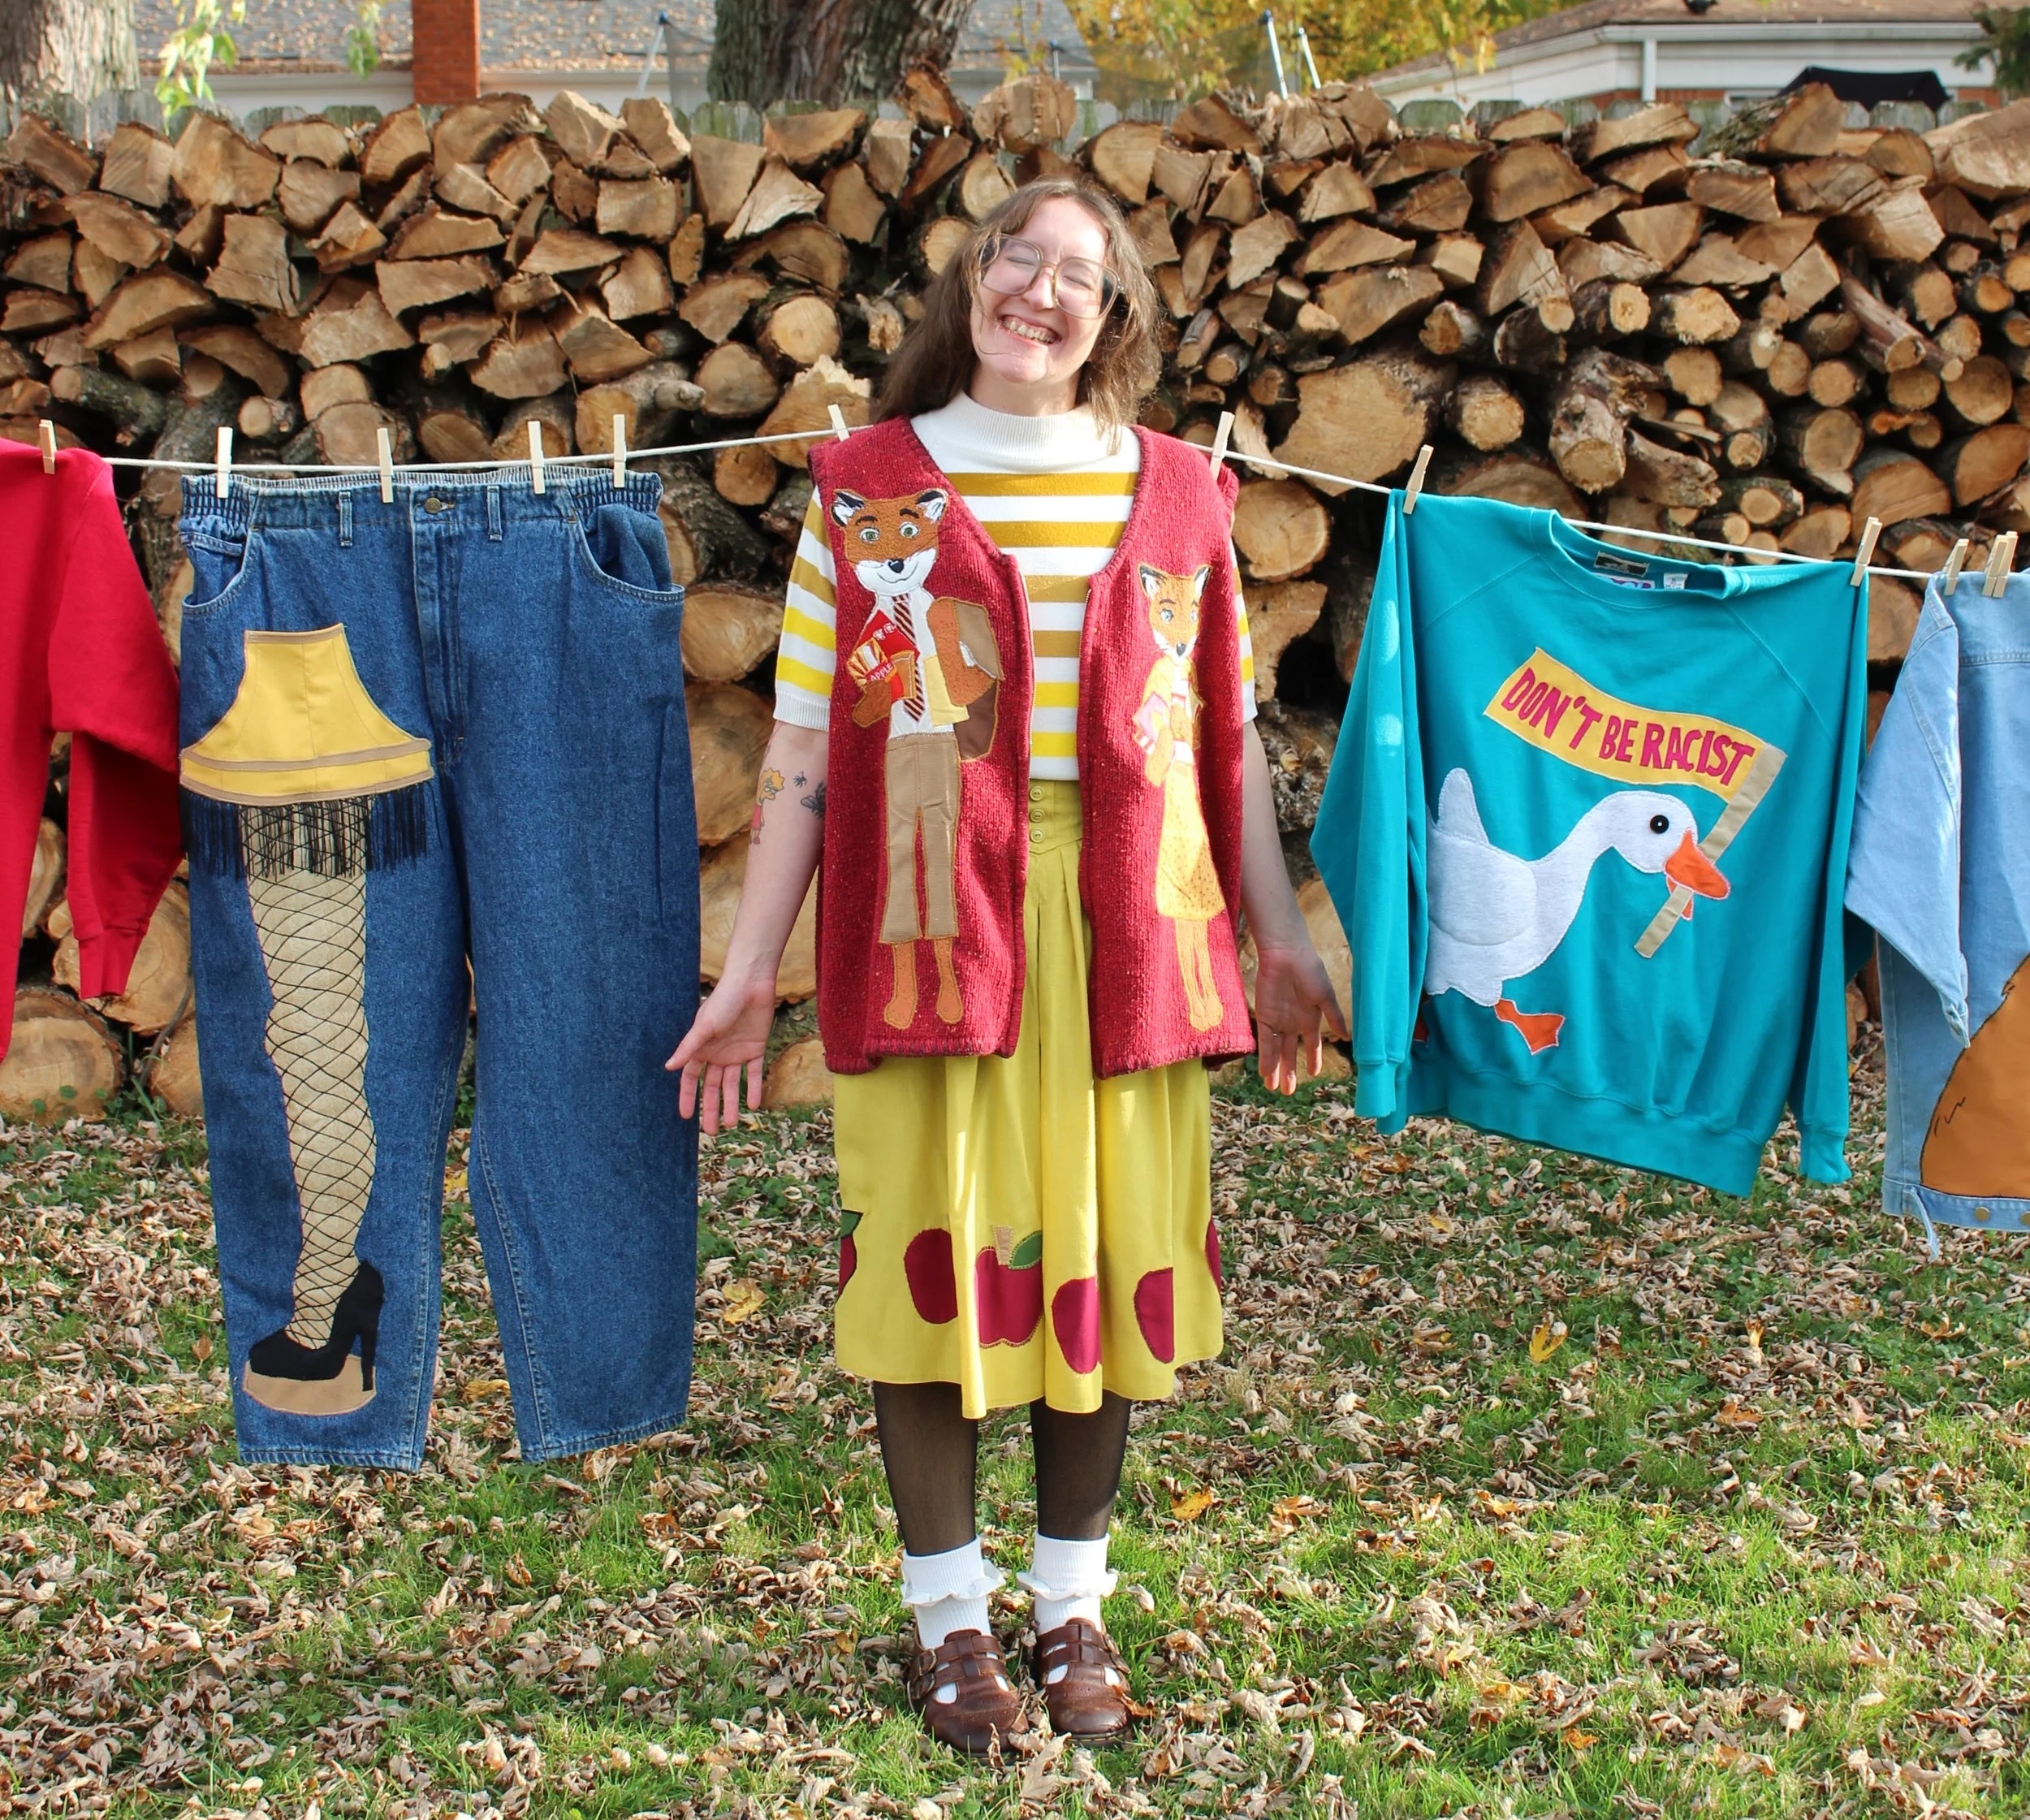
What is “Applique”?
Ap·pli·qué
noun
Pieces of fabric are sewn or stuck onto a large piece of fabric to form pictures or patterns.
You’ll Need
Sewing Machine
A regular sewing machine is capable of applique. I recommend using a free motion foot to make your life easier, but it isn’t required. If you do want a free motion foot, you’ll need to make sure your machine is compatible with one.
(Optional) Free Motion Foot- I prefer the open toe style, read below to see the options.
Thread -As many colors as you can, and need for your project. You can match the thread to every section of fabric, or have one single thread color. I also recommend matching the bobbin thread to your garment.
Thick Sewing Machine Needle- I typically use the ones labeled “Denim”. 90/14
Scissors- Use fabric scissors for fabric, and regular scissors for stabilizers.
Pins- To temporarily secure fabric.
Fabric Glue- I use Aileens or Mod podge Fabric Glue. Washable and Permanent.
Medium Weight Tear-Away Stabilizer- A stiff surface to build and sew your patch onto.
Fabric Scraps- Non-stretchy, thin fabric is best. Though many are usable. Read below for fabric recommendations.
Garment to Upcycle- I typically lean towards Denim, and Sweatshirts. Thinner non-stretchy cotton is also fine. I tend to stay away from thin and stretchy fabrics like t-shirts, because they limit design options.
What Machine?
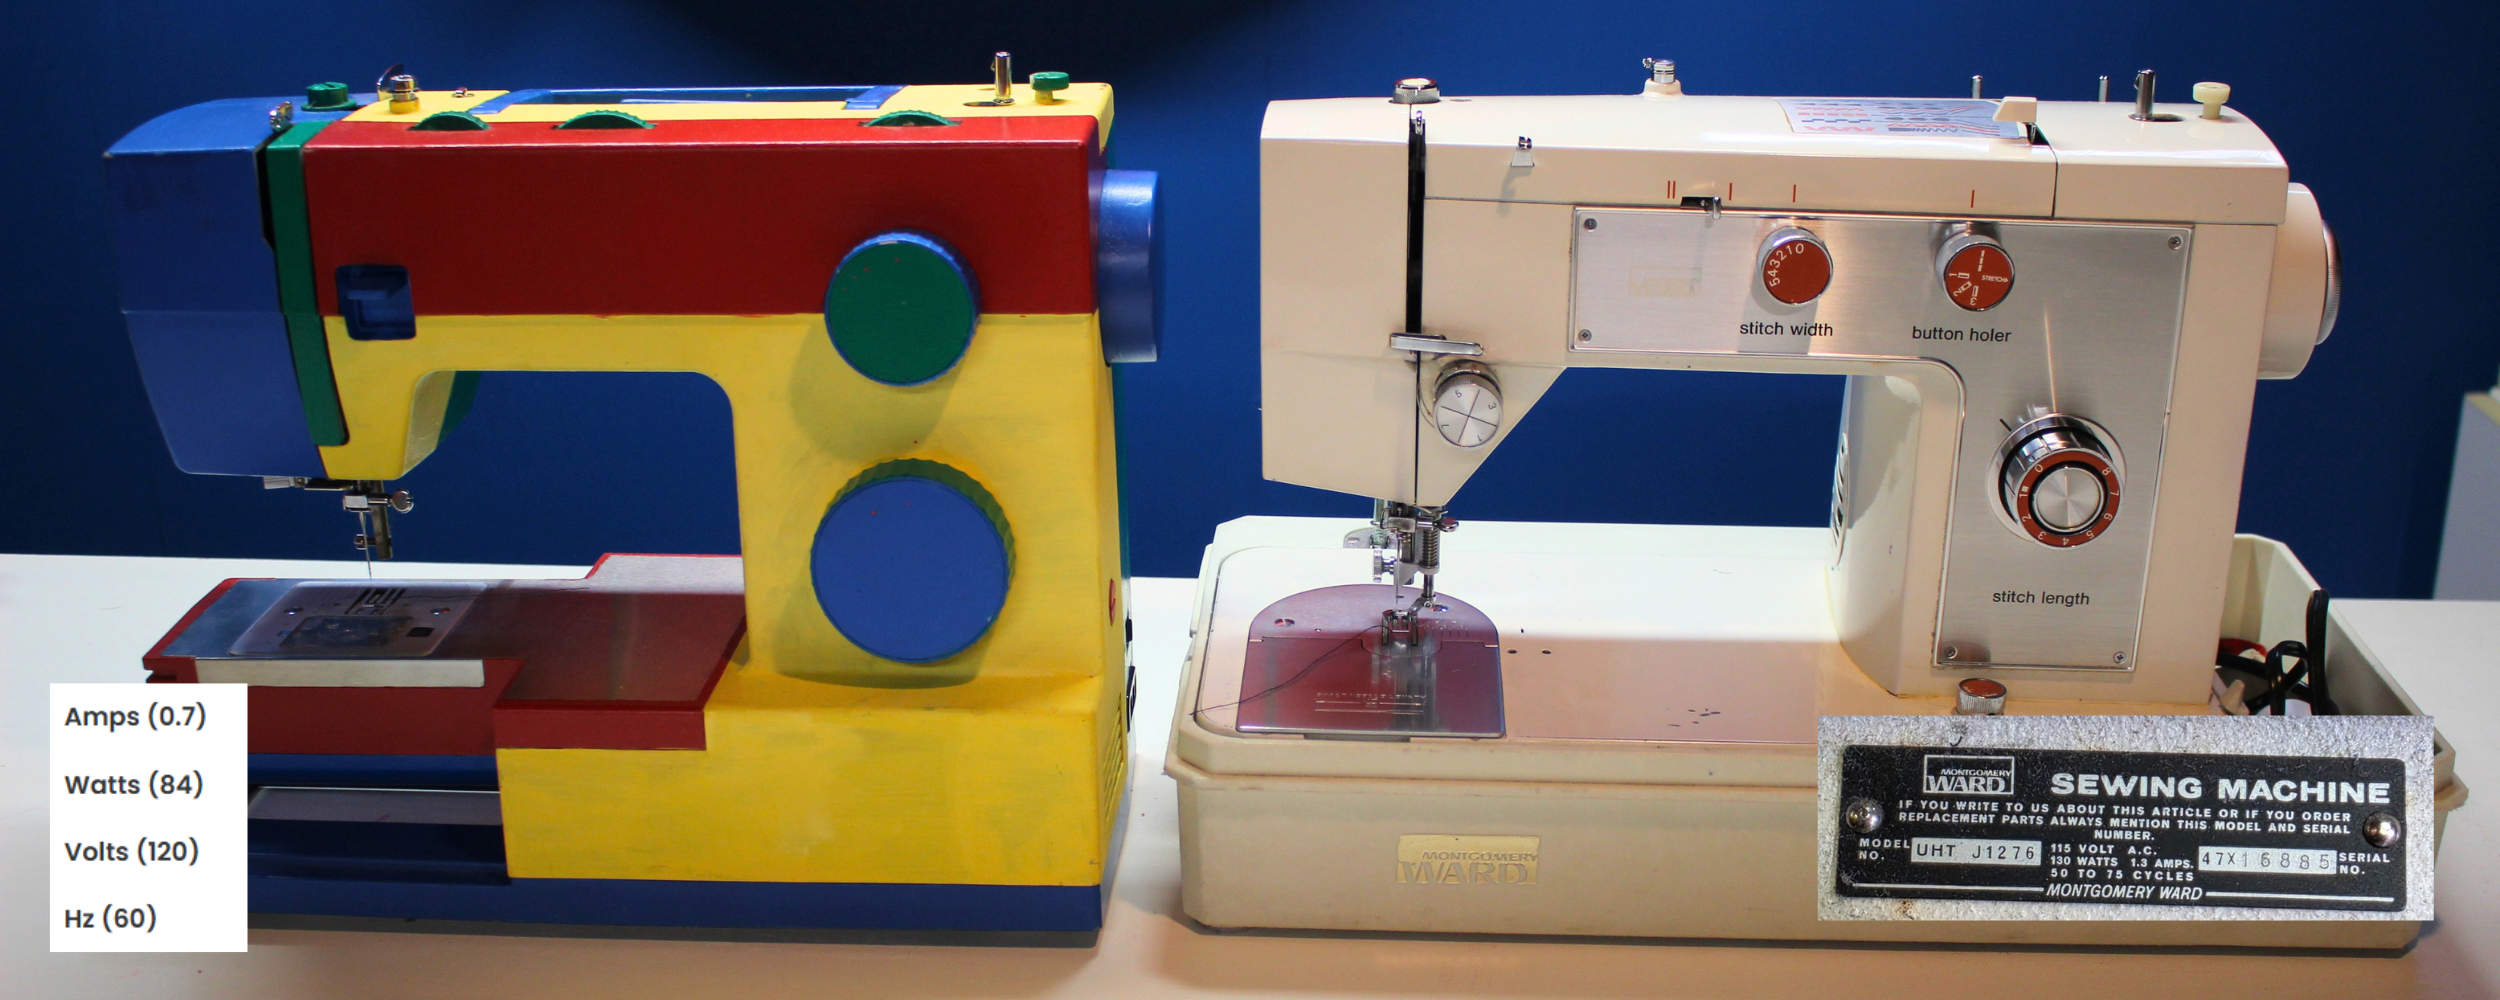
Image: 2 Different Sewing Machines. Left: Modern Singer Heavy Duty. Right: 1970s Montomgery Ward
Most sewing machines should be capable of applique.
I recommend machines that are compatible with free motion feet.
-If your feed dogs can be lowered or covered, etc. (Read below)
Singer Heavy Duty: Watts- 84 (Left on picture, it is painted)
Husqvarna Viking Emerald: Watts- 120 (Not pictured)
1970s Montgomery Ward: Watts 130 (Right on picture)
The HIGHER the wattage, the more powerful your motor is.
My favorite is the 1970s all metal sewing machine, I thrifted for 20 bucks. It’s a BEAST. I know not everyone is able to thrift a machine and risk it not working, but I am personally so glad I took the chance.
Free Motion Presser Foot
Free Motion Presser Foot
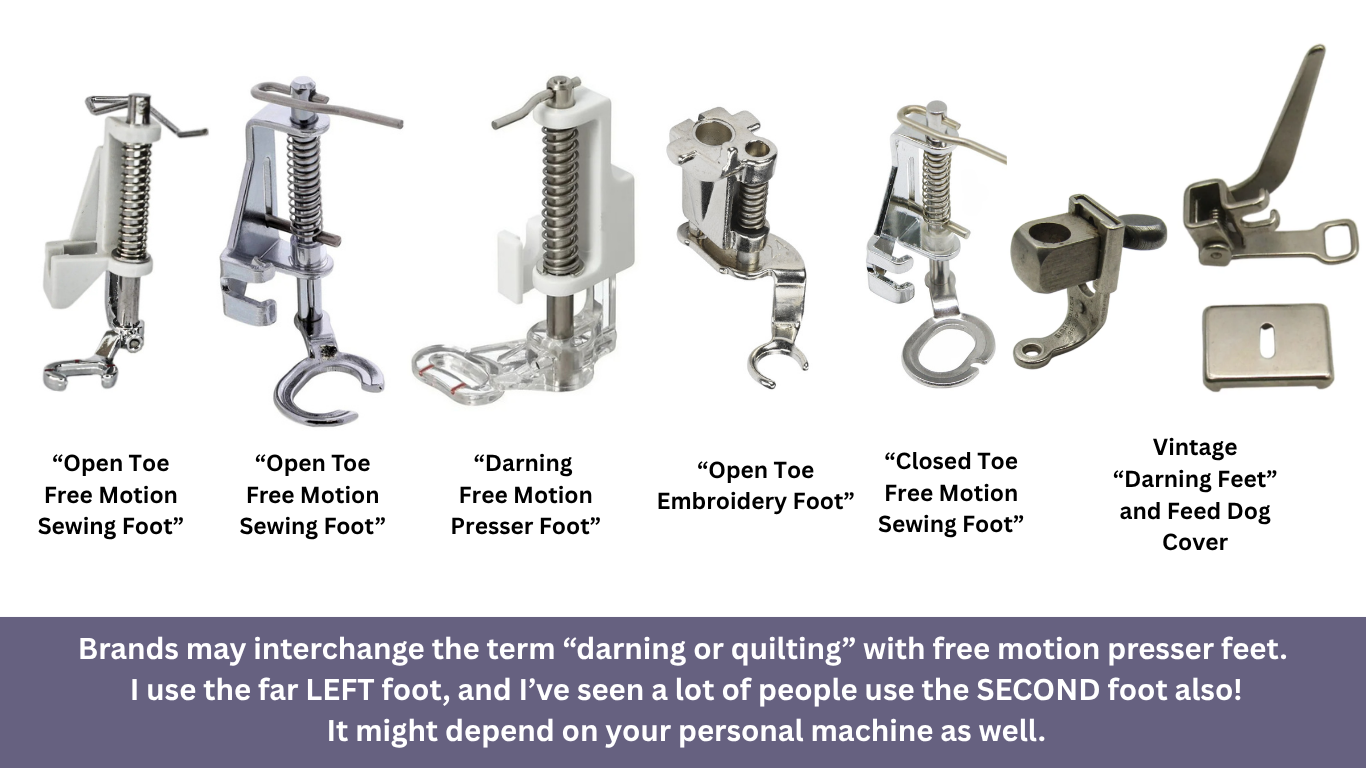
Sometimes referred to as a “Darning Foot” or “Quilting Foot”. (But other times those refer to a different foot entirely.)
*They allow you to sew in any direction, which is vital for free motion!
I typically use the LEFT foot in the image, for my sewing. I also own the SECOND one, and have seen others use it. I like the smaller foot better.
”Do I even need this foot?”
You don’t NEED this foot to sew applique. However, it makes sewing weird shapes, certain stitch types, easier. It also makes sewing in tight spaces easier… like in pant legs and sleeves.
The free motion foot presses down on the fabric to allow it to stay still, and not pull up when the needle leaves the fabric. Then it lifts up completely when the needle is up, to move in any direction. This prevents shifting and skipped stitches.
It also gives you a visual guide as to where the needle will hit down, saving your fingers from getting stabbed.
Most modern/regular machines would need a “low shank” foot, versus industrial machines need a “high shank” foot.
Low Shank Machines: AKA your standard home machine.
High Shank Machines: AKA the industrial ones.
I have been able to interchange my current free-motion foot on every single one of my Low-Shank machines. (Singer HD, 70s Montgomery Ward, Brother, and Husqvarna.) I use a cheap off brand one, nothing fancy.
Putting the foot on
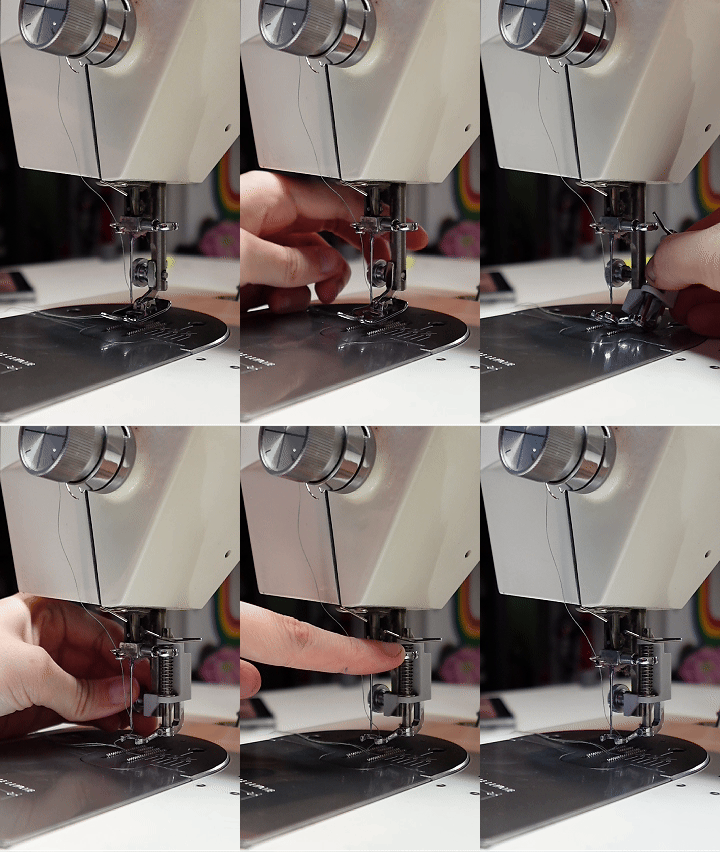
Unscrew and remove the original foot.
Put the foot on, making sure the metal horizontal bar (on the sewing machine arm) is underneath the perpendicular metal bar (on the foot).
Once the lever is put down, to begin sewing,
the bar should push up the foot, causing it hover when the needle is up, and press down with the needle.
If you are having difficulties freely moving the fabric when you sew, it might be inserted wrong.
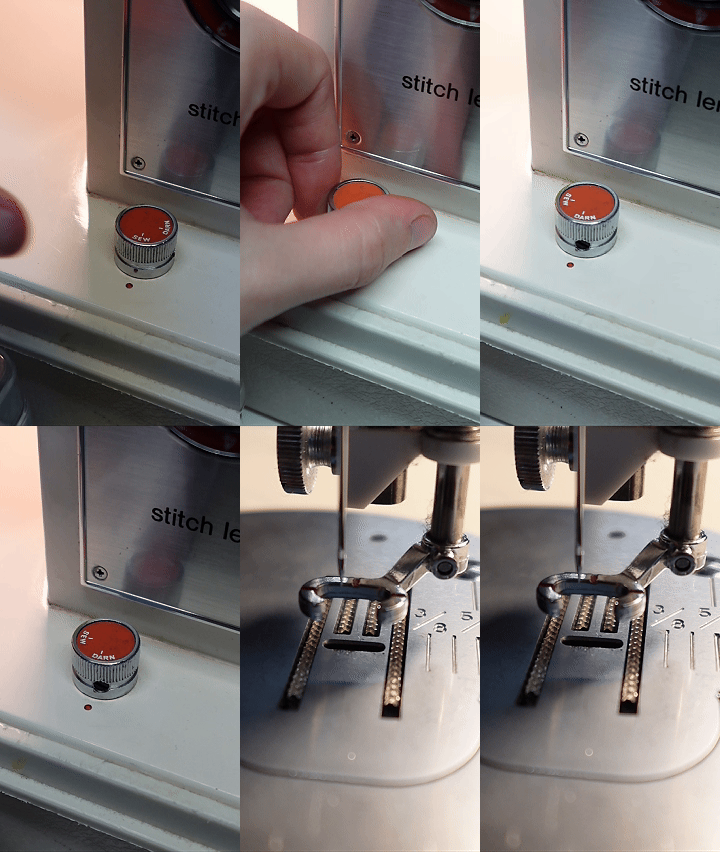
Lowering the feed dogs.
To Free Motion, you need to lower or cover the “Feed Dogs”
These are the grippy things that “pull” the fabric forward.
Depending on your machine:
1. Lever or knob to lower them. (On the front, back, etc.)
2. Plate to cover them.
Not all machines are capable of this.
Tension
There is no universal tension.
It entirely depends on your machine, fabrics, thread, stabilizers, and interfacing.
Your tension may even need to be changed within the same project, if you use different fabrics and thickness.
Keep in mind, while there is an upper thread, and bobbin tension… I am only referring to upper thread tension. You rarely need to adjust bobbin tension, unless something is wrong with your machine.
Think of upper tension, like how tight the top thread is being held.
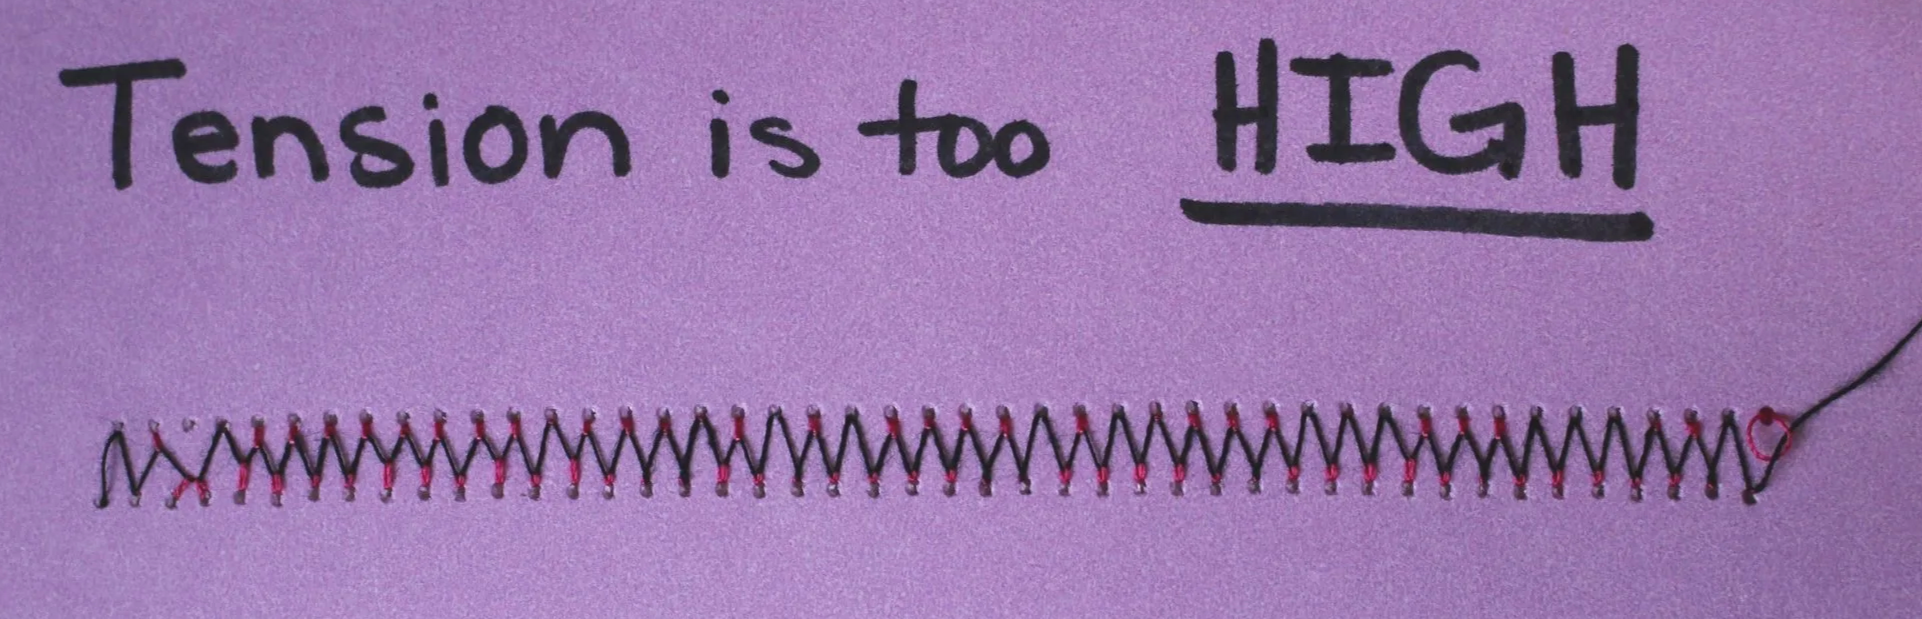
Tension is too HIGH- When the bobbin thread is visible on the top of the stitch.
Image: Pink thread is bobbin, black thread is top.
You need to slowly lower the tension until the bobbin thread is no longer visible.
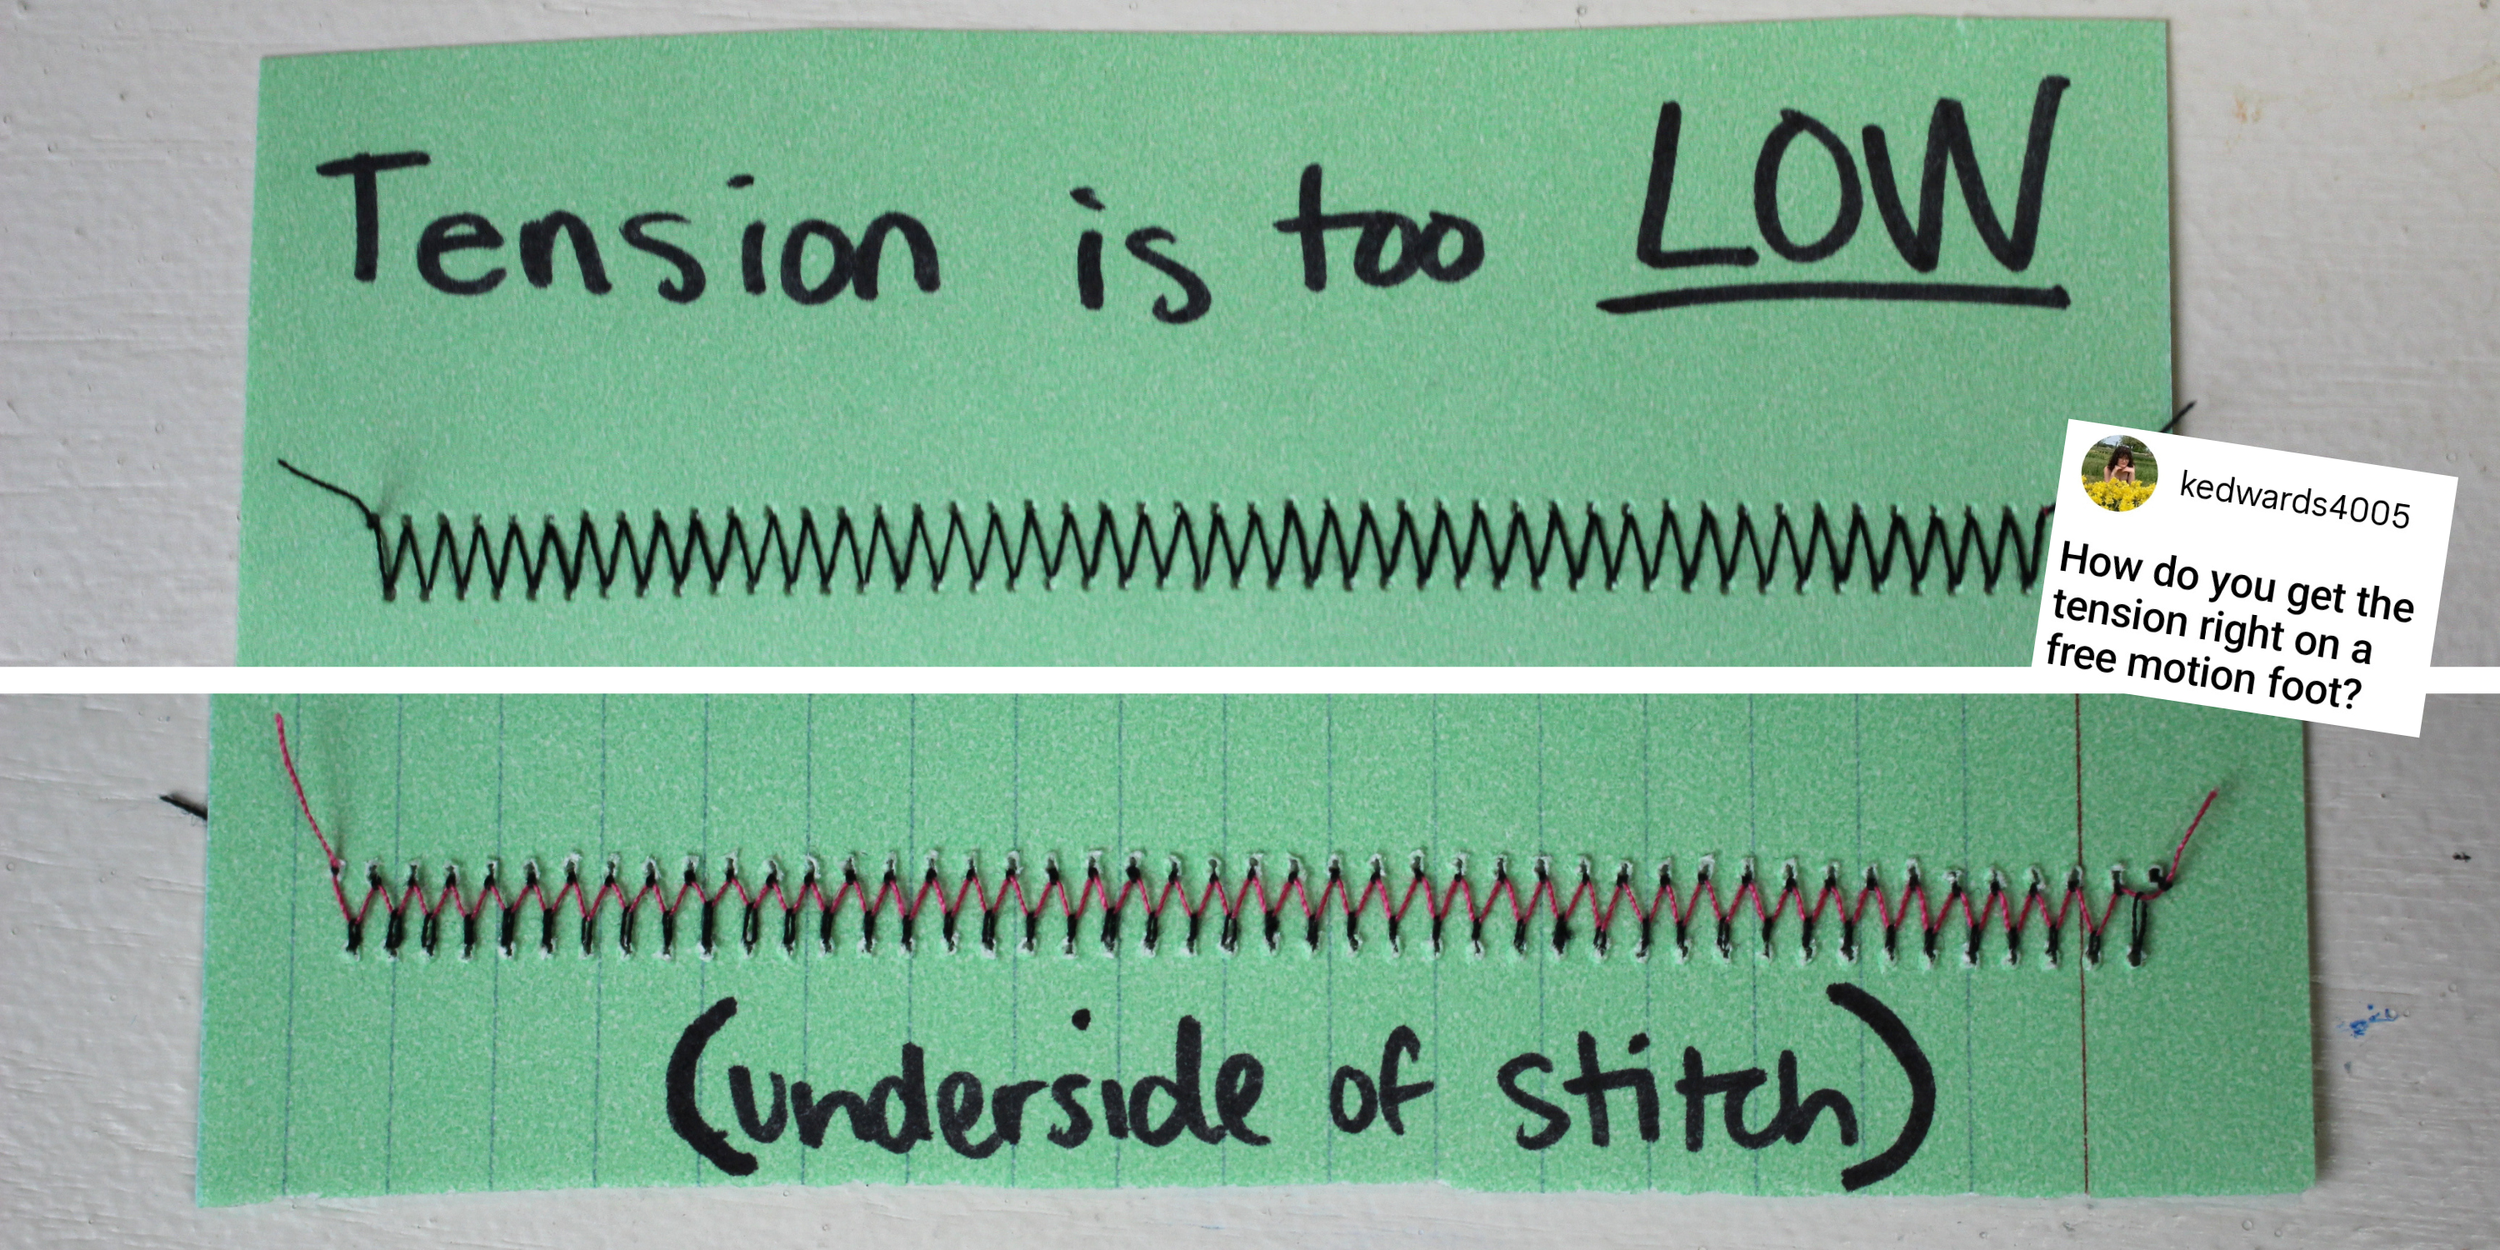
Tension is too LOW- When the top thread is visible on the bottom of the stitch.
Image: Pink thread is bobbin, black thread is top.
You need to slowly increase the tension until the top thread is no longer visible underneath.
This one is more difficult to see, because you have to physically flip your fabric up to see underneath.
Stabilizer and Interfacing
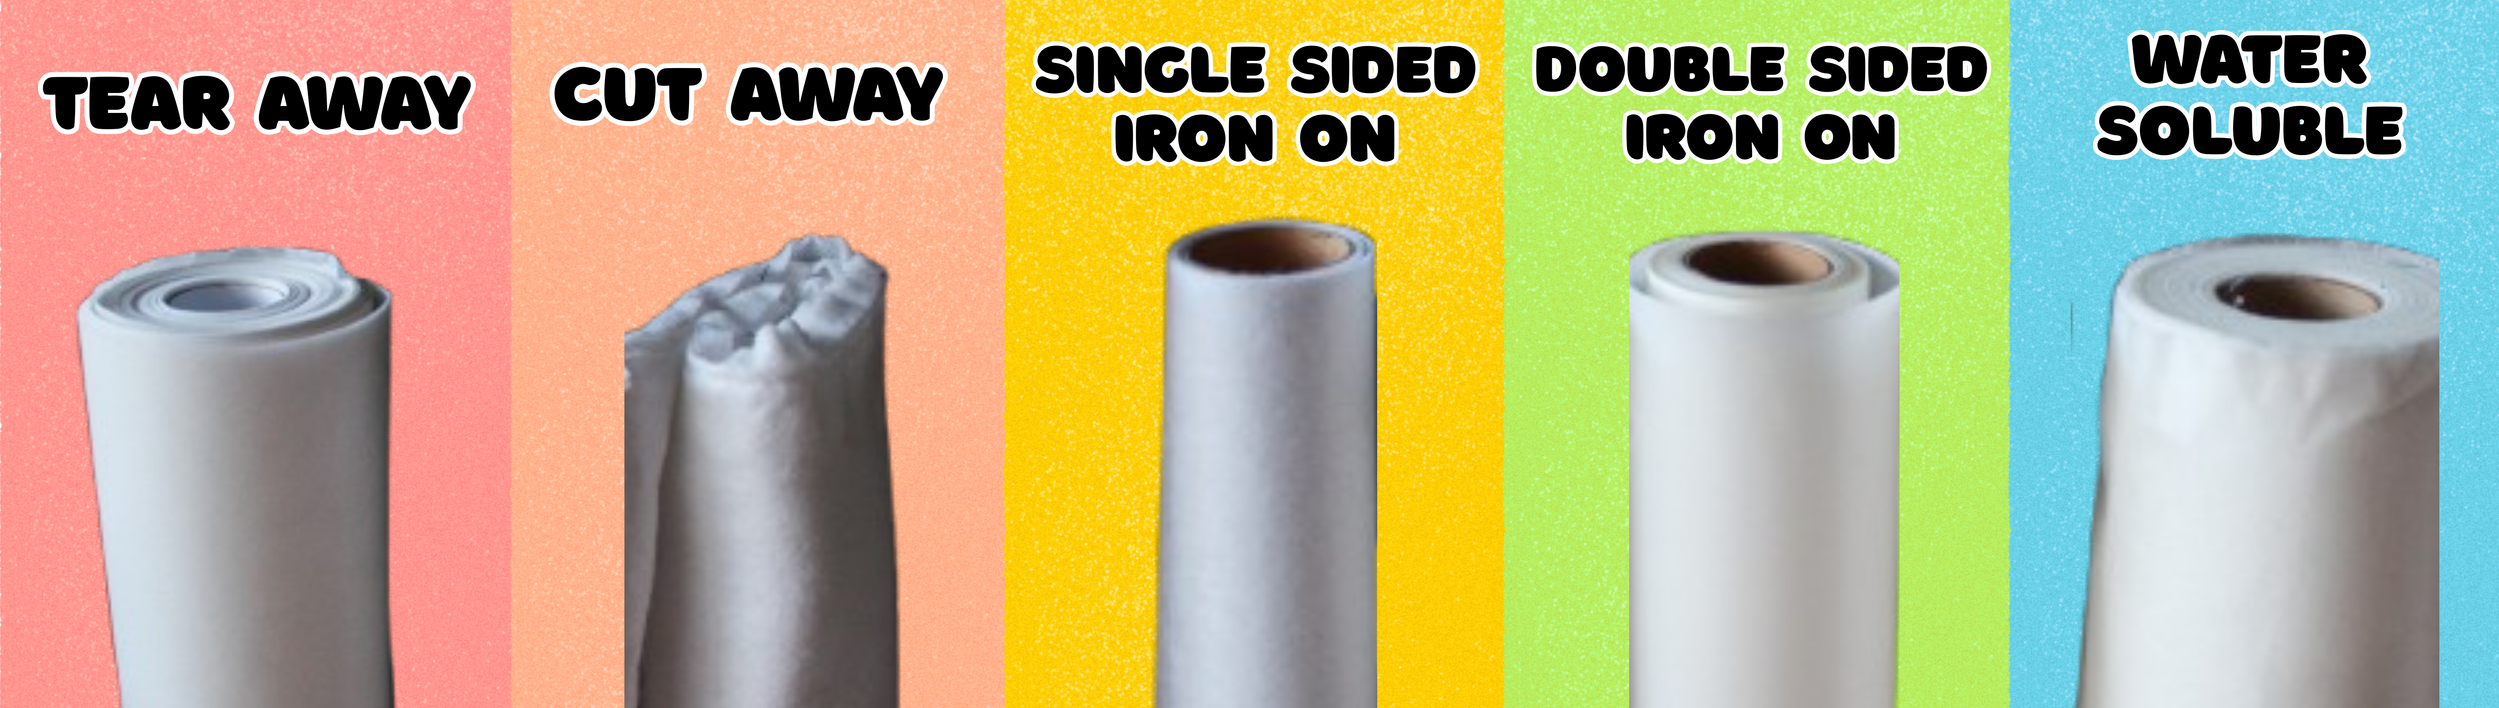
Tear Away - Cut Away - Single Sided Iron-on - Double Sided Iron-on - Water Soluble
Stabilizer and Interfacing are materials used to provide extra support to fabric while sewing.They prevent shifting, stretching, or puckering.
There are many different types… each with pro’s, and con’s.
Stabilizer: is referred to the temporary support, that is removed after sewing.
Interfacing: is referred to the permanent support, permanently kept in place.
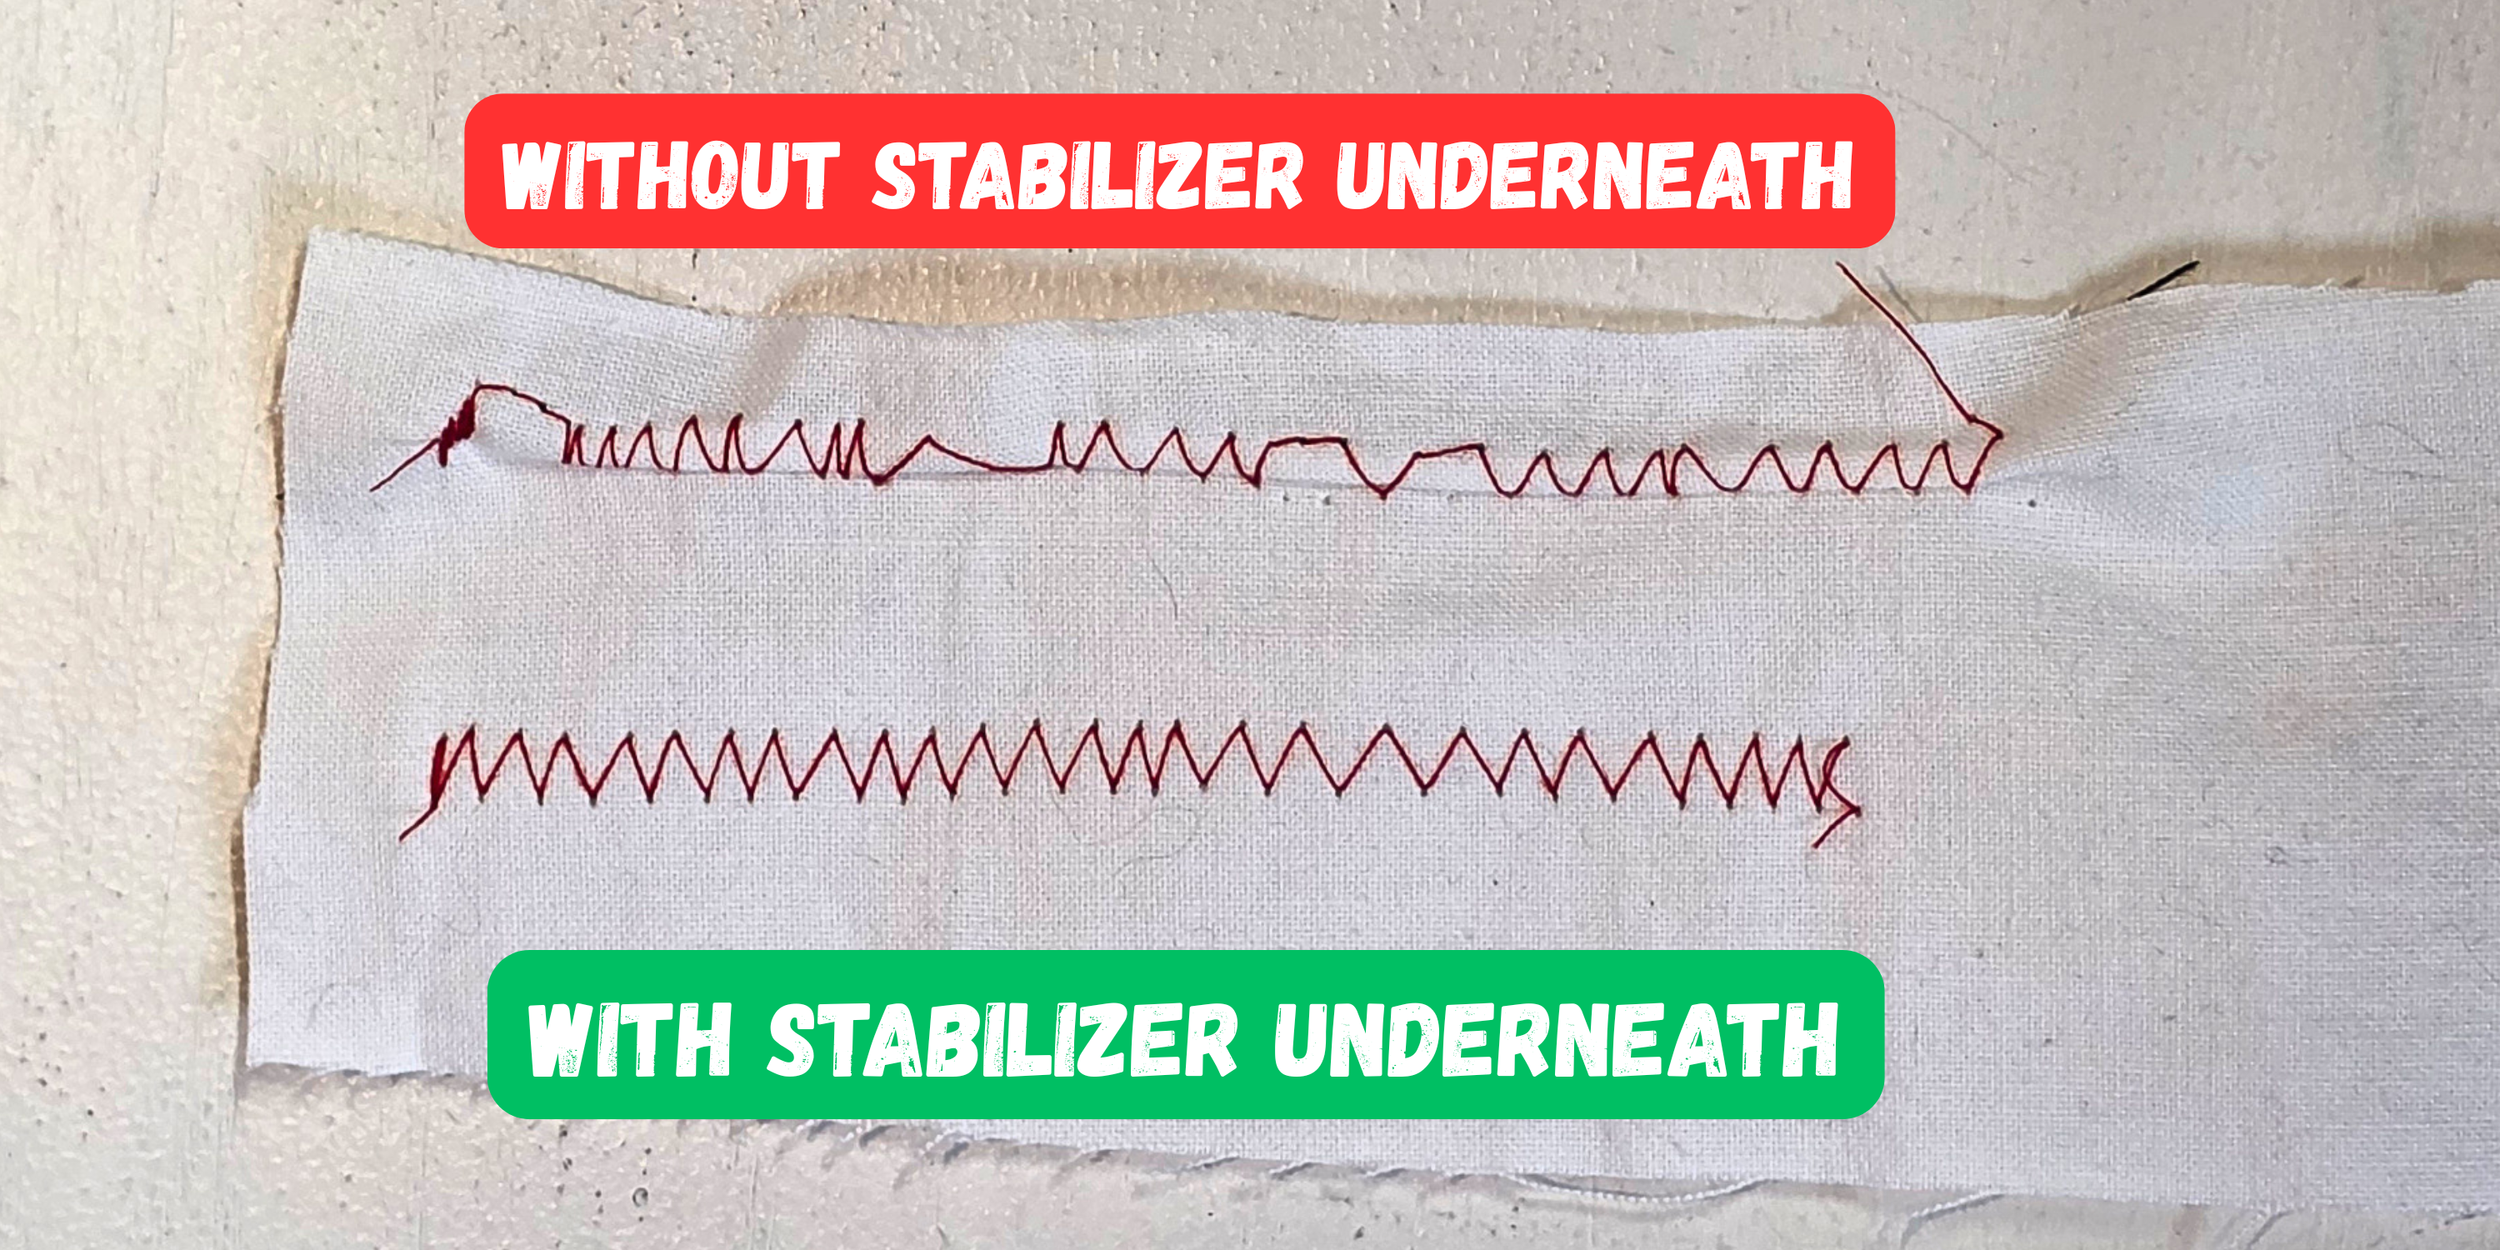
Tear Away Stabilizer- (ABOVE) serves as a durable base to build and sew your patch onto. This is my favorite to use.
They are available in light weight, medium weight, and heavy weight.
I typically just use medium, but you can try out the other weights to see what you prefer!
-Acts as a great base to build detailed appliques on.
-Prevents warping from most fabrics and projects.
Cons:
-It should remain hidden and not used inside garments where it would be visible.
-Requires a lot of sewing around the edges before tearing it off, in order to “score” and make it easy to tear.
-Makes a “crinkling” paper sound so I recommend not leaving large open portions underneath the patch.
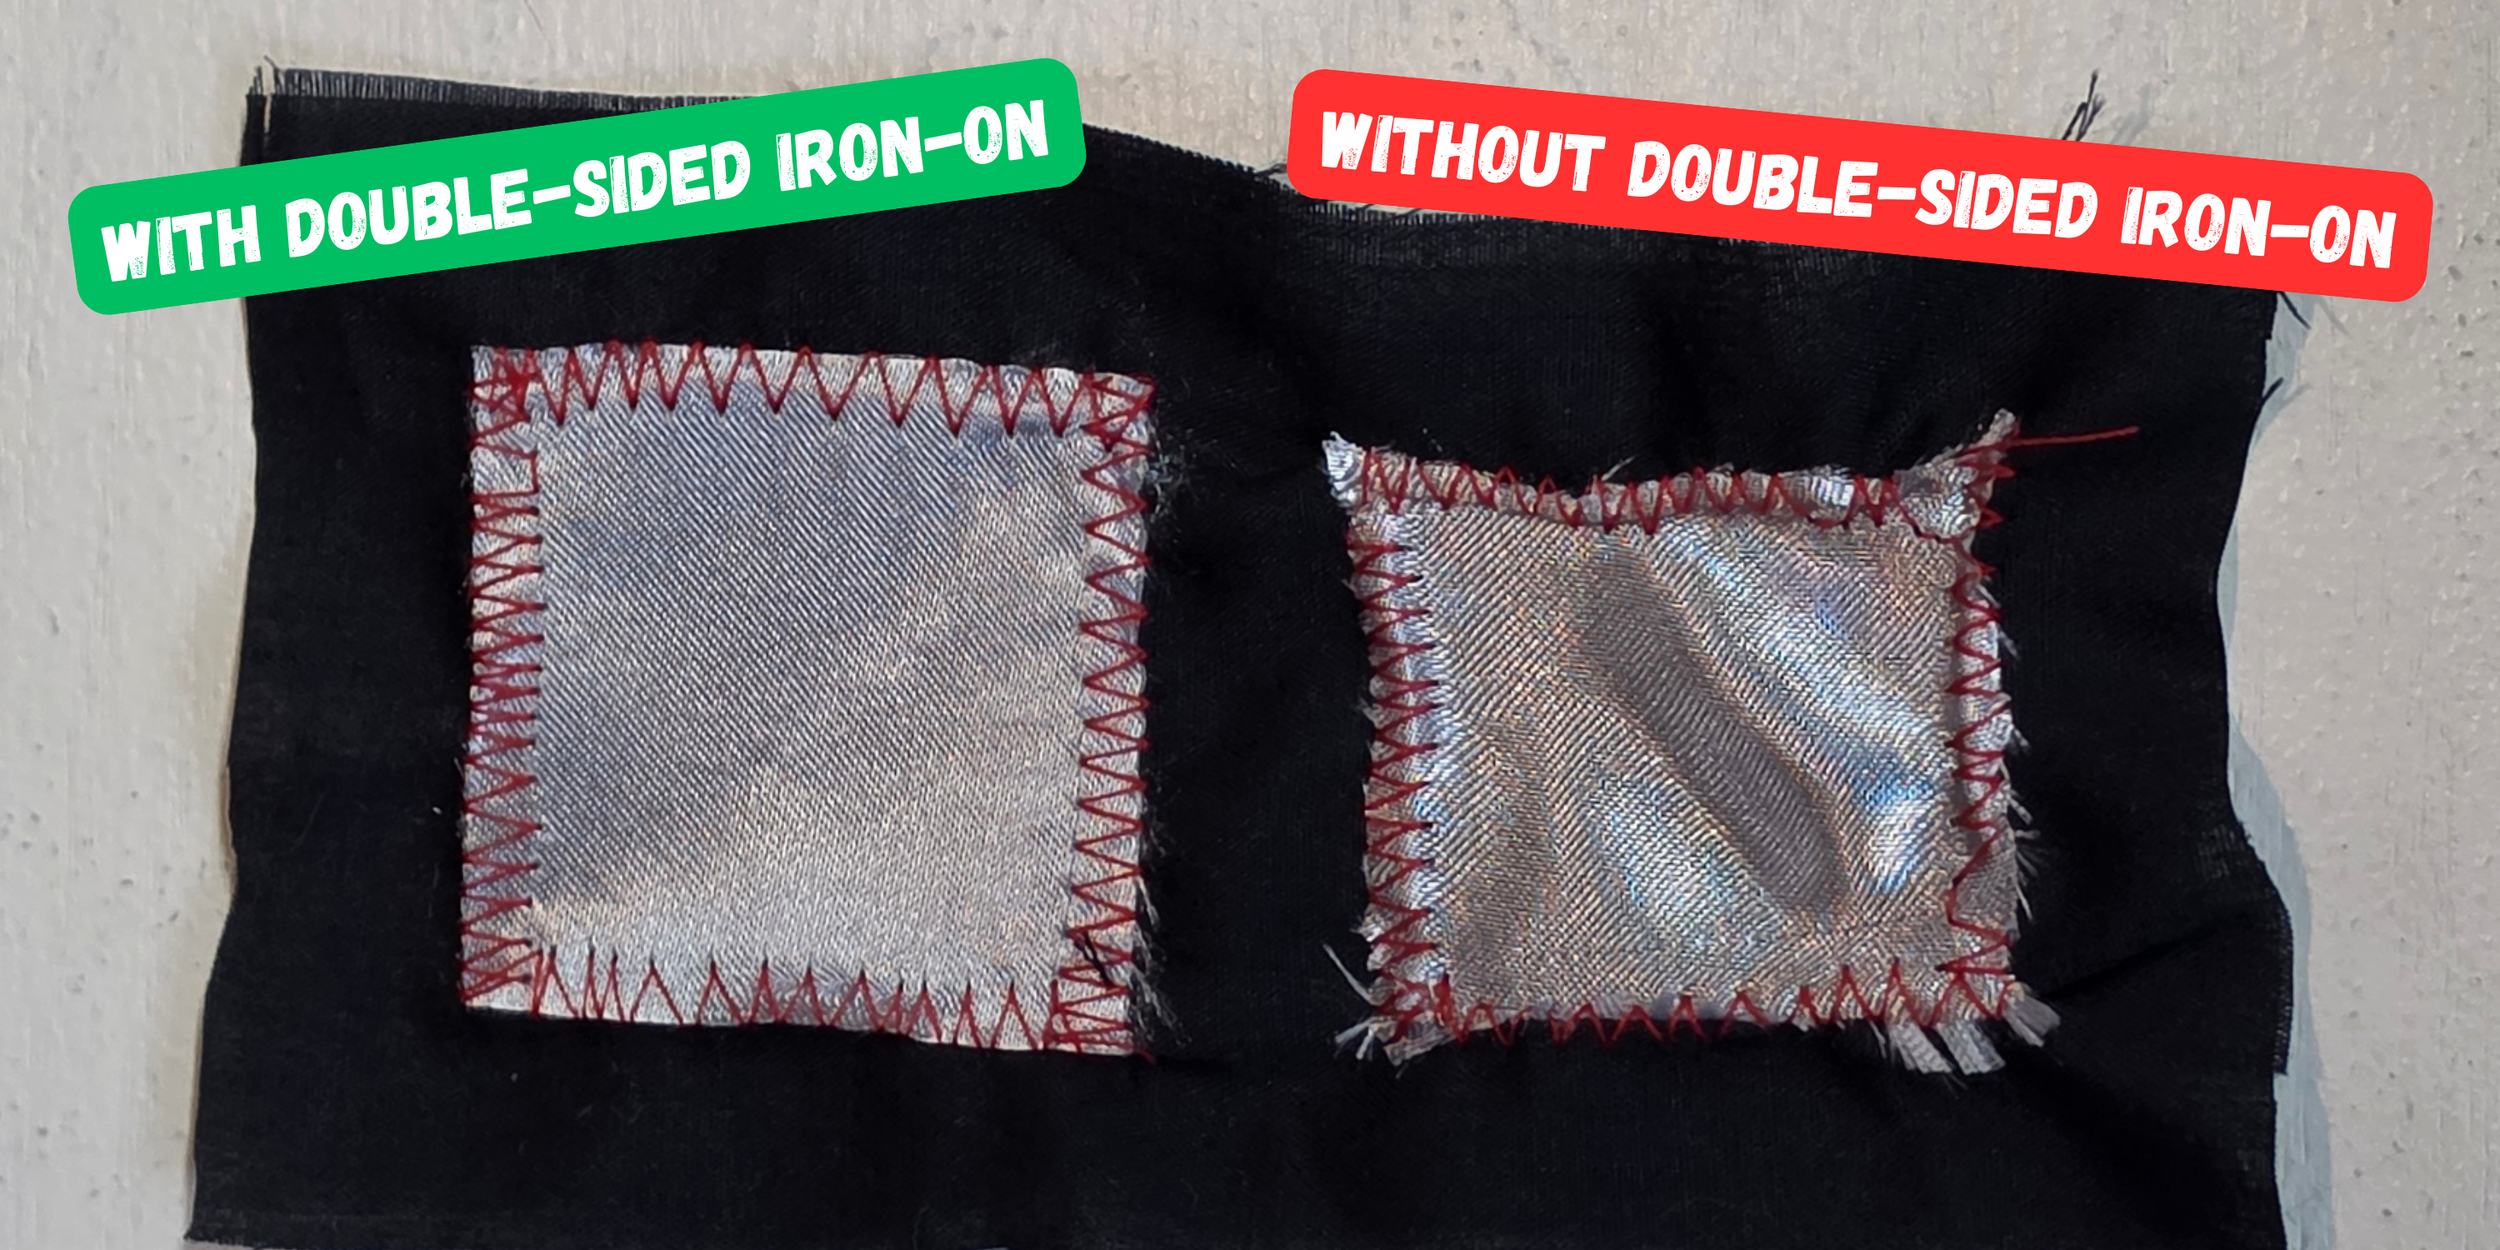
Double Sided Iron-on: (ABOVE) Adhesive on both sides. Comes in different “weights”
-Temporarily secures fabric in place without need for pins or glue.
-Best for small and detailed shaped pieces. (like letters)
-Prevents fraying on a lot of fabrics.
-Stiffens stretchy and lightweight fabric.
- May gum up your machine and needles. Don’t layer too much of this! (2 is usually max for me)
Cons:
-Not recommended for fleece or delicate meltable fabric
-Can get a little gluey for the needle to go through, so don’t use too many layers
-Has an additional sheet to cover one of the adhesive sides, that is eventually thrown away (aka more waste)
-Not permanent. Still needs to be sewn on!
Cut Away: Thick batting like material, typically cotton.
-Stays on the garment after sewing. Can be washed.
-Typically used on heavy weight fabrics, and embroidering onto garments like sweatshirts, caps, and denim.
Cons:
-Not easily removable.
-Tends to stay visible on the isnide of a garment.
Single Sided Iron-on: Can be woven, or non woven. Woven= washable/sturdier, Unwoven= easily rip-able
-Provides additional support for fabrics, to permanently prevent stretch or stiffen thin fabrics.
-Prevent fraying on thinner fabrics
Cons:
-Doesn’t attach well to fleece/fluffier fabrics.
-Typically has “dots” of adhesive versus entire coverage
- May gum up your machine, keep it clean!
-Only attaches to one side, not sued as a way to adhere one fabric to another.
Water Soluble: Disintegrates with water.
-Best for thinner delicate fabrics.
-Easily removes when washing.
-I typically use this with an embroidery hoop on the underside of garments.
Cons:
-Thinner, so it tends to only provide support with thinner fabrics.
- You can’t use fabric glue with this, or it’ll dissolve.
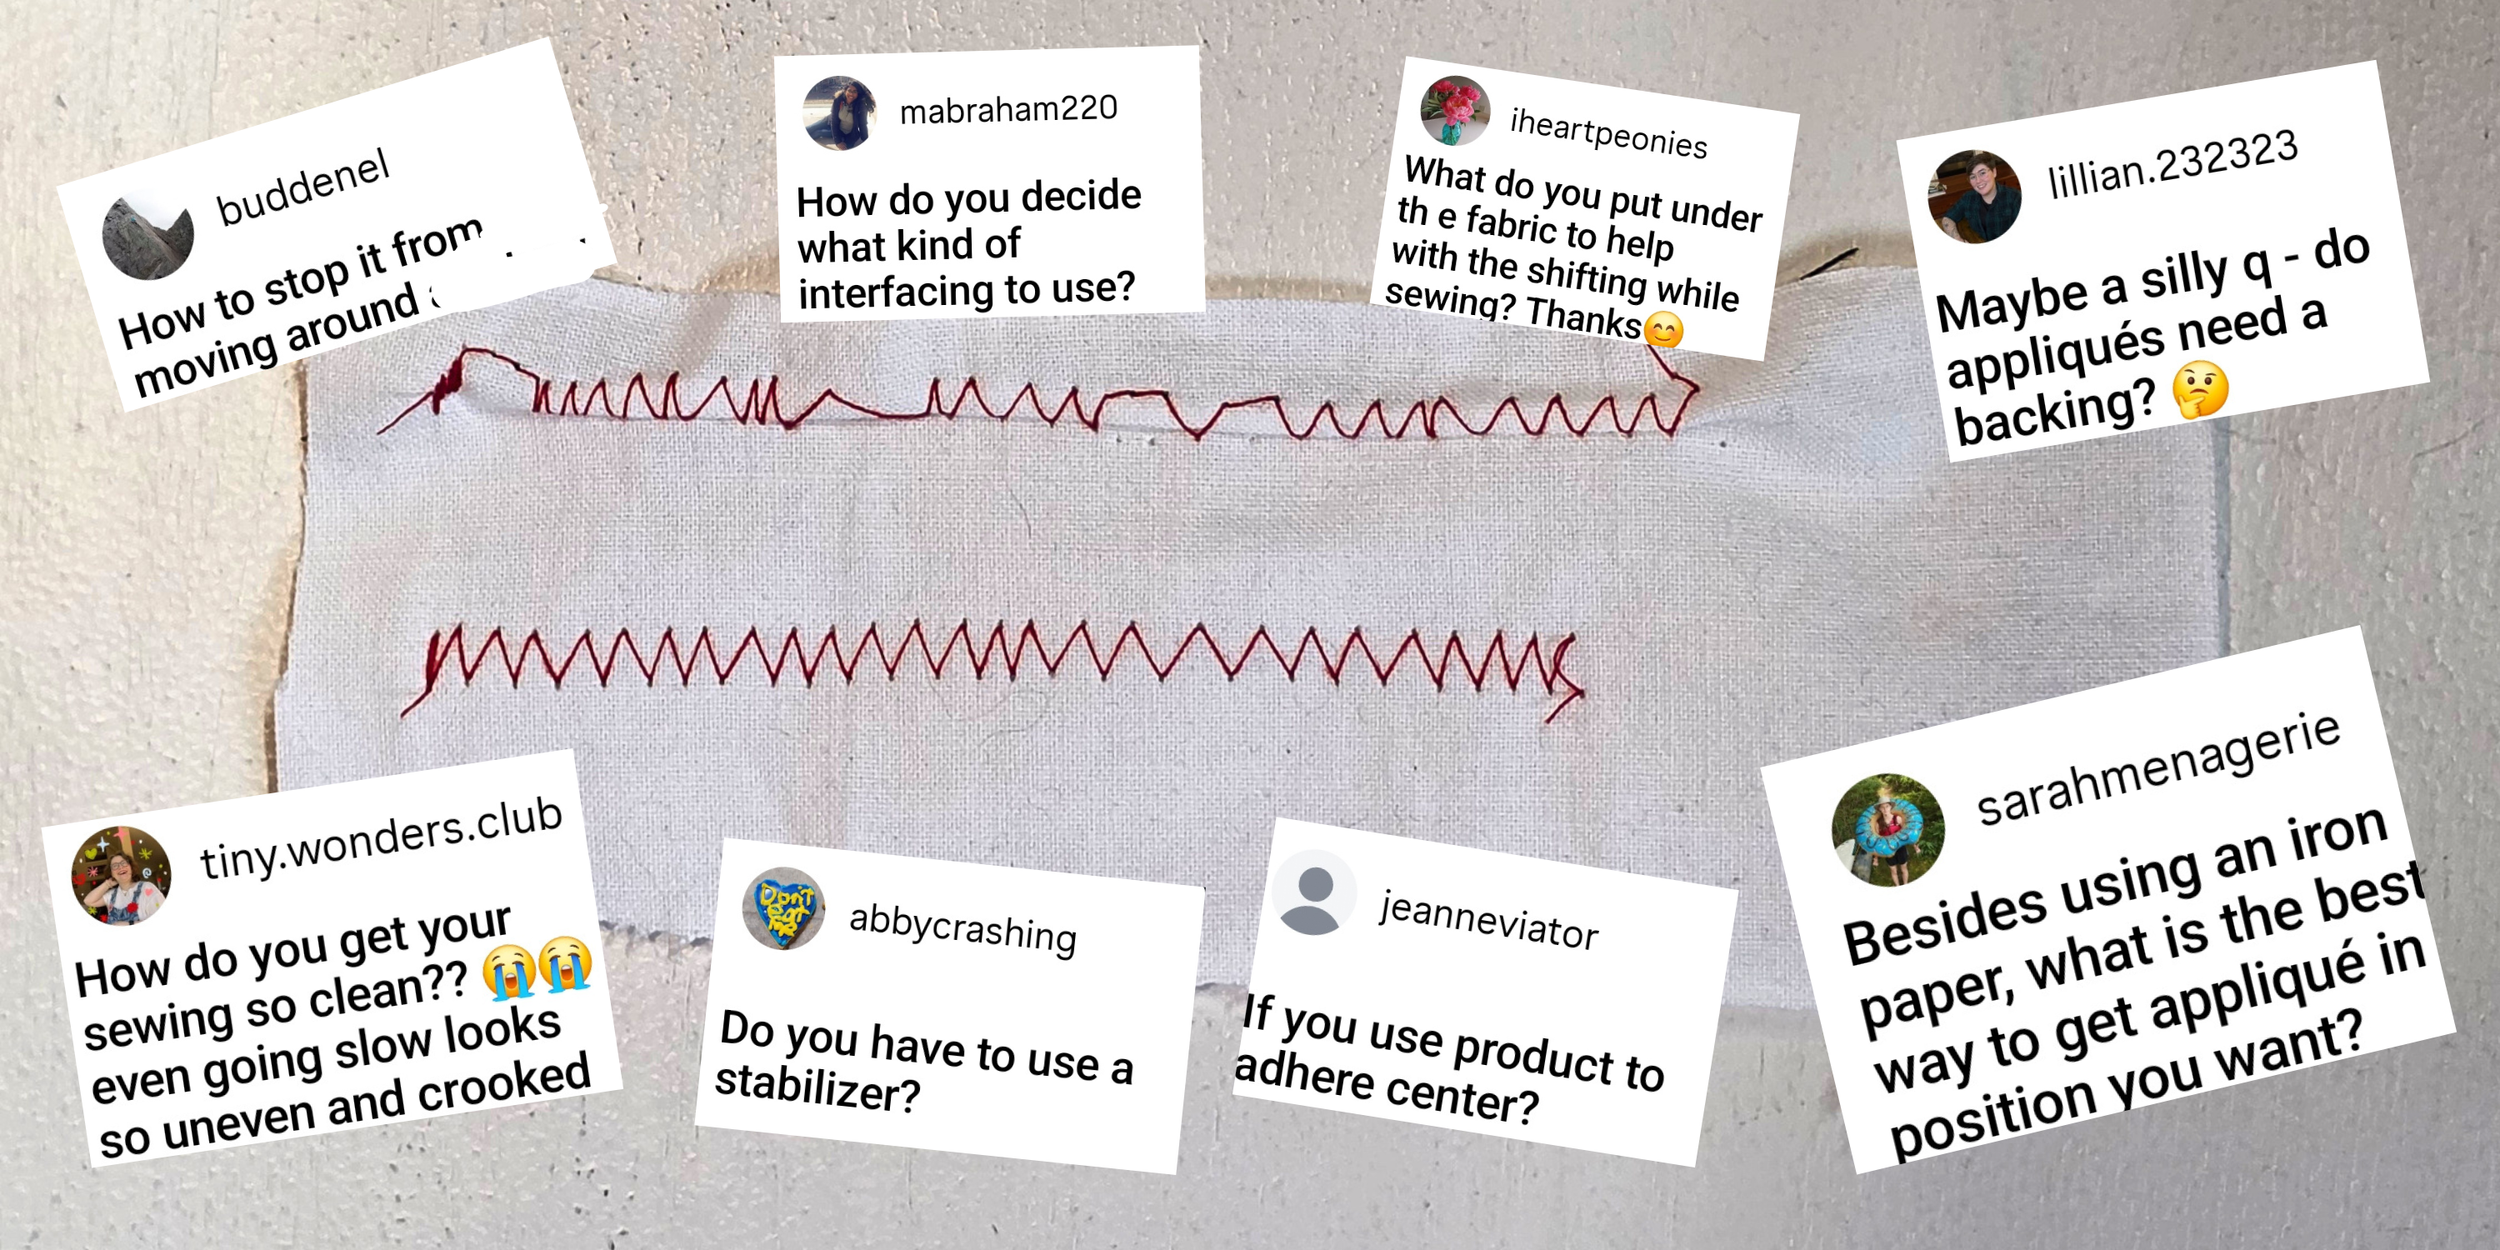
Image: Fabric sewn with a zigzag stitch. There is medium weight tear away stabilizer underneath, on half of it. This helps shown how helpful it is when sewing on thinner fabrics.
Fabric Scraps
You can make applique out of all kinds of fabric. However, they all require different techniques and they are all great for certain aspects.
Try thrifting your fabric! Tablecloths, old sweatshirts, t-shirts, curtains, sheets, blankets, you name it!
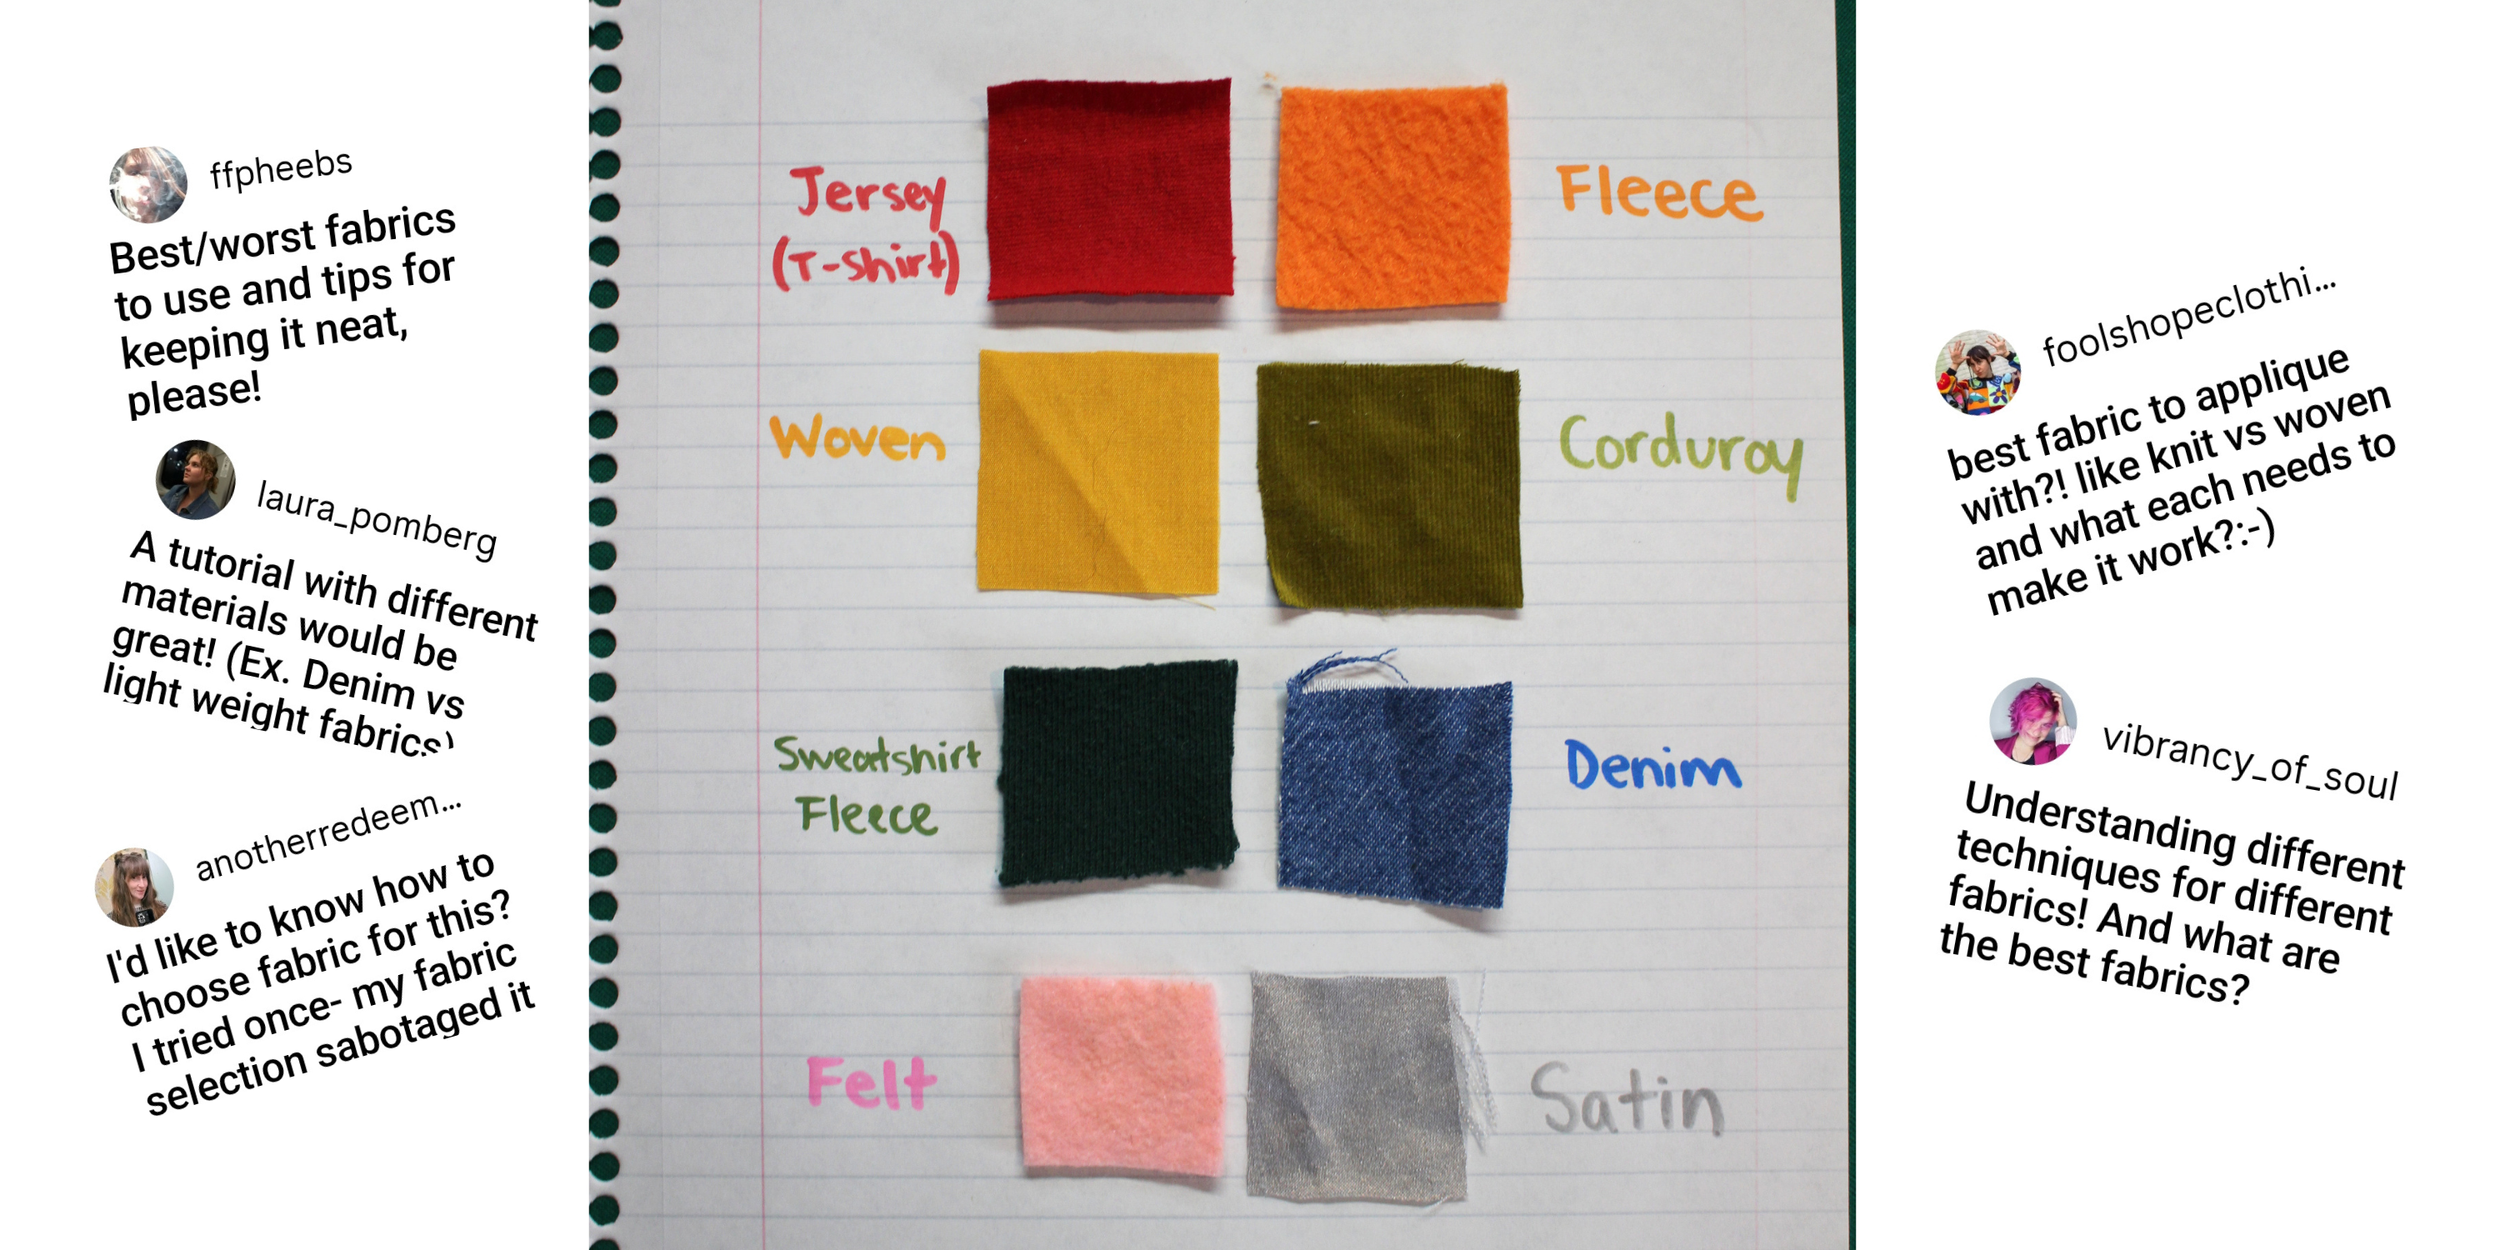
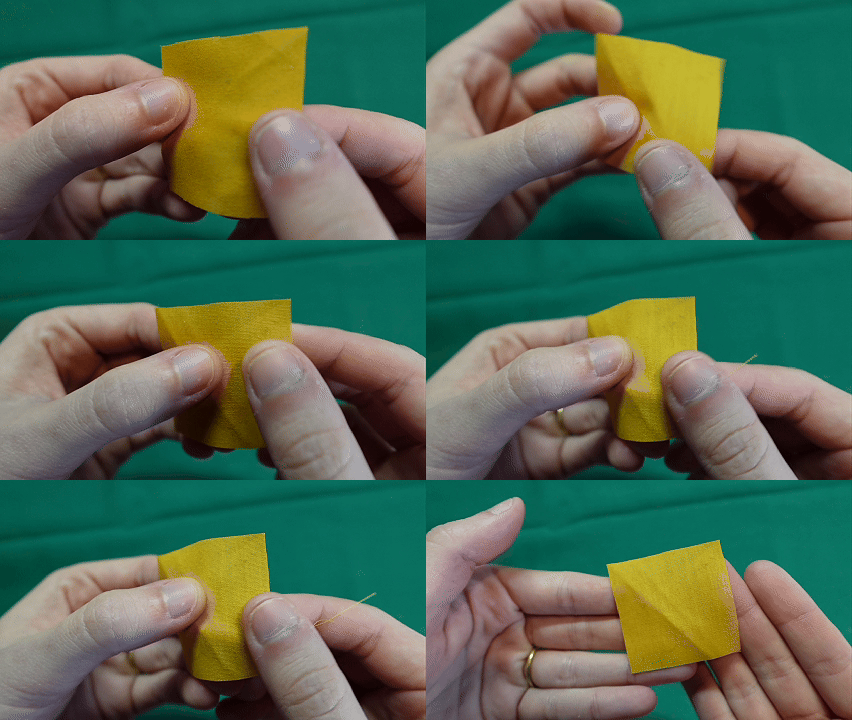
Woven
-Typically cotton, rayon, linen, or polyester.
-This is the most common type of fabric to applique with.
-Thin, non stretchy. (Except on the bias aka diagonally)
-Great for many layers, and for needle turn applique.
-The edges will fray. A ziz-zag or some sort of stitch that goes over the edge is recommended to prevent fraying.
-Use double-sided iron on for smaller shapes.
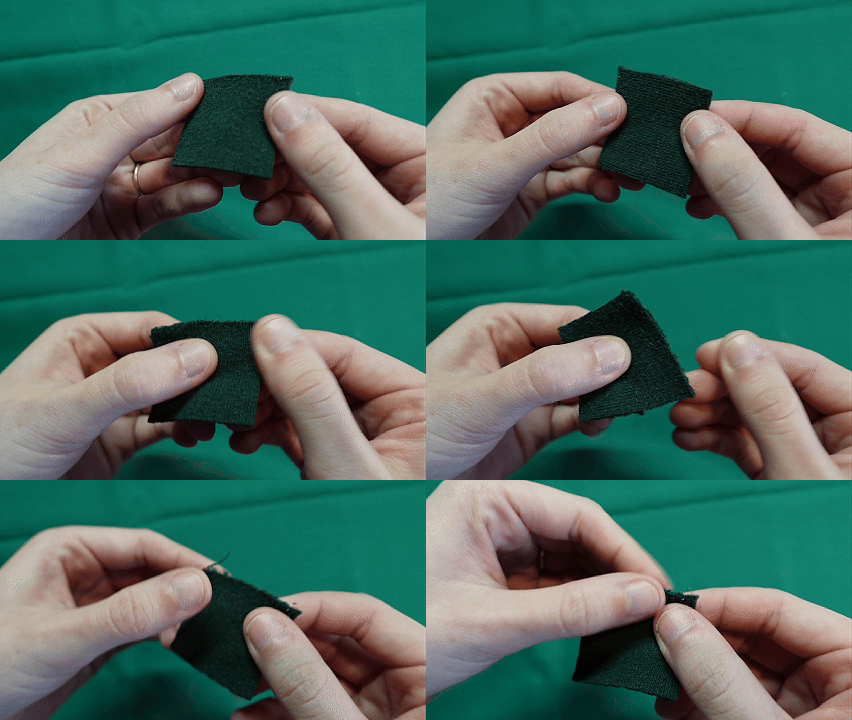
Sweatshirt Fleece
-Recycled sweatshirts are great for large sections of applique.
-Typically polyester cotton blend, with a softer inner fleece.
-Minimal fray, so you can use a straight stitch, or any preferred stitch.
-Does have some stretch, and may have “wobbled” edges on certain clothing, or with certain stitches.
-Thicker, don’t layer too much of this fabric.
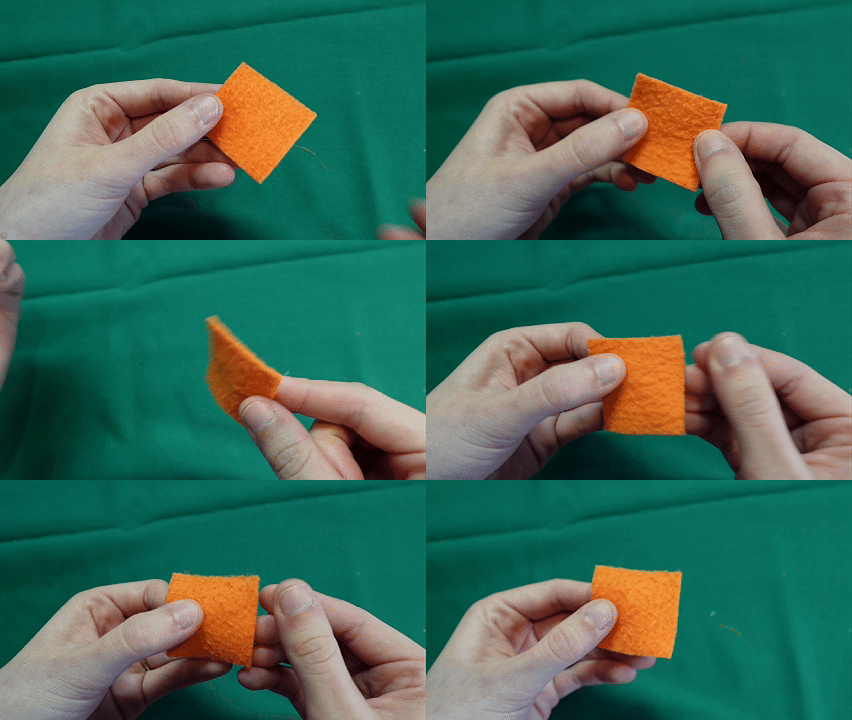
Regular Fleece
-Typically polyester.
-Doesn’t fray. You can use a straight stitch, or any preferred.
-Great for large sections or tiny shapes.
-Some stretch, stitches like zig-zag may cause wobbly edges.
-Thicker than average, can’t be layered too much.
-Does shed a lot of fibers, make sure to clean your sewing machine!
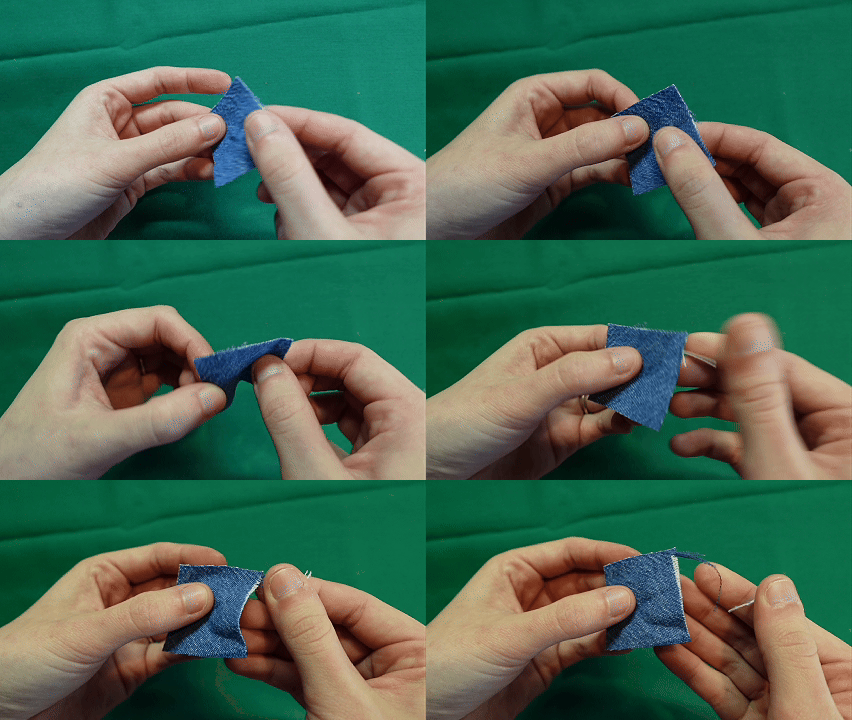
Denim
-100% cotton (Spandex blends are stretchy)
-Does fray, but some people prefer to allow the edges to fray for extra effect.
-Medium thickness, not very stretchy.
-Great for large and small areas.
-Very easy to sew with.
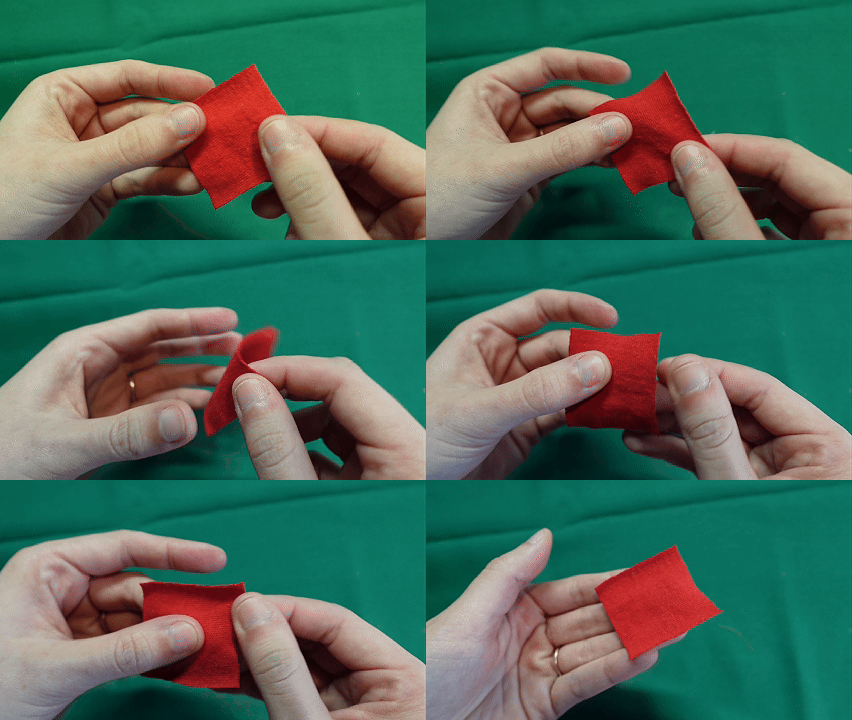
Jersey (T-shirt)
-Typically cotton
-Thin and stretchy.
-I recommend using a double sided iron on to use for appliques.
-Very minimal fray. You can use a straight stitch or preferred.
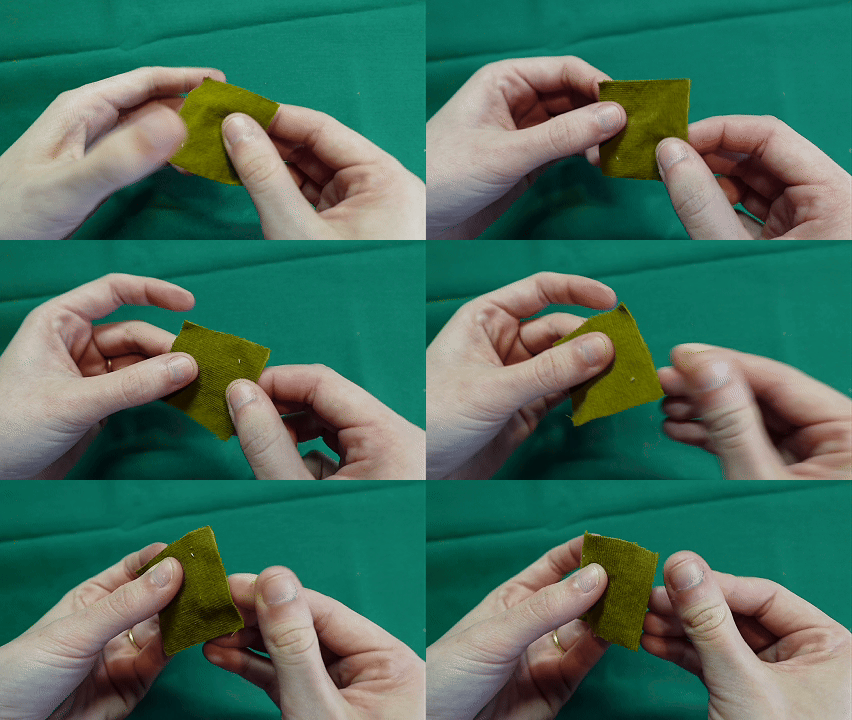
Corduroy
-Micro corduroy = thinner
-Regular corduroy = thicker
-Adds a fun texture for appliques.
-Does shed fibers while sewing.
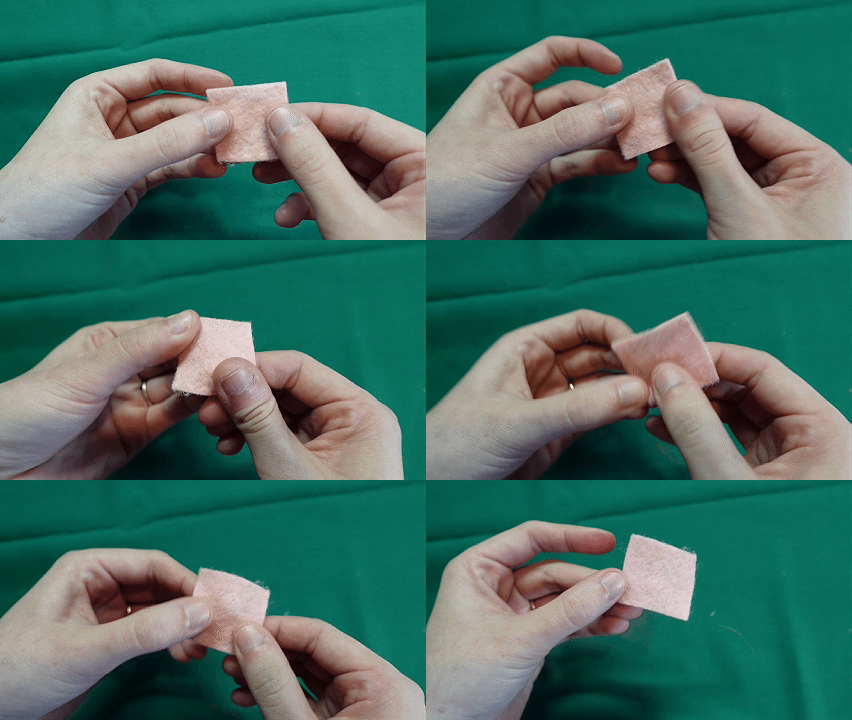
Felt
-Typically polyester or acylic.
-Doesn’t fray
-Not woven, so it will come apart over time. Limit this fabric to very small shapes. (Pinky width and smaller)
-Some felts are not washable, and may shrink with hot water.
-Sheds a lot of fibers, make sure to clean your sewing machine.
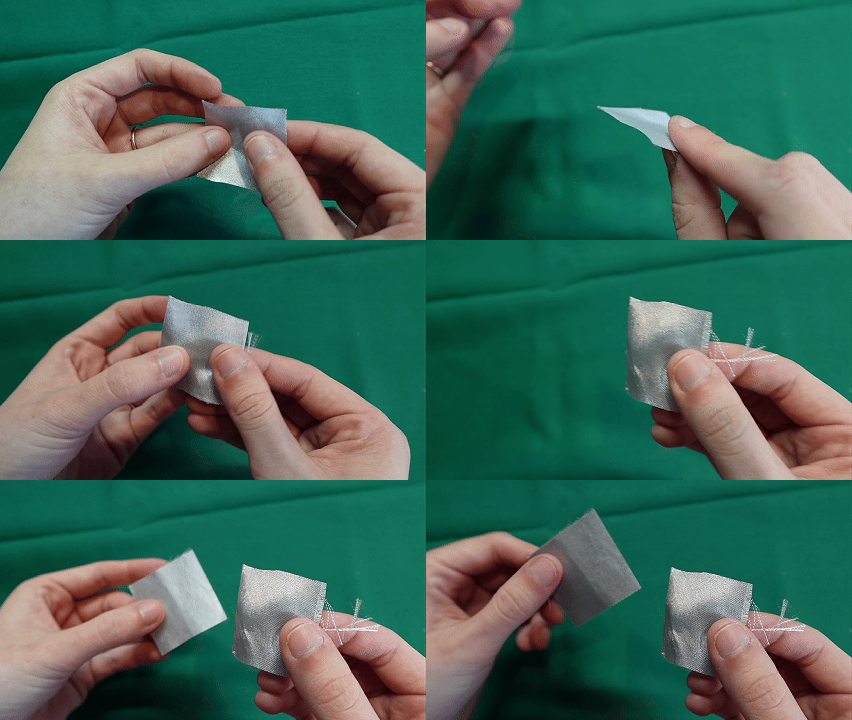
Satin
-Typically polyester, or silk.
-Very thin, needs double-sided iron on or some sort of interfacing to make it stiff enough to applique with.
-Does fray. Requires a stitch that goes over the edge.
-I like using shiny metallic satins to mimic “metal” objects on my appliques.
-In video: second fabric shown is satin with double-sided iron-on.
Not pictured
Knit and crotchet: I don’t recommend appliqueing with this, unless you make sure to secure the entire edge to prevent yarn from coming undone.
Nylon: I don’t often applique with nylon, because it tends to melt with high temperatures and irons.
Double Knit Polyester: tends to skip stitches and does not take well to fabric glue. (Typically associated with 1970s blouses.)
Clothing to Upcycle
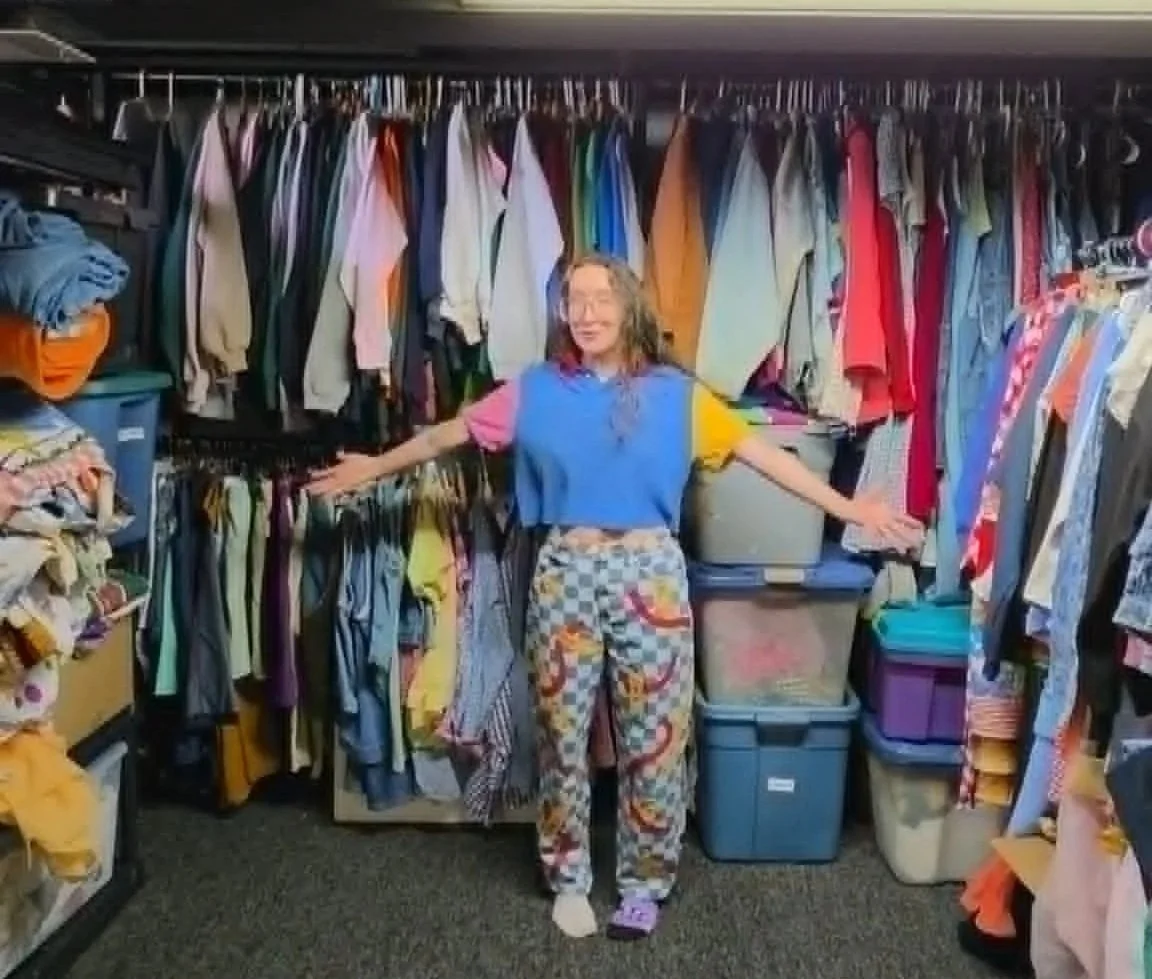
Same with fabric scraps, what fabric you applique onto is just as important.
I typically choose thicker, or less stretchy clothes. Think denim, sweatshirts, or woven cotton/linen.
I’ll be honoest, I rarely if ever applique onto T-shirts, so there wont be too much information on that.
Denim: My favorite fabric to upcycle onto.
Typically thick enough to sew without stabilizer.
Not very stretchy, if at all. (Depends on the garment)
Sweatshirts: My second favorite.
Usually thick enough to do all kinds of designs. Detailed, minimal, etc.
Less detailed designs sometimes don’t even need stabilizer.
Please note, not all sweatshirts are created equal. Some are thinner than others.
Cotton weave: Best for less detailed, thinner appliques.
Not technically stretchy, but does stretch on the “bias”, aka diagonally.
Jersey: (T-shirts)
Stretchy and thin.
I recommend only thin less detailed appliques.
Stabilizer or interfacing is required.
Corduroy
Usually thick and sturdy enough to sew appliques onto.
The variated texture may cause skipped stitches. (Noticeably on thicker regular corduroy)
Knit: (Sweaters and vests, etc.)
Stretchy, typically requires non stretchy fabrics and/or interfacing/stabilizers.
Sometimes too thick or textured to sew easily.
Make sure the needle isn’t blunt, or it could break the knit and cause holes.
Twill:
Thicker ones are typically a great surface.
Does stretch diagonally (on the bias).
Spandex:
I don’t recommend sewing appliques onto spandex… at least not as a beginner.
Stitch Types
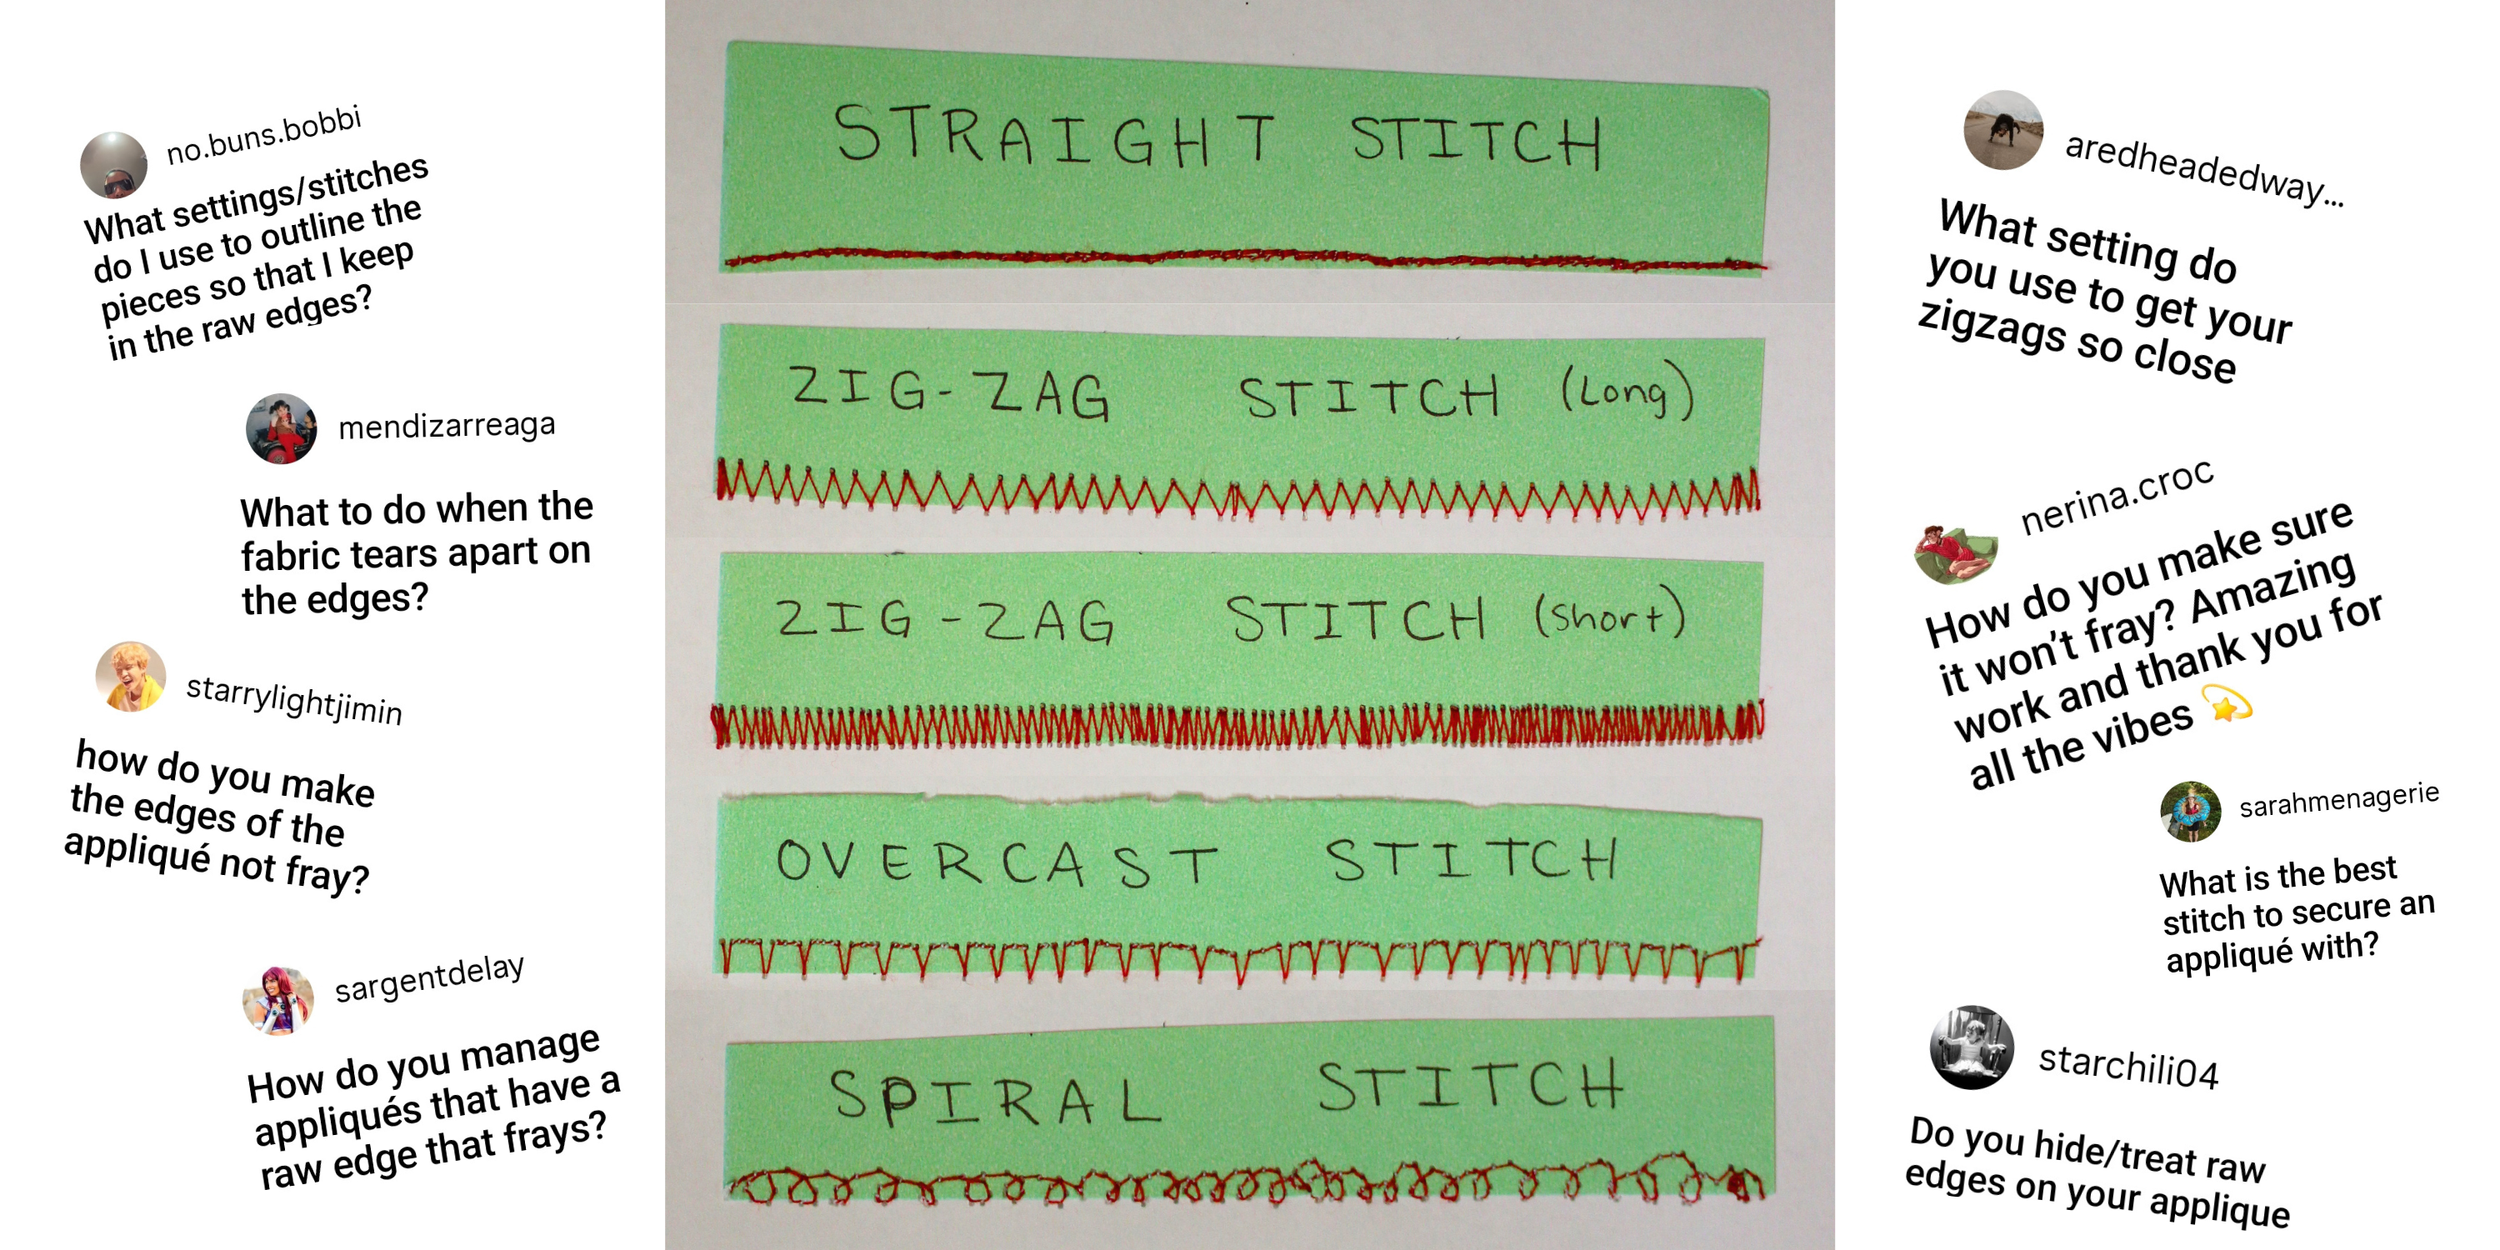
There are SO many stitch techniques for raw edge applique.
I recommend doing stitches that go over the edge, for fabrics that fray.
Use a straight stitch on fabrics that don’t fray.
(Some stitches require a free motion foot.)
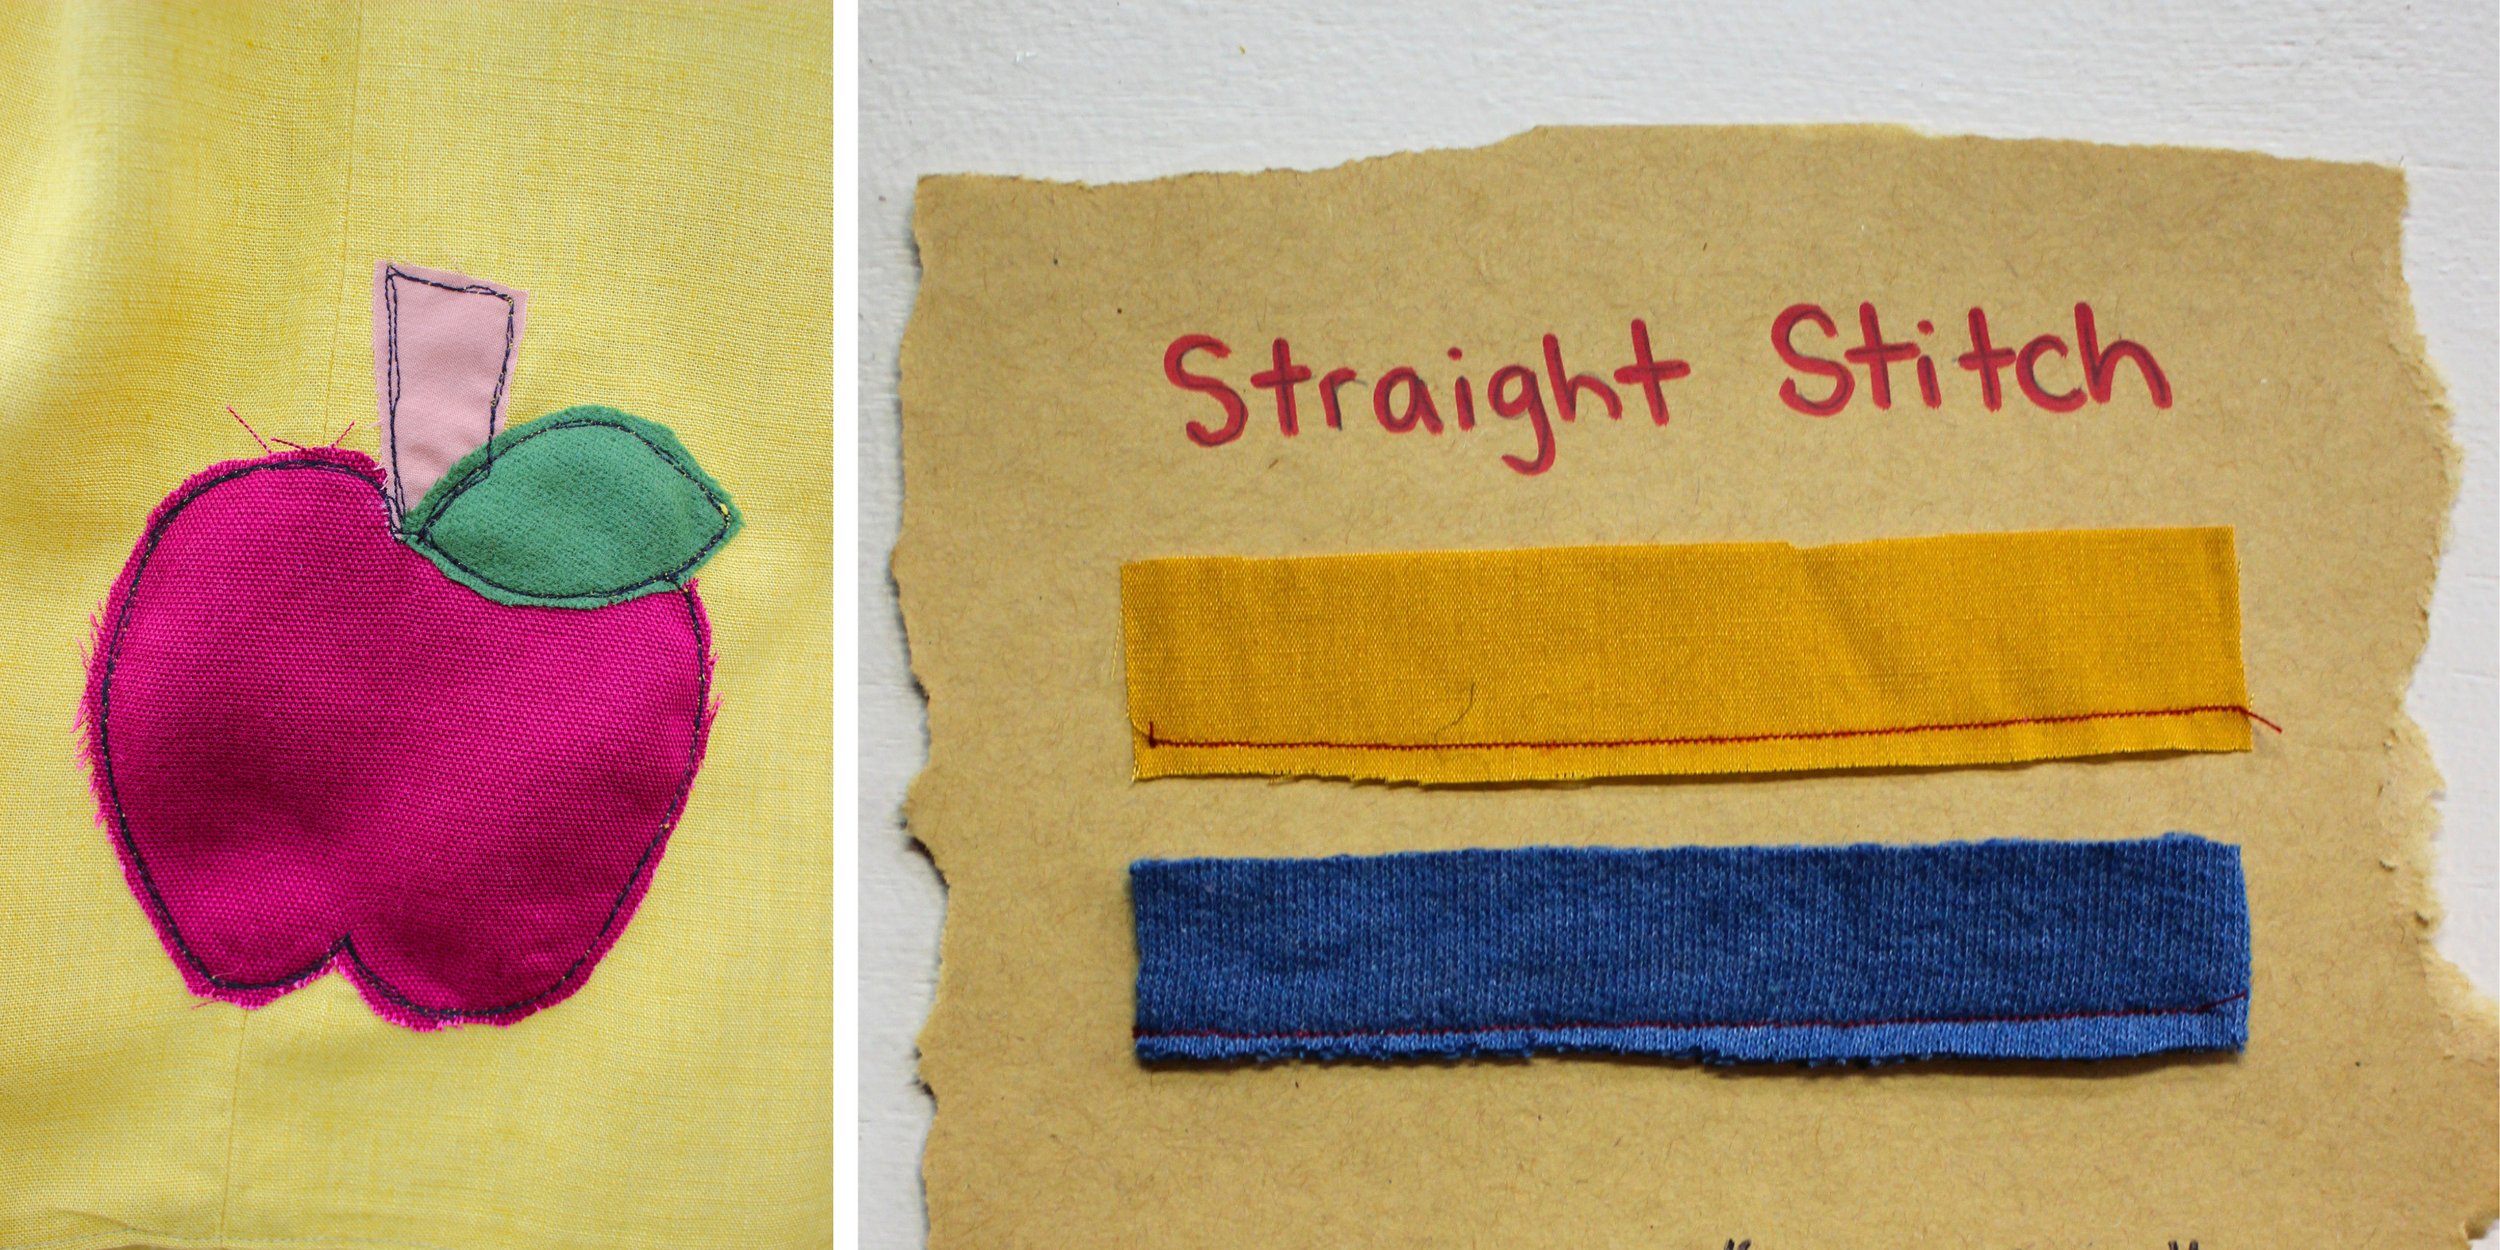
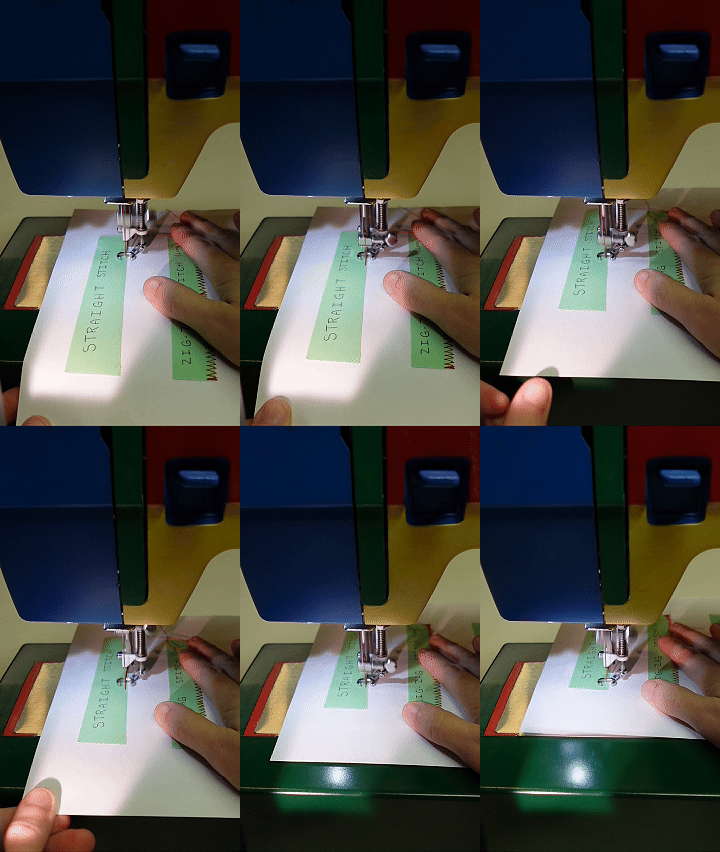
Straight Stitch:
Best for fabrics that don’t fray.
Set machine to straight stitch.
(For regular foot: Set length to preference)
Doesn’t provide any security over the edges. Fabrics that do fray may eventually pull off over time.
Best for use with the free-motion foot. I recommend going back and forth to lock in the stitches, rather than going over once.
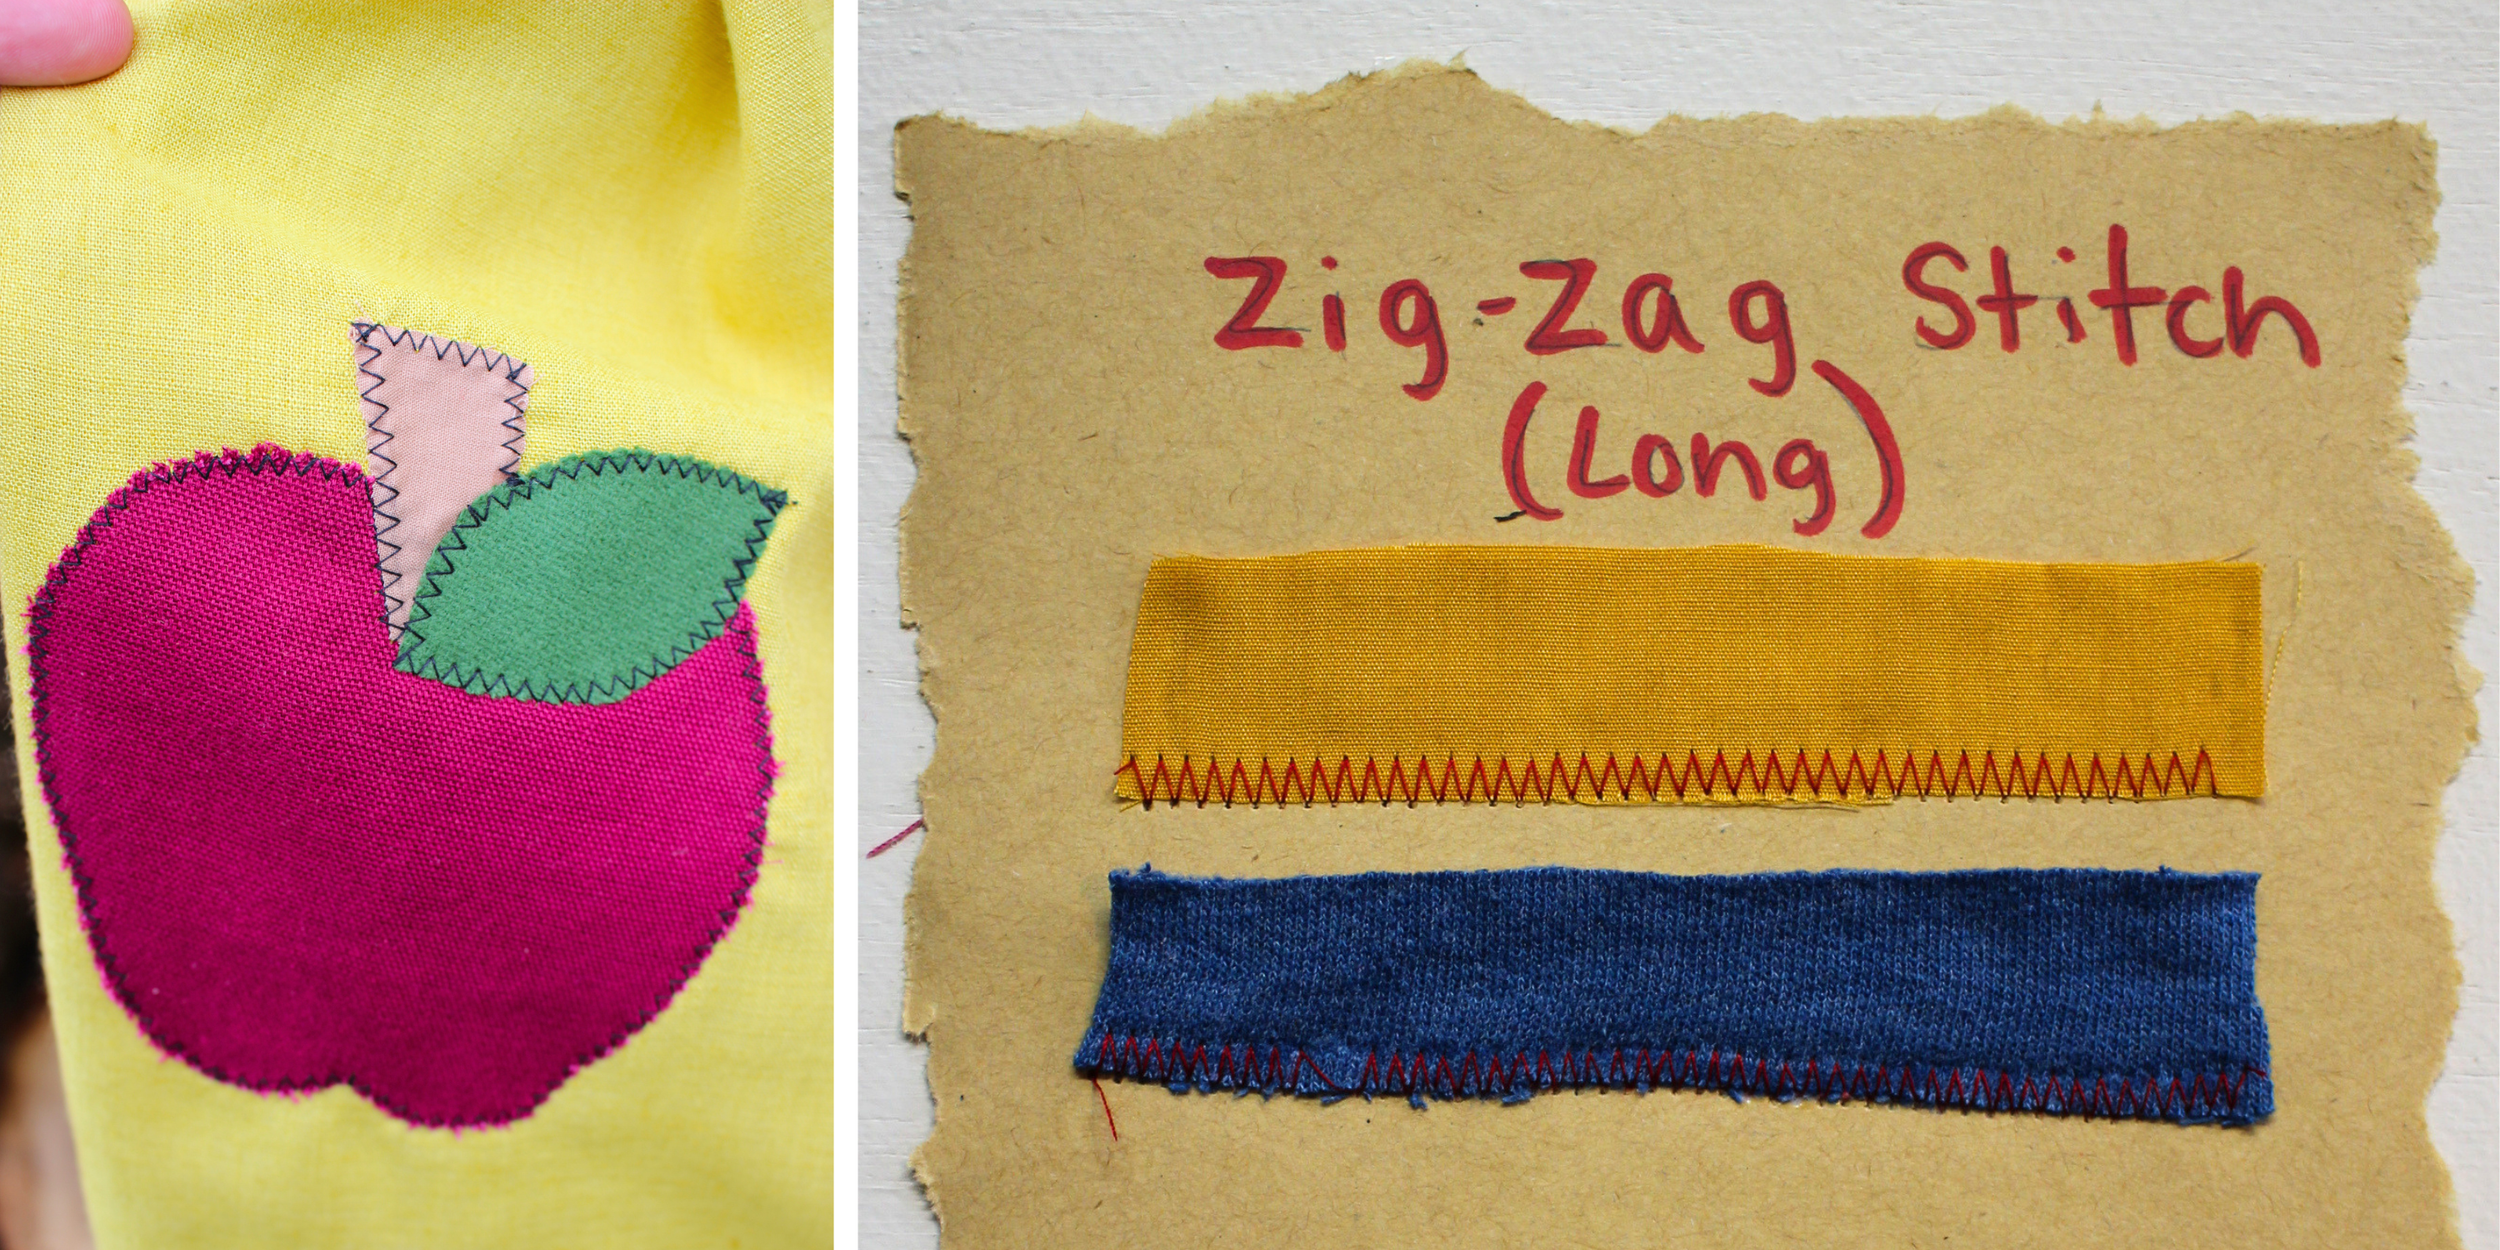
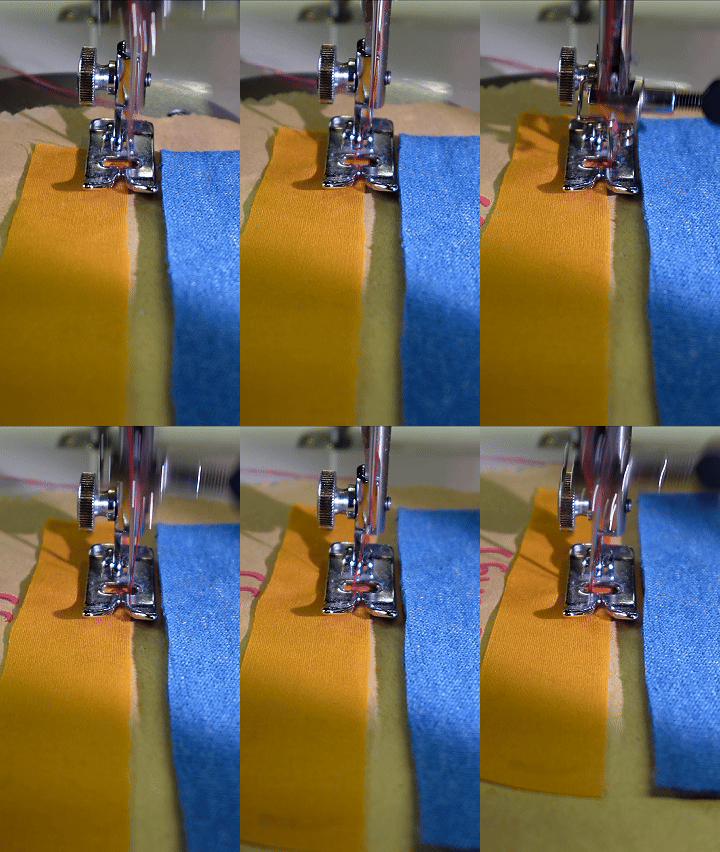
Zig-Zag Stitch (Long):
One of the most common raw edge applique stitches.
Prevents fraying
Can be done with a regular foot or free motion foot.
Set machine to zig zag stitch,
Set width to preference. Make sure it’s wide enough to properly secure the fabric.
If sewing with regular foot: set with a mid-short length.
If sewing with a free-motion foot: move the fabric at whatever speed you prefer.
This depends on your preference. The longer the width between each stitch, the more the fabric will fray.
Keep in mind, don’t expect the zig-zags to have a consistent length between each stitch, if you use a free motion foot.
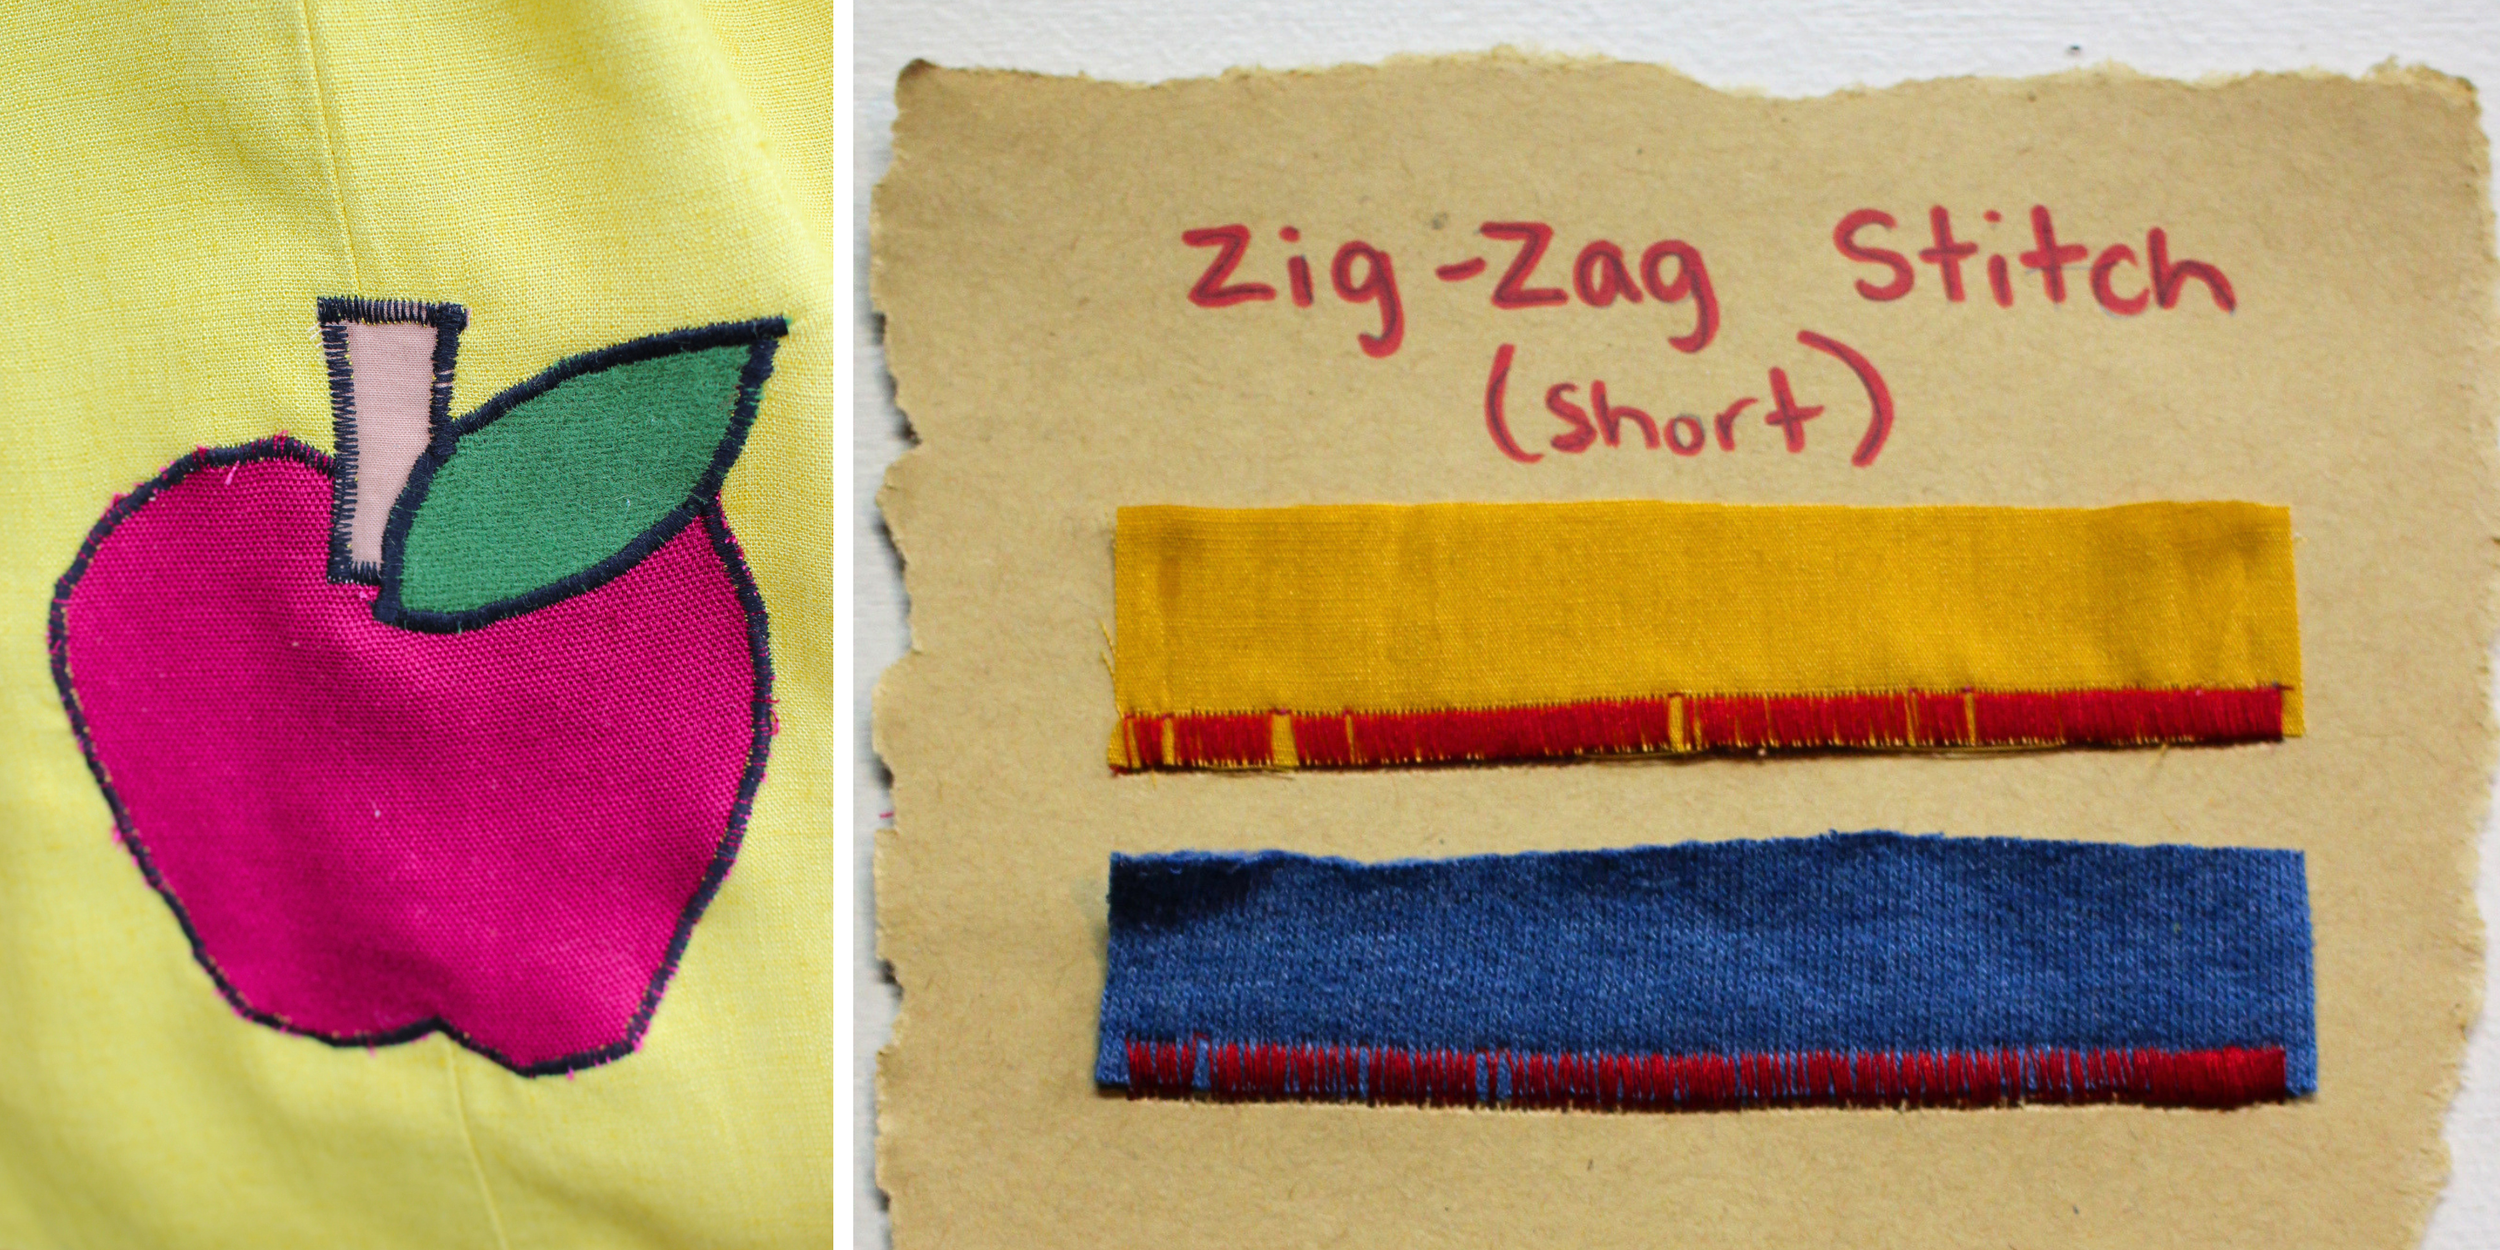
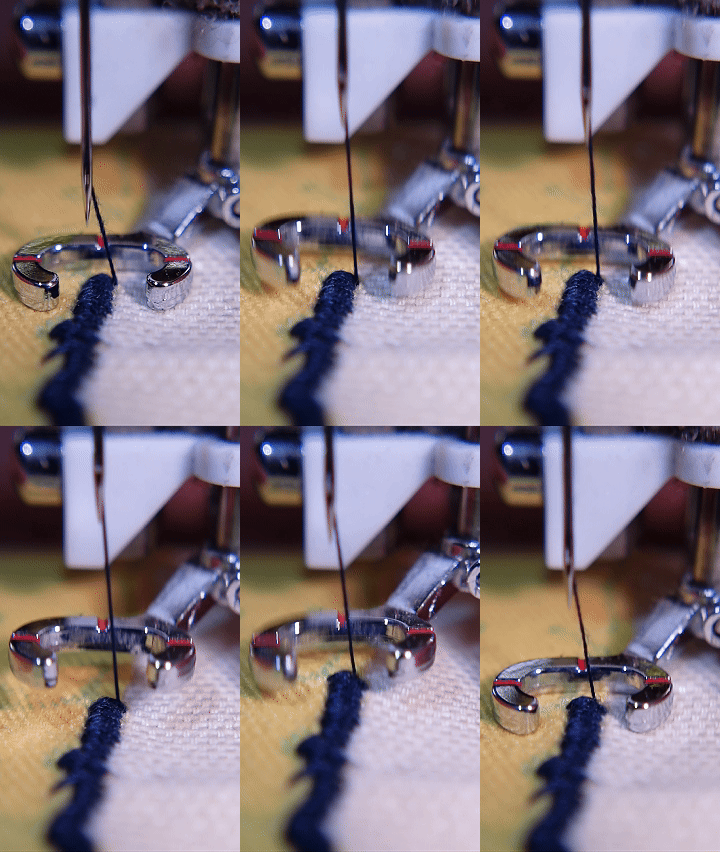
Zig-Zag Stitch (Short):
Creates a thick “line” on the edge.
The best prevention for fraying.
Can be done with a regular foot or free motion foot.
Set machine to zig zag stitch,
Set width to preference. Make sure it’s wide enough to properly secure the fabric.
If sewing with regular foot: set with a VERY short length. The feet with just barely pull the fabric forward. Yry not to set it too short, or it will create bumps with the thread.
If sewing with a free-motion foot: move the fabric at a very slow speed.
Keep in mind, don’t expect the zig-zags to have a consistent length between each stitch, if you use a free motion foot.
Can stretch the fabric, causing “wobbly” edges. (Depending on the fabric and stabilizer)
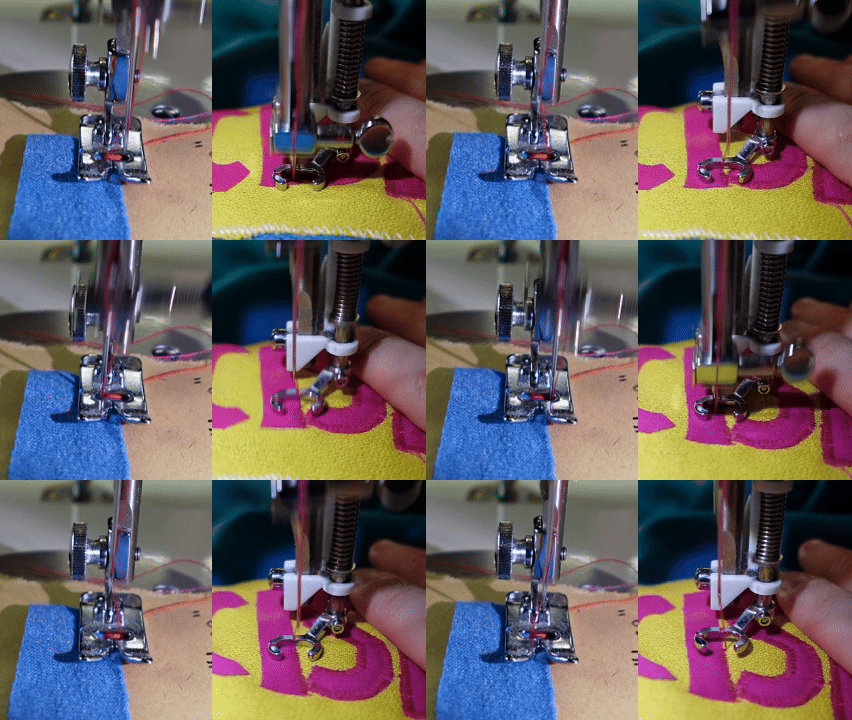
More examples of short zig-zag stitches.
For appliques with thick black lines, like cartoons, try using this stitch with black/outline thread to achieve that look!
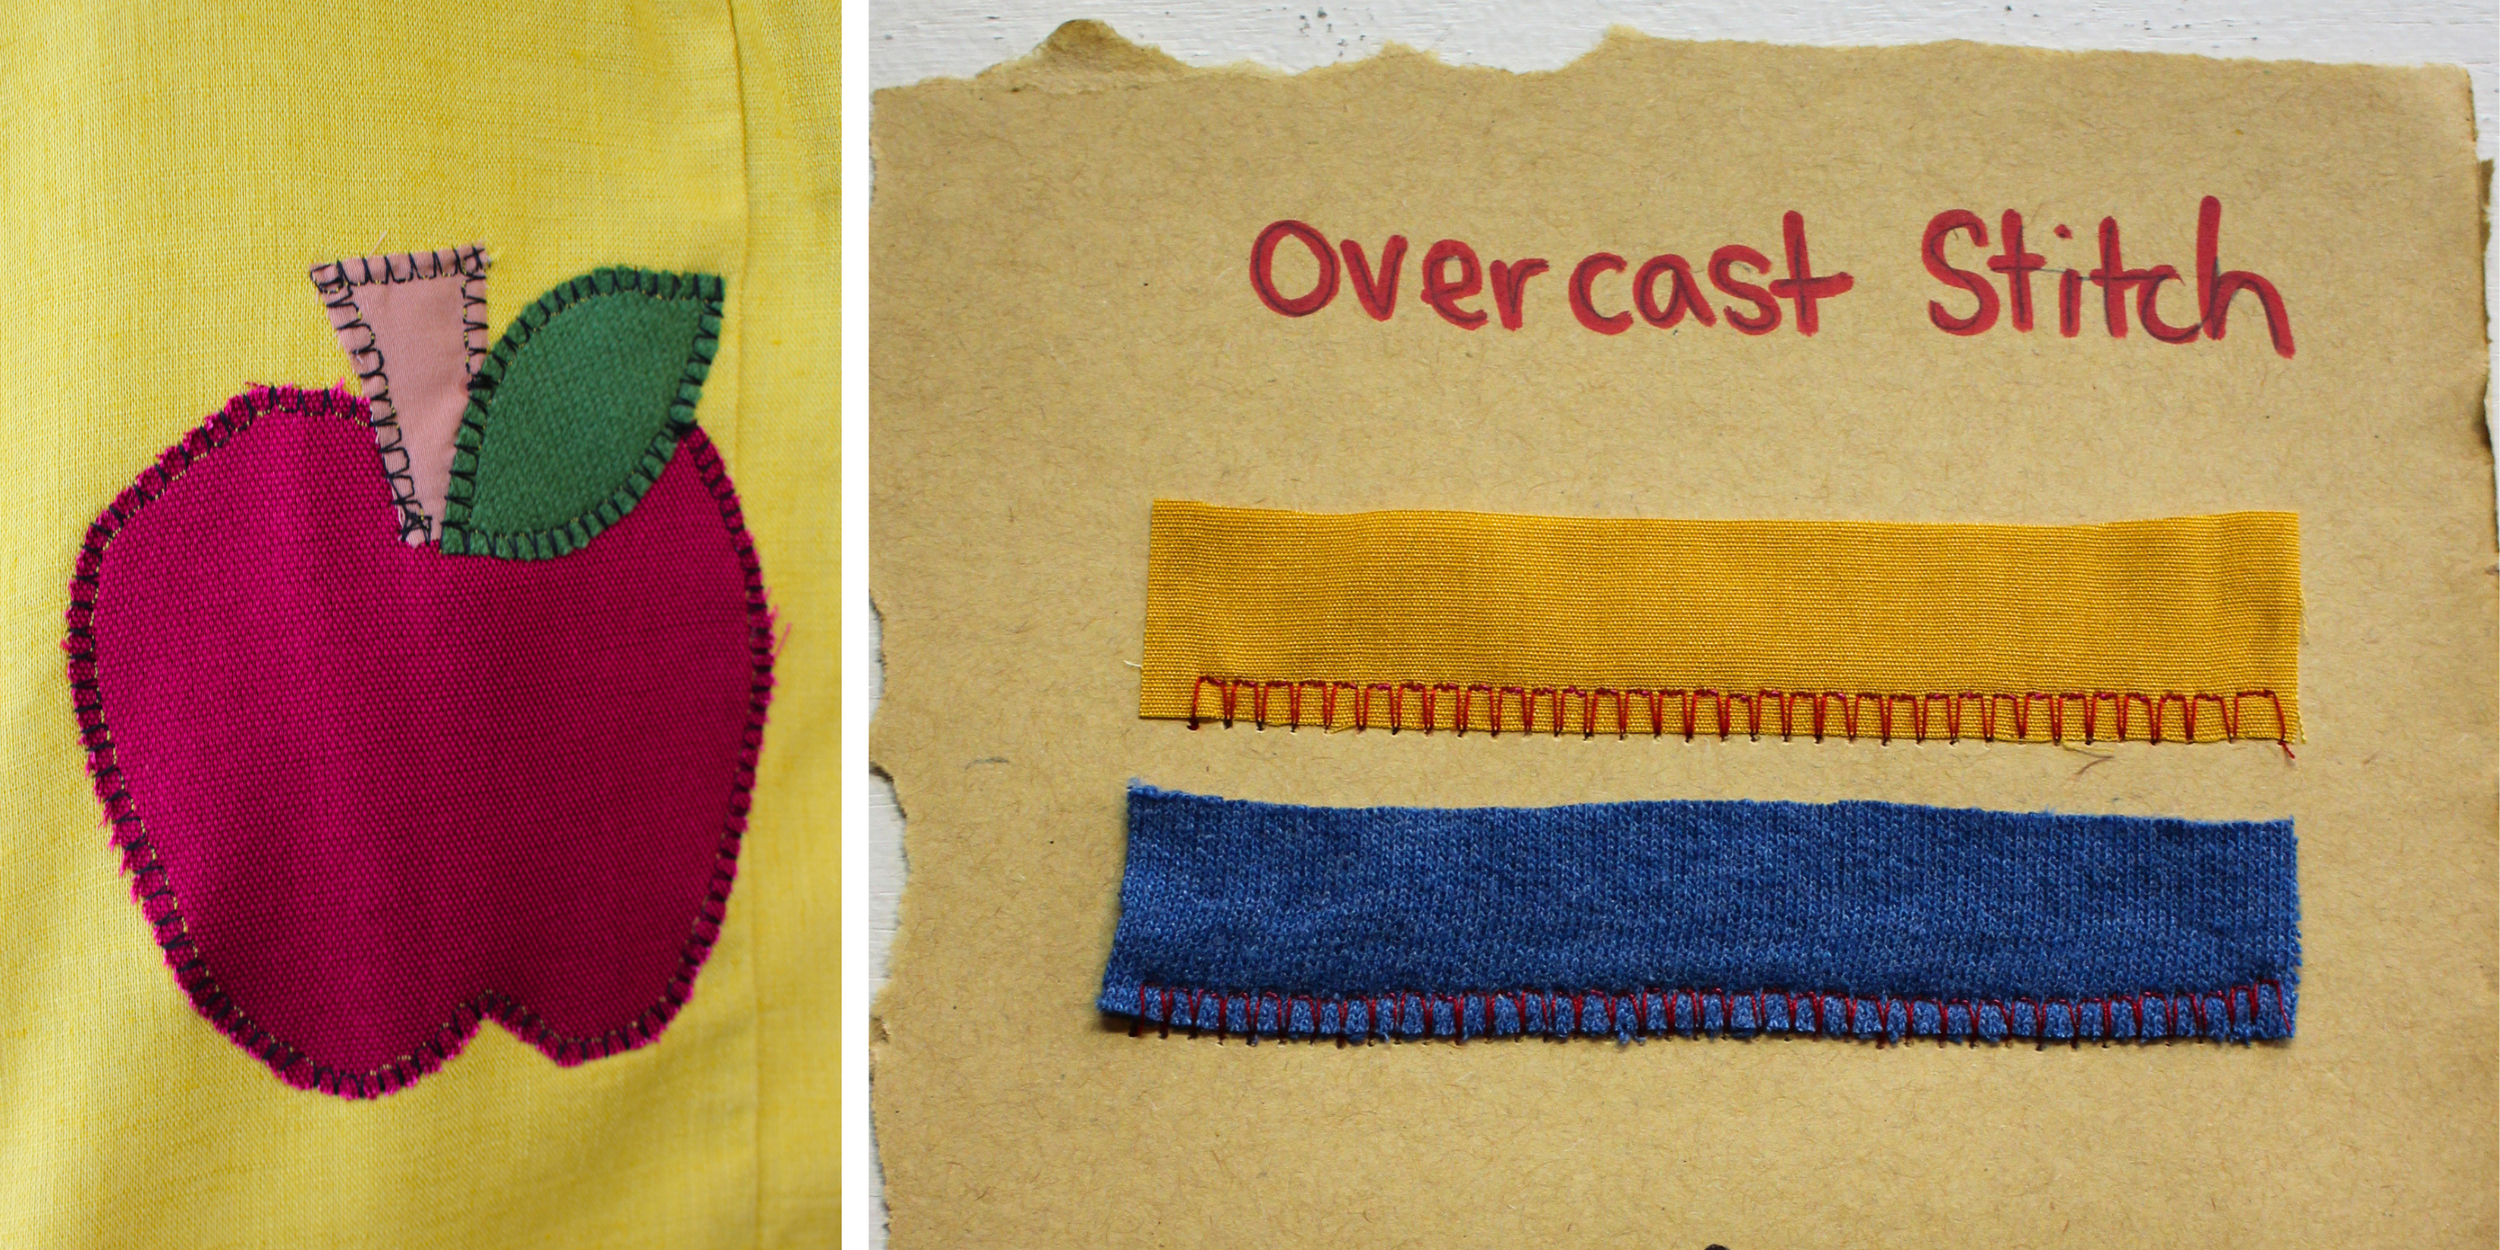
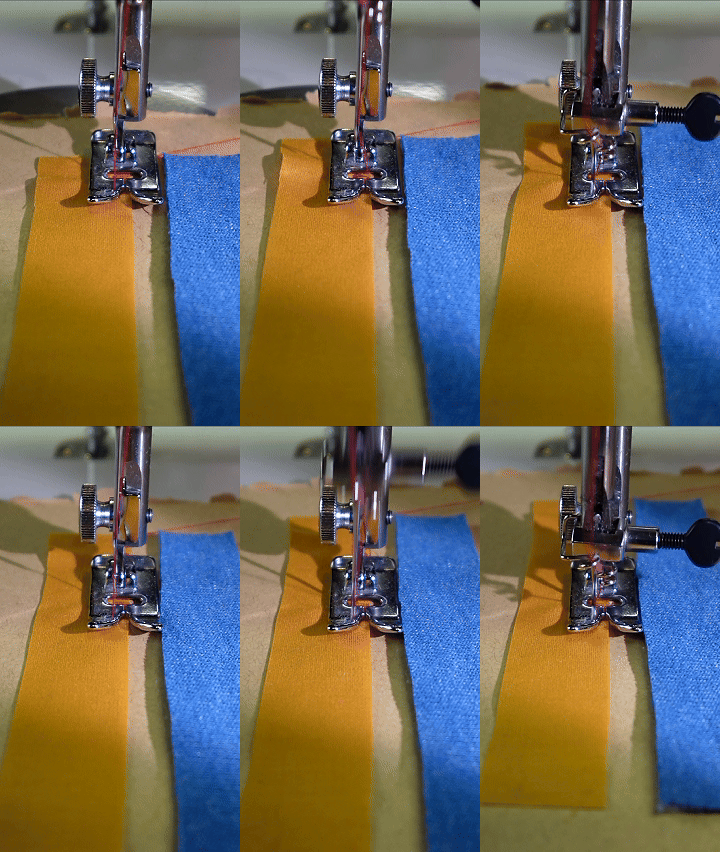
Overcast Stitch:
Set stitch to the overcast stitch.
Set width to your preference, though mid to widest is best.
If sewing with regular foot: Set length to whatever is your preference.
(I set mine to a 1. (Out of 7))
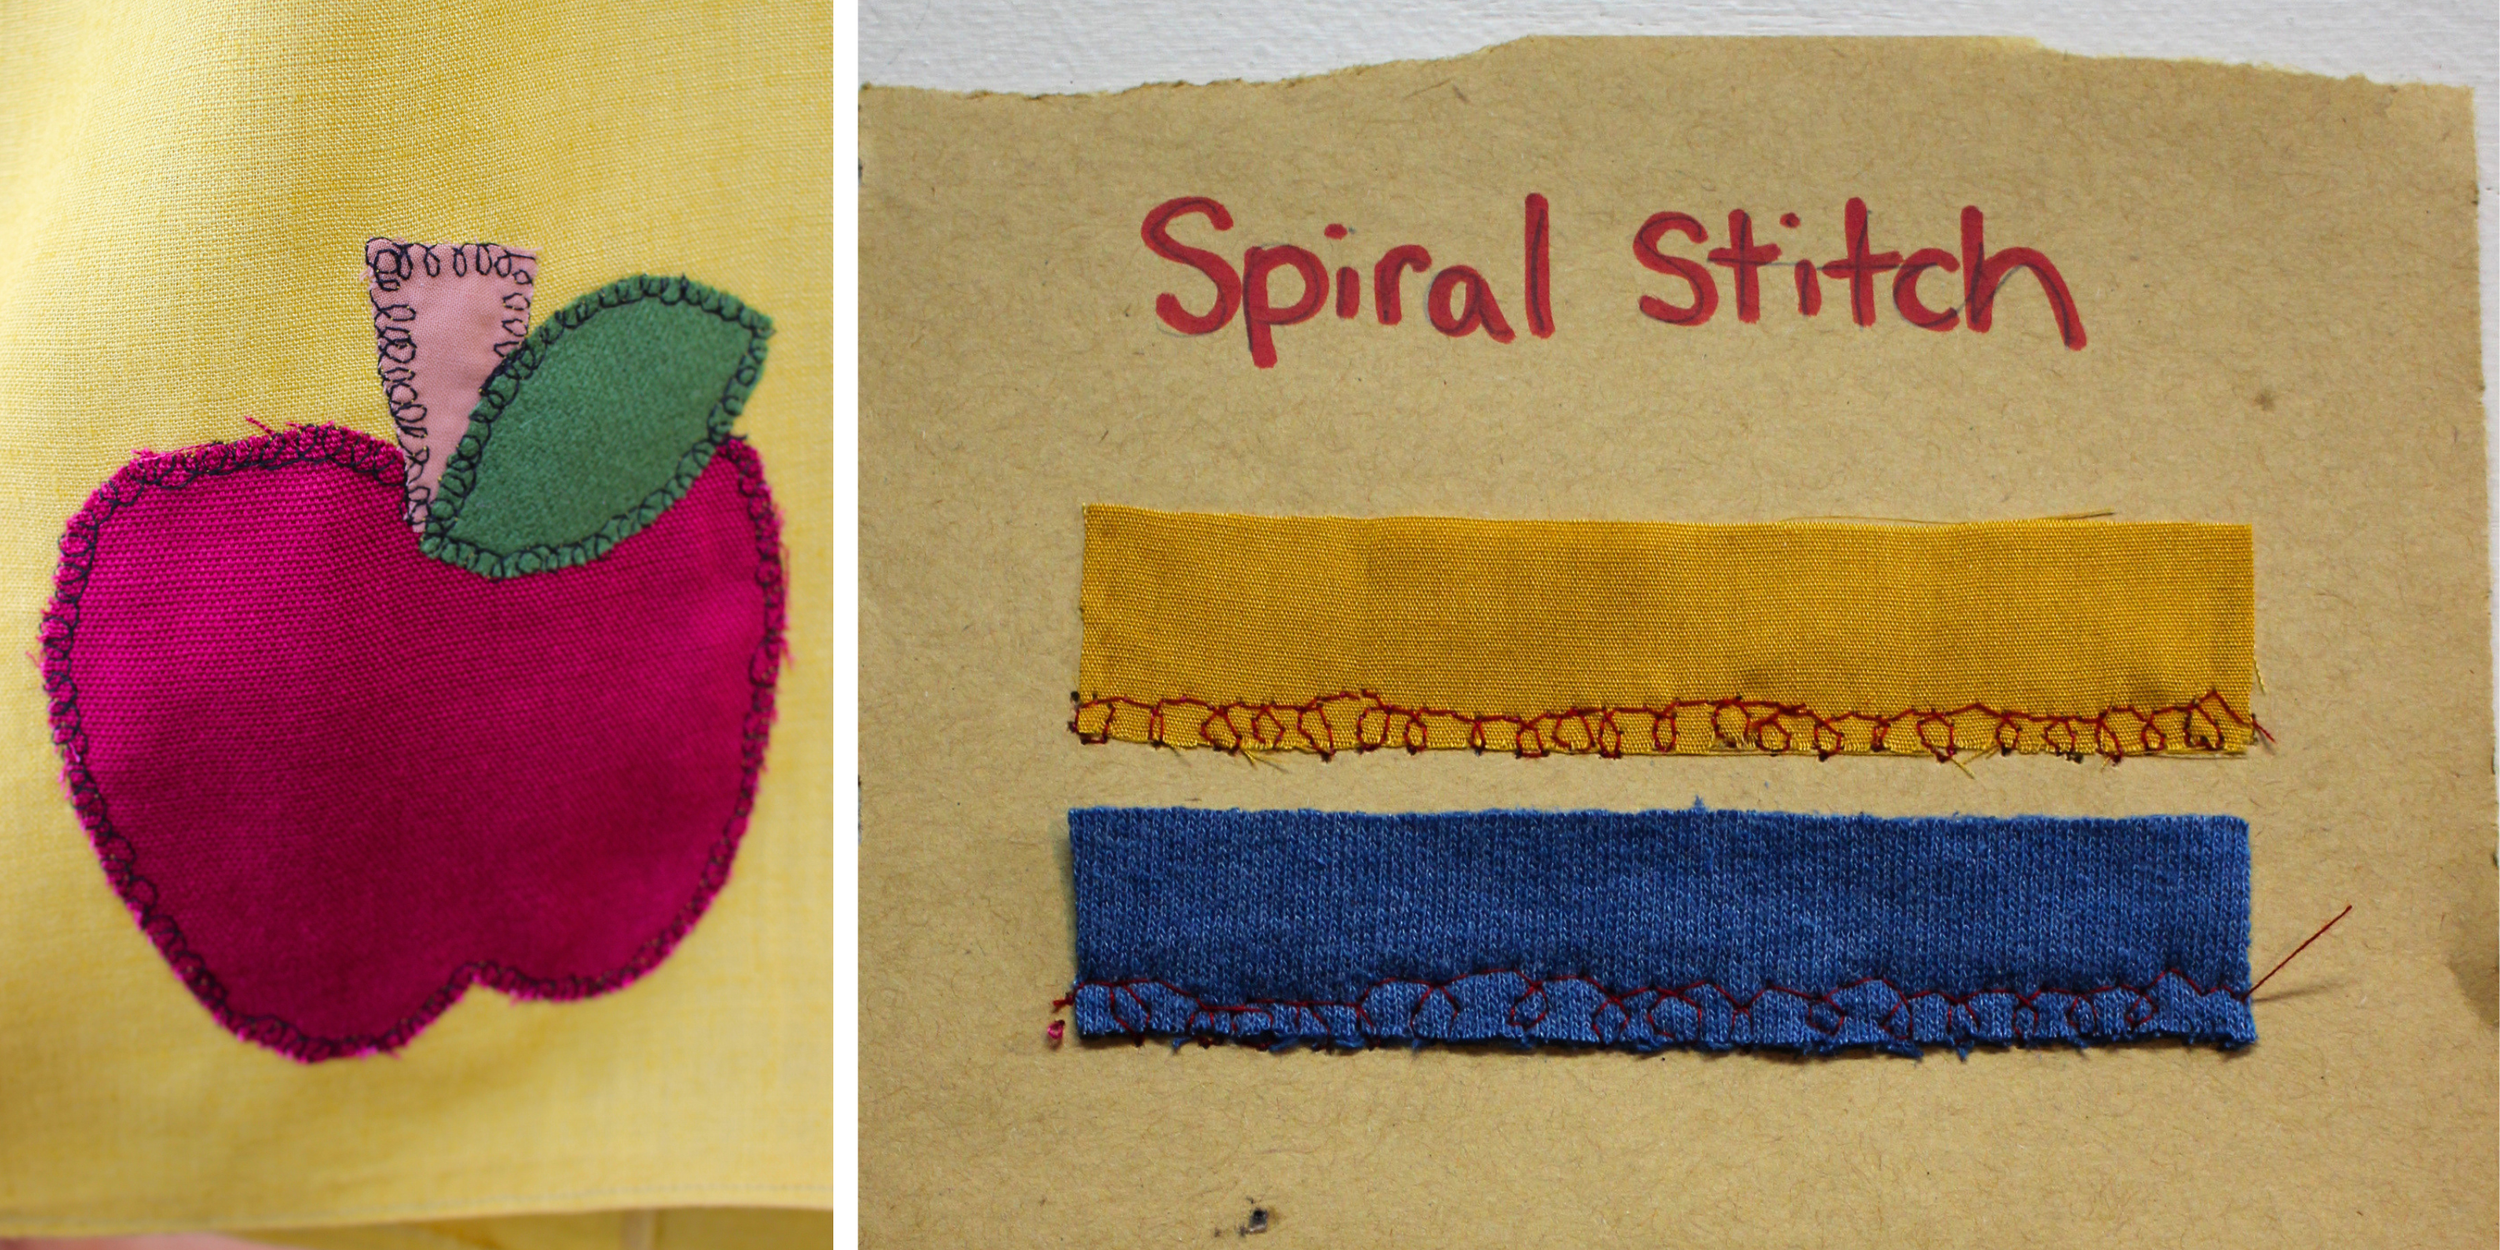
Spiral Stitch
I typically use this stitch for hard to reach areas like sleeves and pant legs.
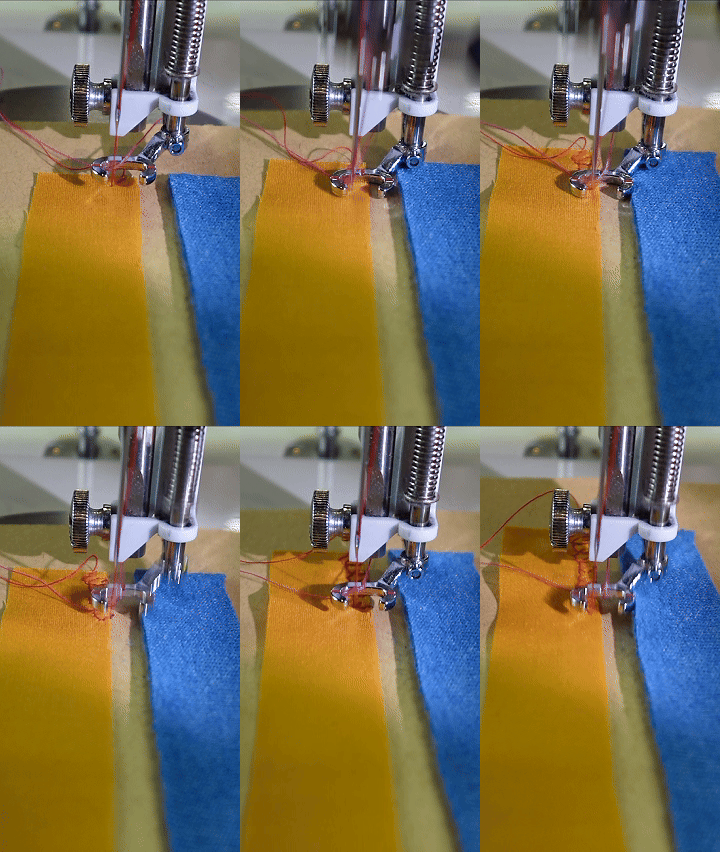
It secures the edges while also allowing the fabric to stay in one location - aka not rotating the fabric as you would have to do with a zig zag or overcast.
Requires a free motion foot.
Set stitch to straight.
Move the fabric in a spiral motion, so the needle hits just over the edge and then back over.
Choosing Top Thread
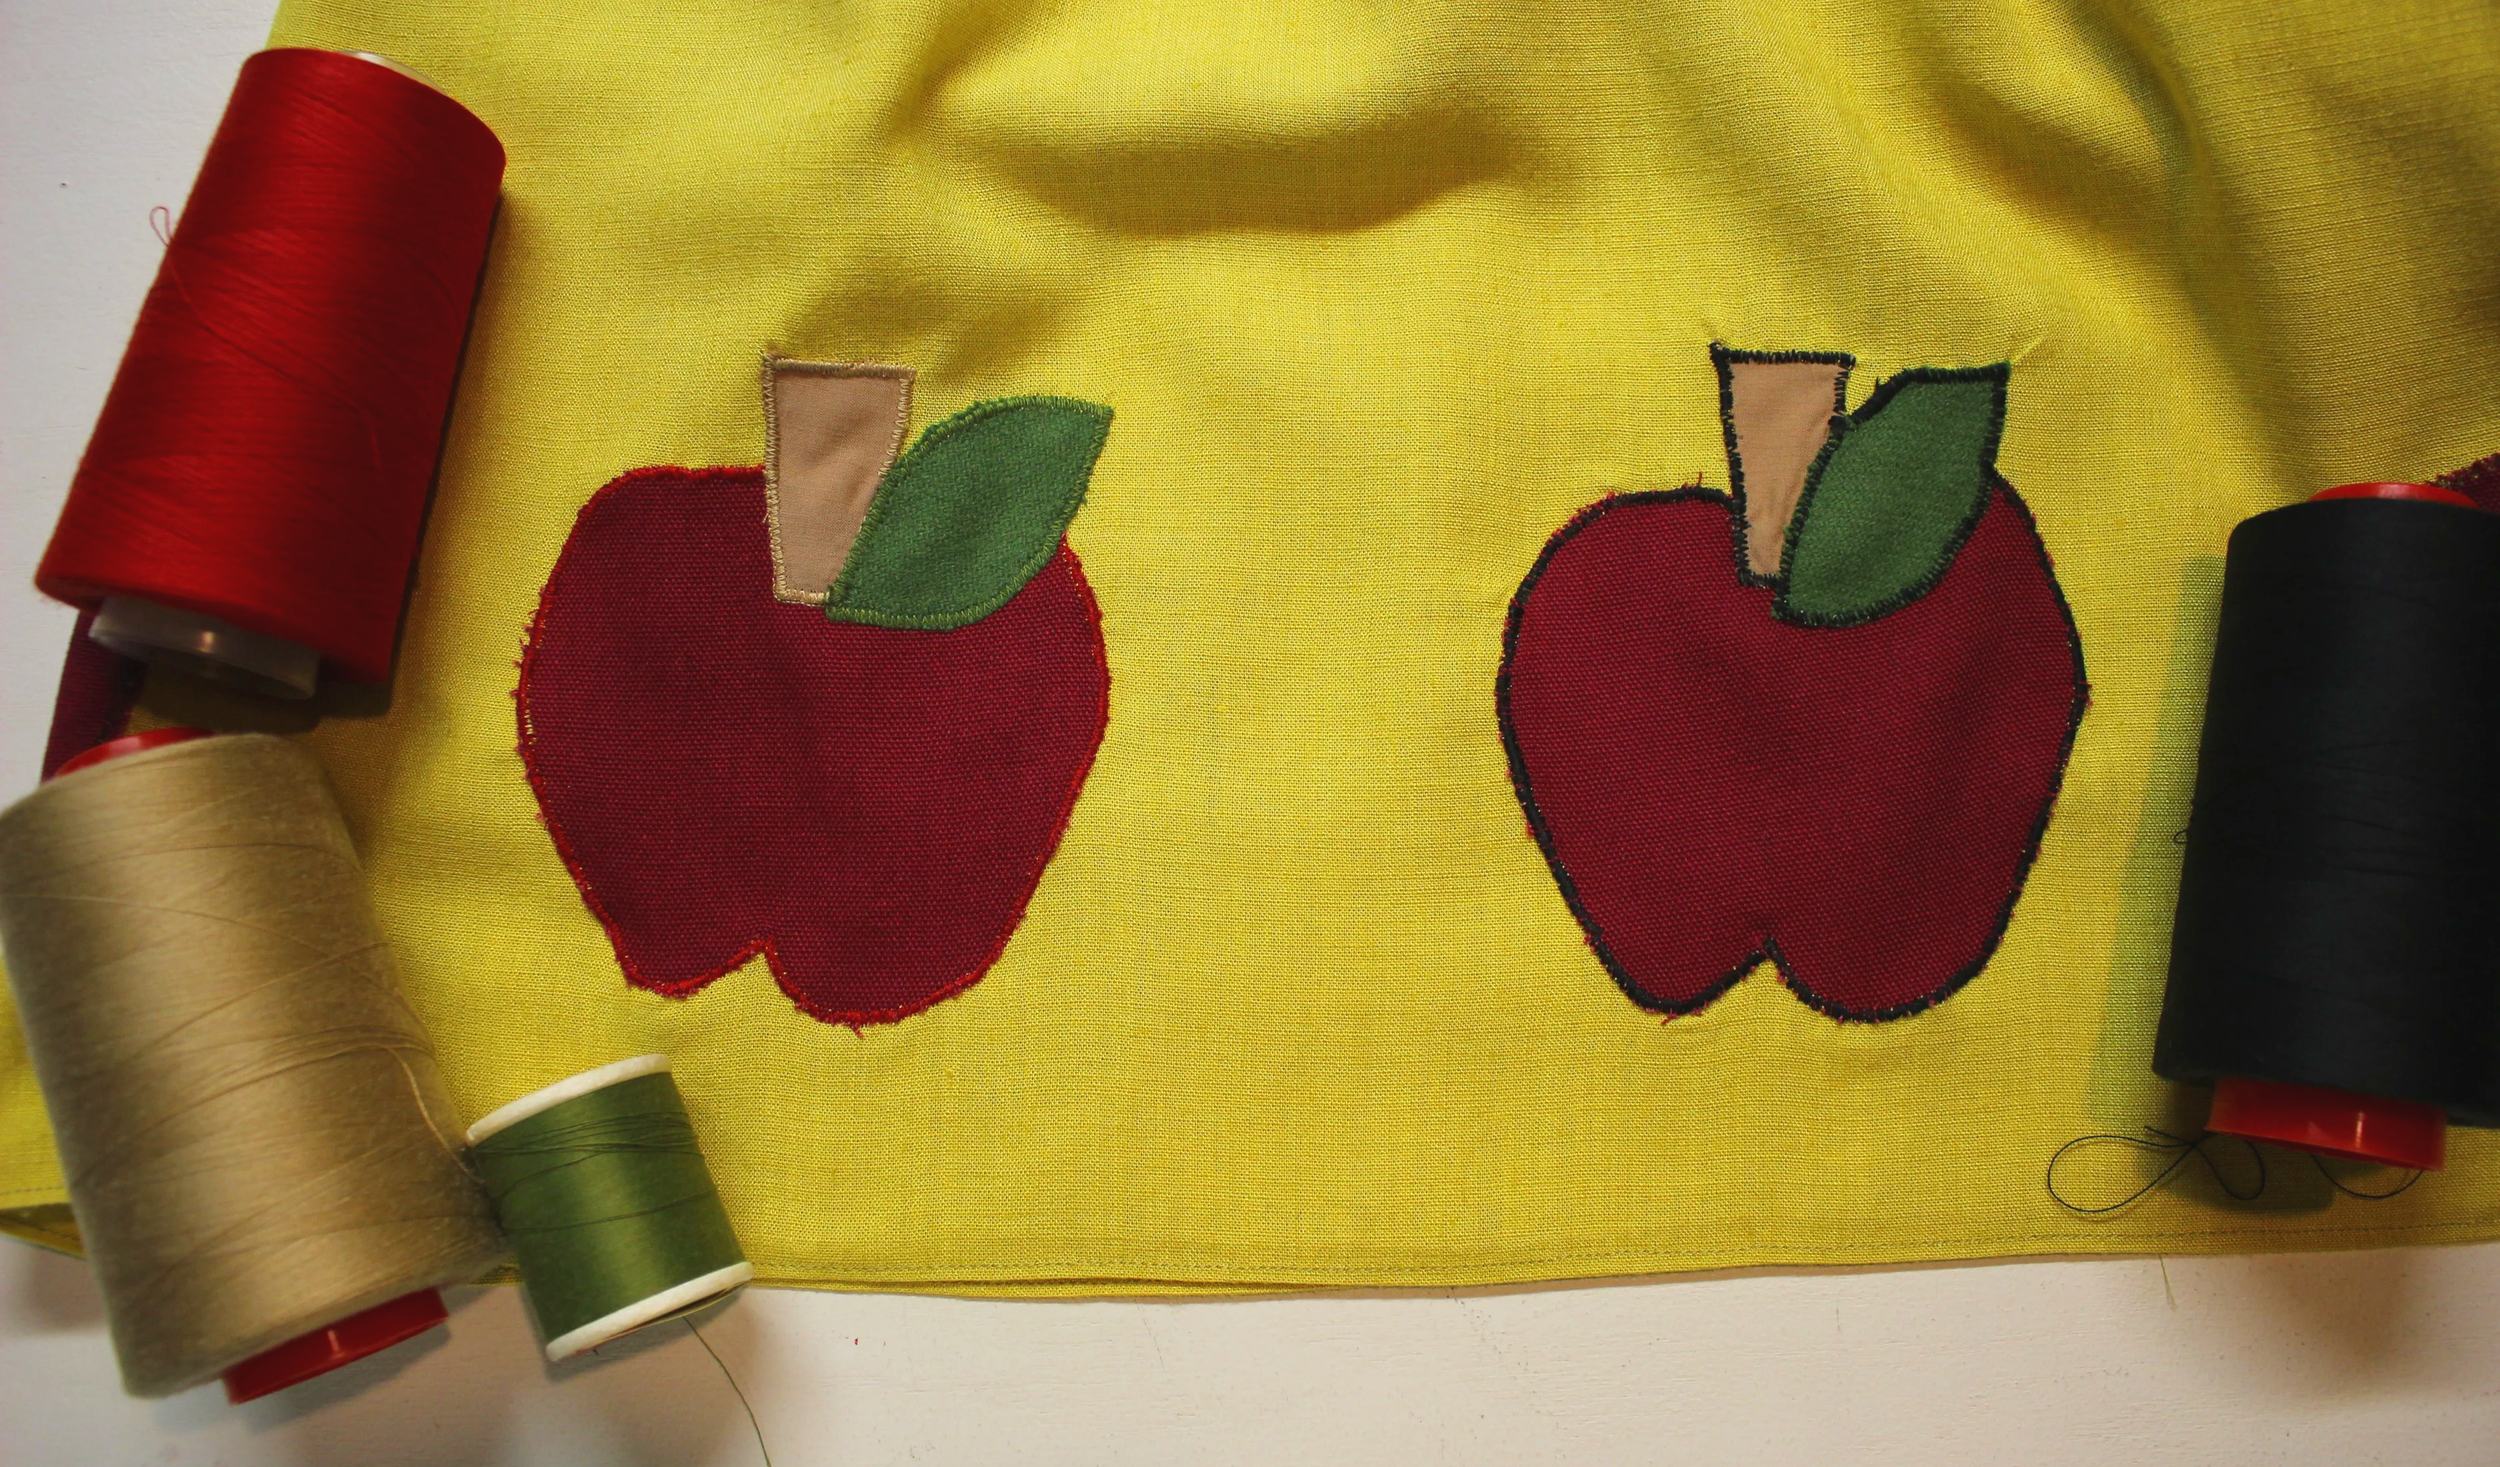
You can choose whatever top thread color you want!
I sew with regular polyester sewing thread. (Not embroidery)
In this example, the apple on the left is sewn with matching thread colors, and the apple on the right is sewn with one color (black).
Appliqueing Detailed Patches
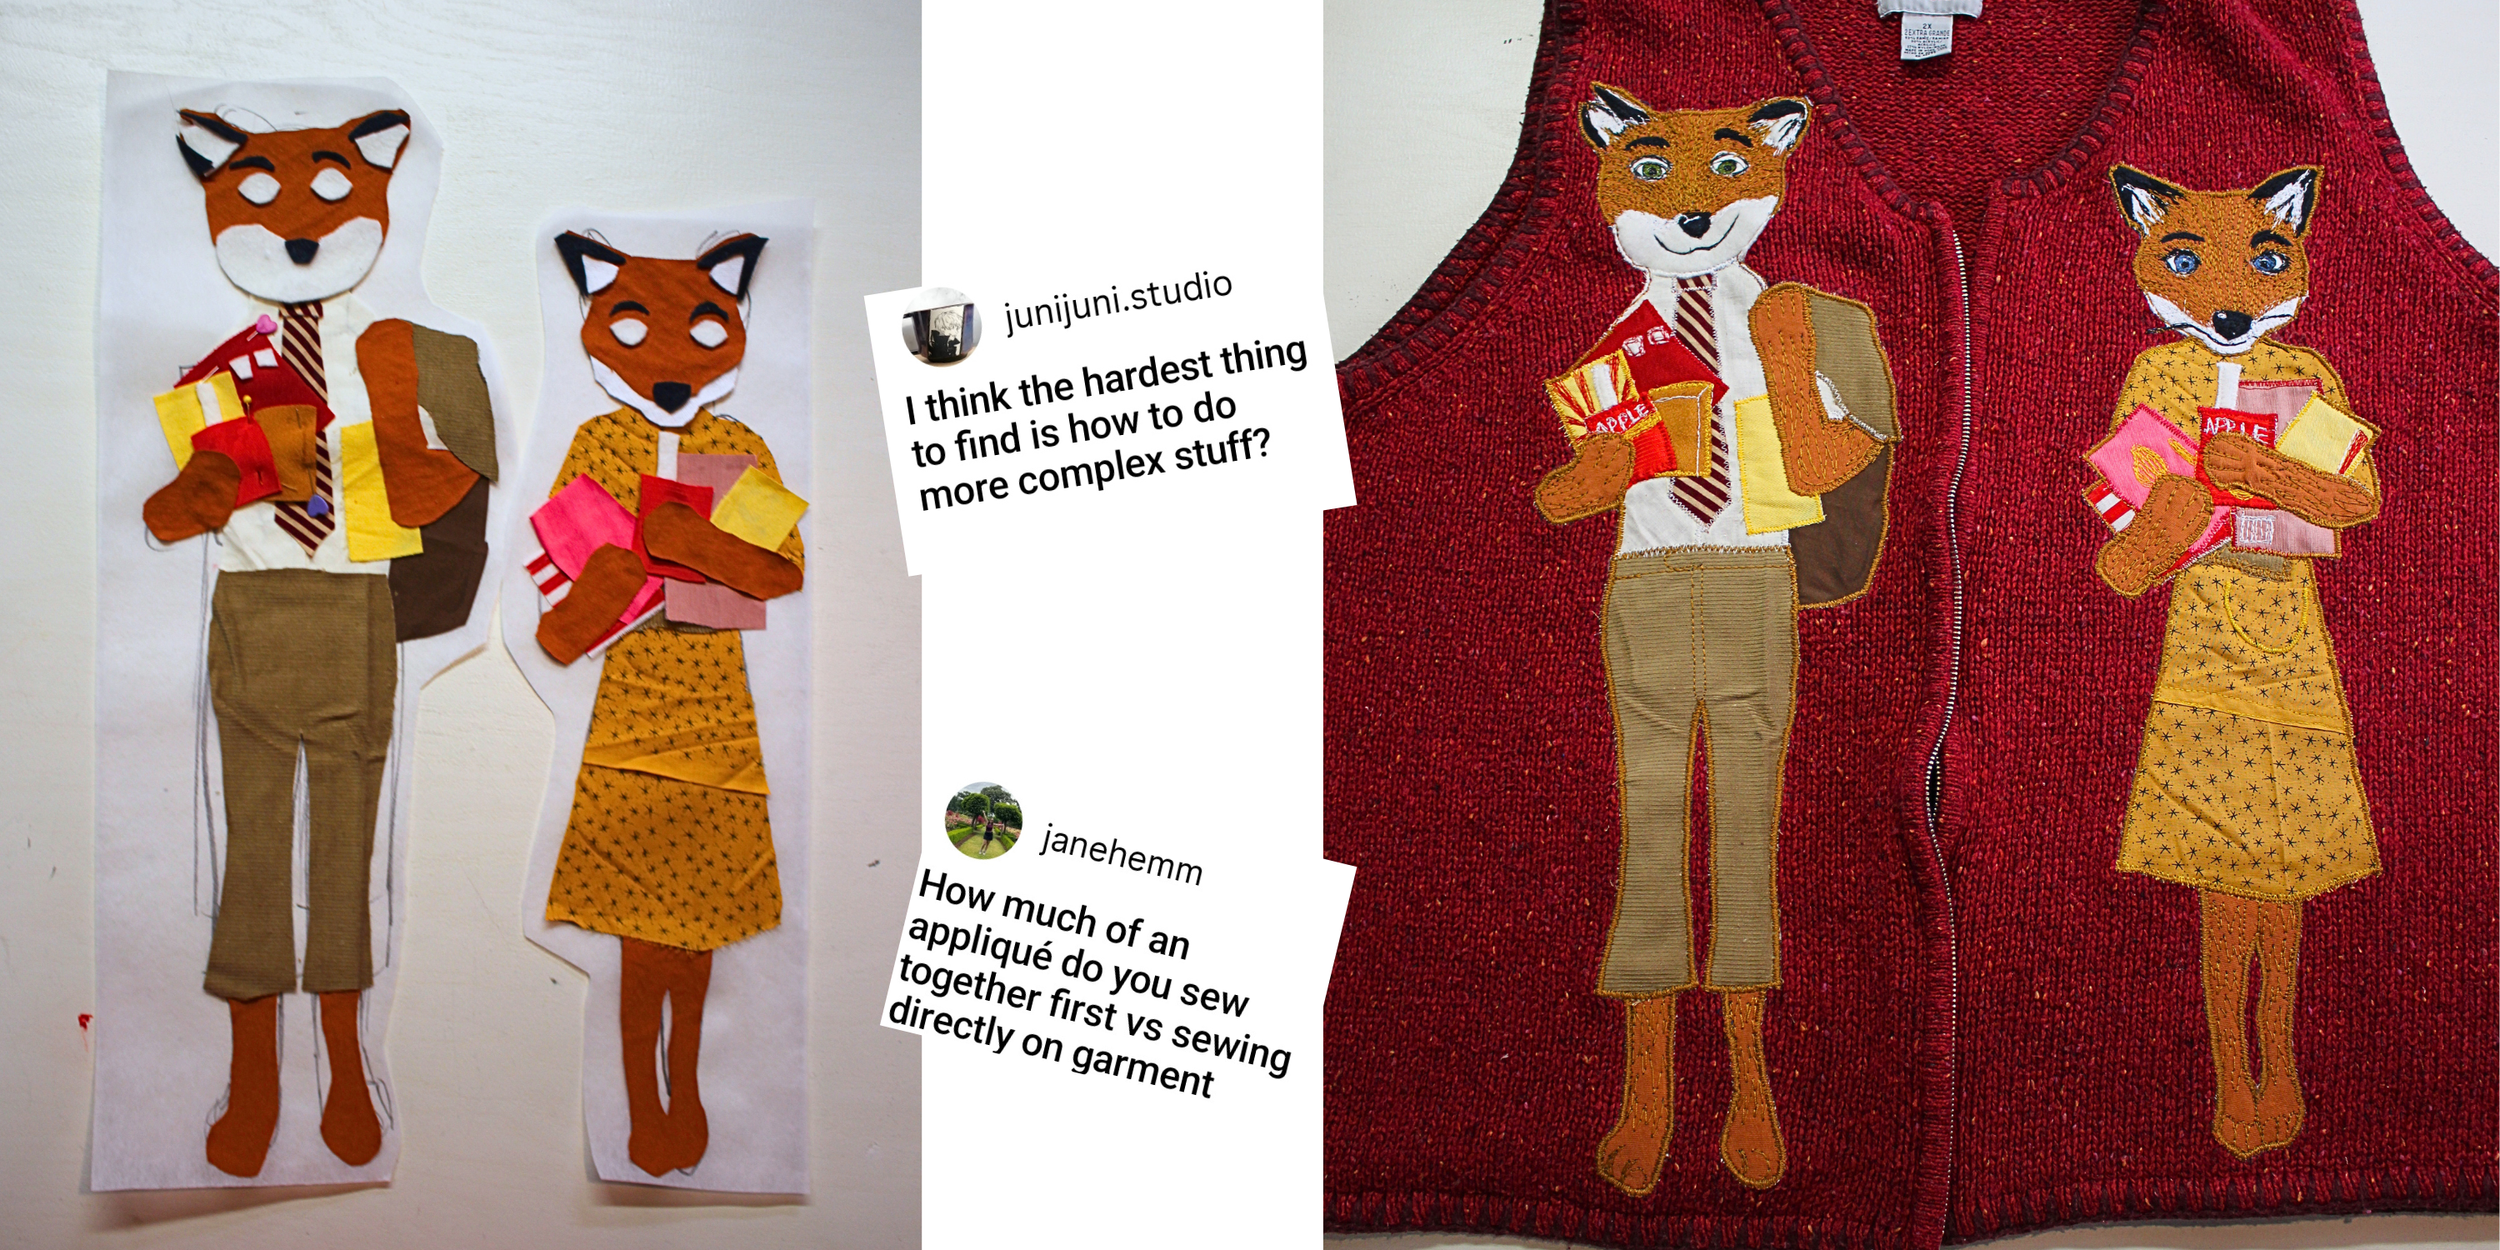
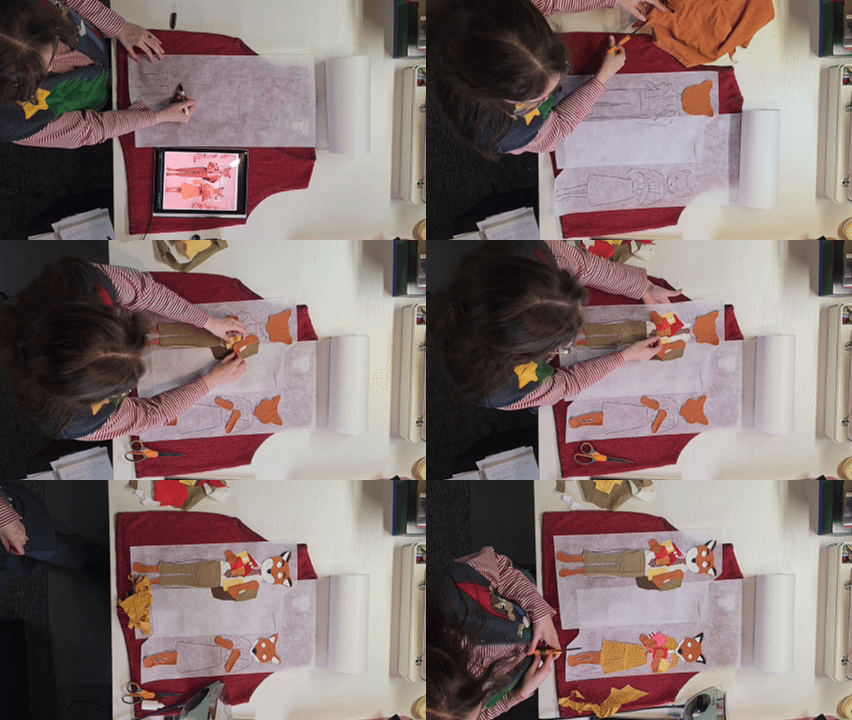
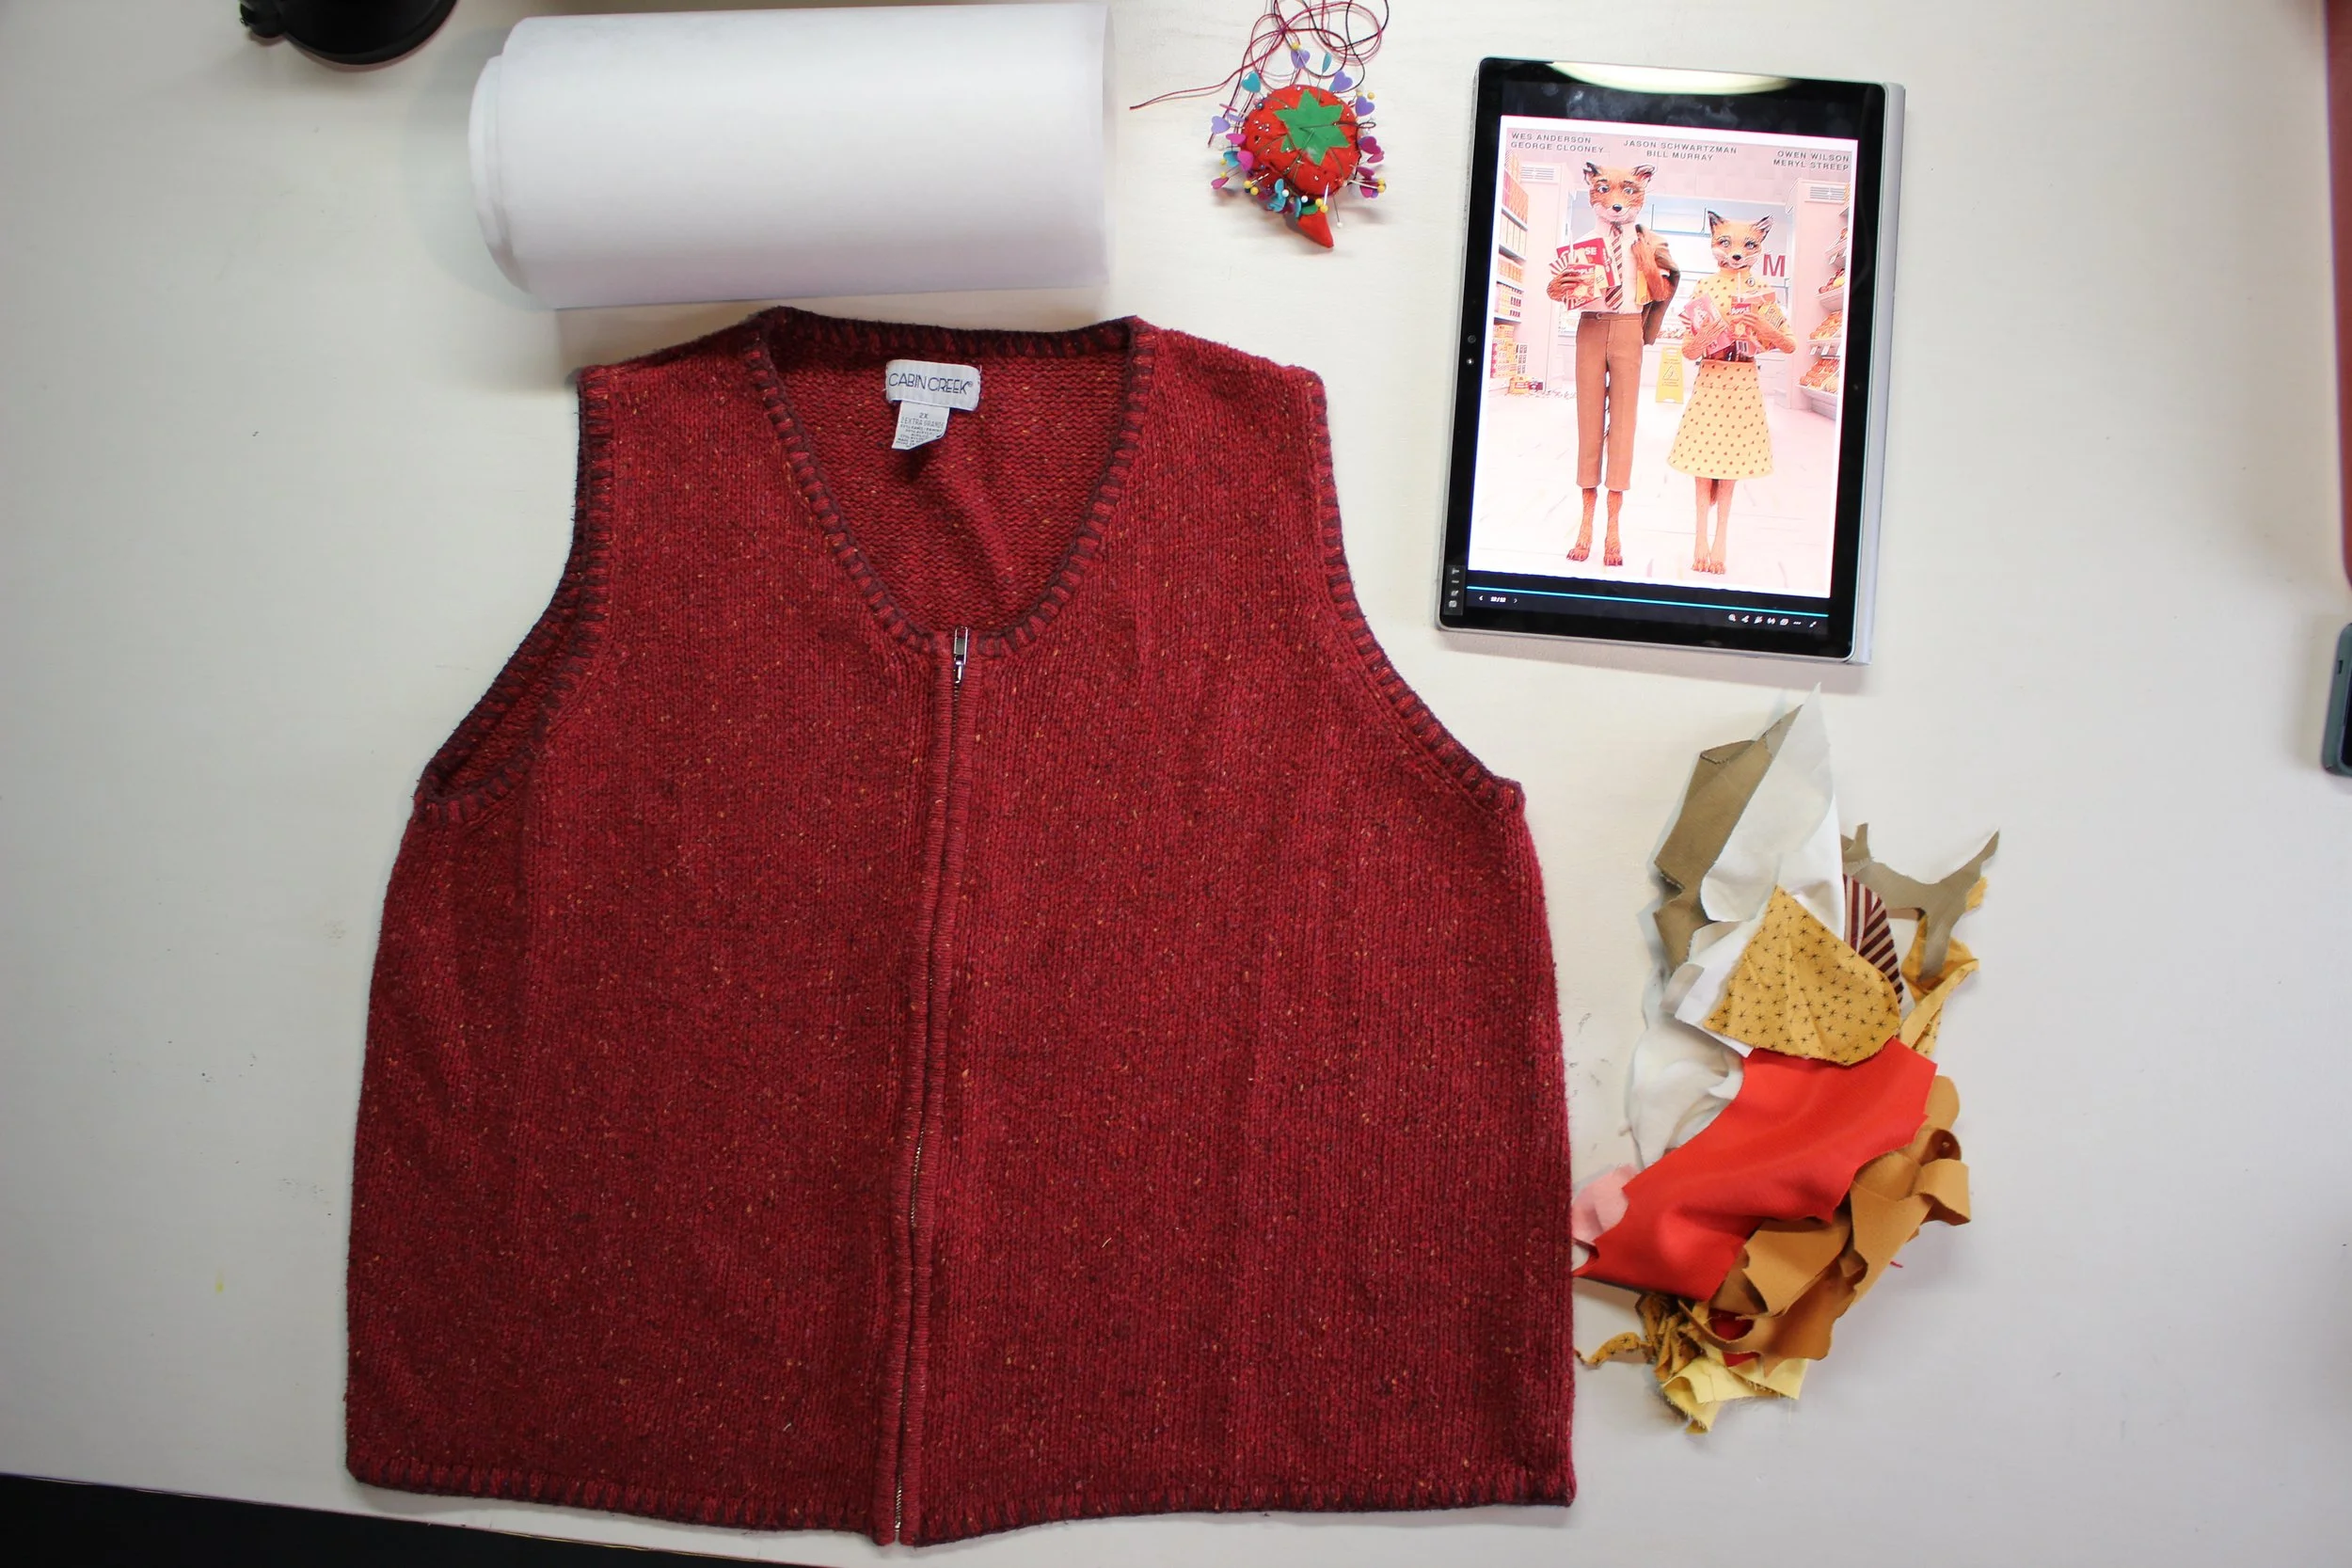
Assemble the patch.
I recommend building them up onto sheets of medium weight tear away stabilizer first.
Cut and arrange the fabric, glueing the edges directly to the sheet.
Try not to layer too many layers of fabric! Cut away any excess pieces underneath that won’t be visible.
The fabric I used:
White (fleece and sweatshirt fleece), tan (corduroy), striped tie (woven cotton), yellow dress (woven cotton), orange fur (jersey), food boxes (woven cottons and polyester).
Questions:
“How much of an applique do you sew beforehand, and directly to the garment?”
—It depends on the design for me. Detailed patches are built onto stabilizer, sewn entirely, and then finally sewn to the garment. Less detailed patches on shirts like sweatshirts and denim, cant typically be built and sewn directly on the garment!
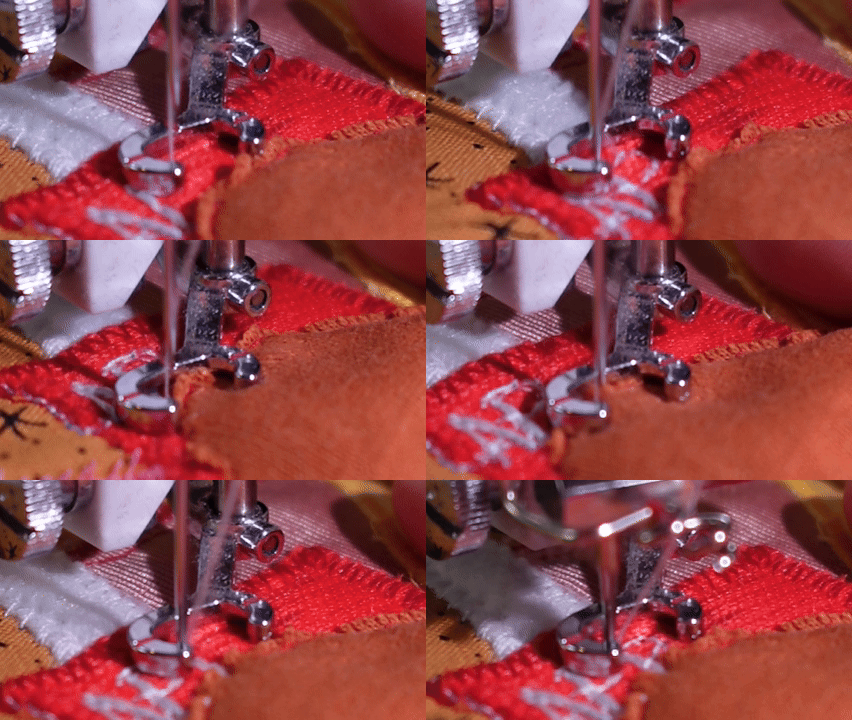
Sew the entire patch to the sheet.
This is where you can add extra embroidered details to add dimension, etc.
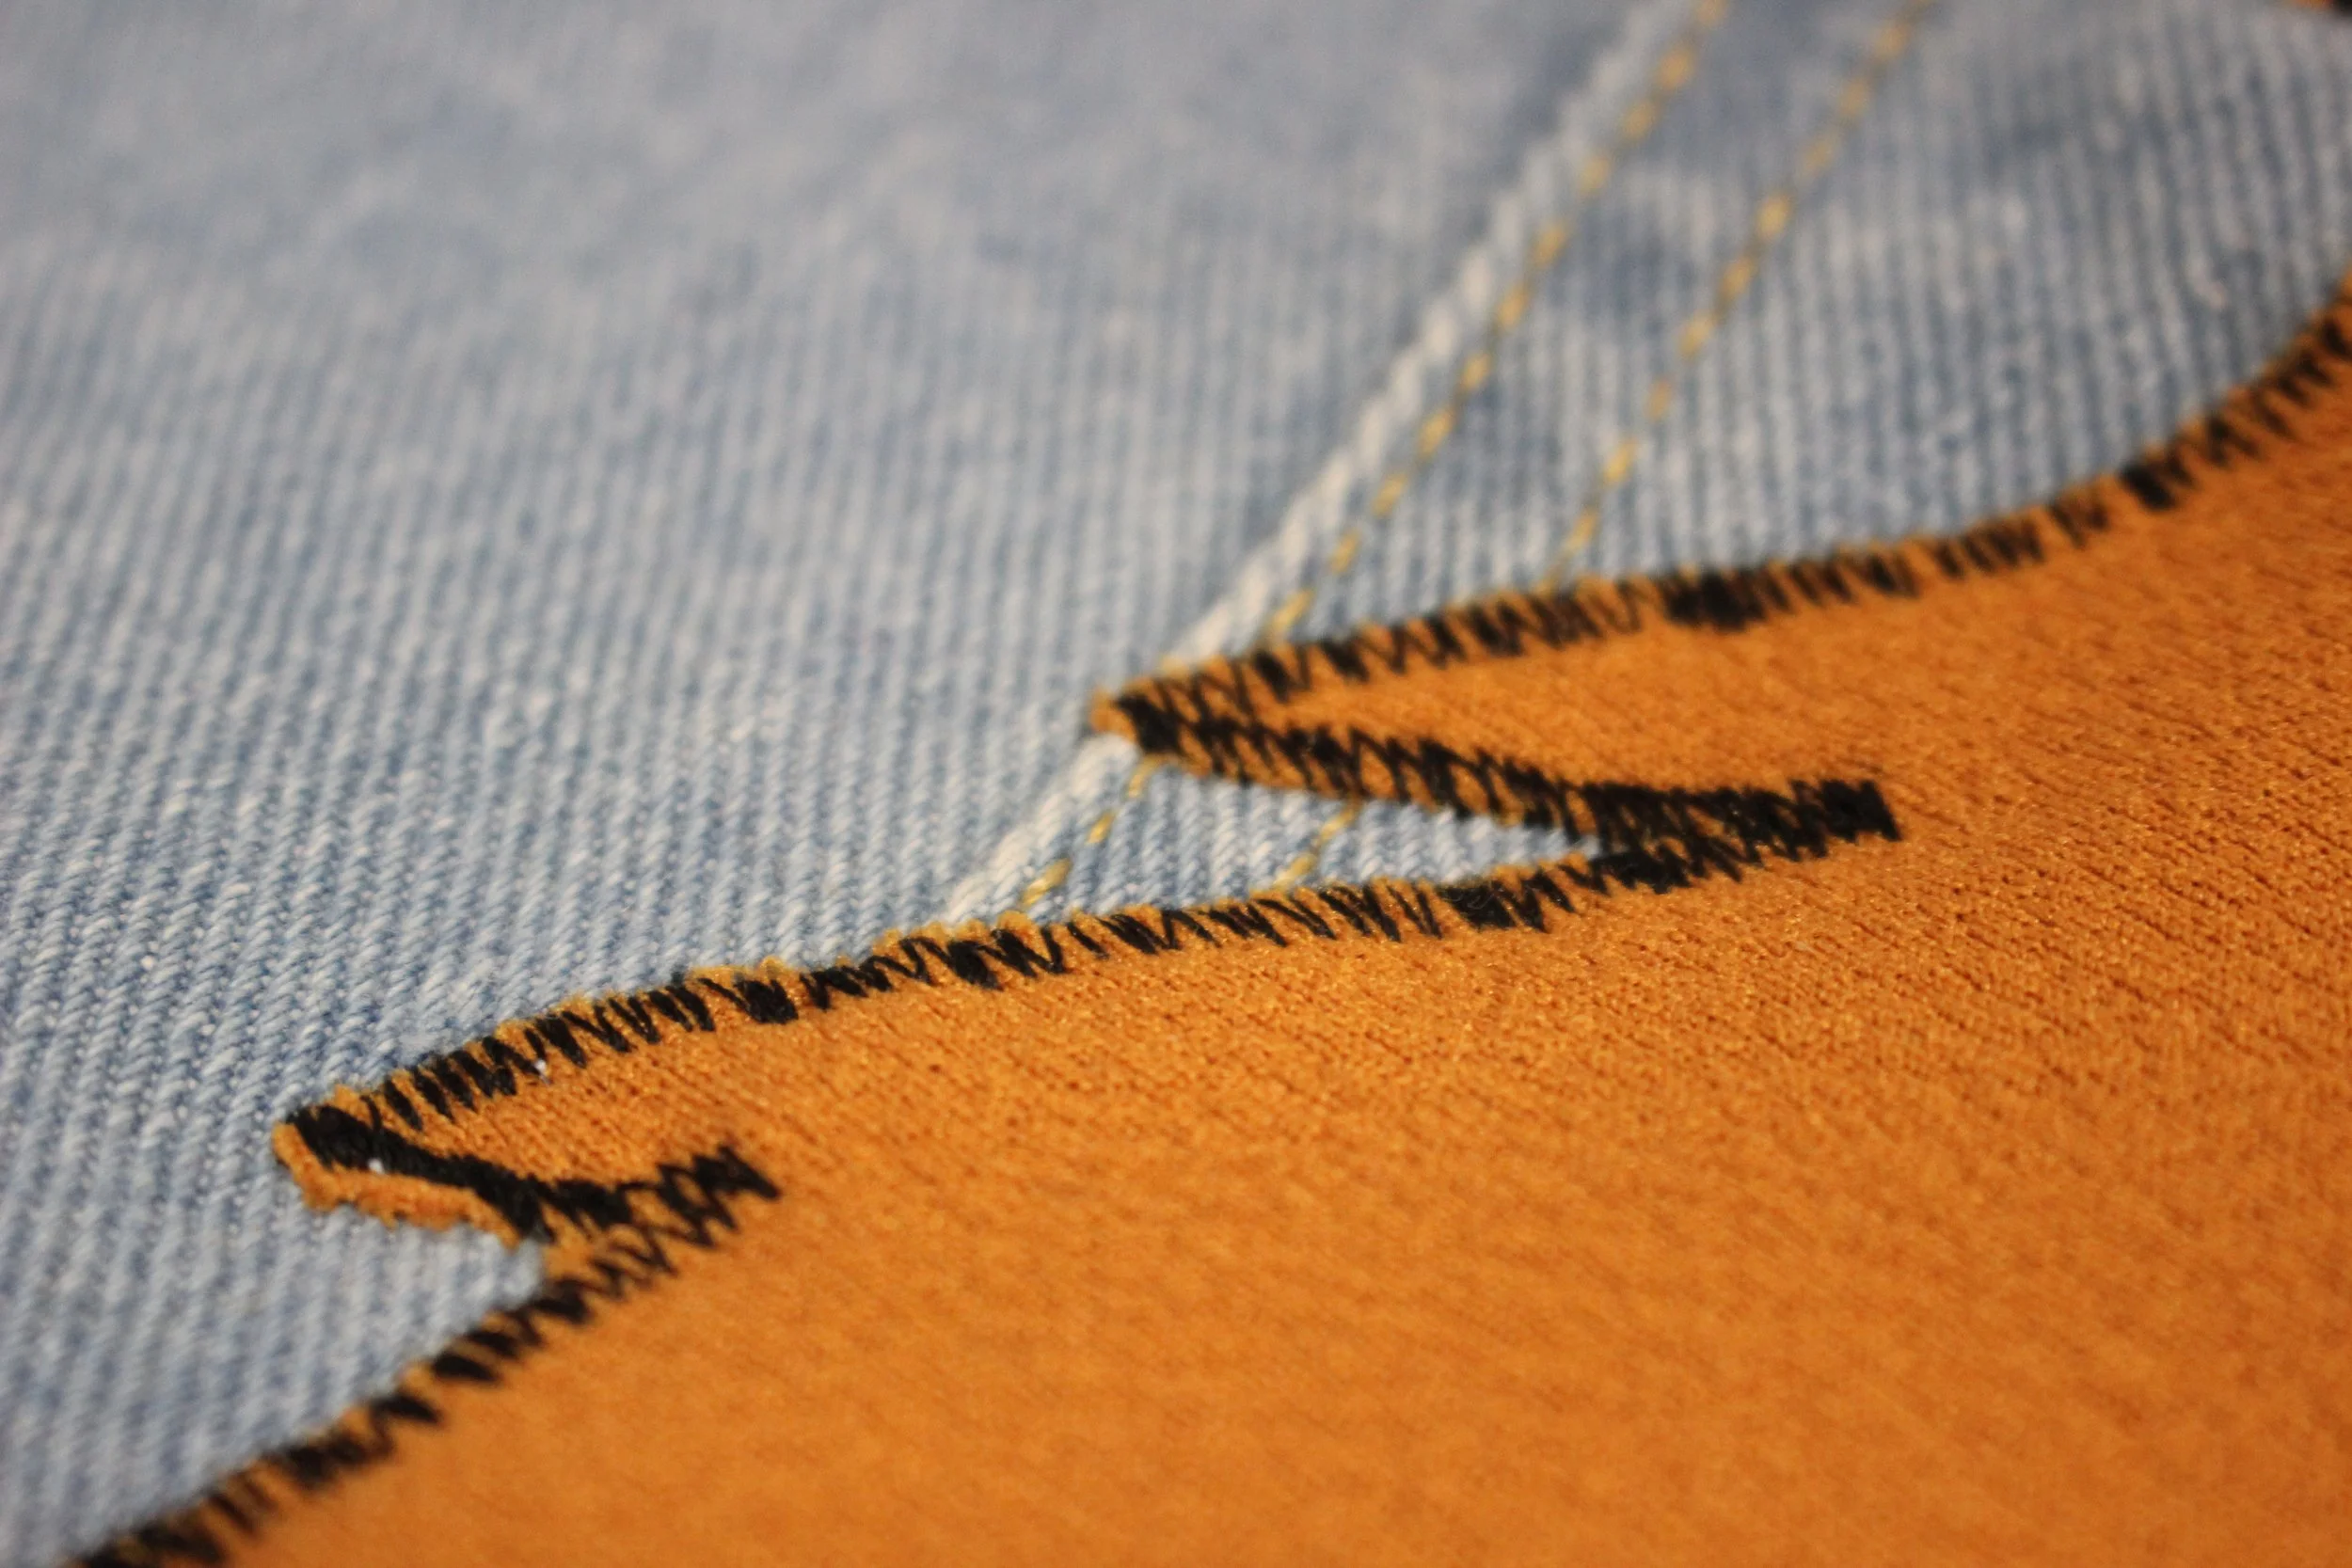
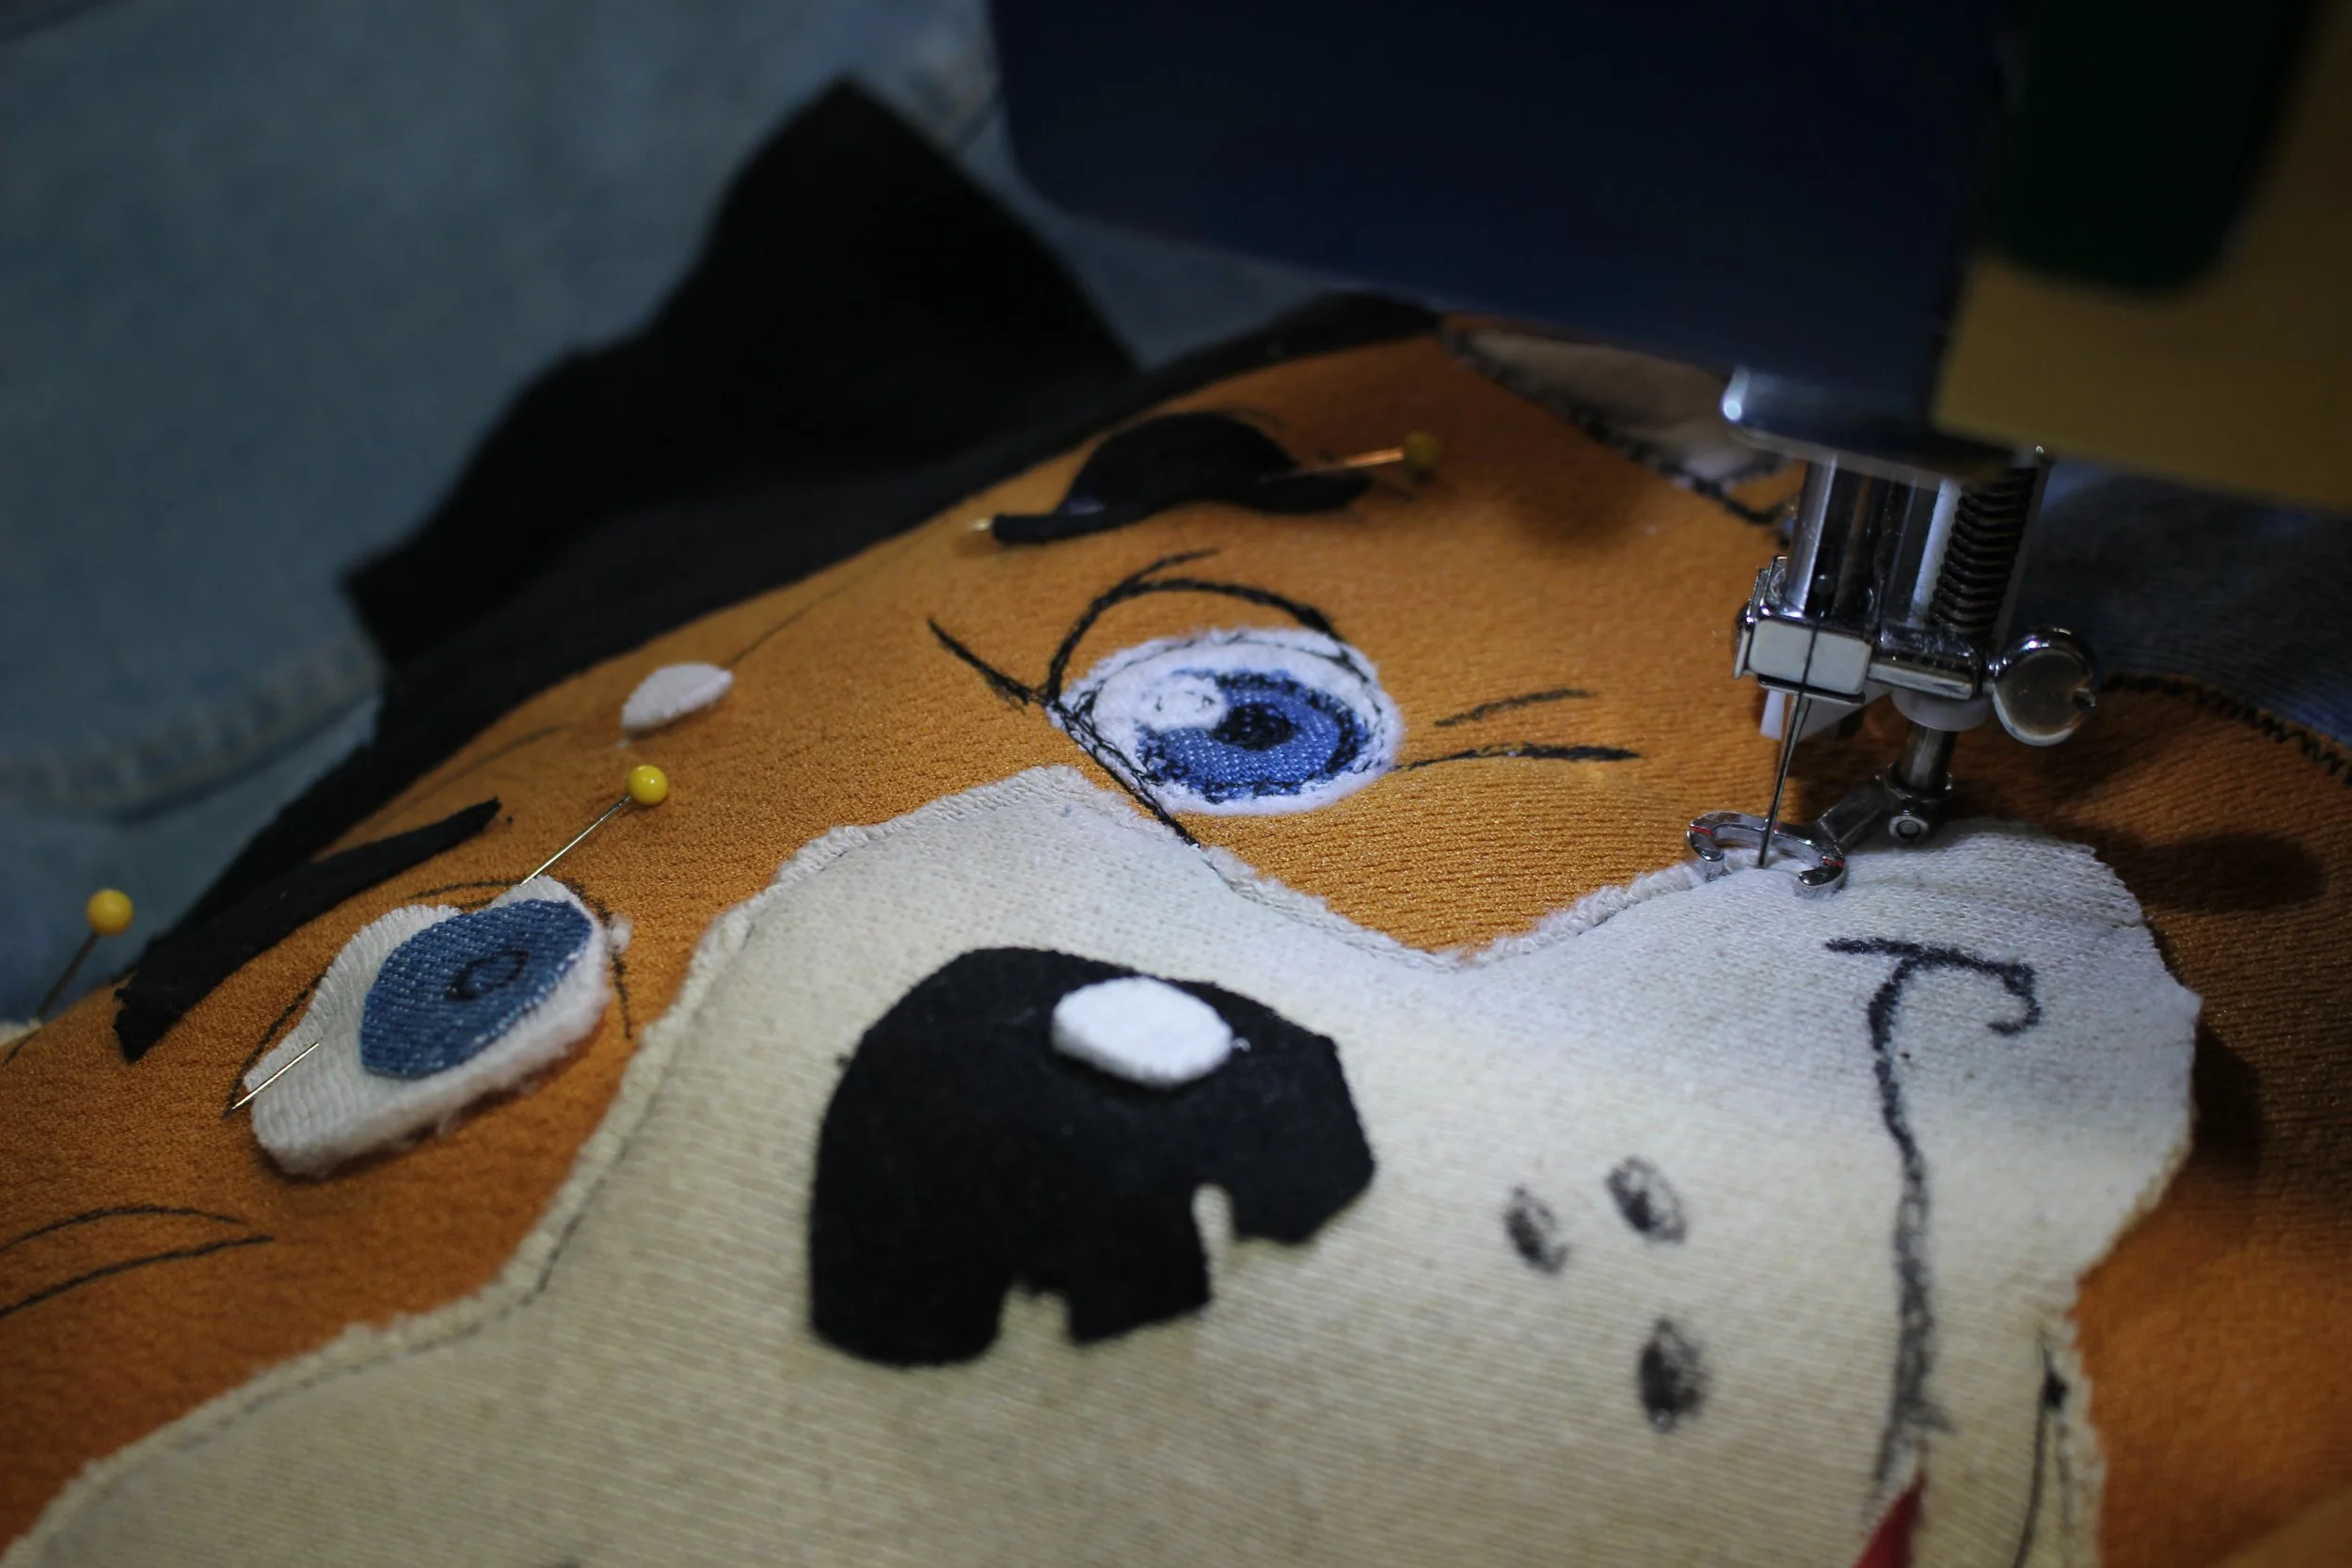
In my design, I used short zig zag stitches over all the edges, and straight stitches for details like the fur, whiskers, words, and eyeballs. This was entirely done with a free motion foot.
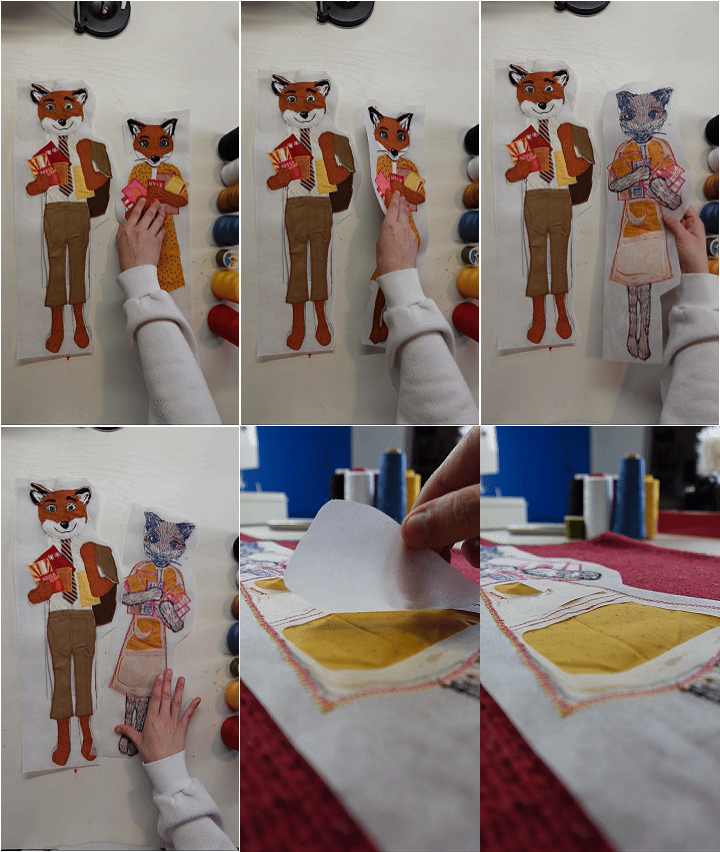
Remove the excess stabilizer and fabric underneath.
Flip the patches over, and carefully remove any unused areas. Try not to tear the stabilizer, or you may pull stitches.
Don’t worry about removing the stabilizer on the outer edges.
Feel free to apply fabric glue on the underside where any threads may come undone.
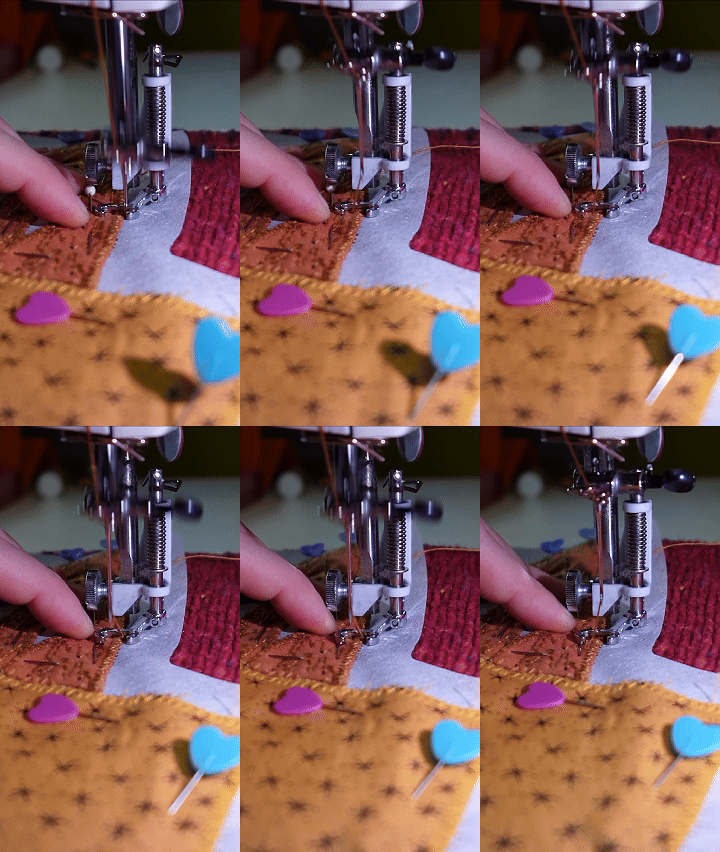
Pin the patch to the garment.
Make sure to only pin the top of the clothing, not all the way through.
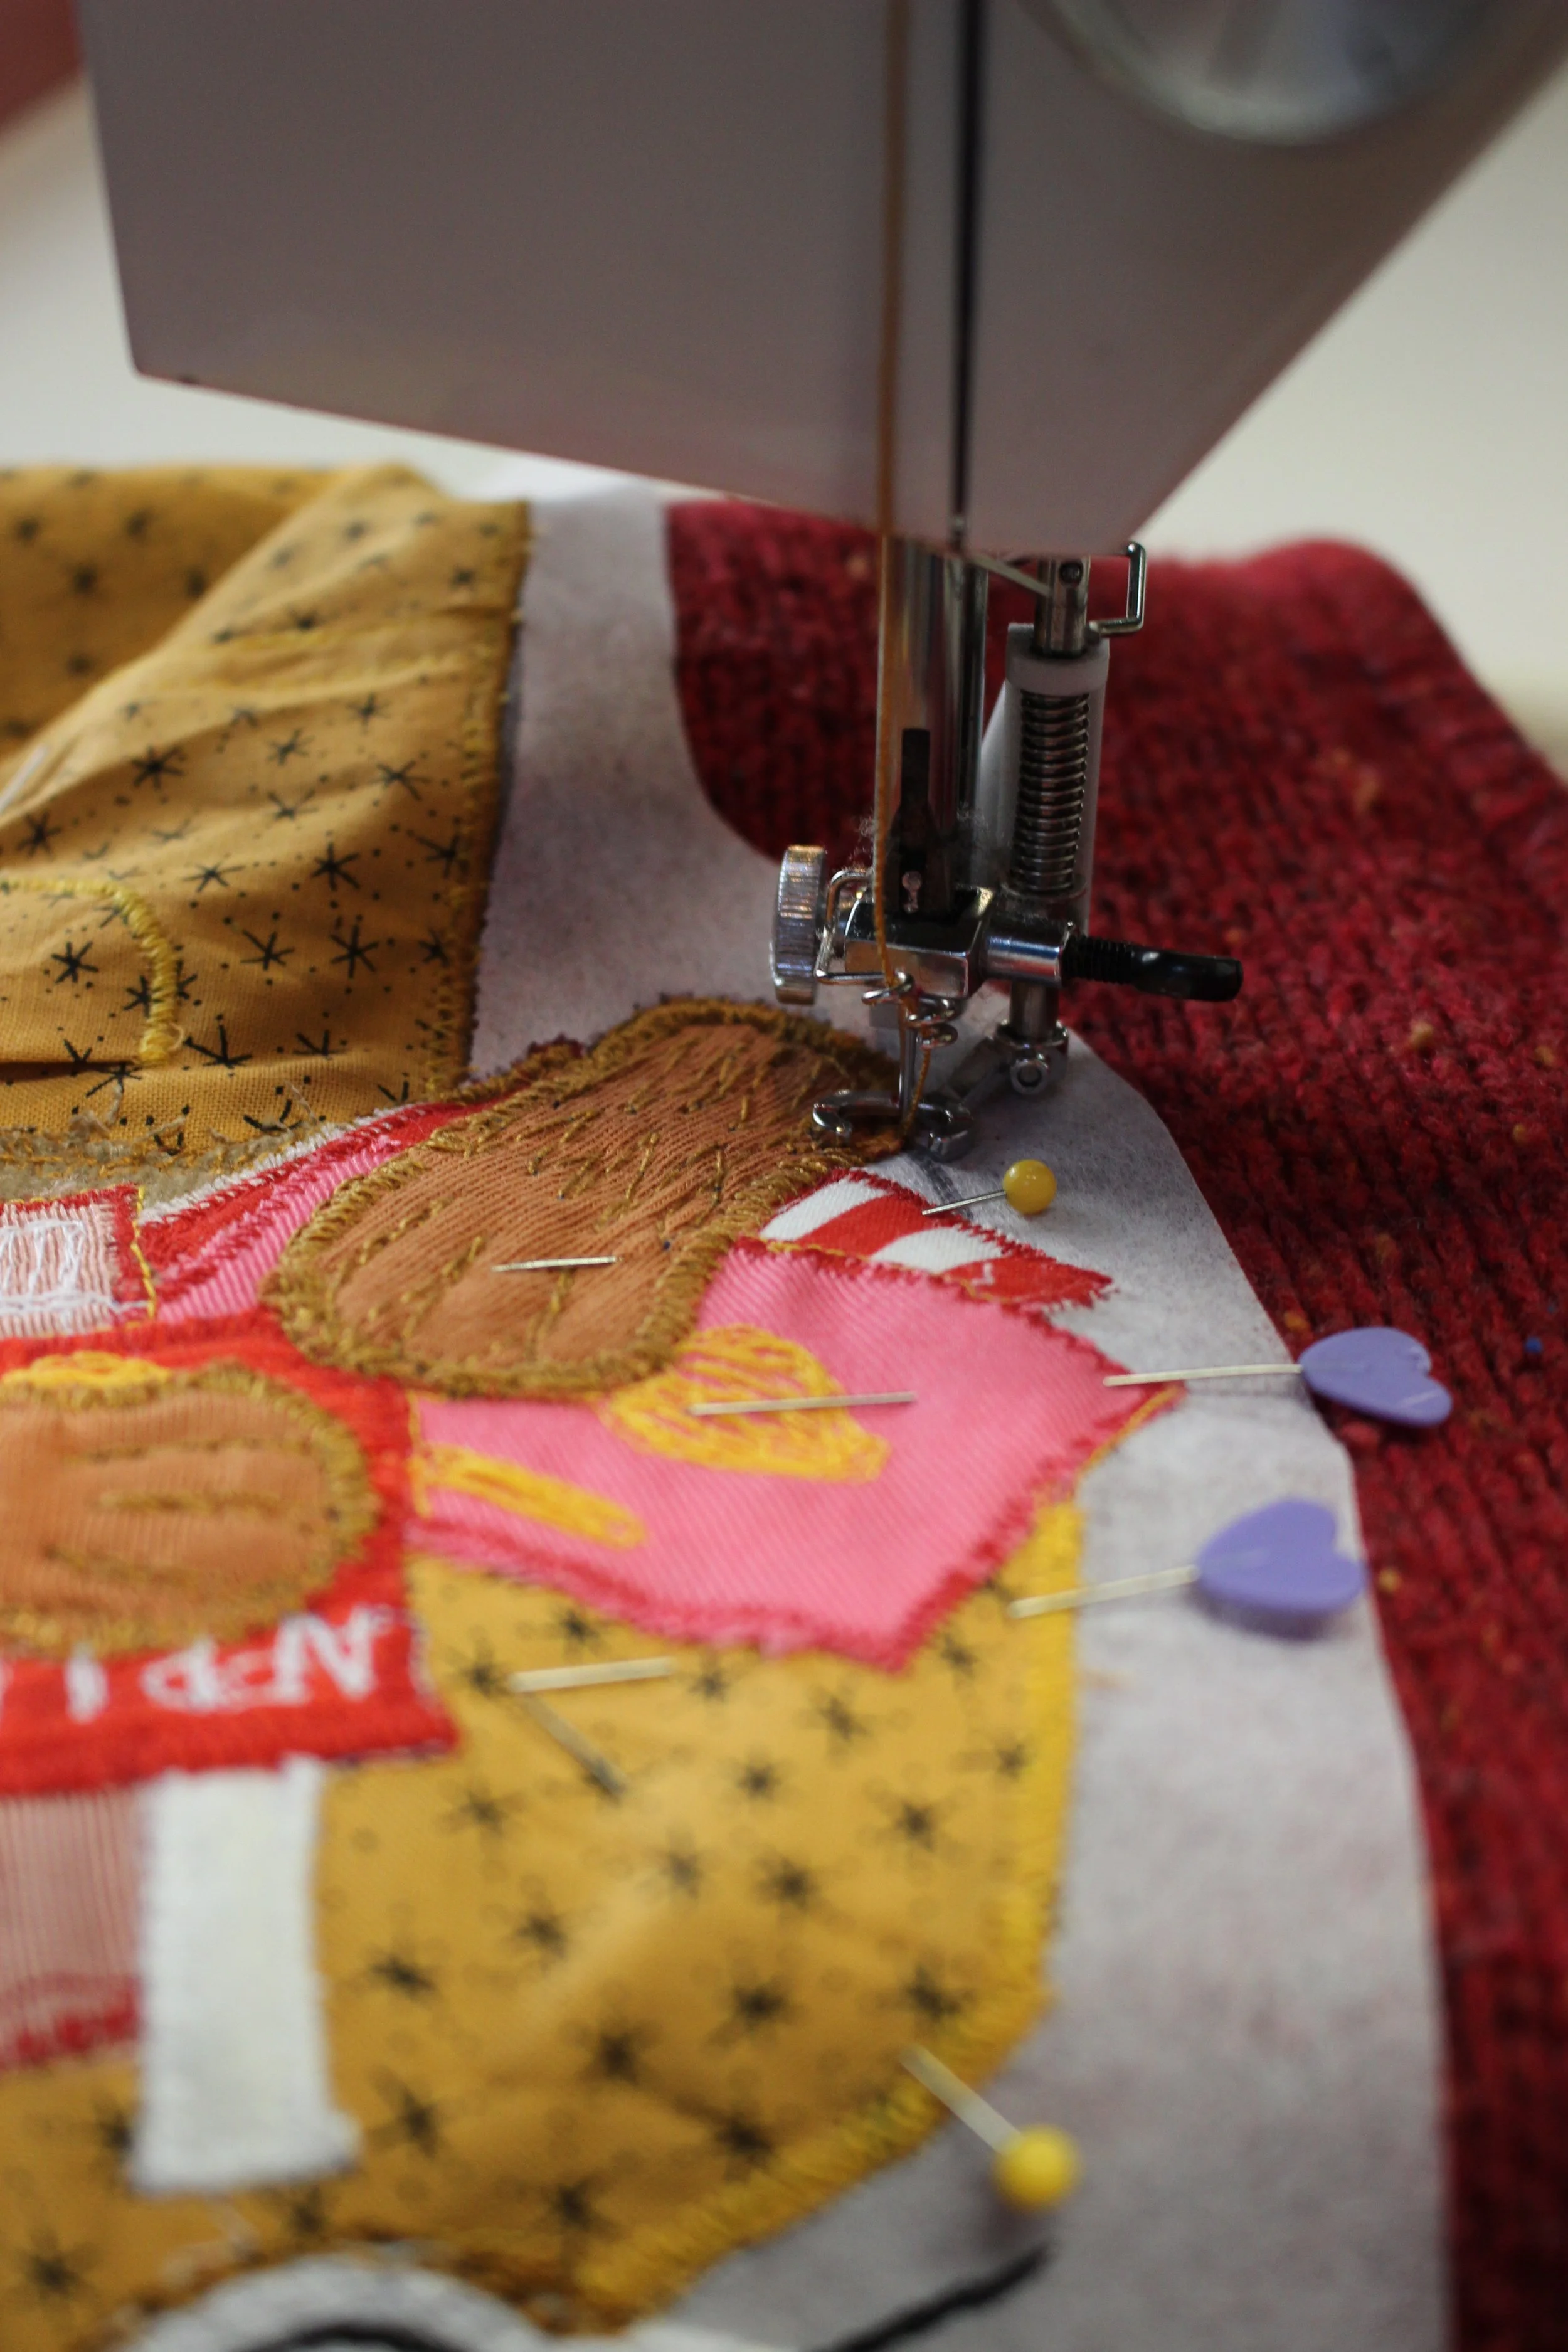
Sew the patch to the garment.
I am using a short zigzag stitch, right over the edge. As you can see, the stabilizer is still on the outer edge.
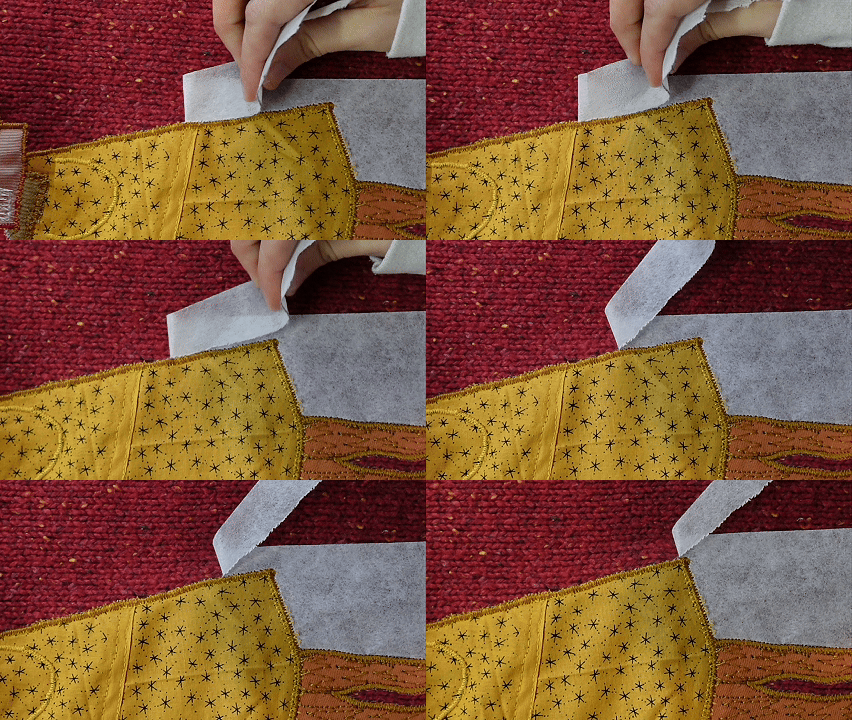
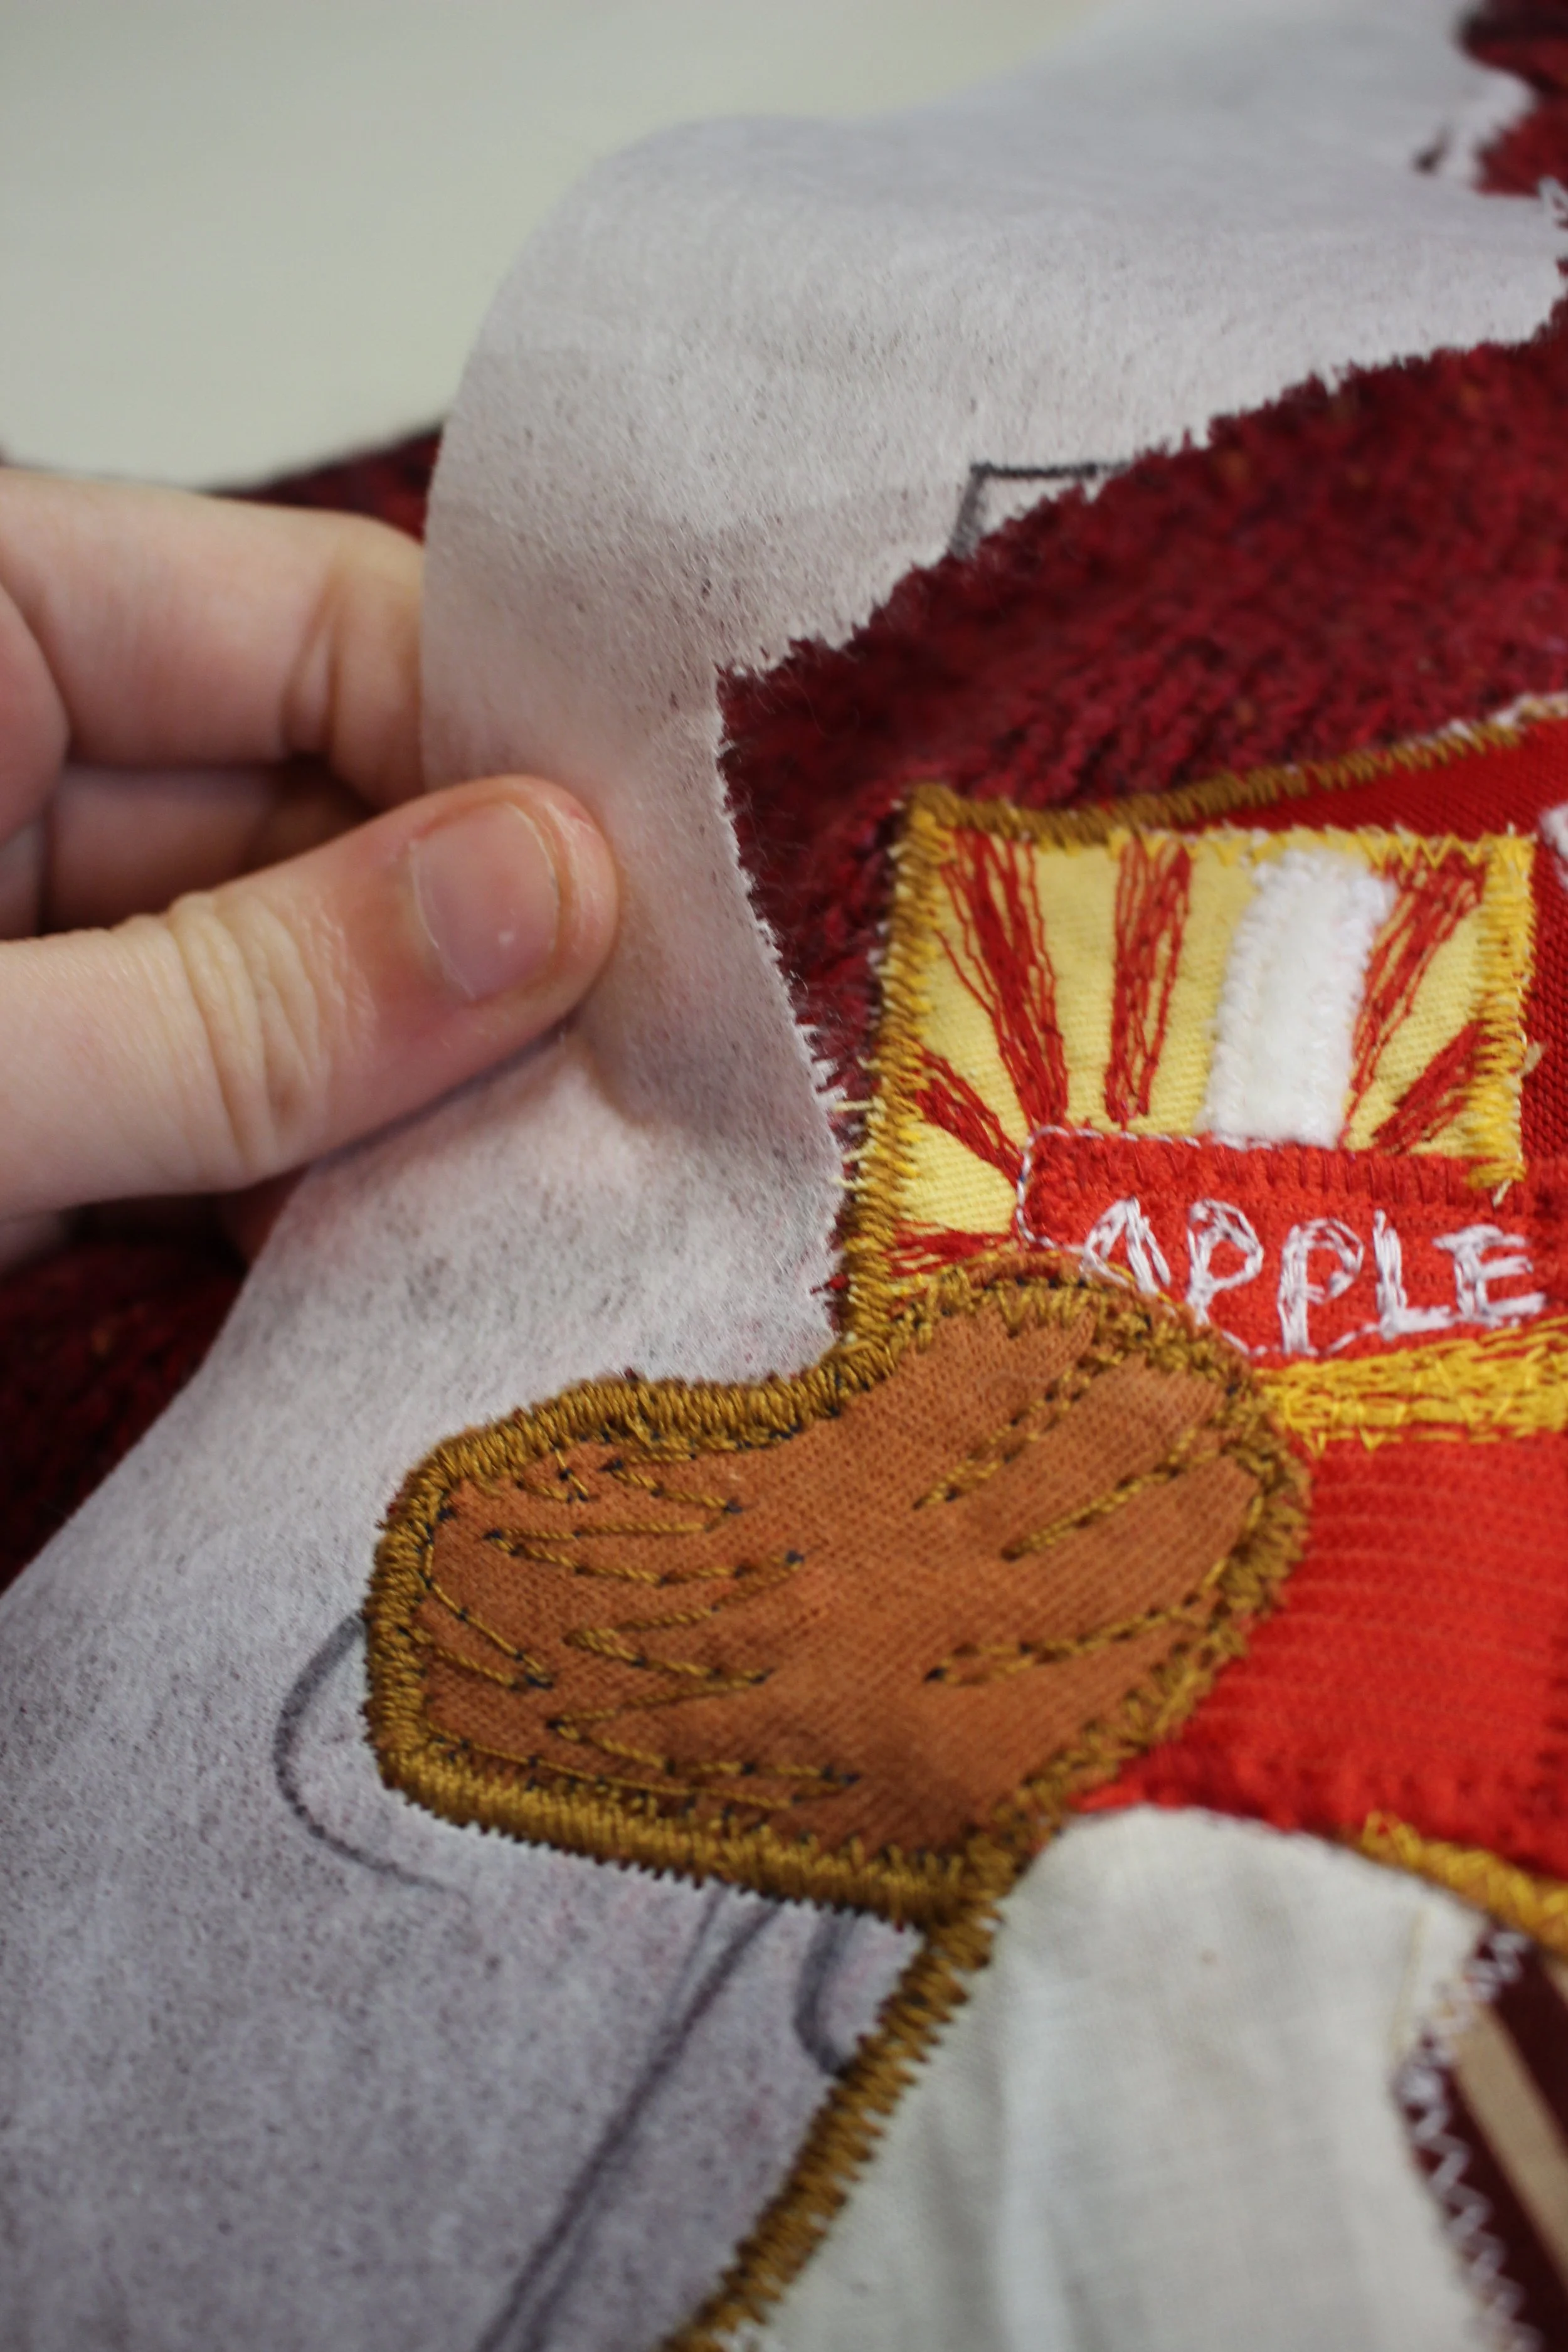
Once sewn, carefully pull the excess stabilizer from the edges. As you can see below, it shouldn’t be a difficult pull, if you sewed over the edge enough.
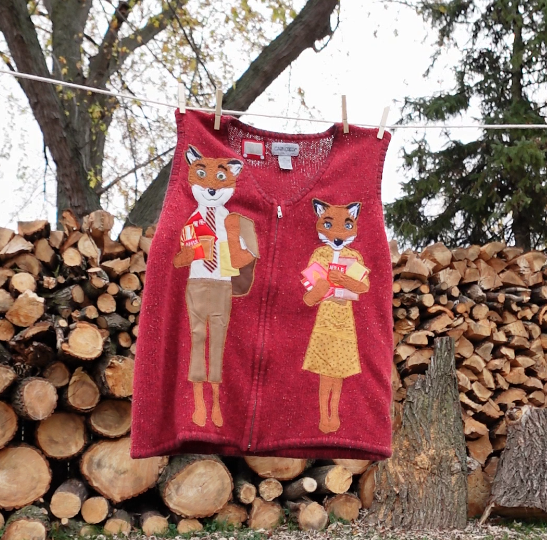
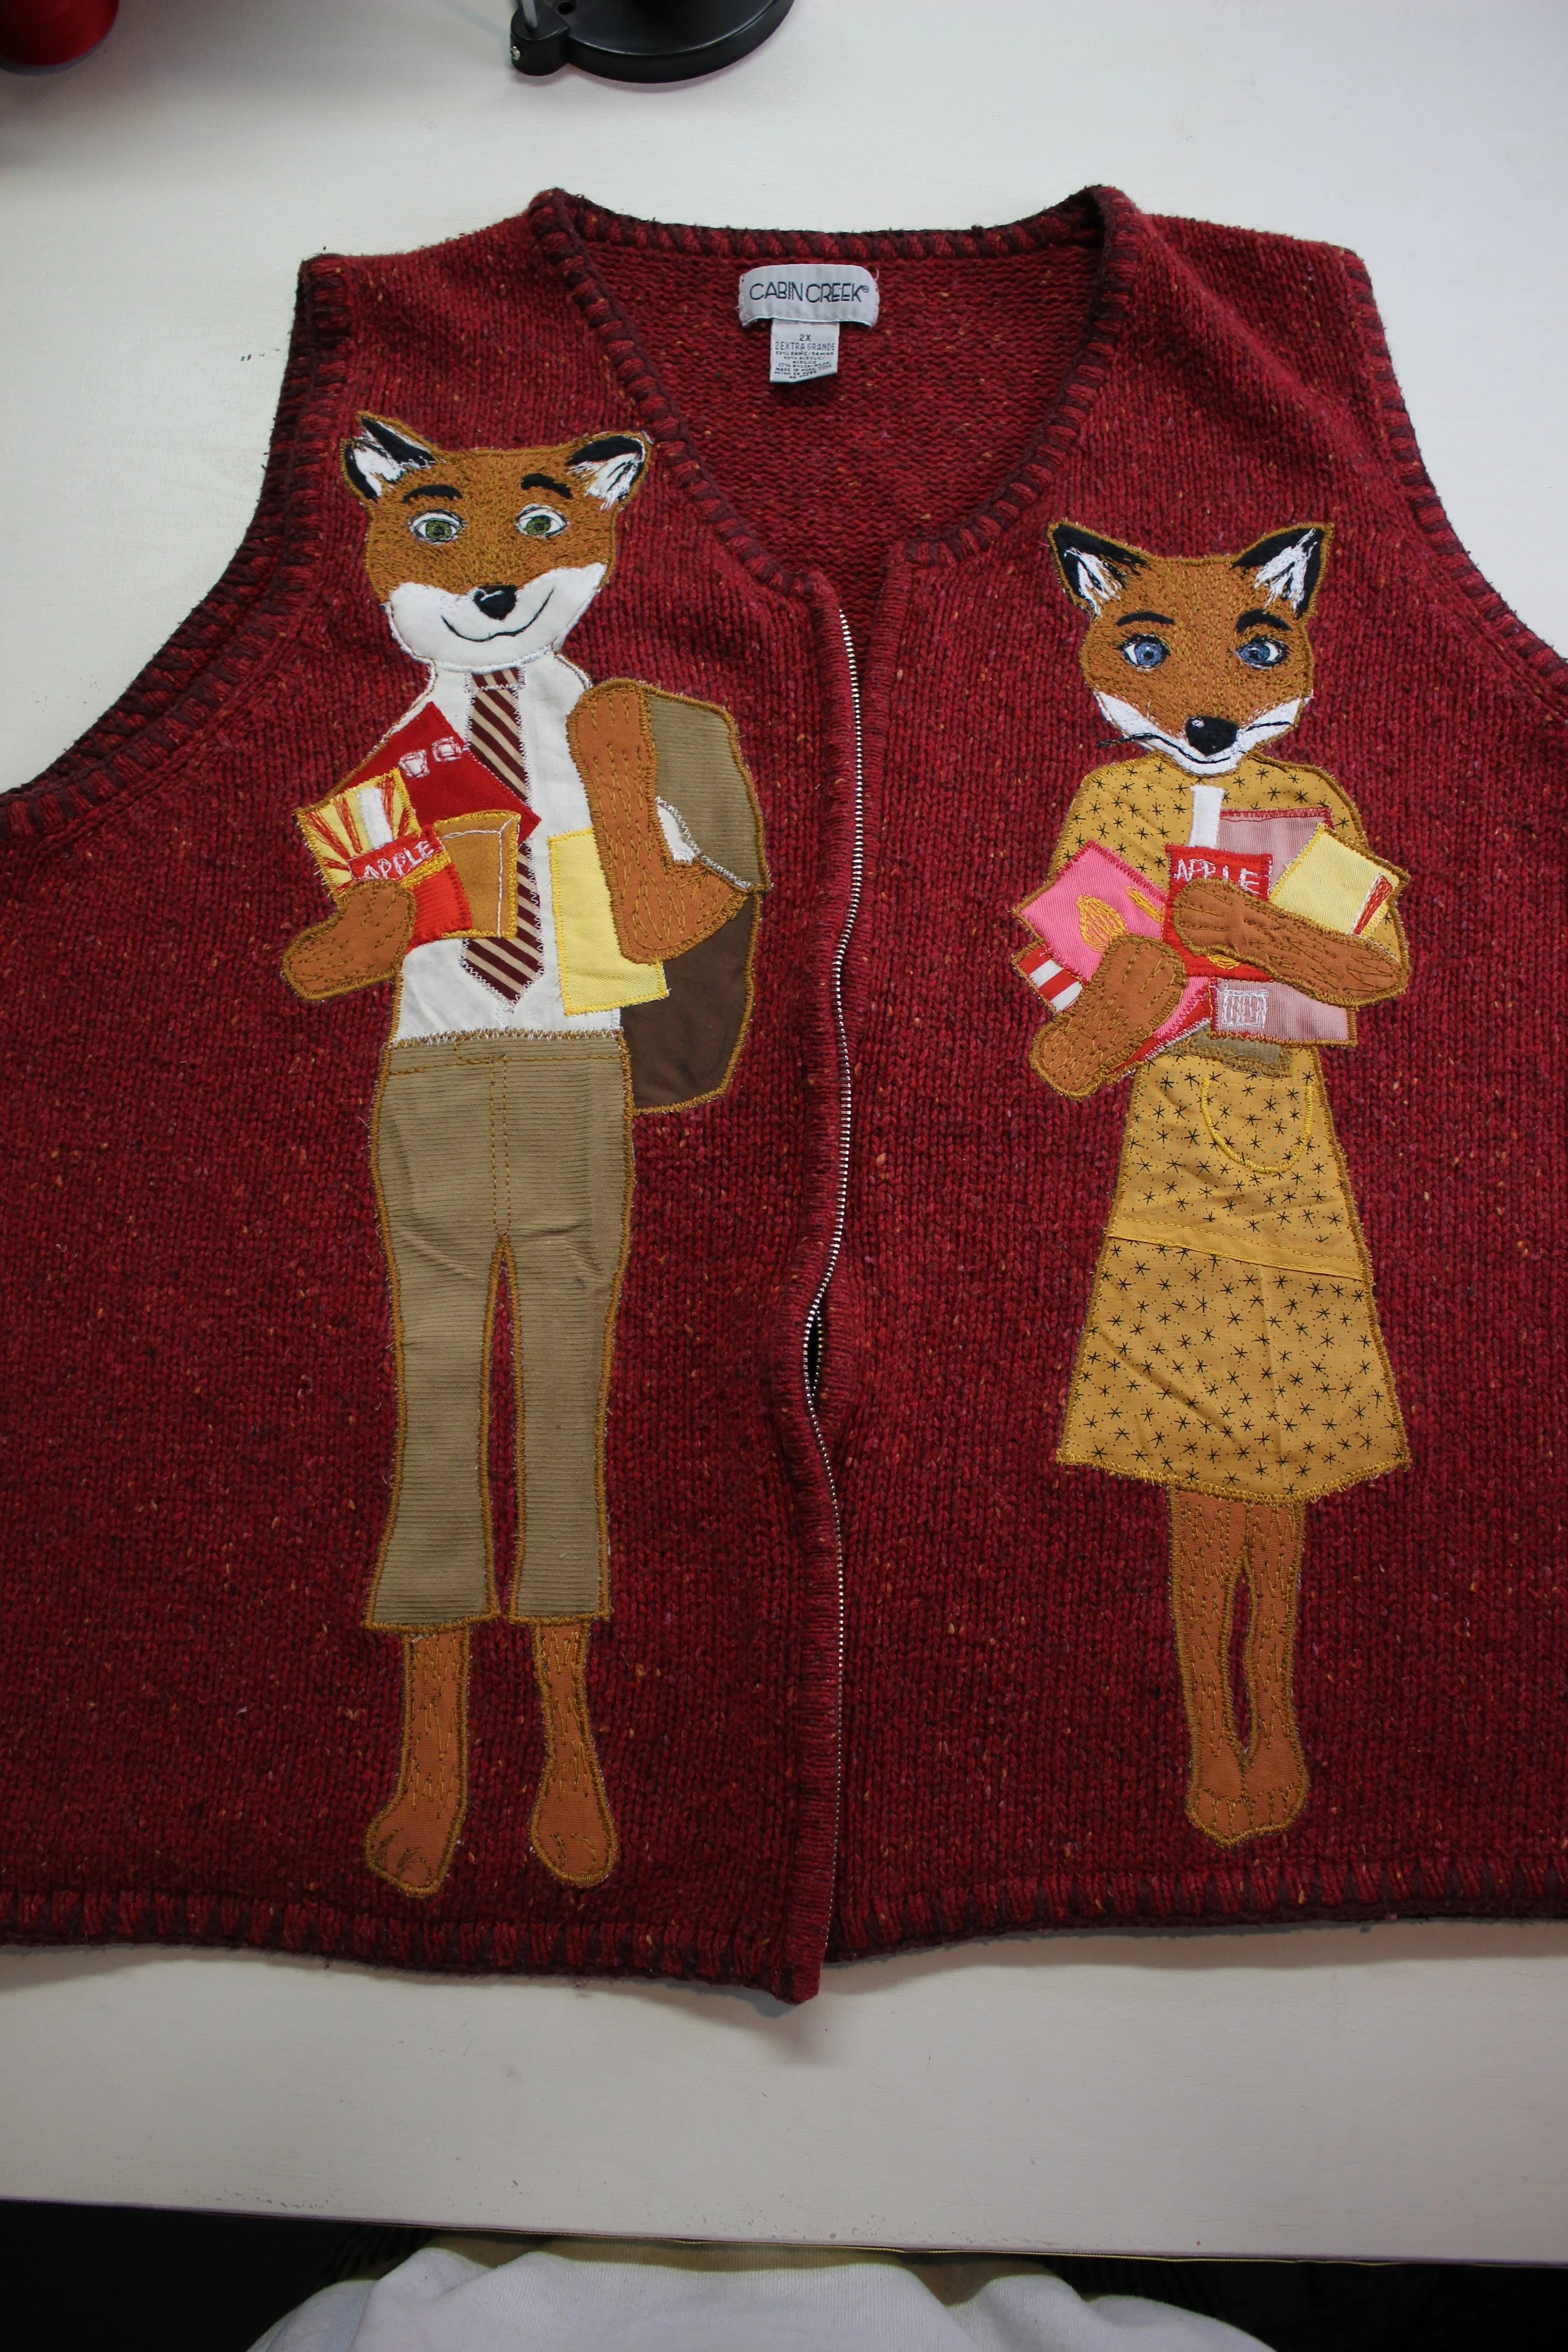
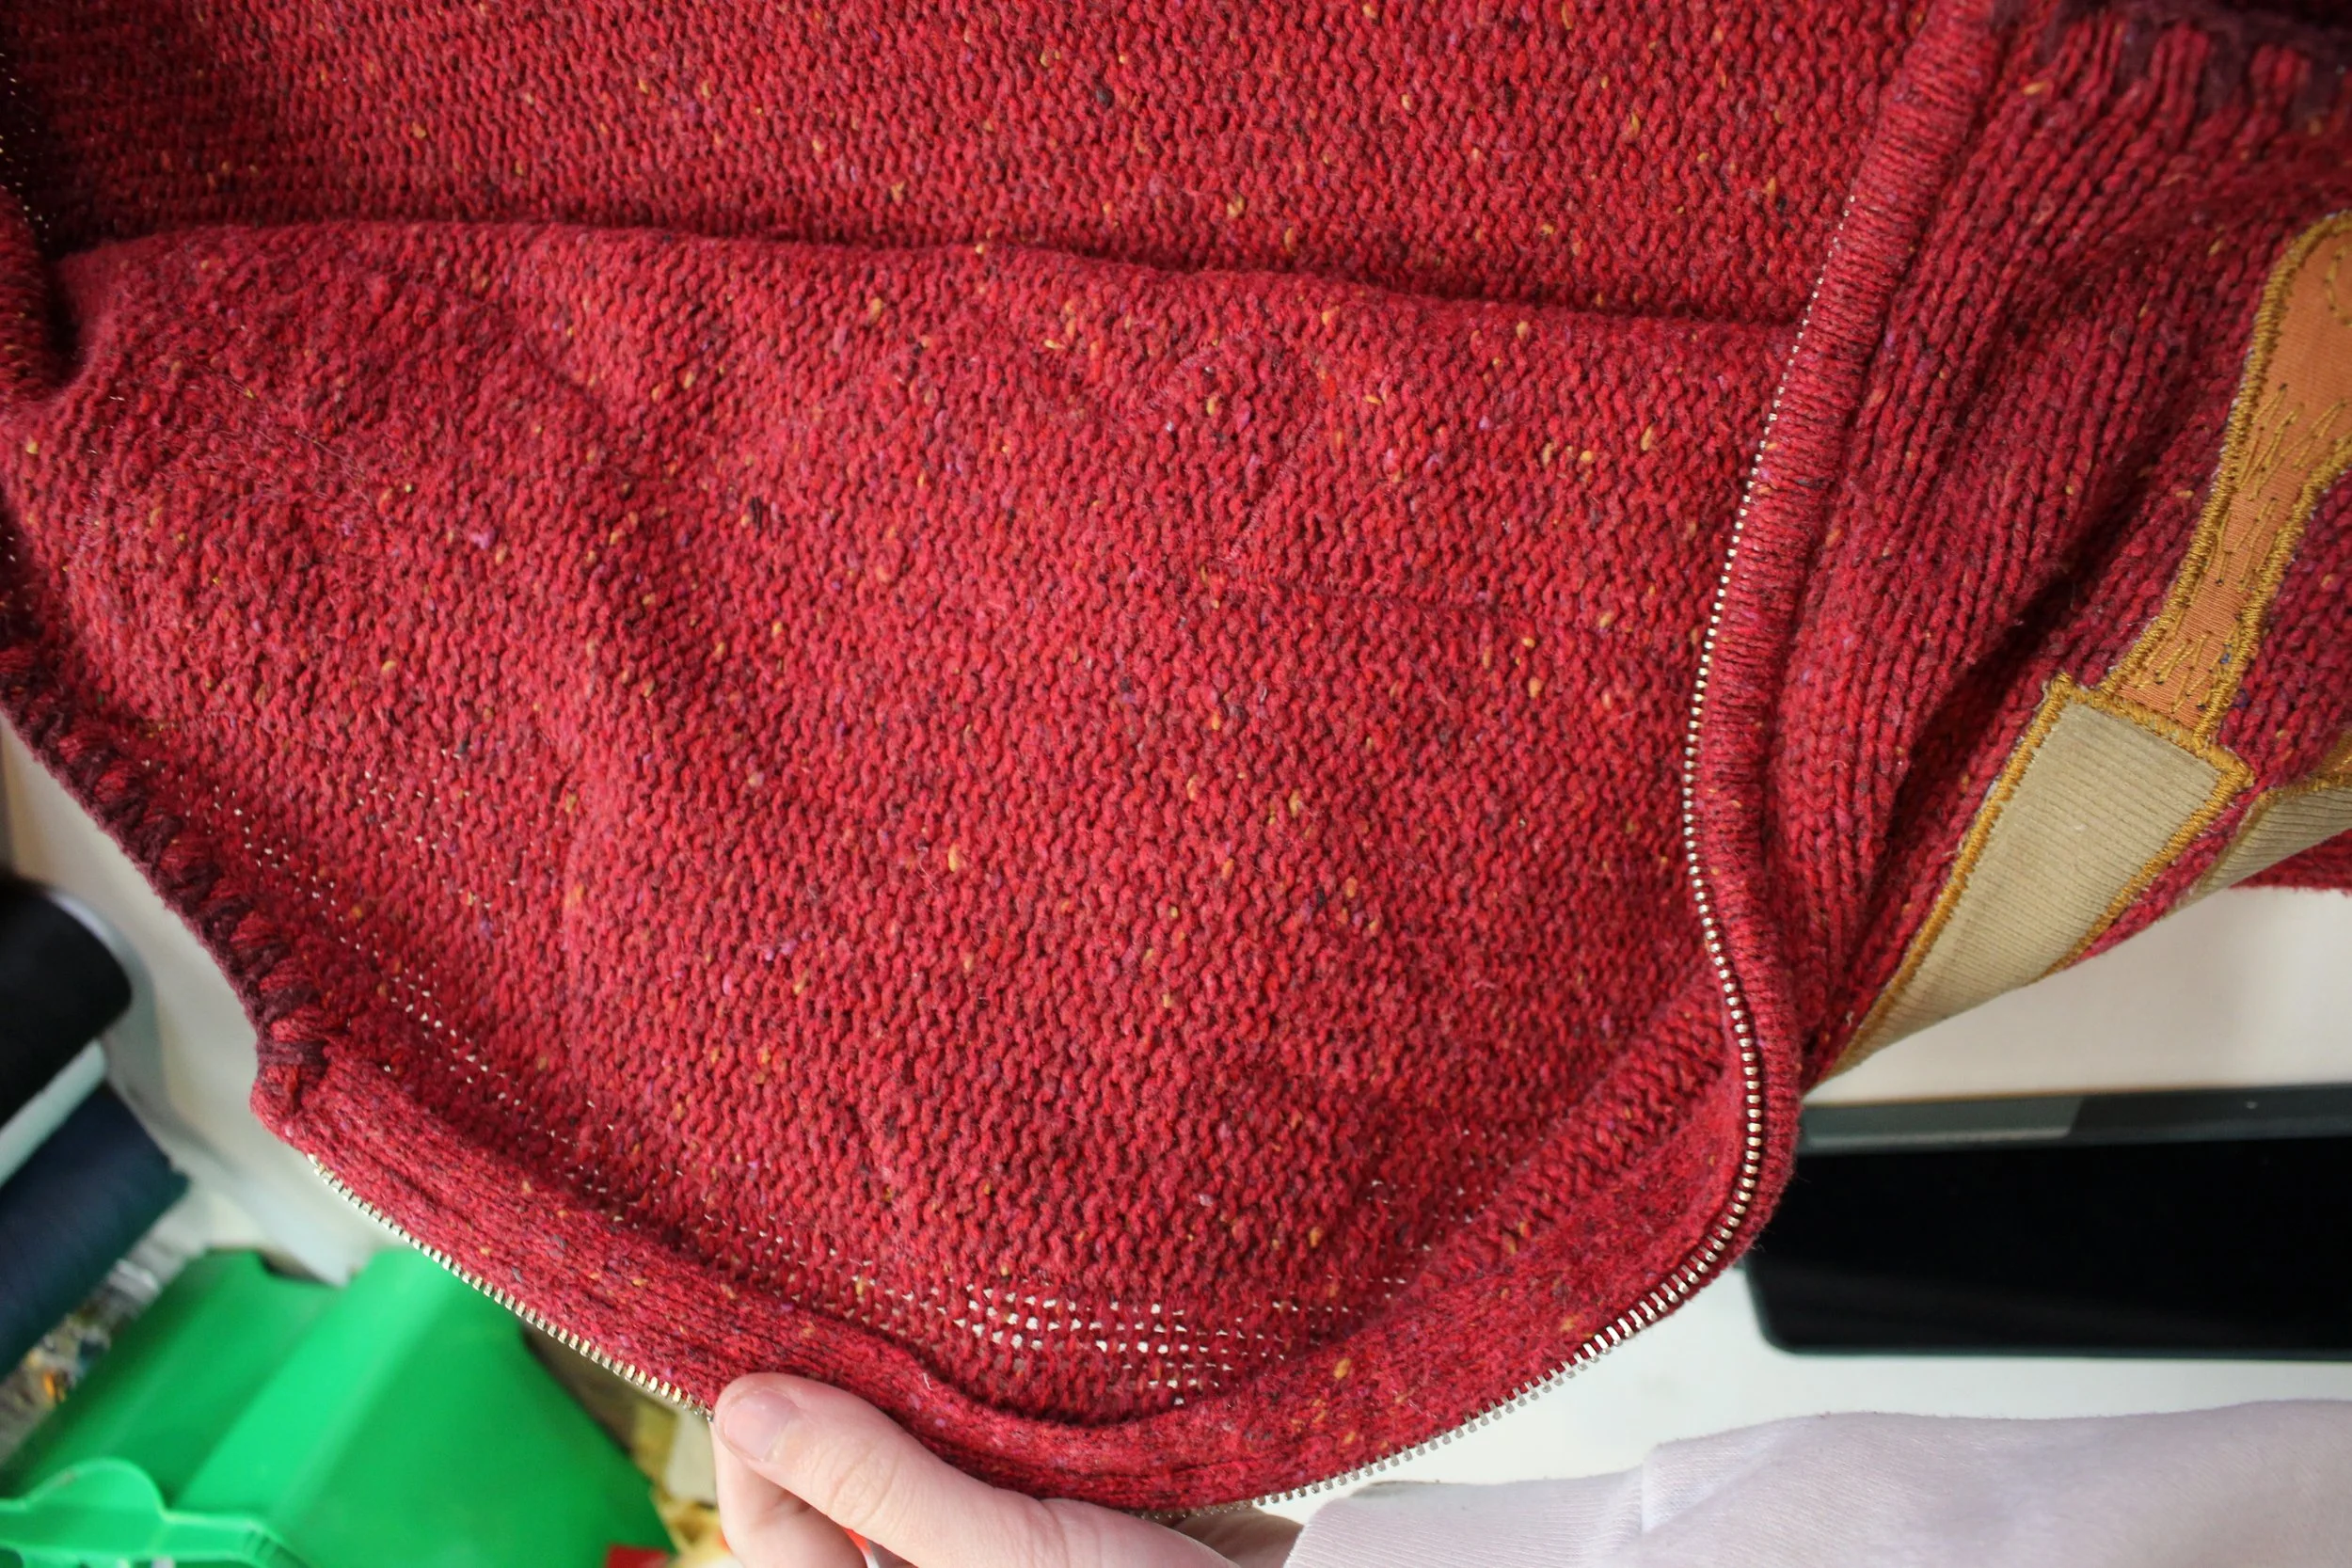
Notice how the knit vest is nice and flat after sewing? Not pulled or stretched? The stabilizer acts not only as a great base for detailed appliques, but helps prevent warping when sewing to the garment as well.
Appliqueing Words and Intricate Shapes
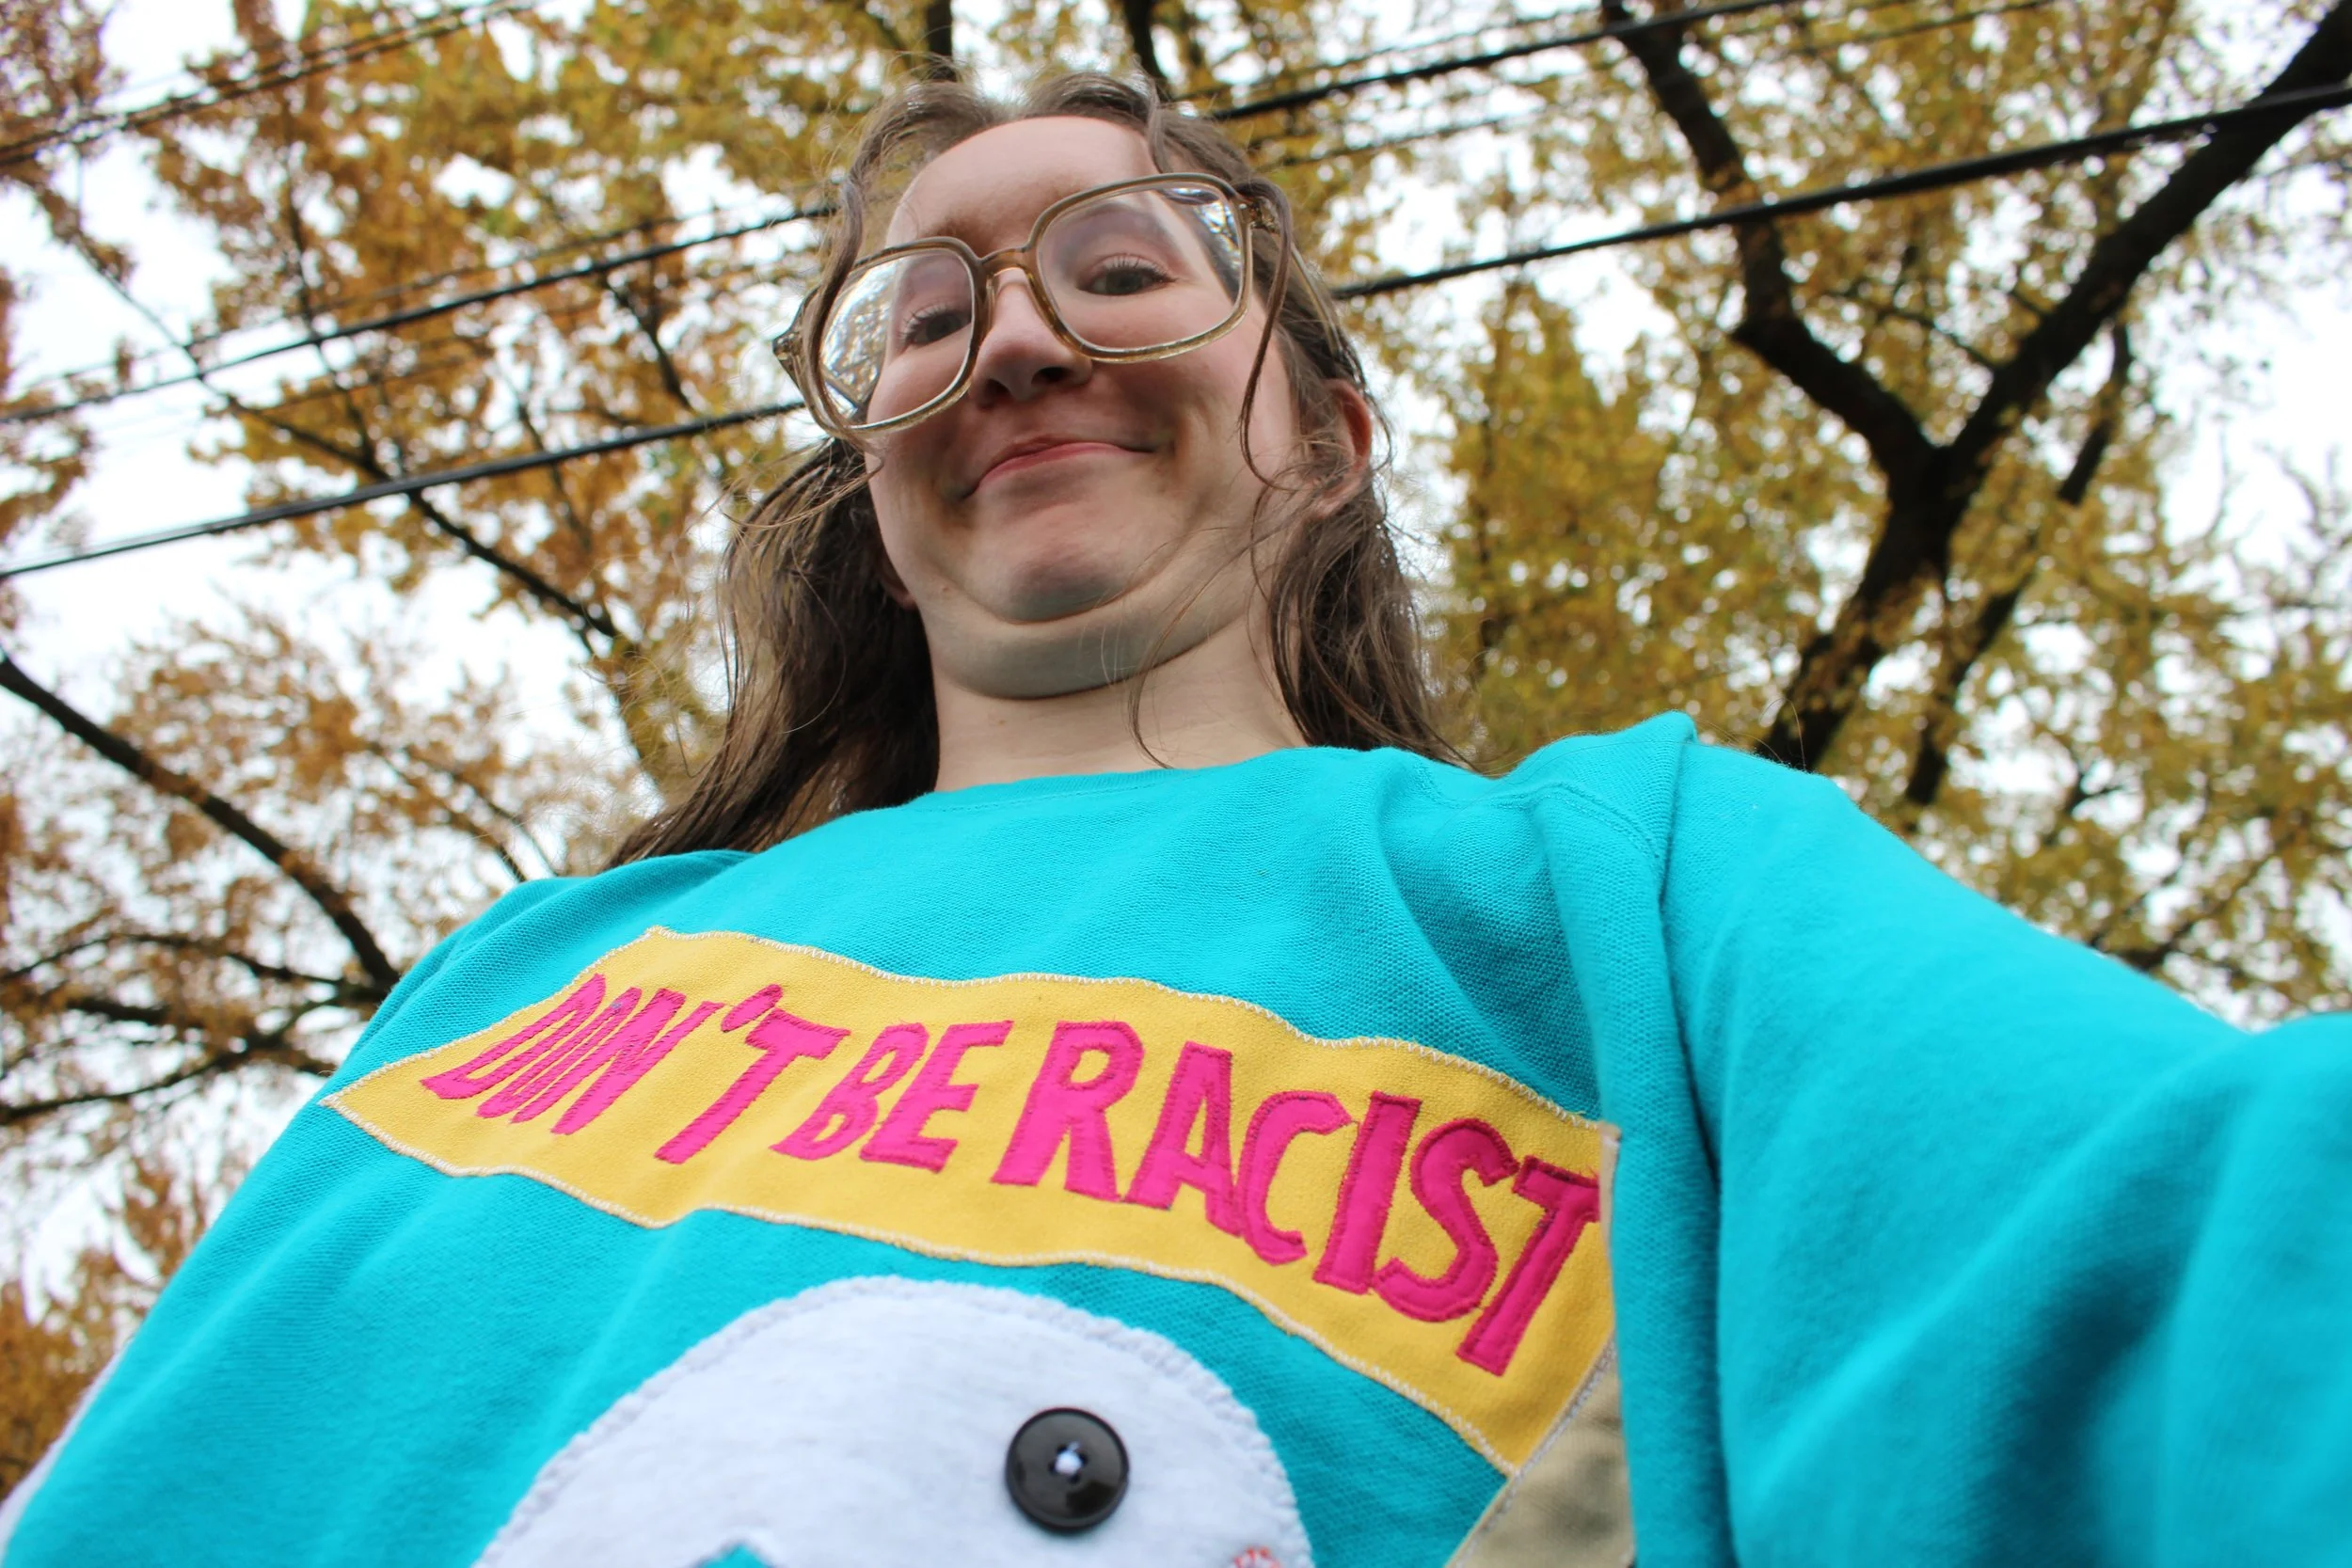
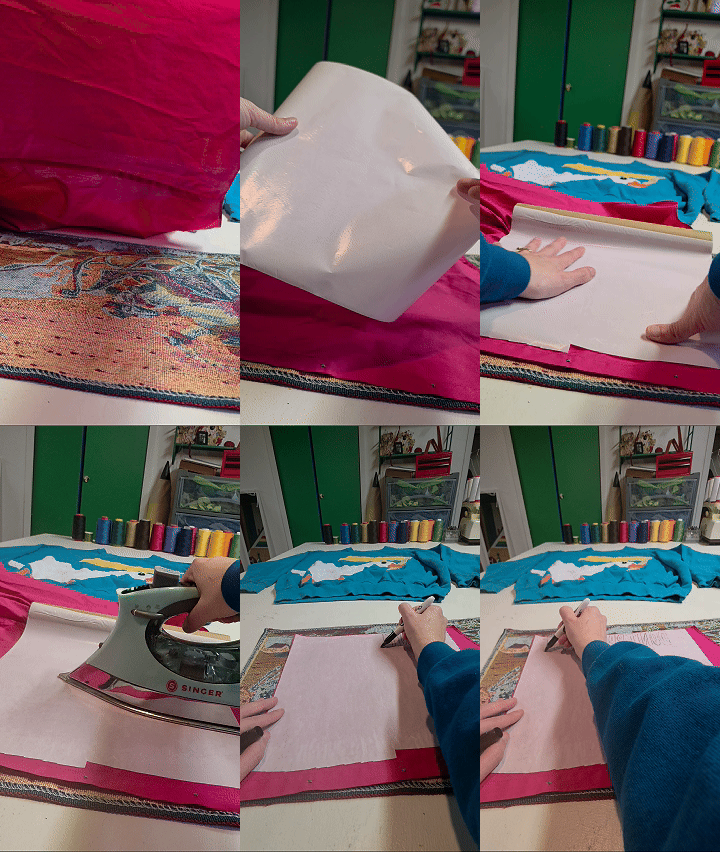
To sew intricate shapes and letters:
Try using double sided iron on!
Lay out thin woven fabric, I’m reusing a cotton buttonup shirt.
Lay the interfacing onto the underside of the fabric, waxy side down, paper side up.
Iron to the fabric.
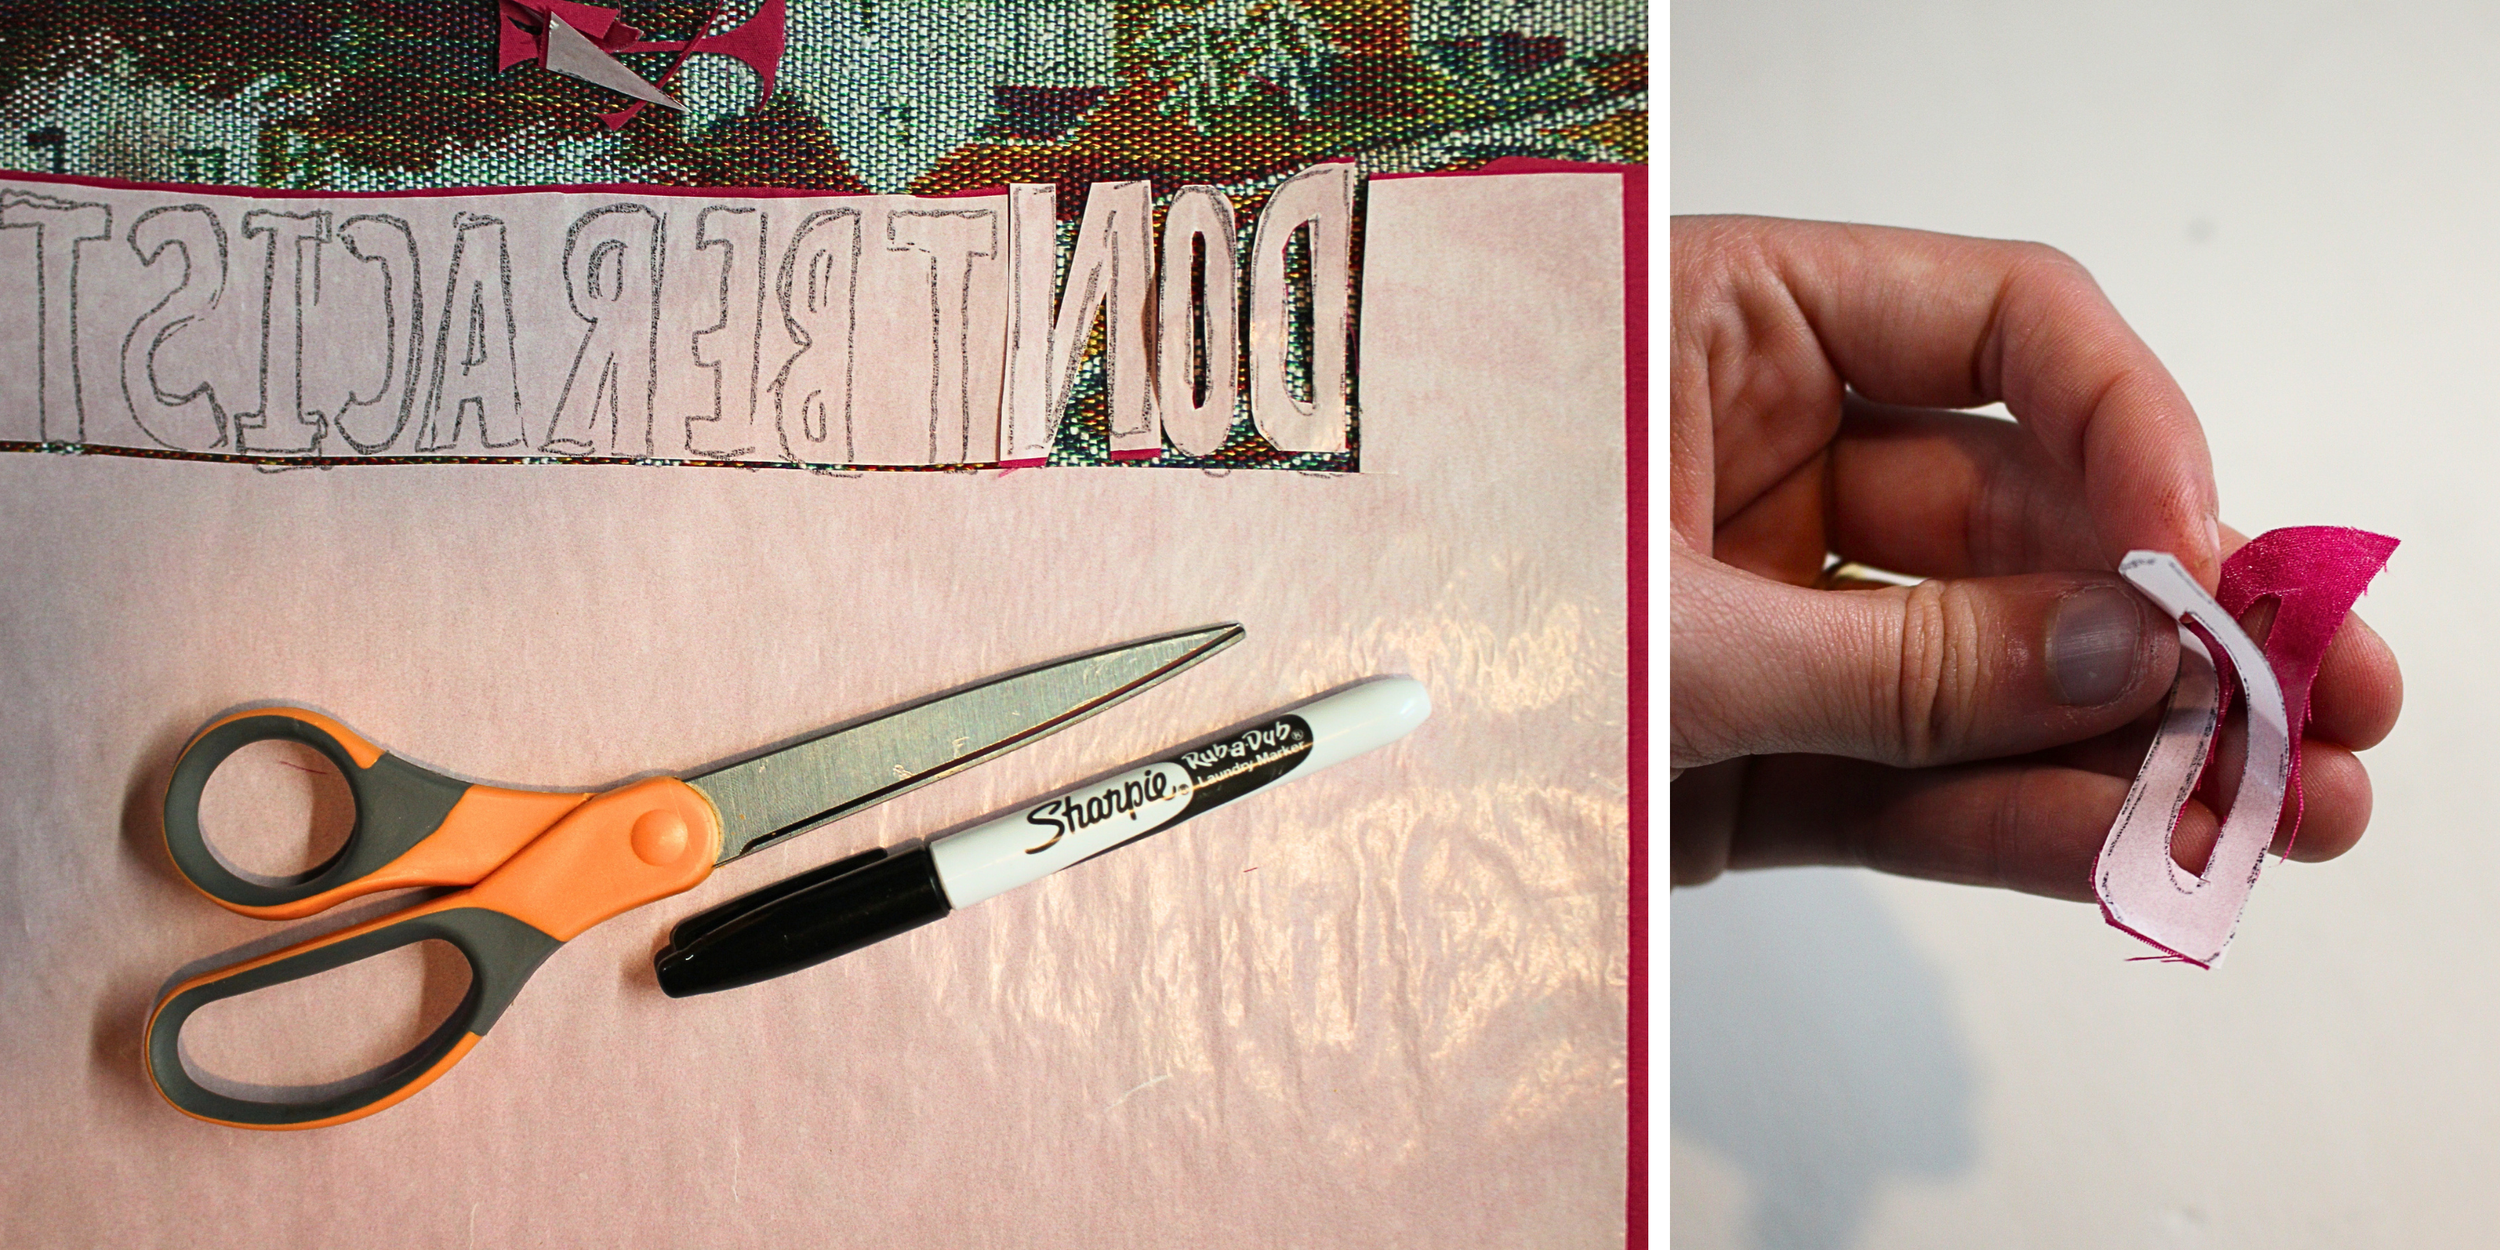
Trace your letters backwards on the underside of the fabric,
(You can also trace them right side up on the front of the fabric with a water souluble marker.)
Questions:
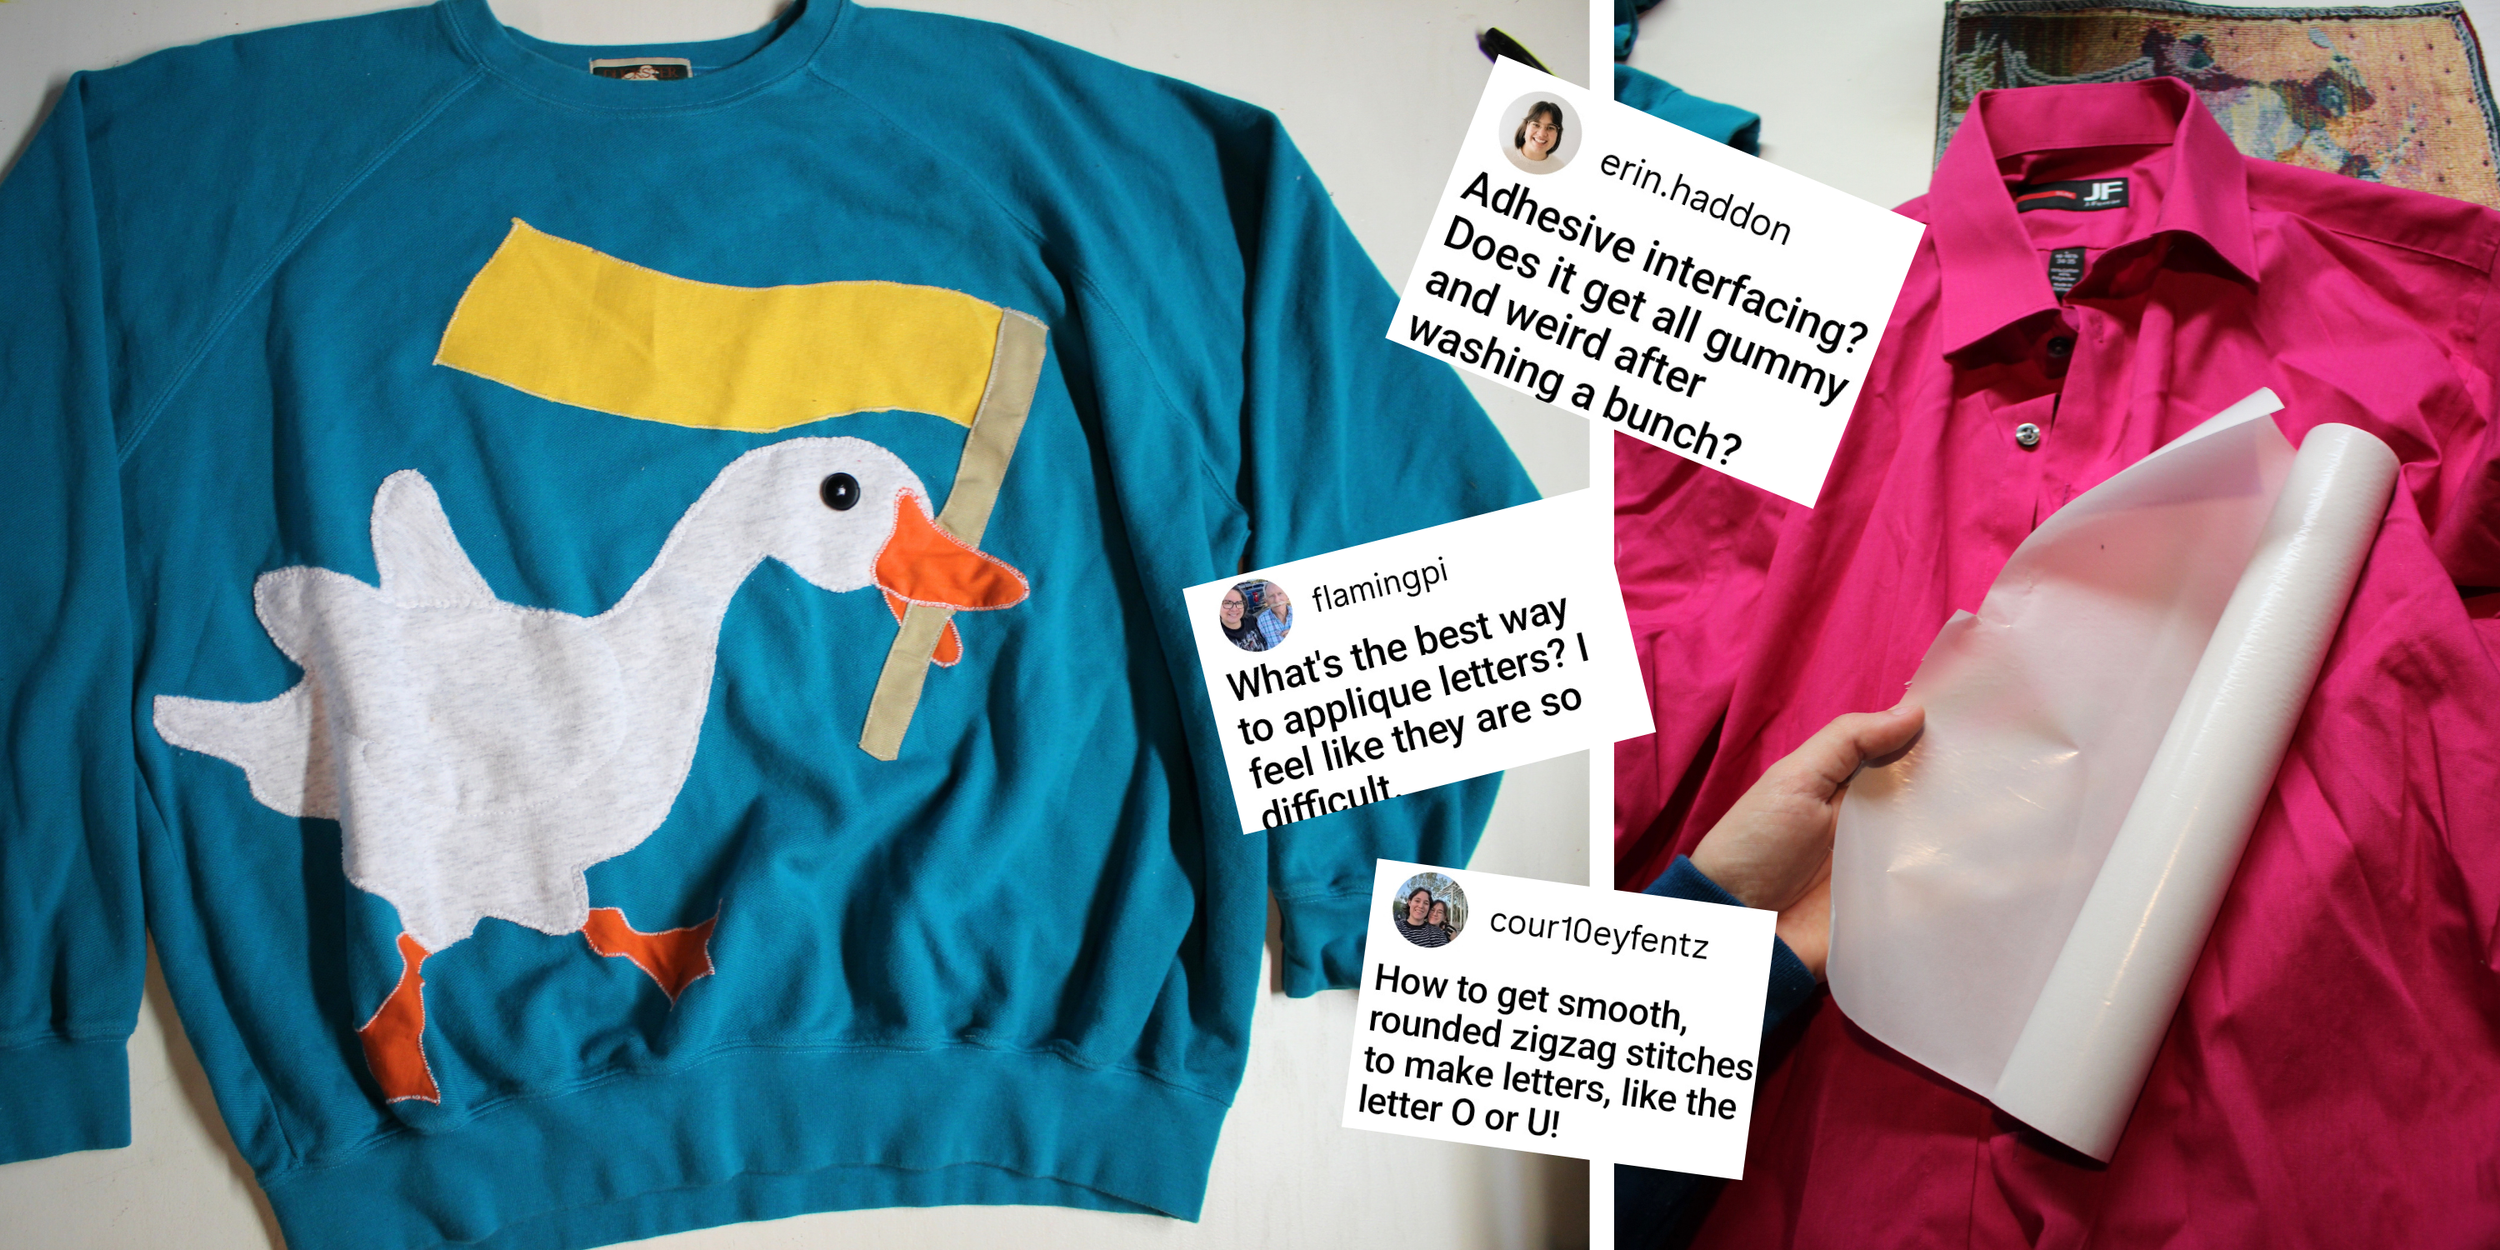
“Does adhesive interfacing get gummy after washing"?”
—It shouldn’t get gummy after you’ve sewn it and locked it between the fabric and garment. Depending on the brand, it should remain held.
—-However it can get gummy while sewing… clog needles and cause skipped stitches, especially with multiple layers.
“What’s the best way to applique letters?
—I recommend thin woven fabric, double sided iron on, and a short zigzag stitch with a free motion foot.
“How do you get smooth rounded zigzag stitches around curves?”
—The free motion foot helps with tight curves!
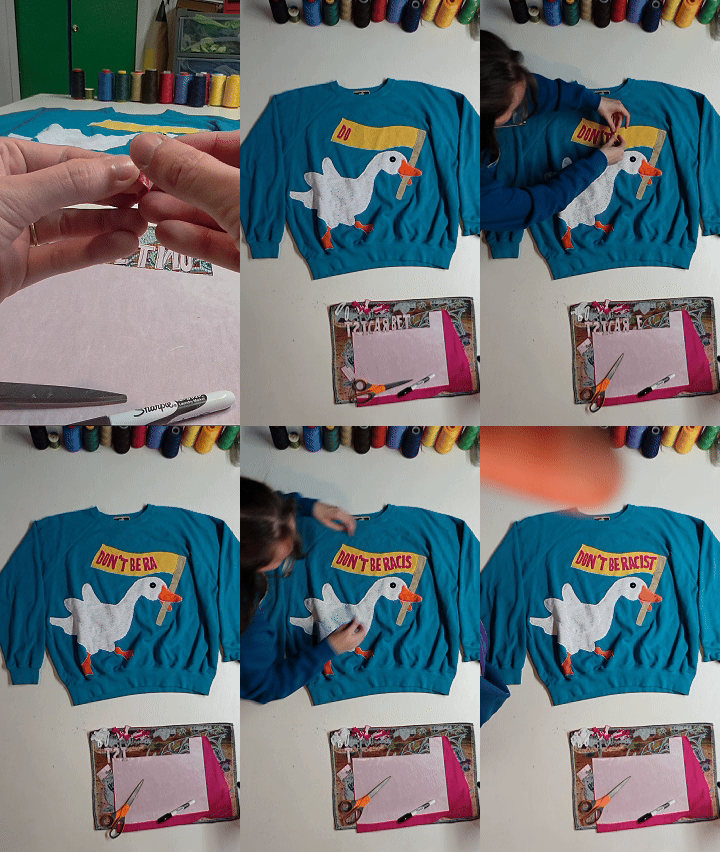
Cut out the letters.
Carefully peel away the backing.
Place onto your design.
Iron it down.
Make sure to set the iron down, lift, and place. Don’t rub it across the fabric, or you risk rolling the letters/shapes.
Make sure not to layer too many layers of iron on, or you risk gumming up the needle and cauing skipped stitches. I try to do no more than 2 layers in any given area. 3+ layers is pushing it.
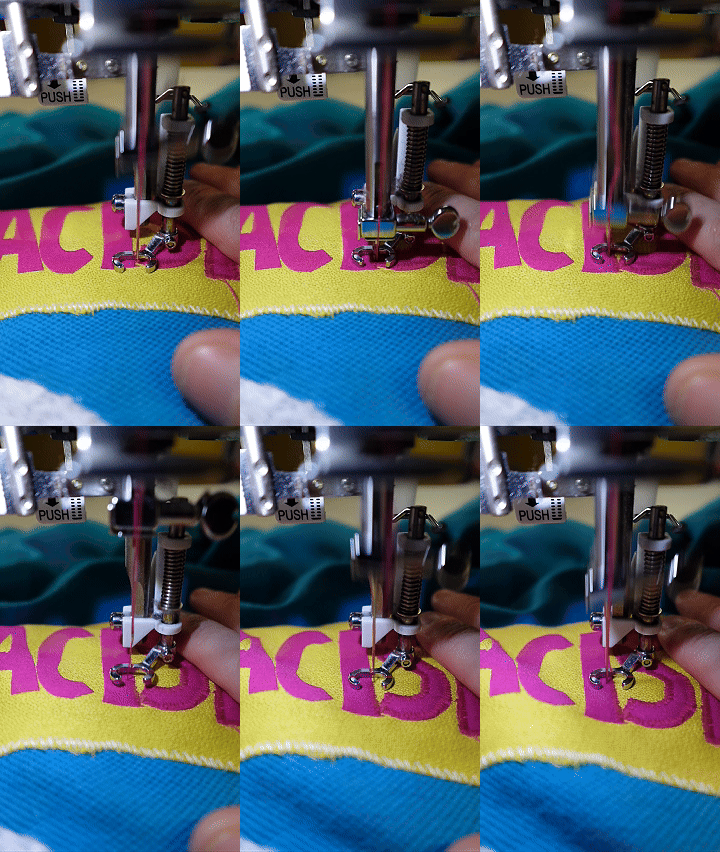
Sew to the garment.
I am using a free motion foot with a short zig zag stitch. The free motion foot is best for these small intricate shapes.
Try using a thicker needle if you are experiencing skipped stitches.
(You have to sew pieces with iron on. The adhesive facing is not a permanent hold.)
Appliqueing onto Denim
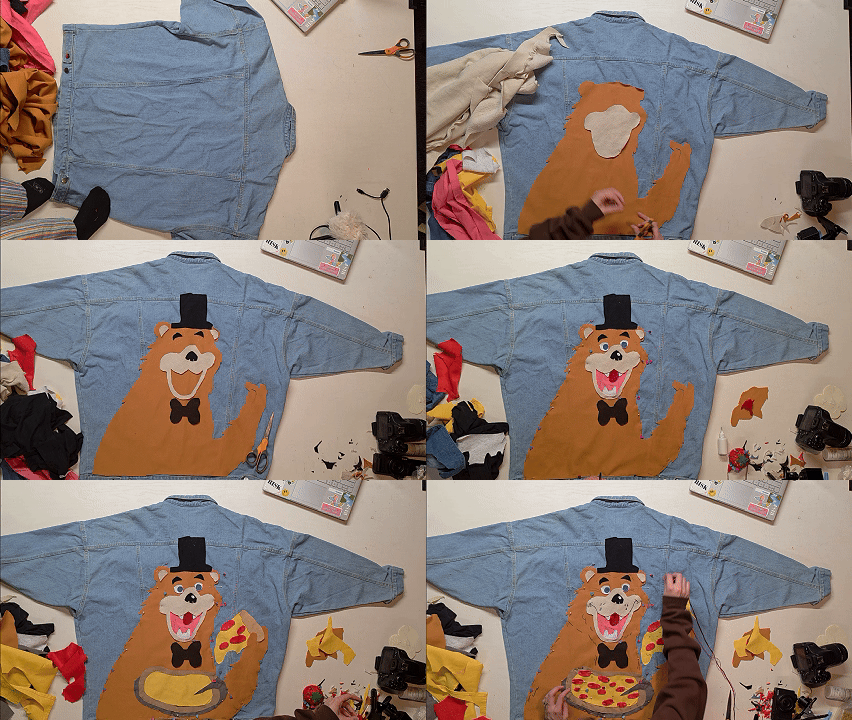
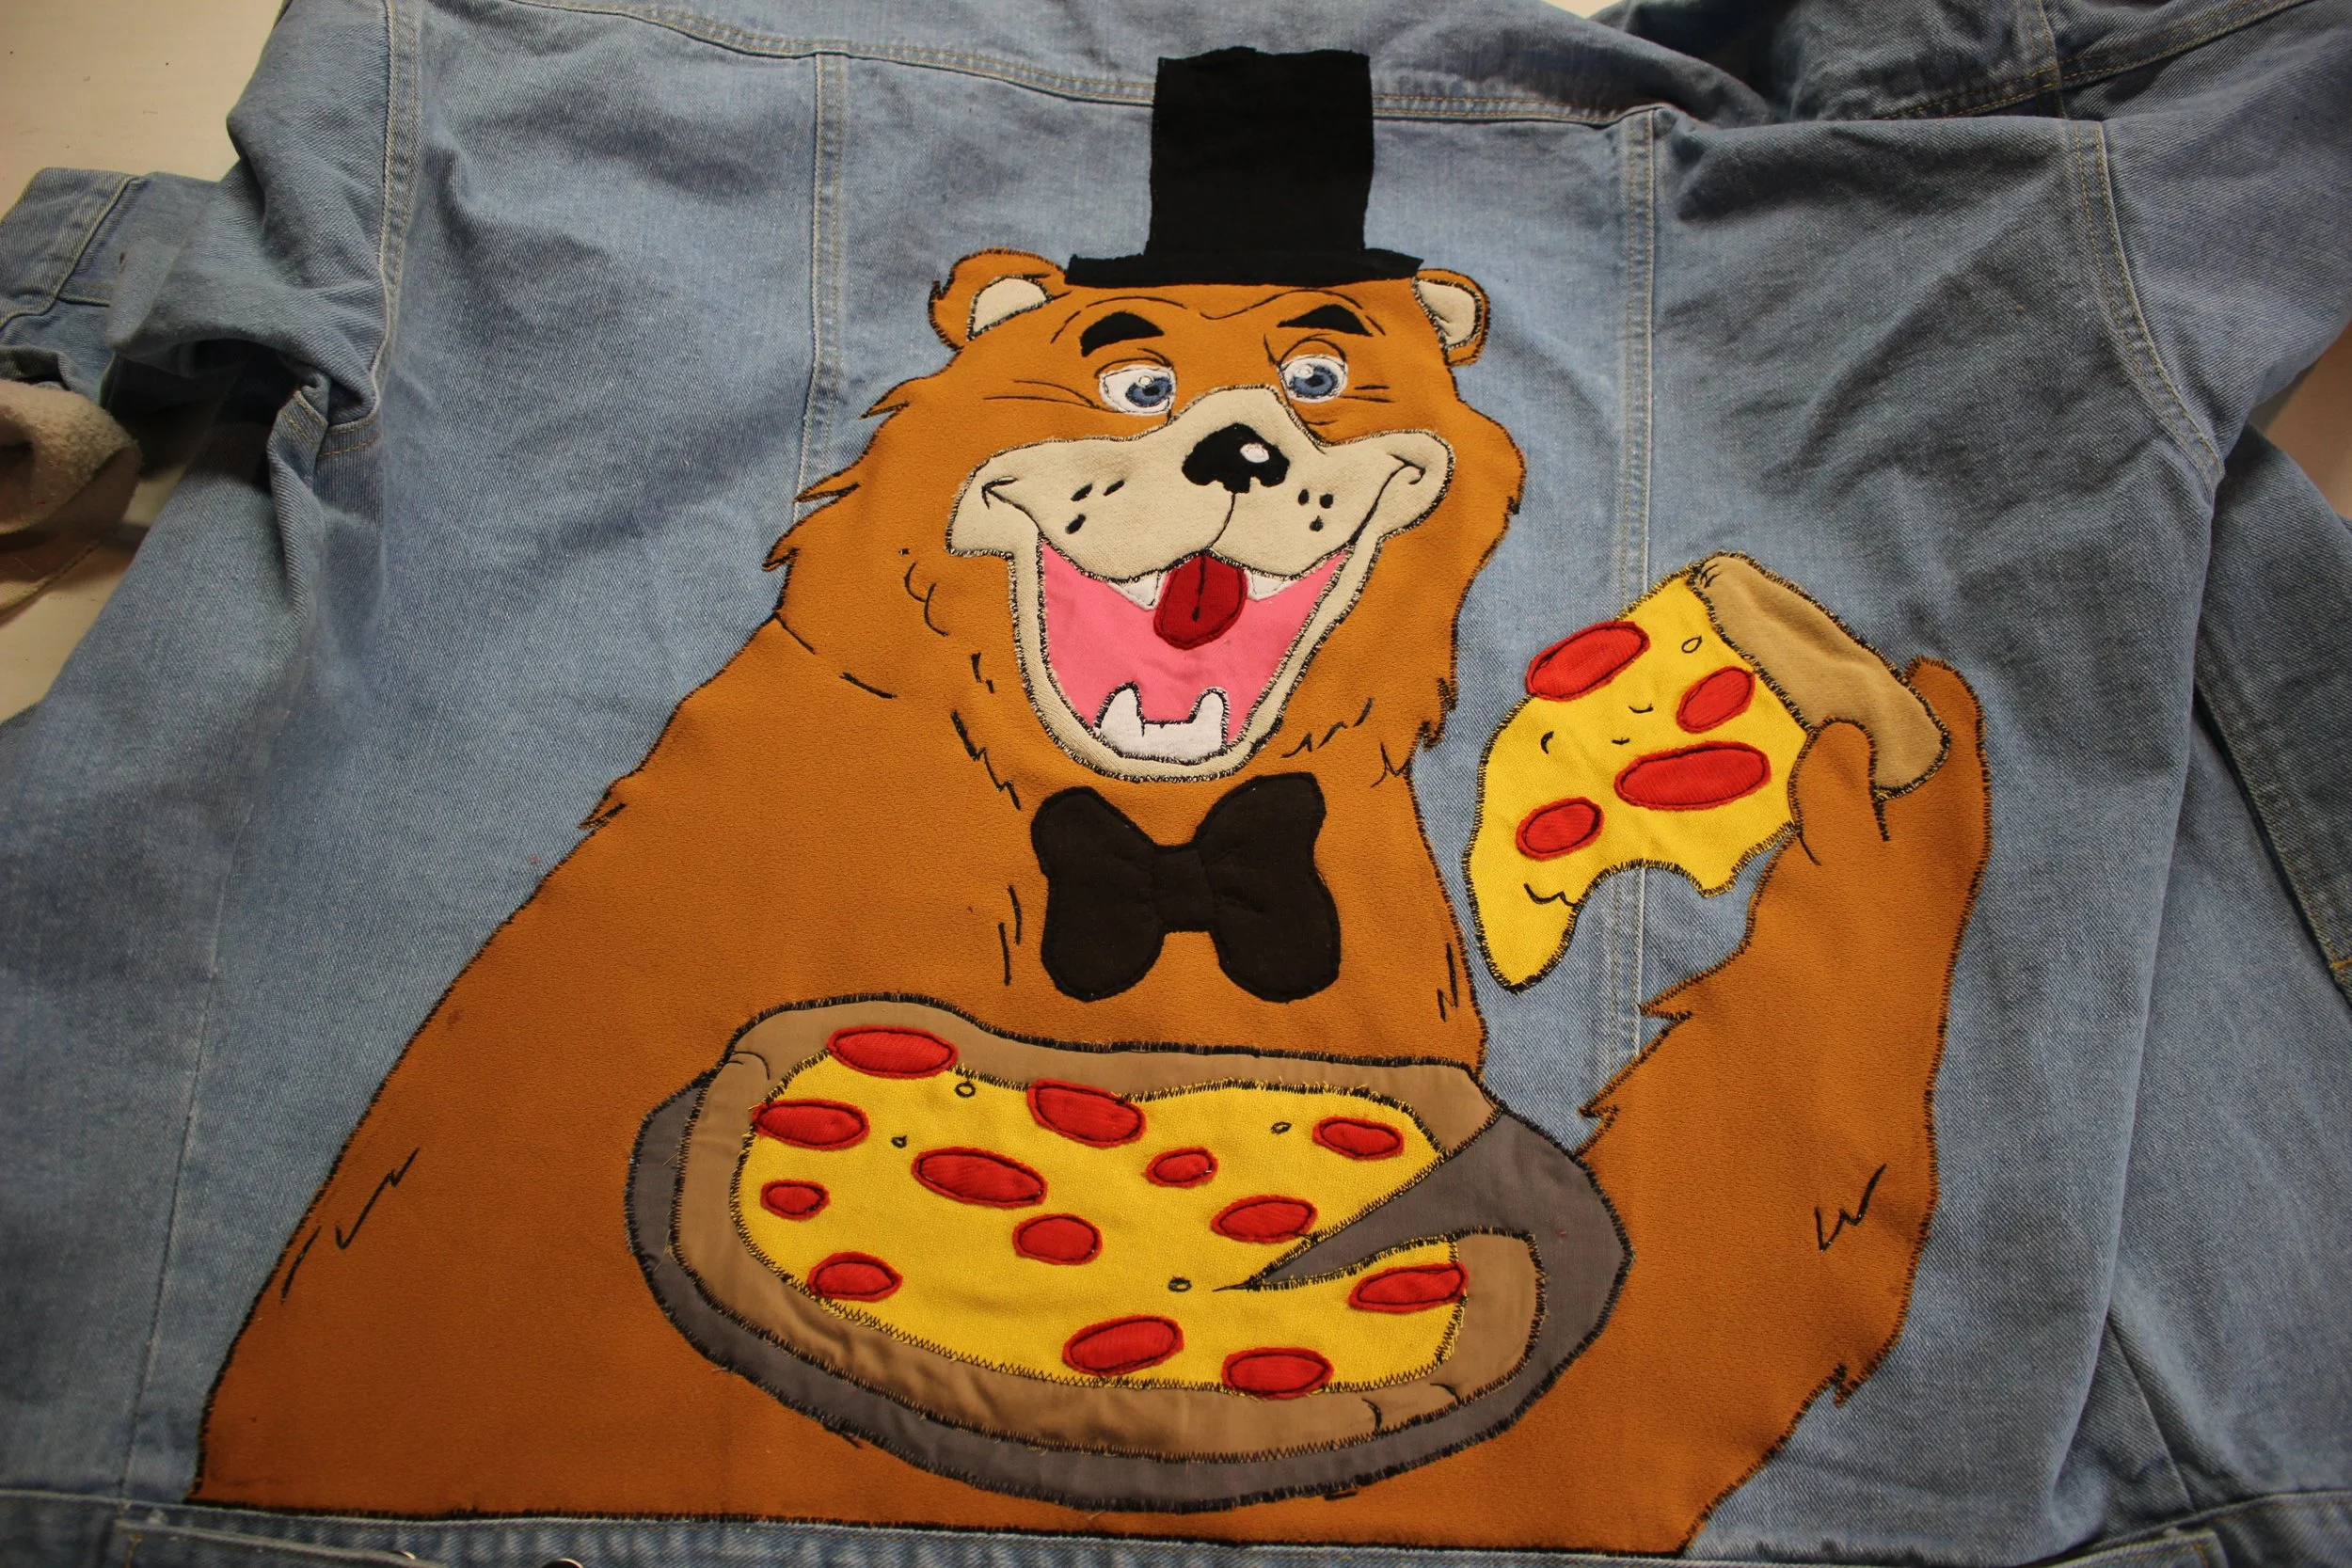
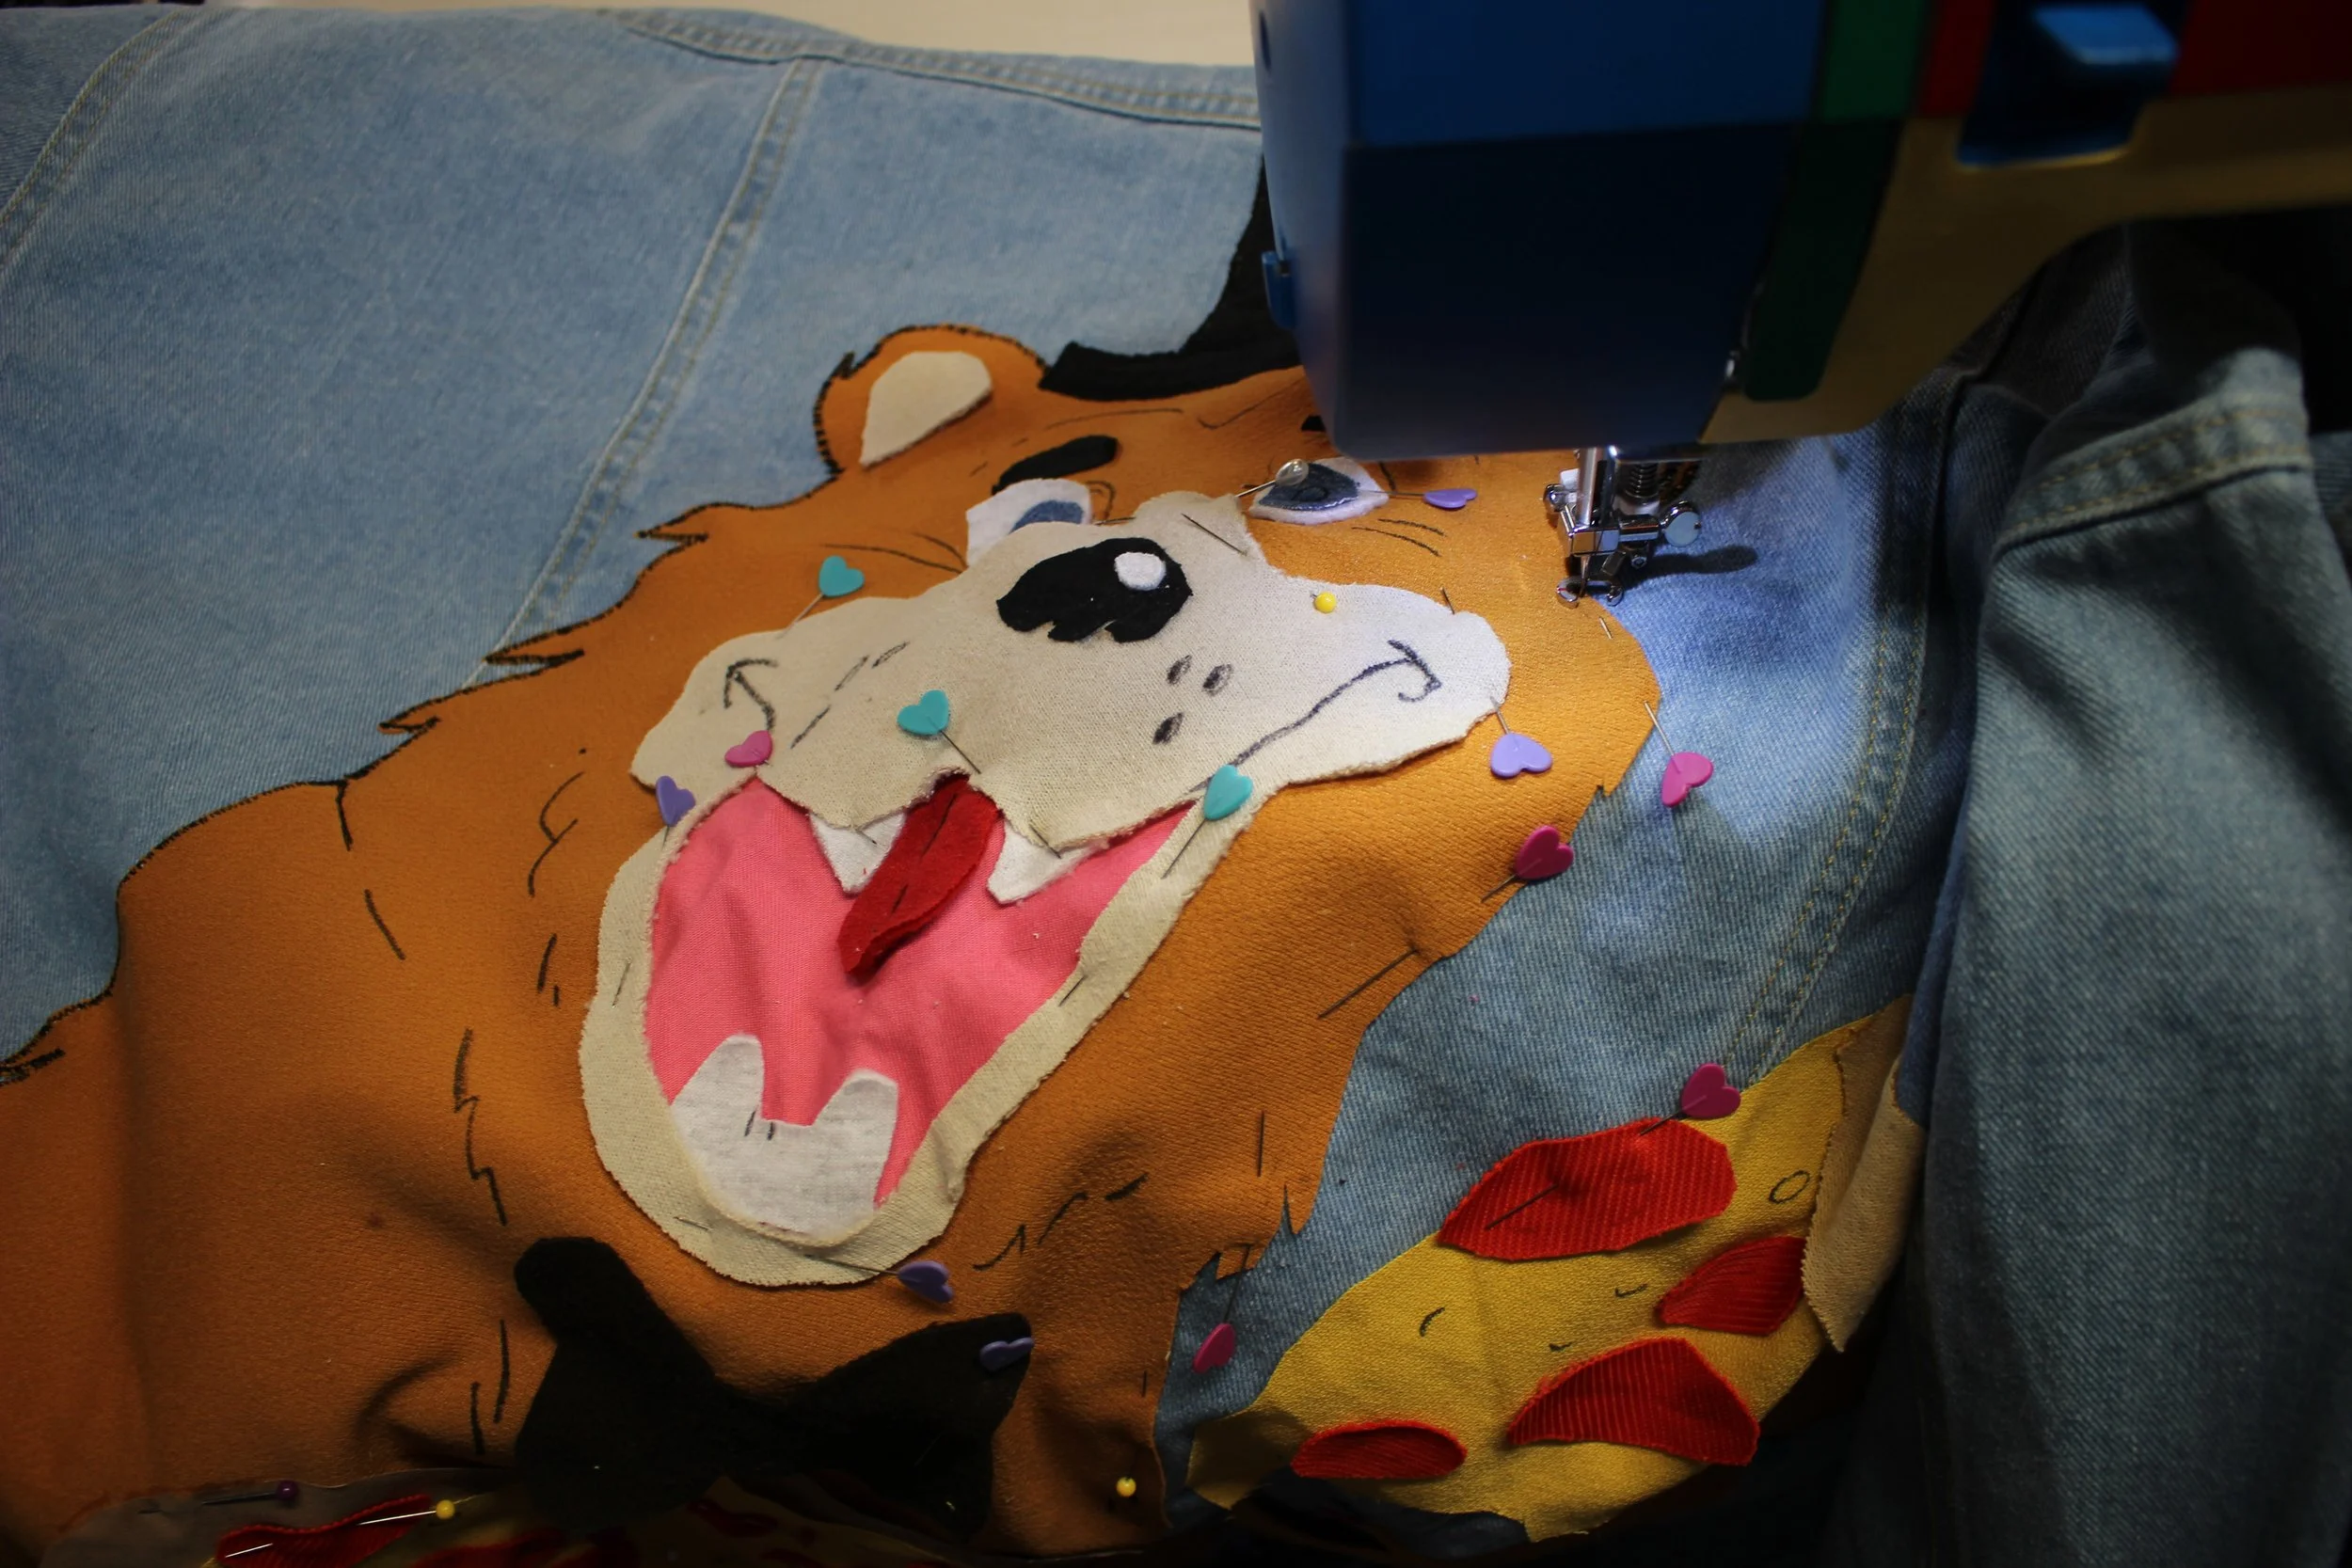
I usually just build and sew the designs directly onto denim.
(Unless the design is very detailed, etc.)
The denim is normally sturdy enough to go without stabilizer.
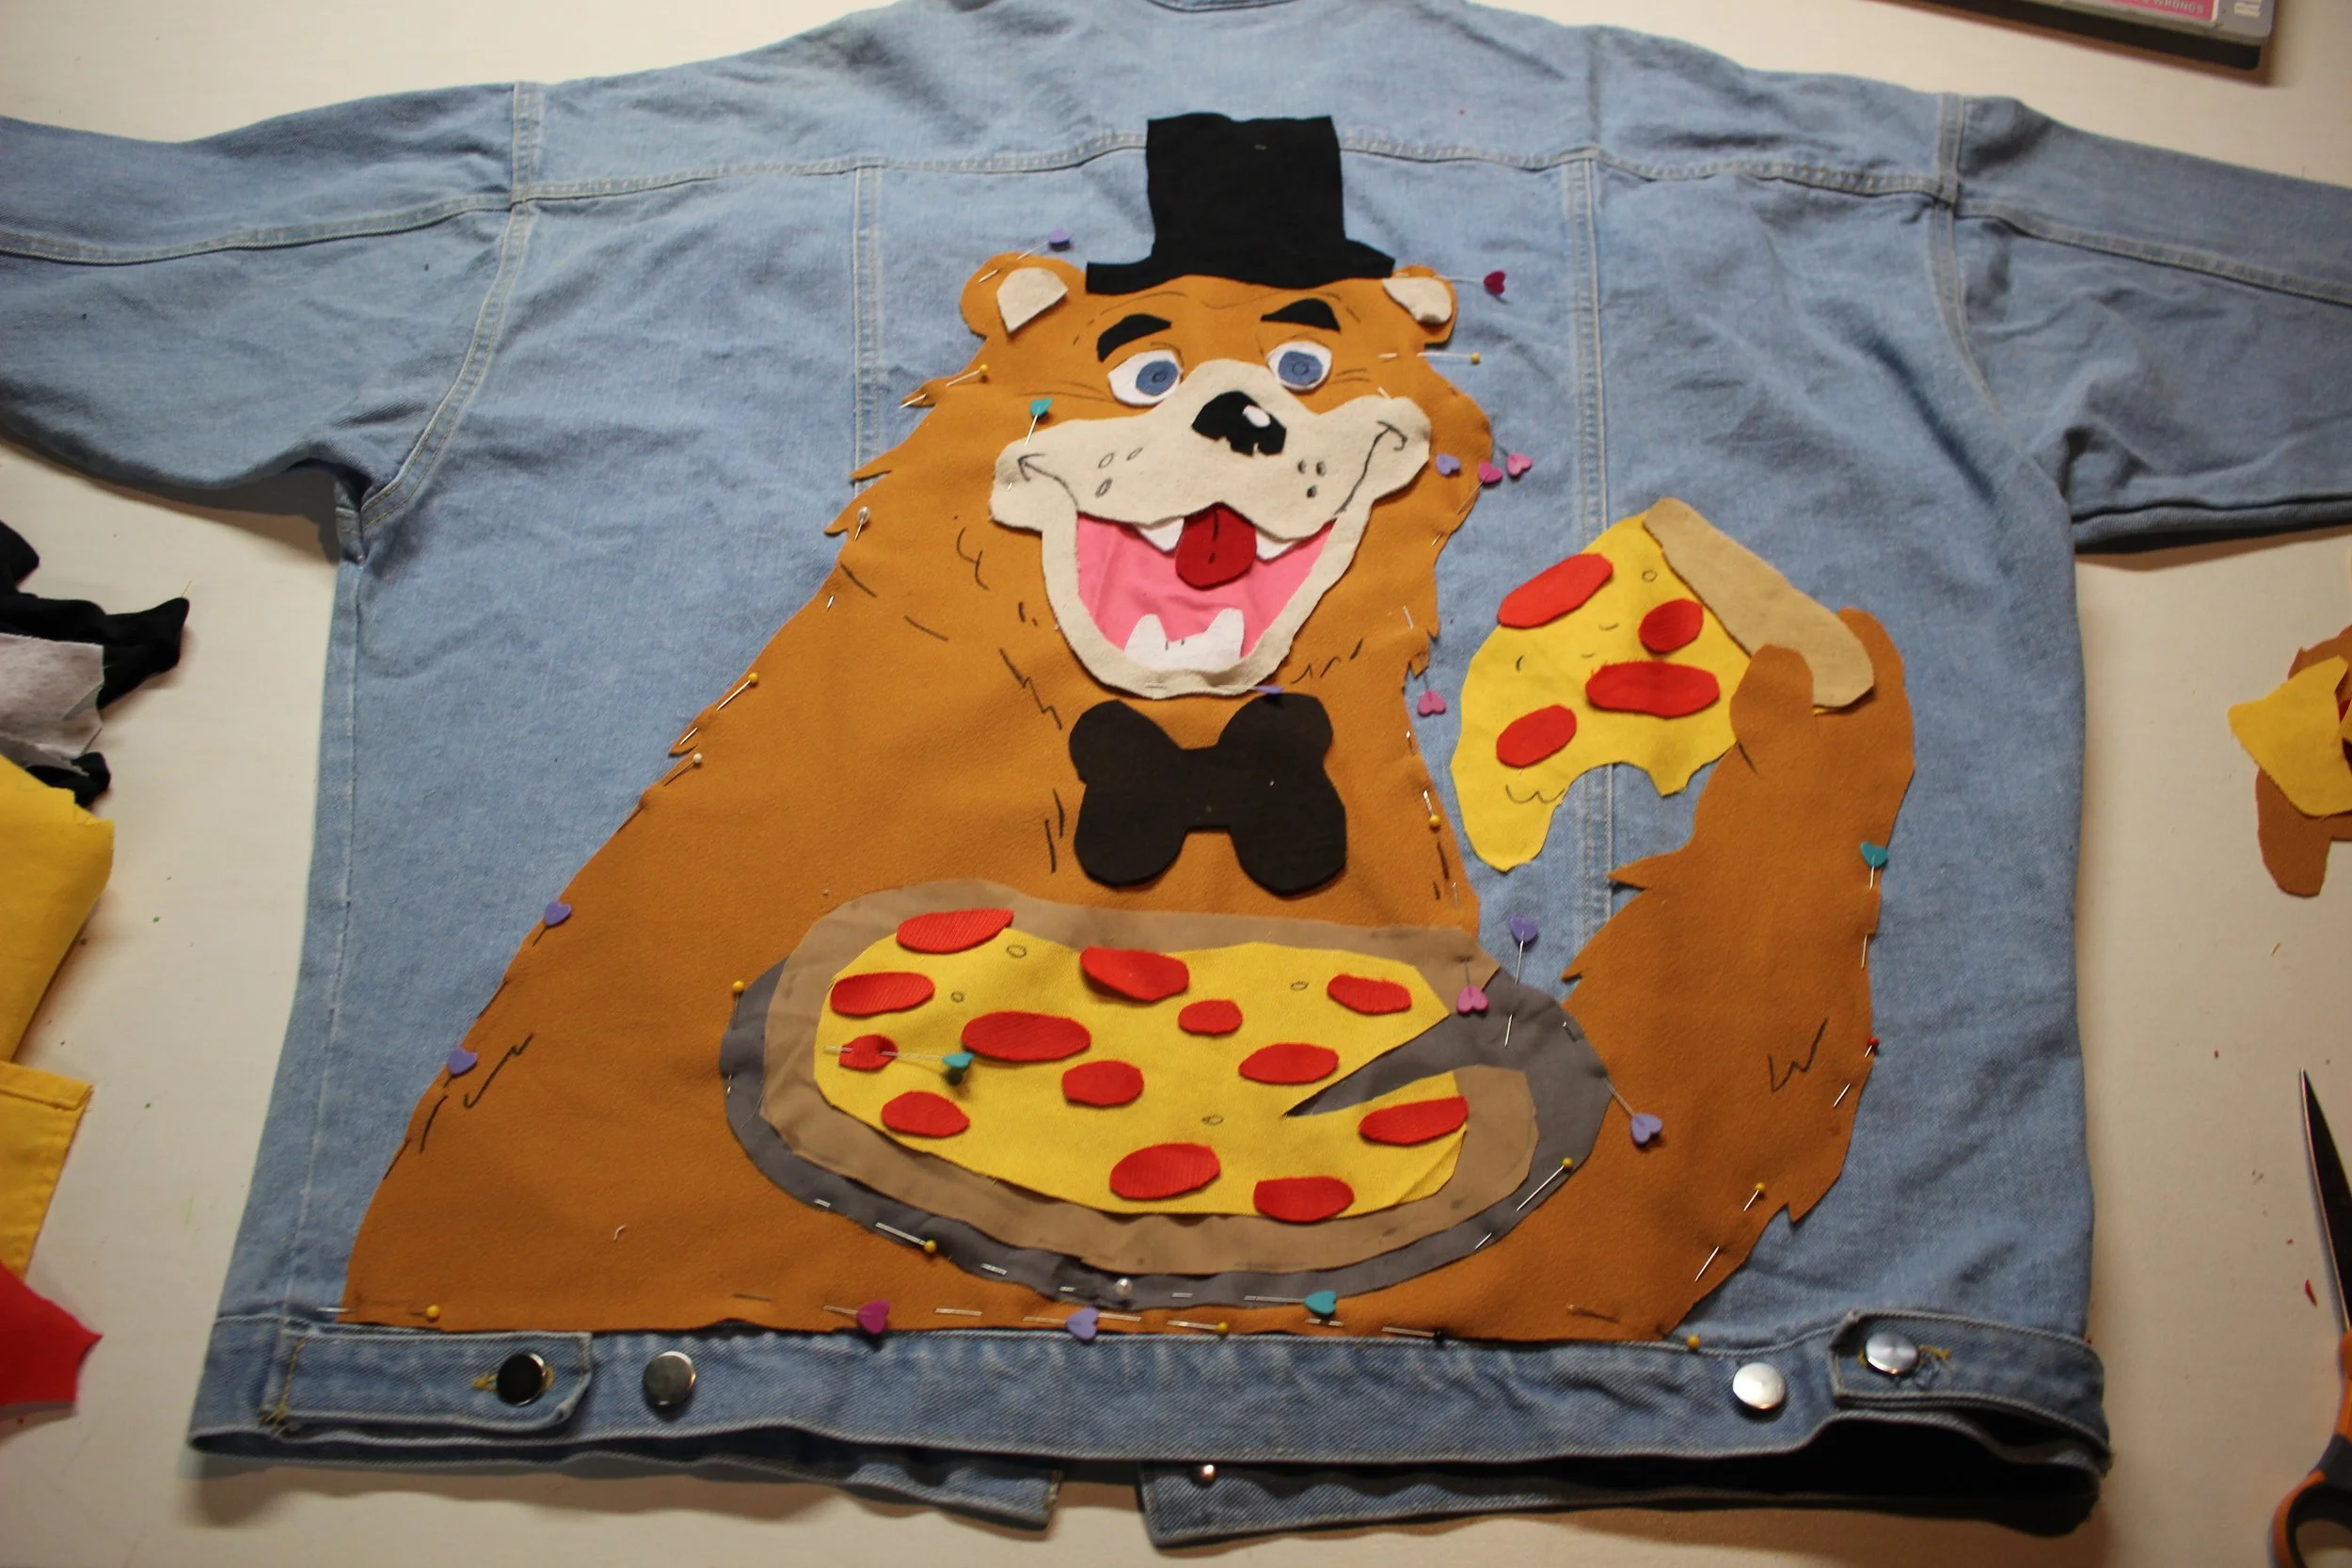
Cut and arrange the fabric, glue all the edges, and pin the center/edges to really help hold everything in place.
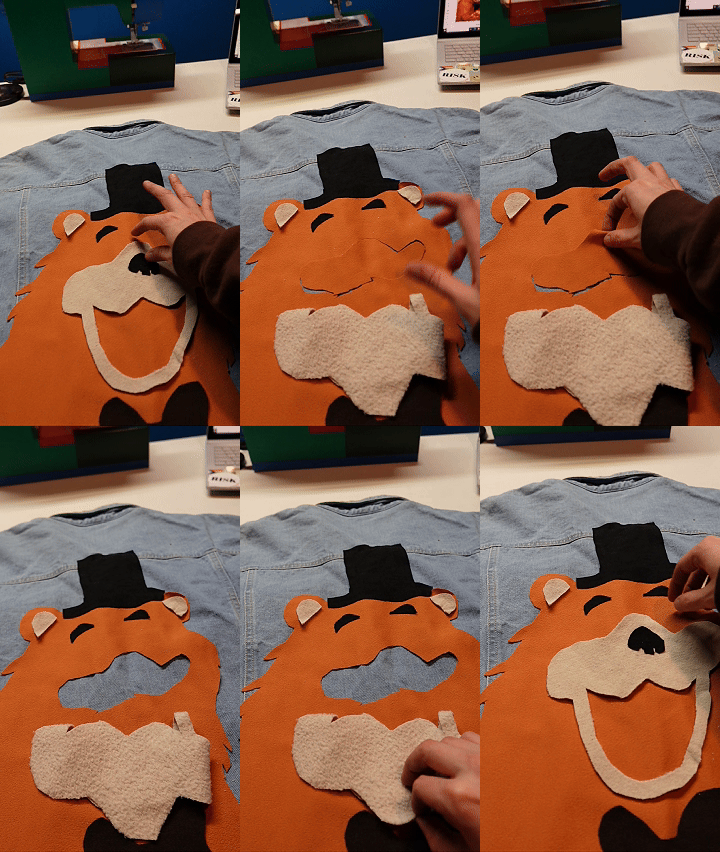
Don’t forget to remove excess fabric bulk!
Notice how all this brown fabric underneath the snout isnt visible? Cut it away to reduce layers.
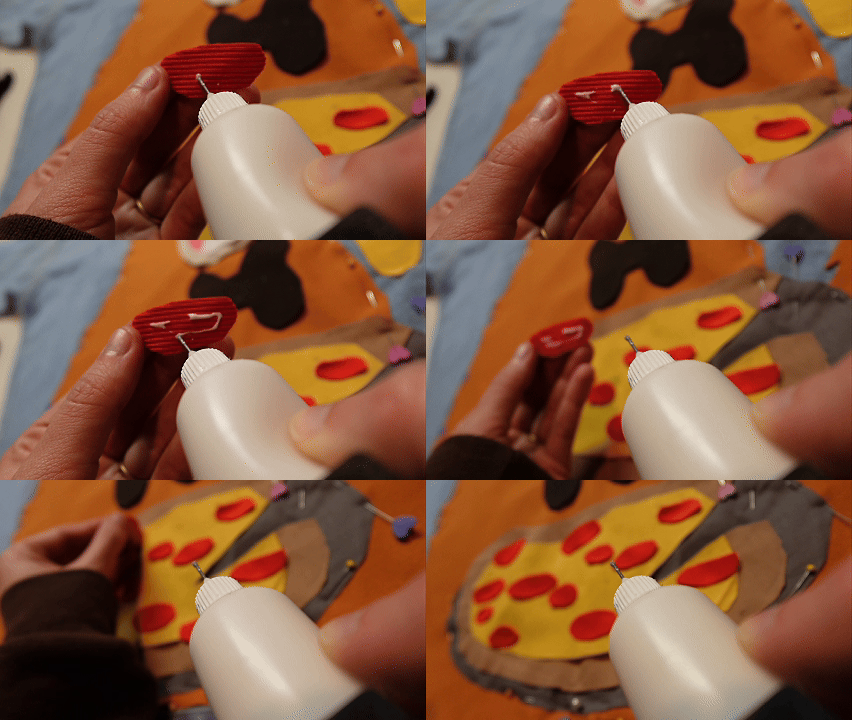
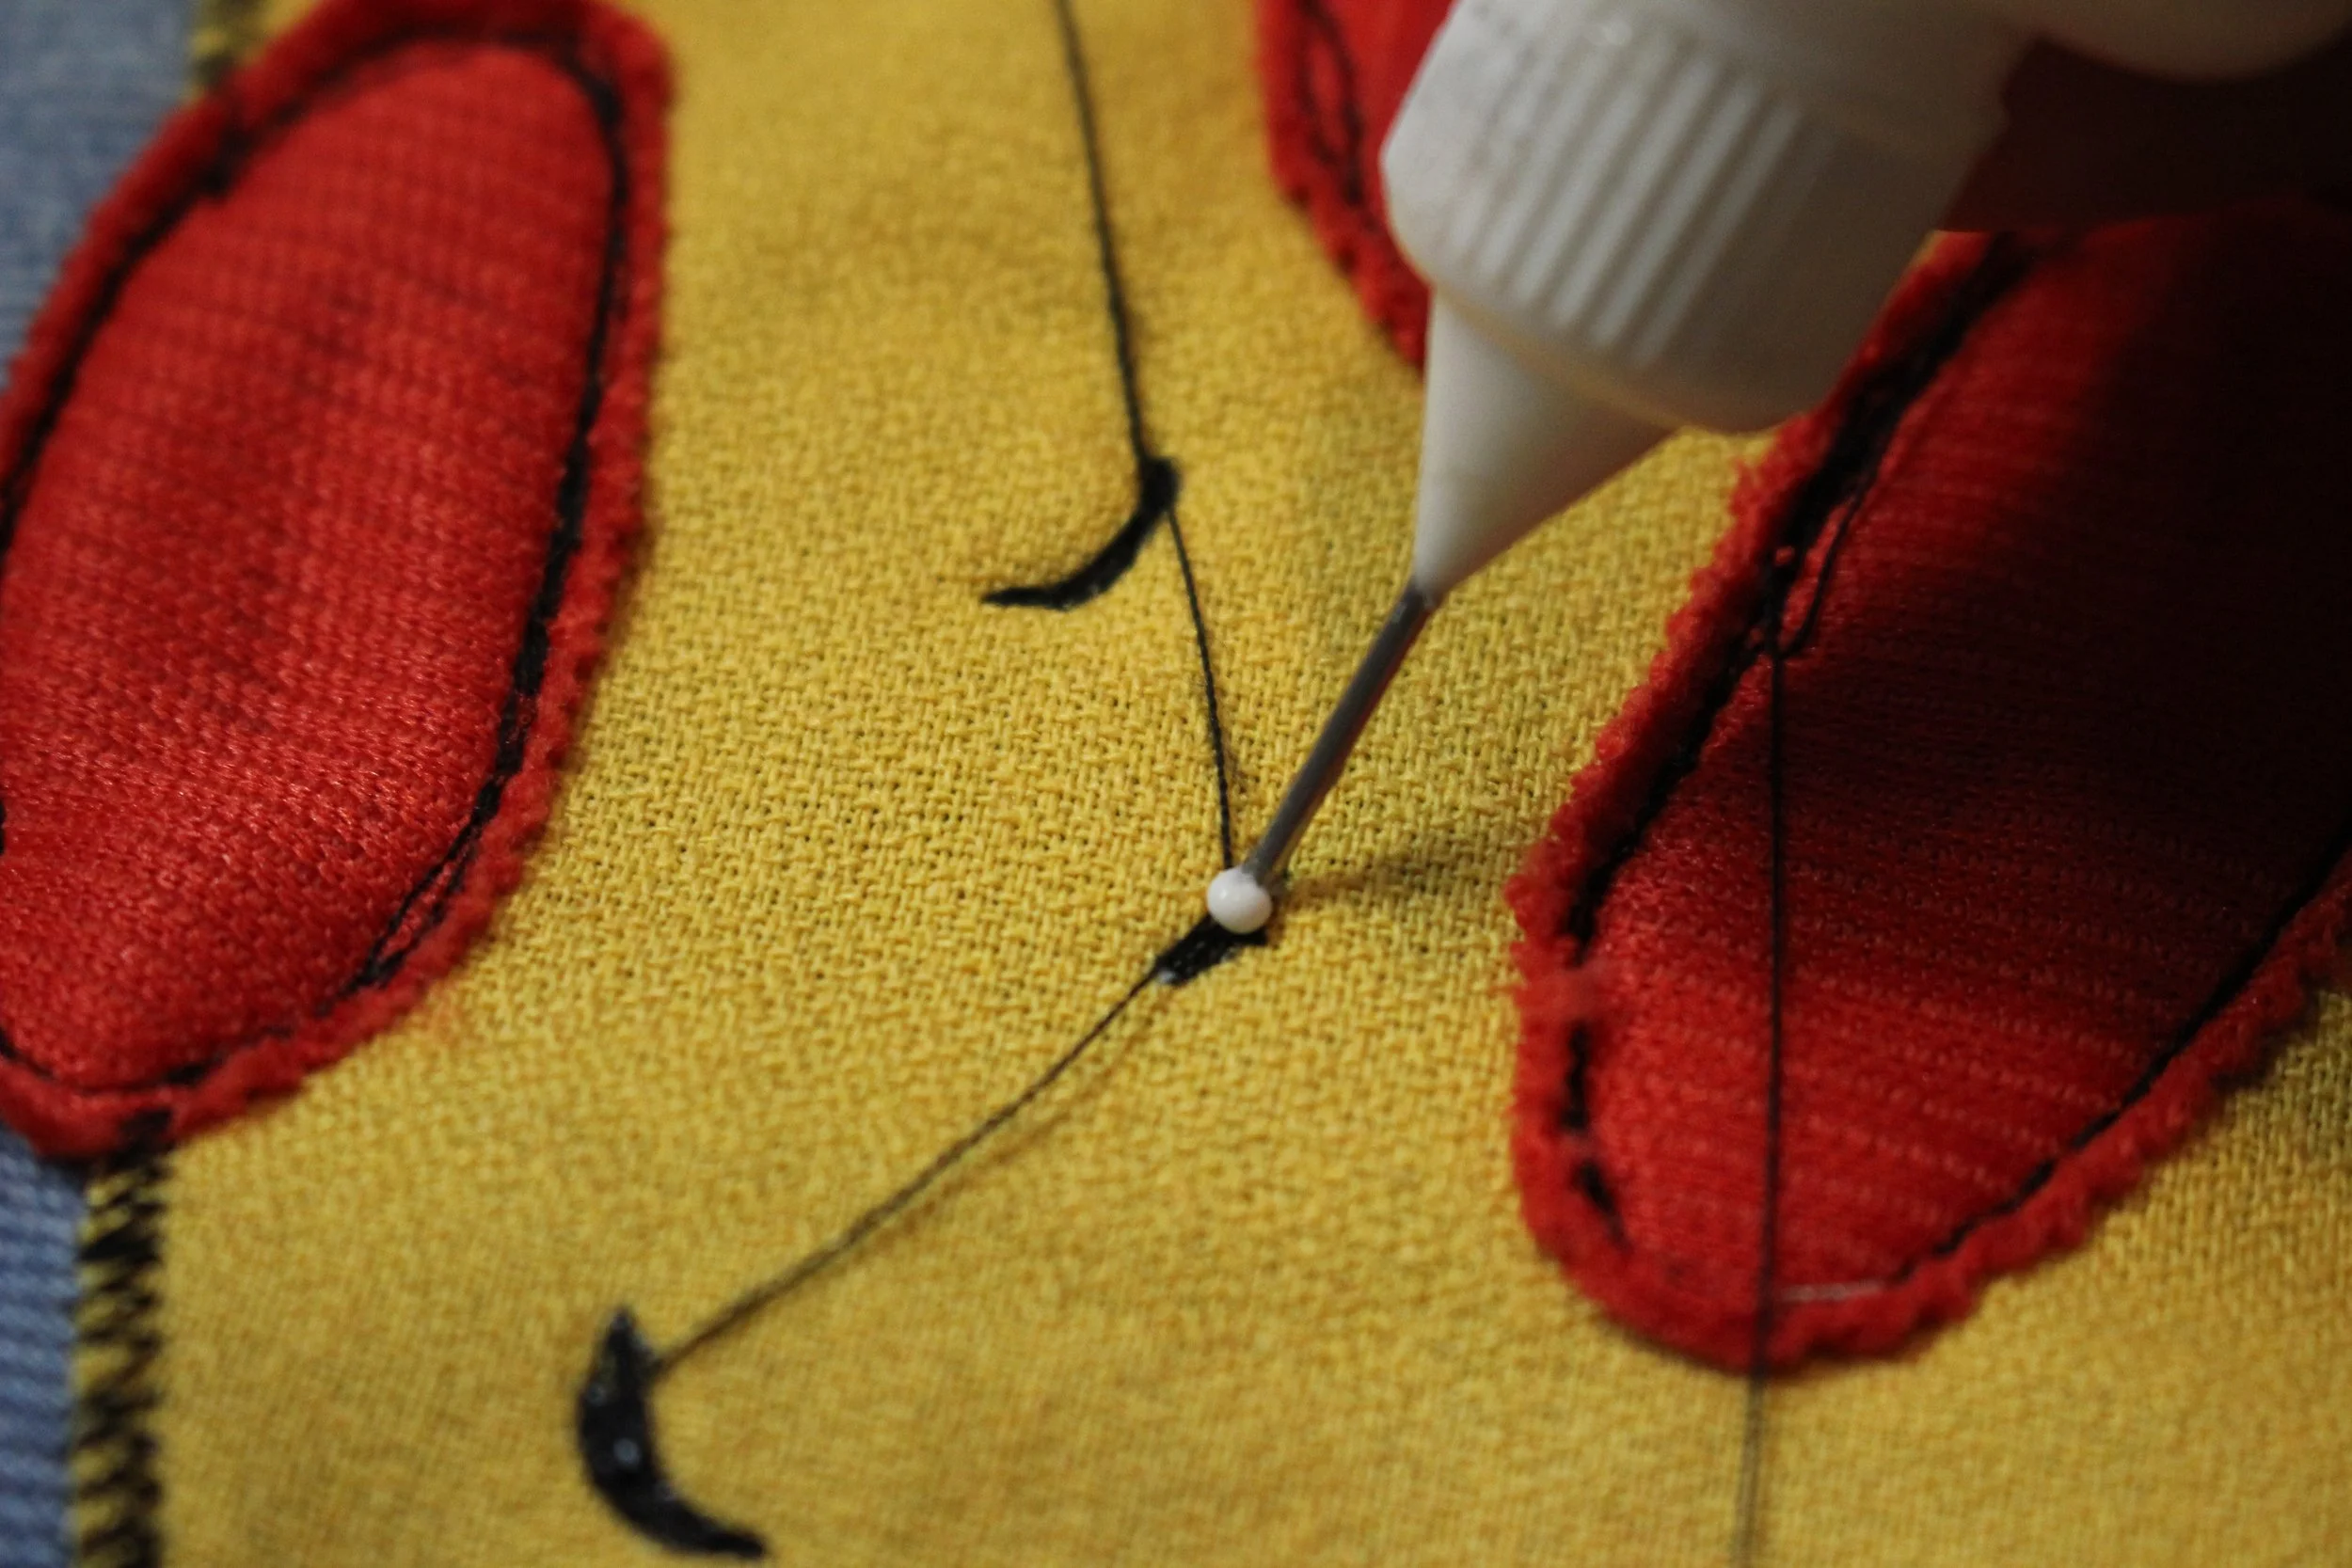
Fabric glue is a great temporary hold.
I like putting it into needle tip squeeze bottles for small amounts.
Make sure it’s completely dry before sewing!
Test fabrics, some glue is visible on the outside.
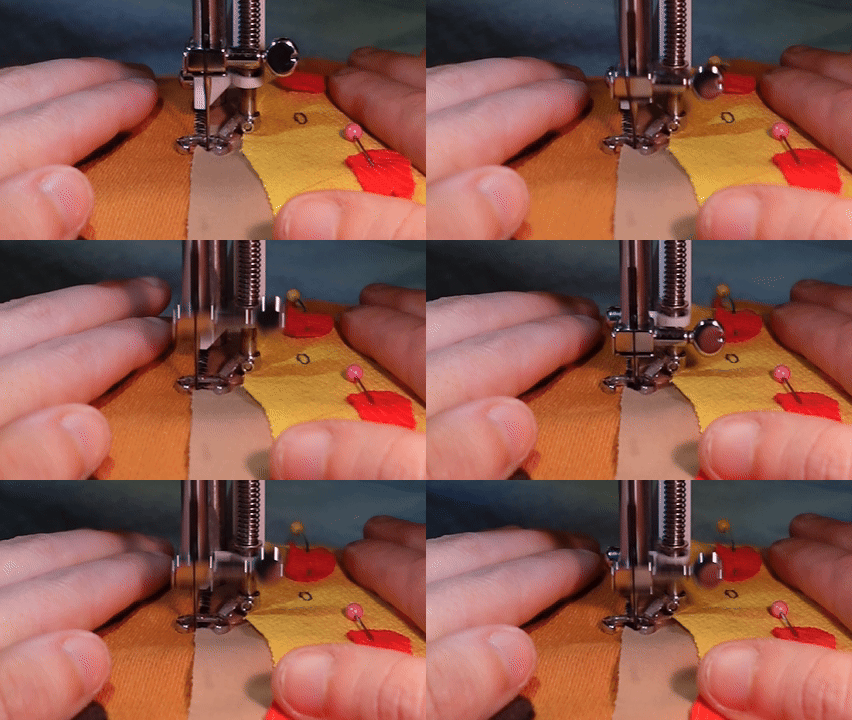
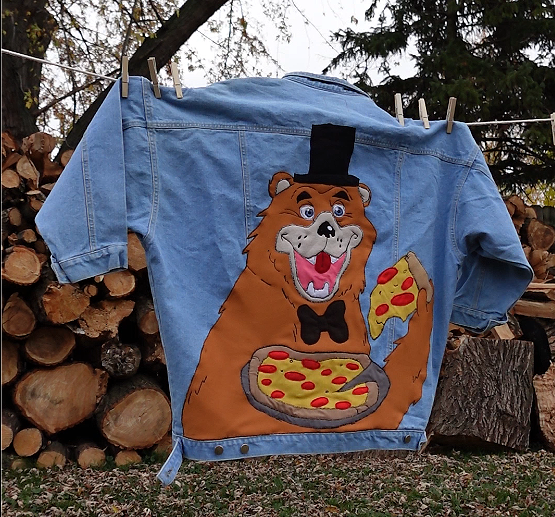
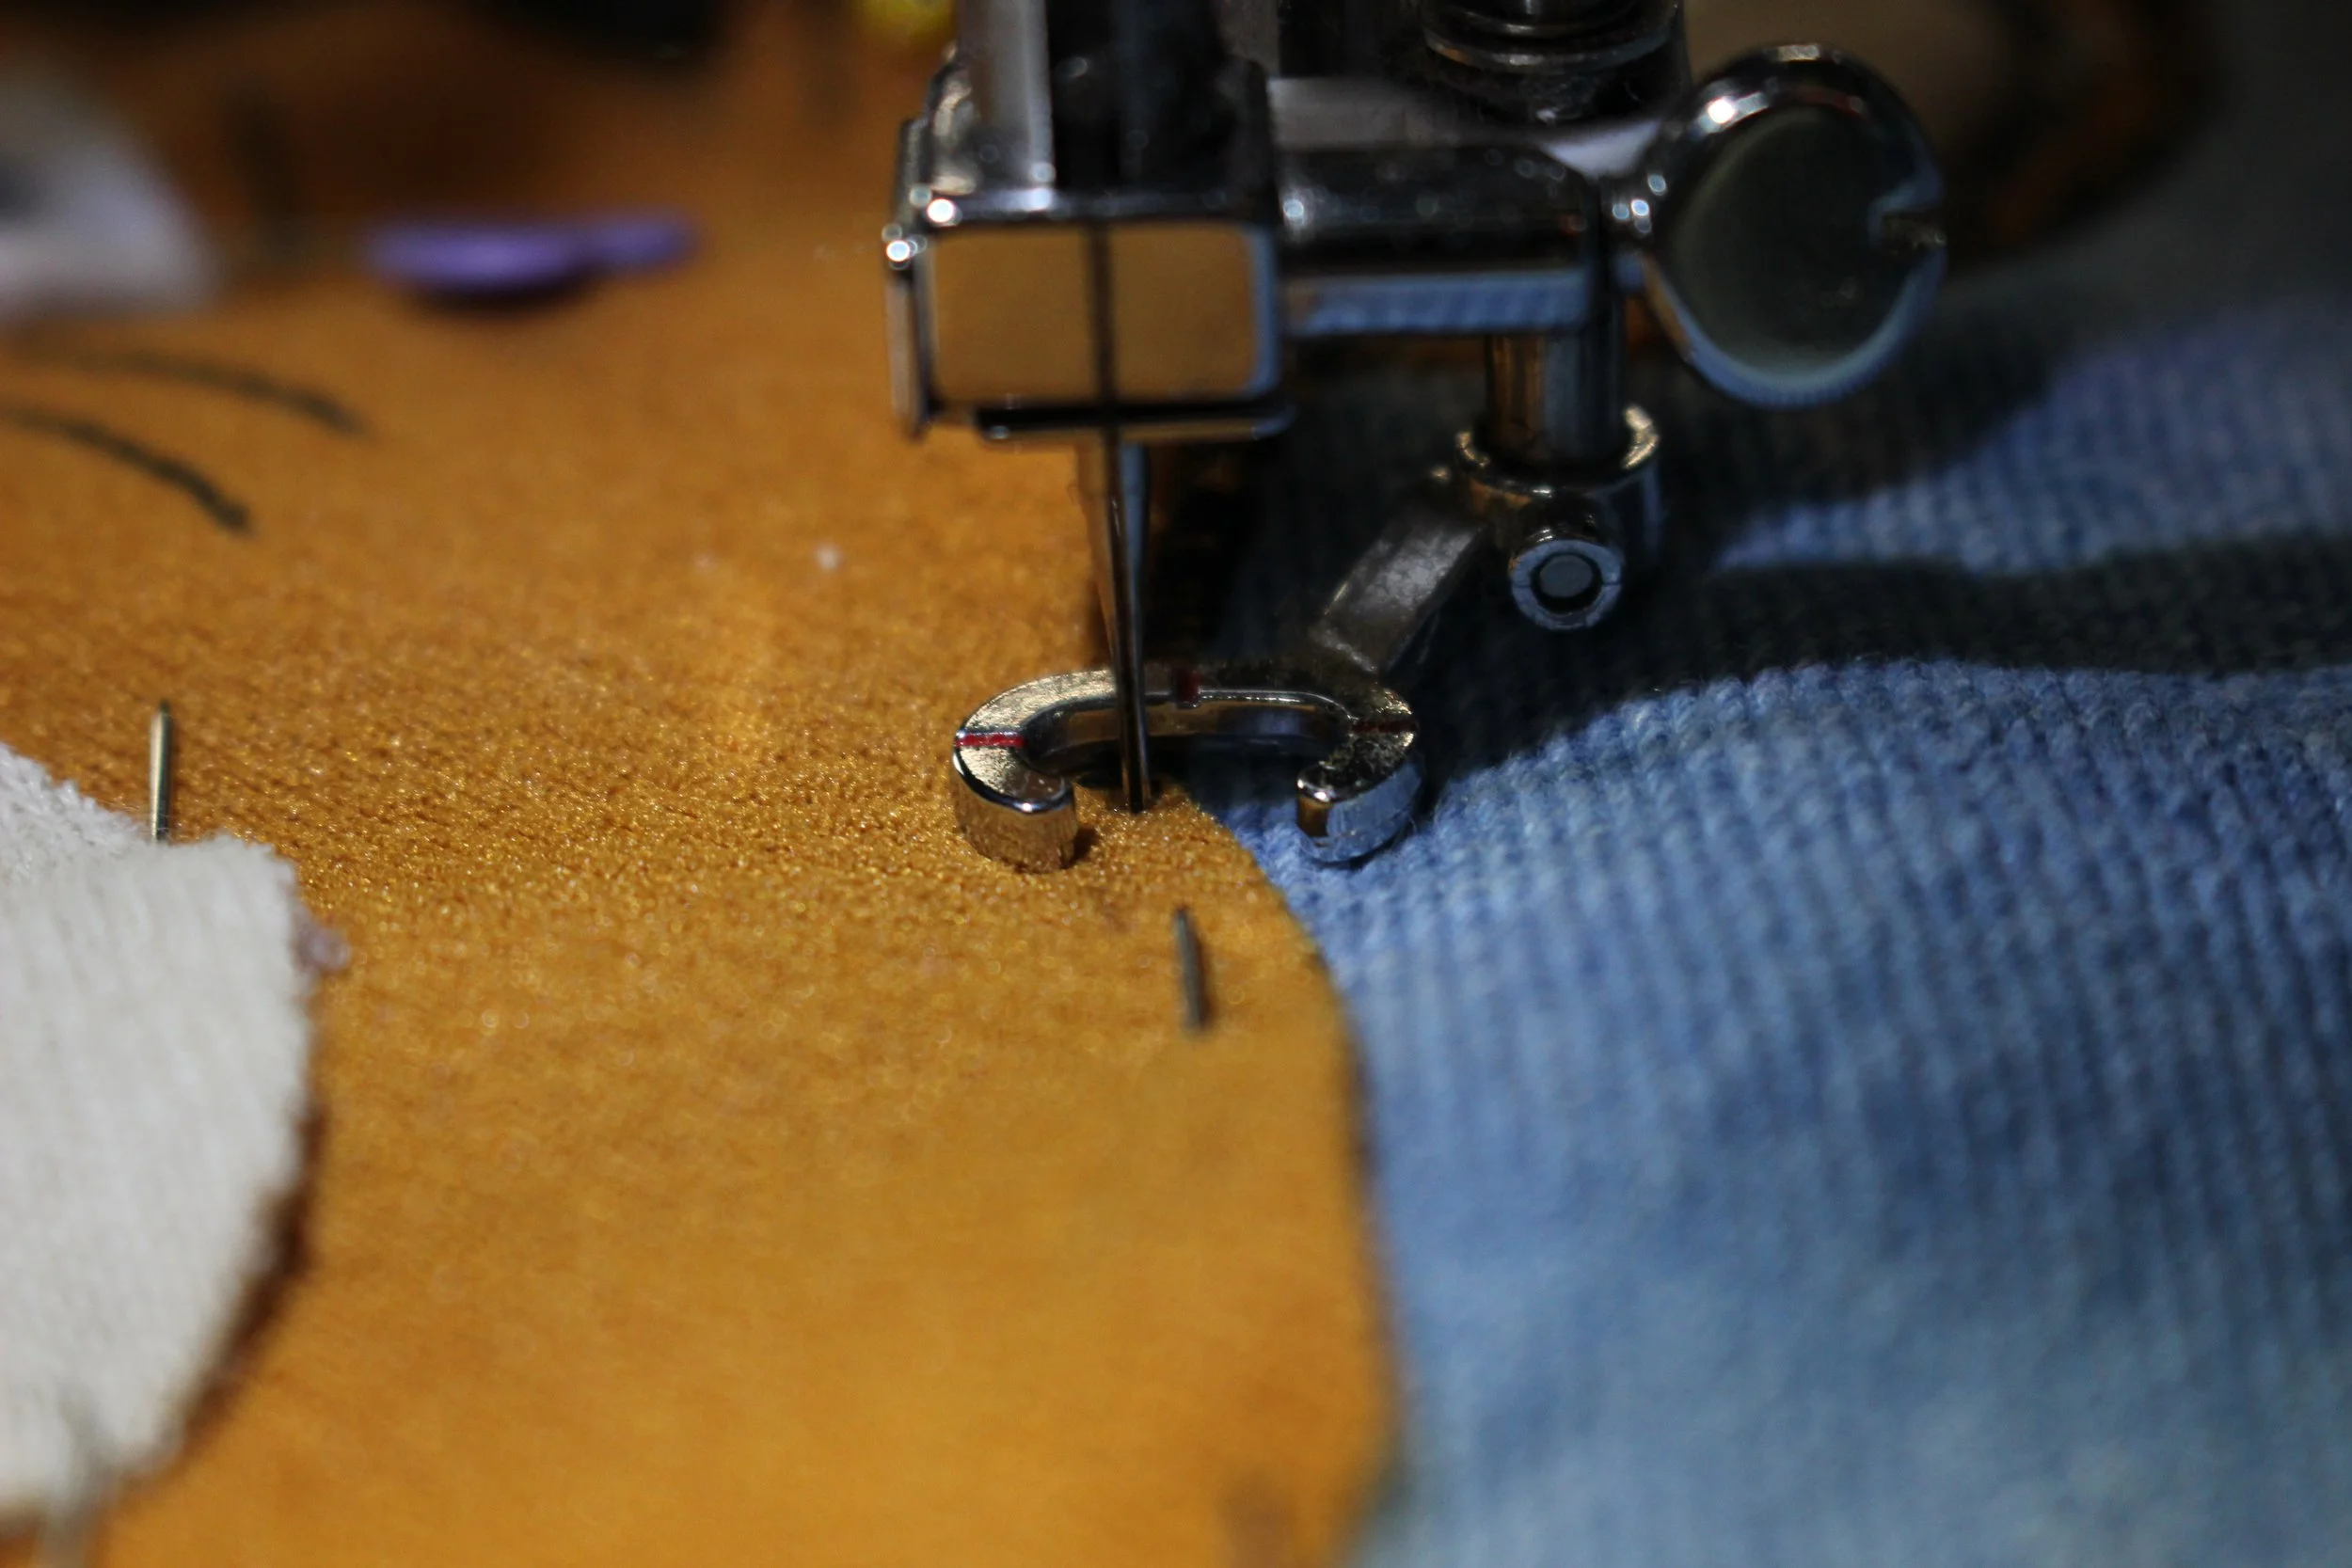
Carefully sew it to the garment. (I’m using a short zig zag on the edges, and straight stitch for details and non-fraying fabrics)
This can be a long process depending on the design.
Free motion feet are especially useful, because you don’t have to rotate the garment as much!
Pertaining to the gallery below:
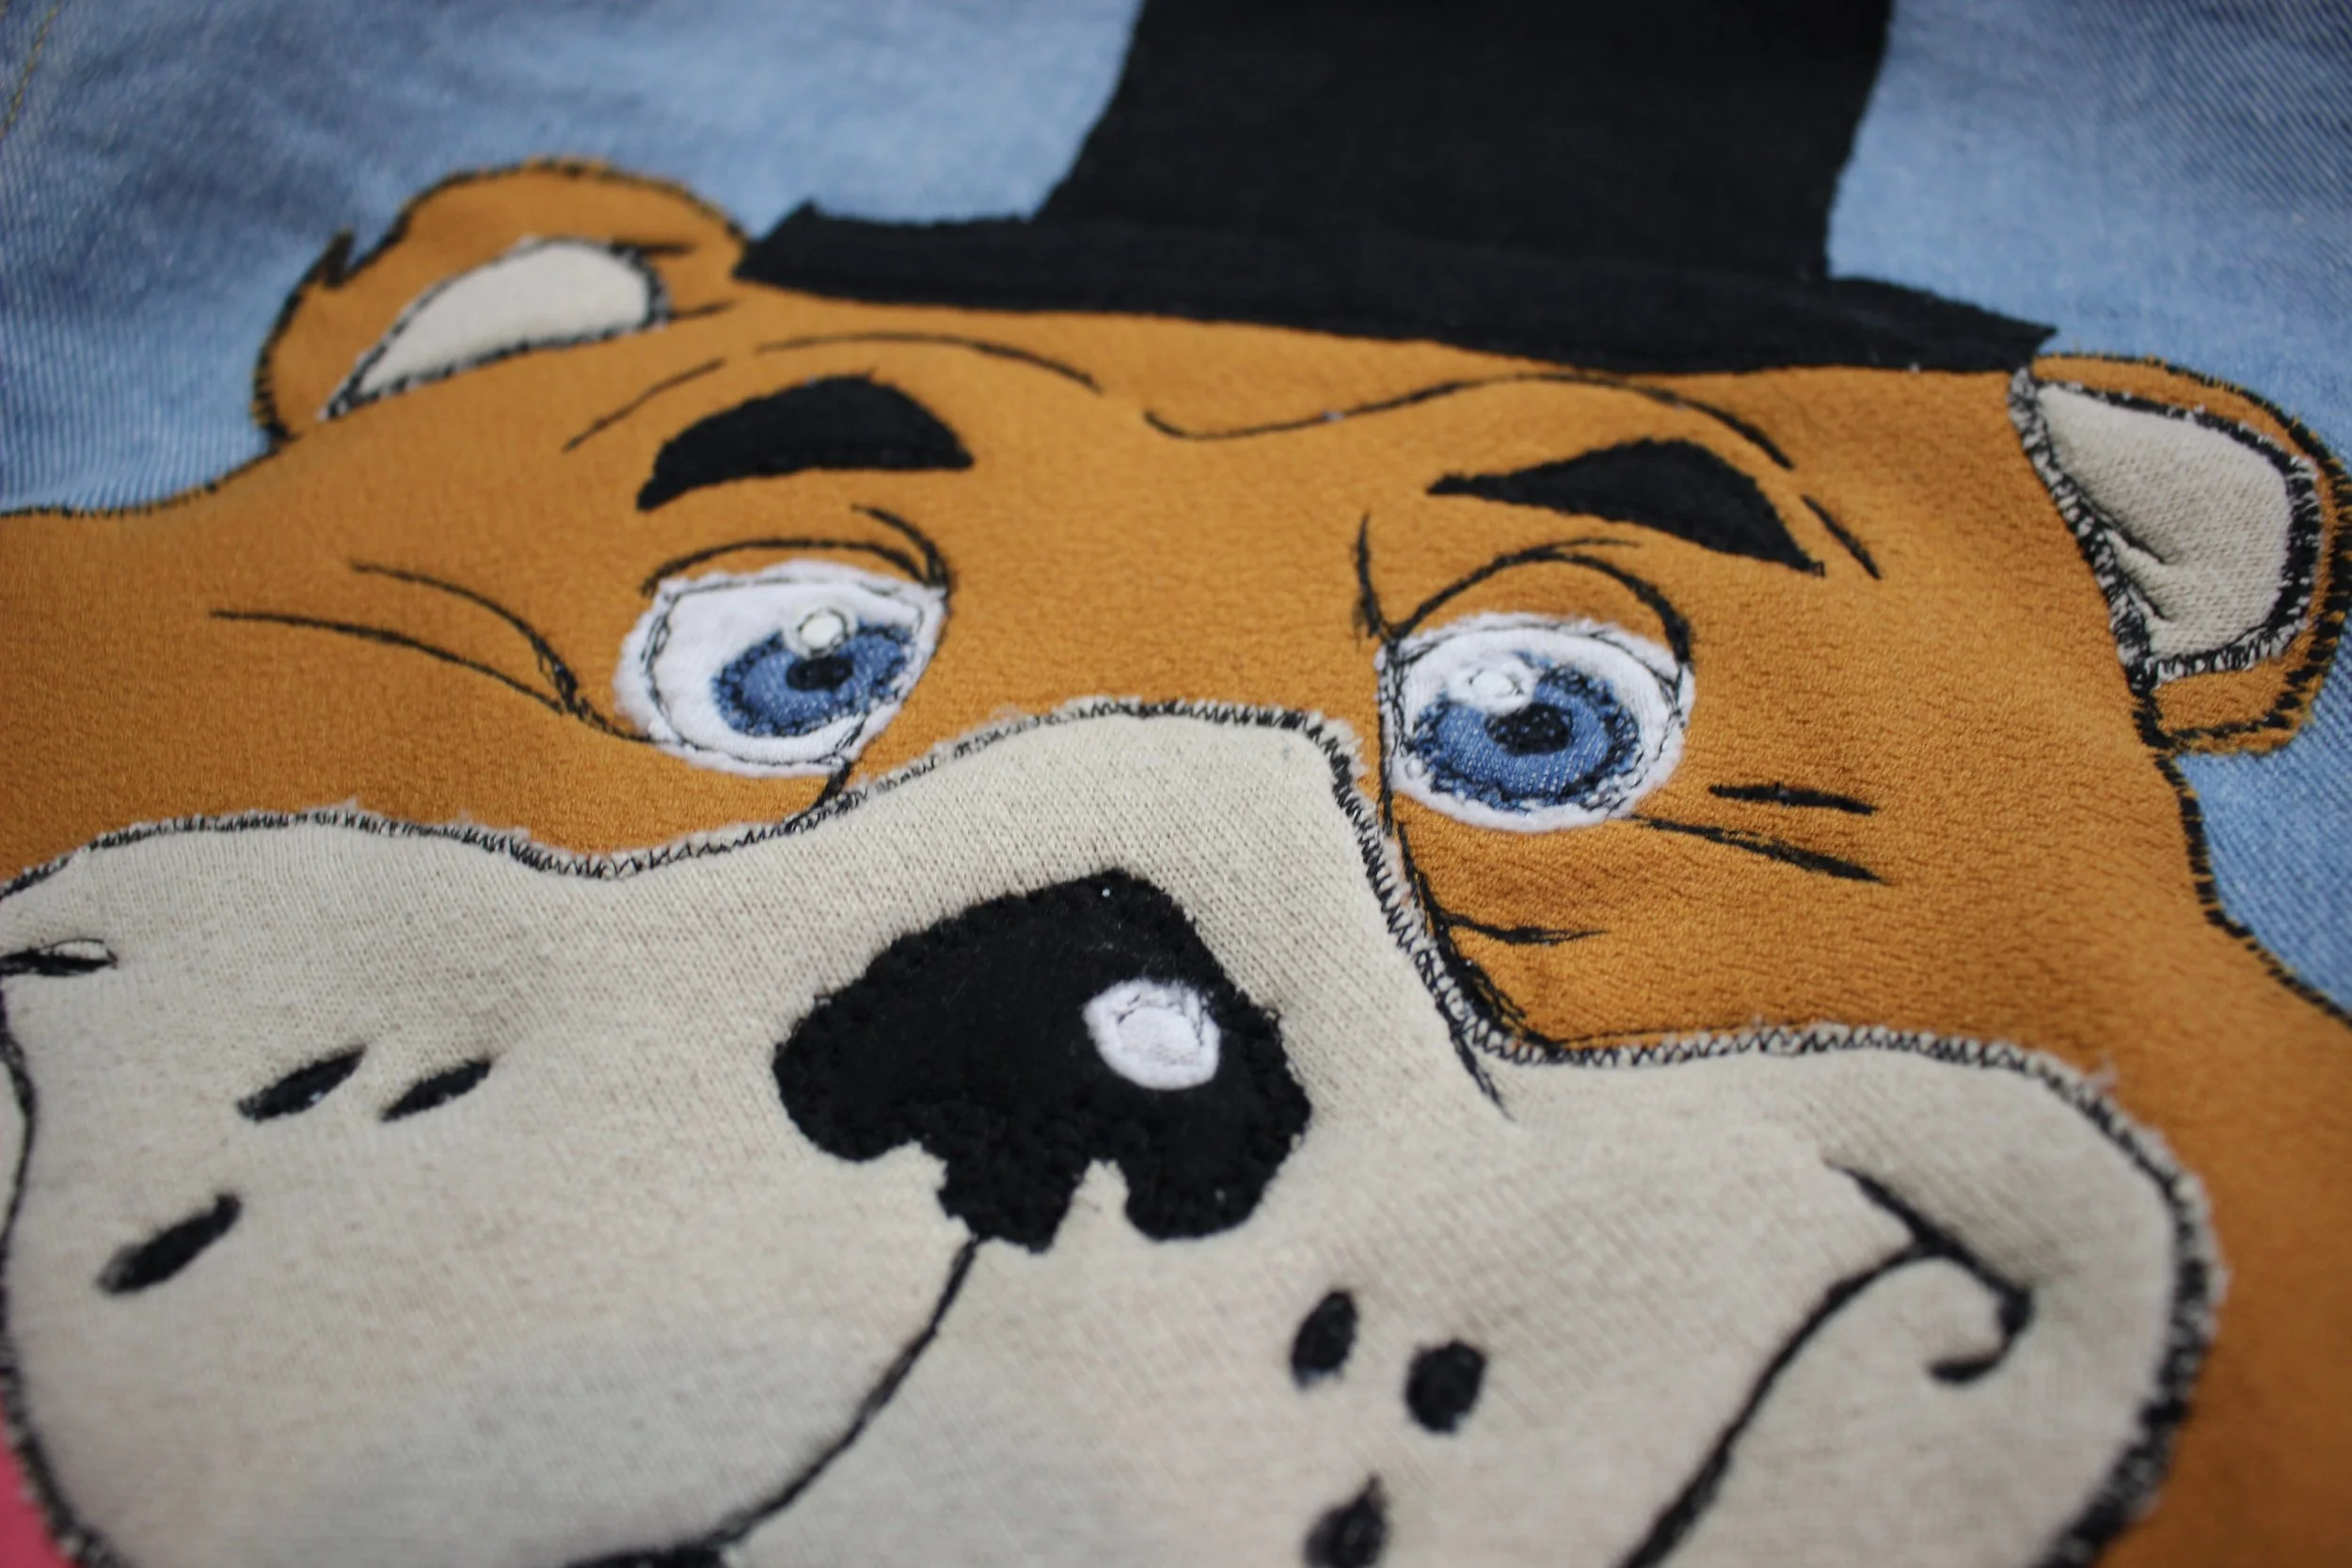
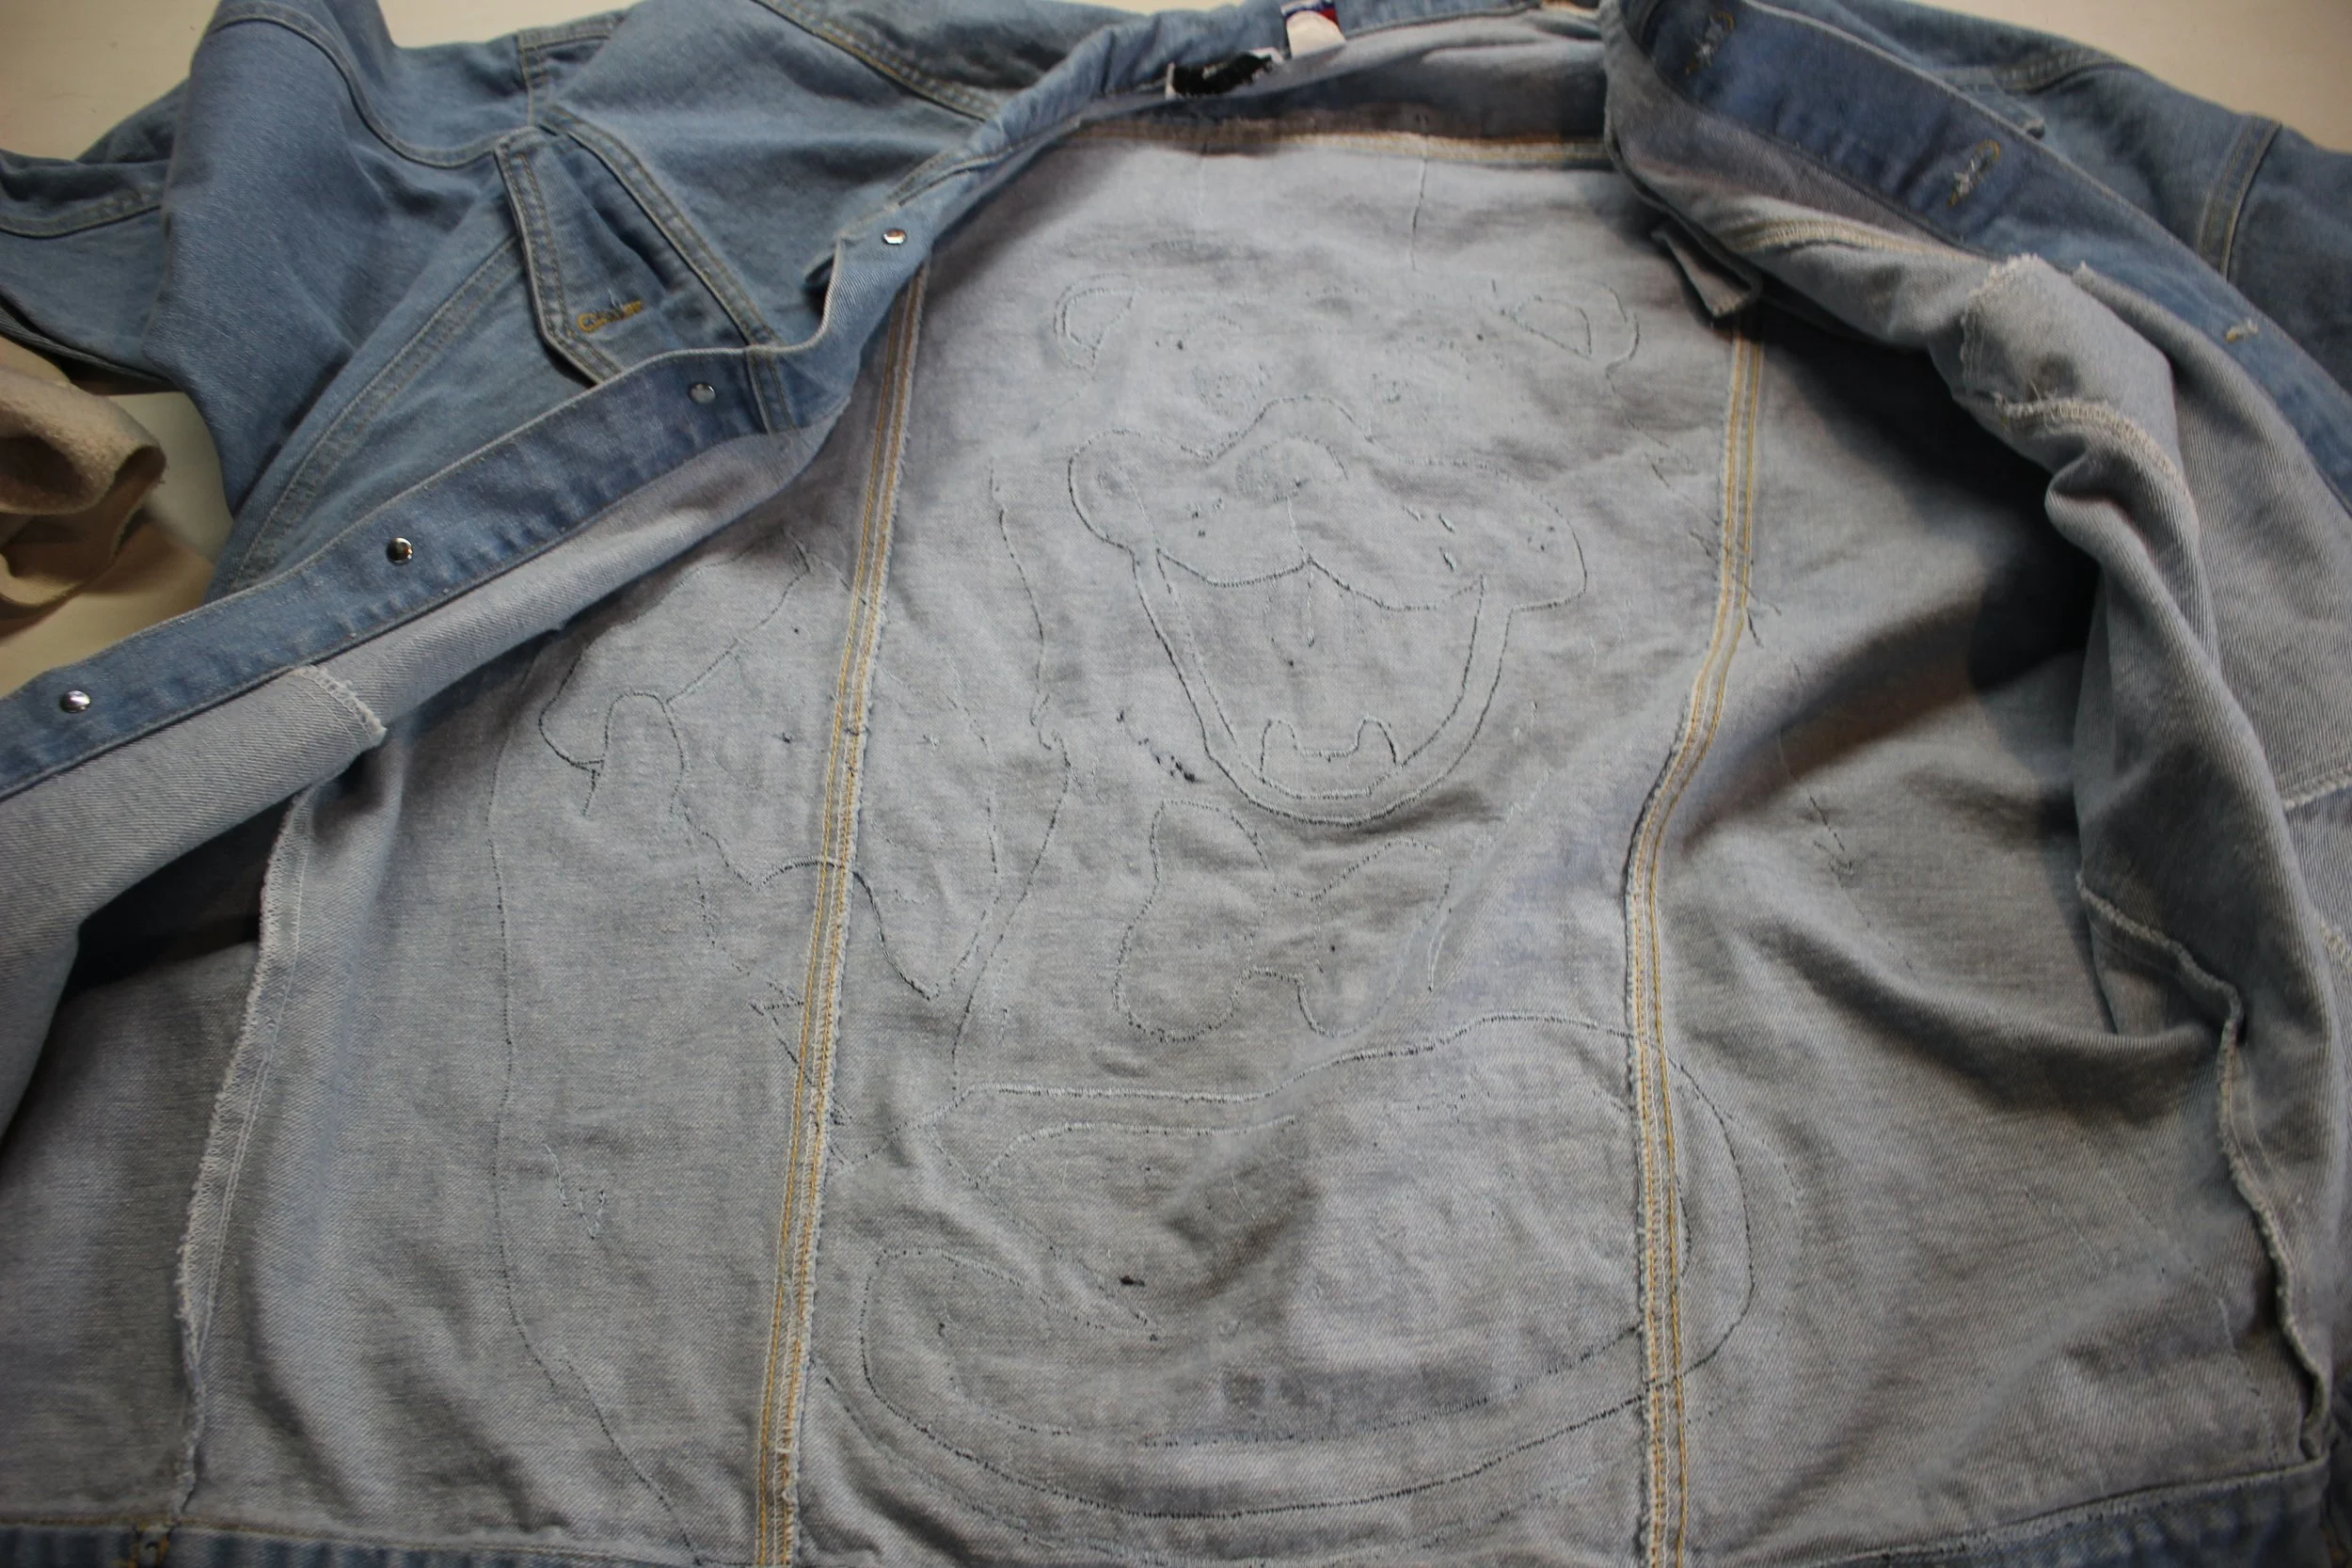
-Use a fabric marker to mark fine details, and thread to embroider over those spots.
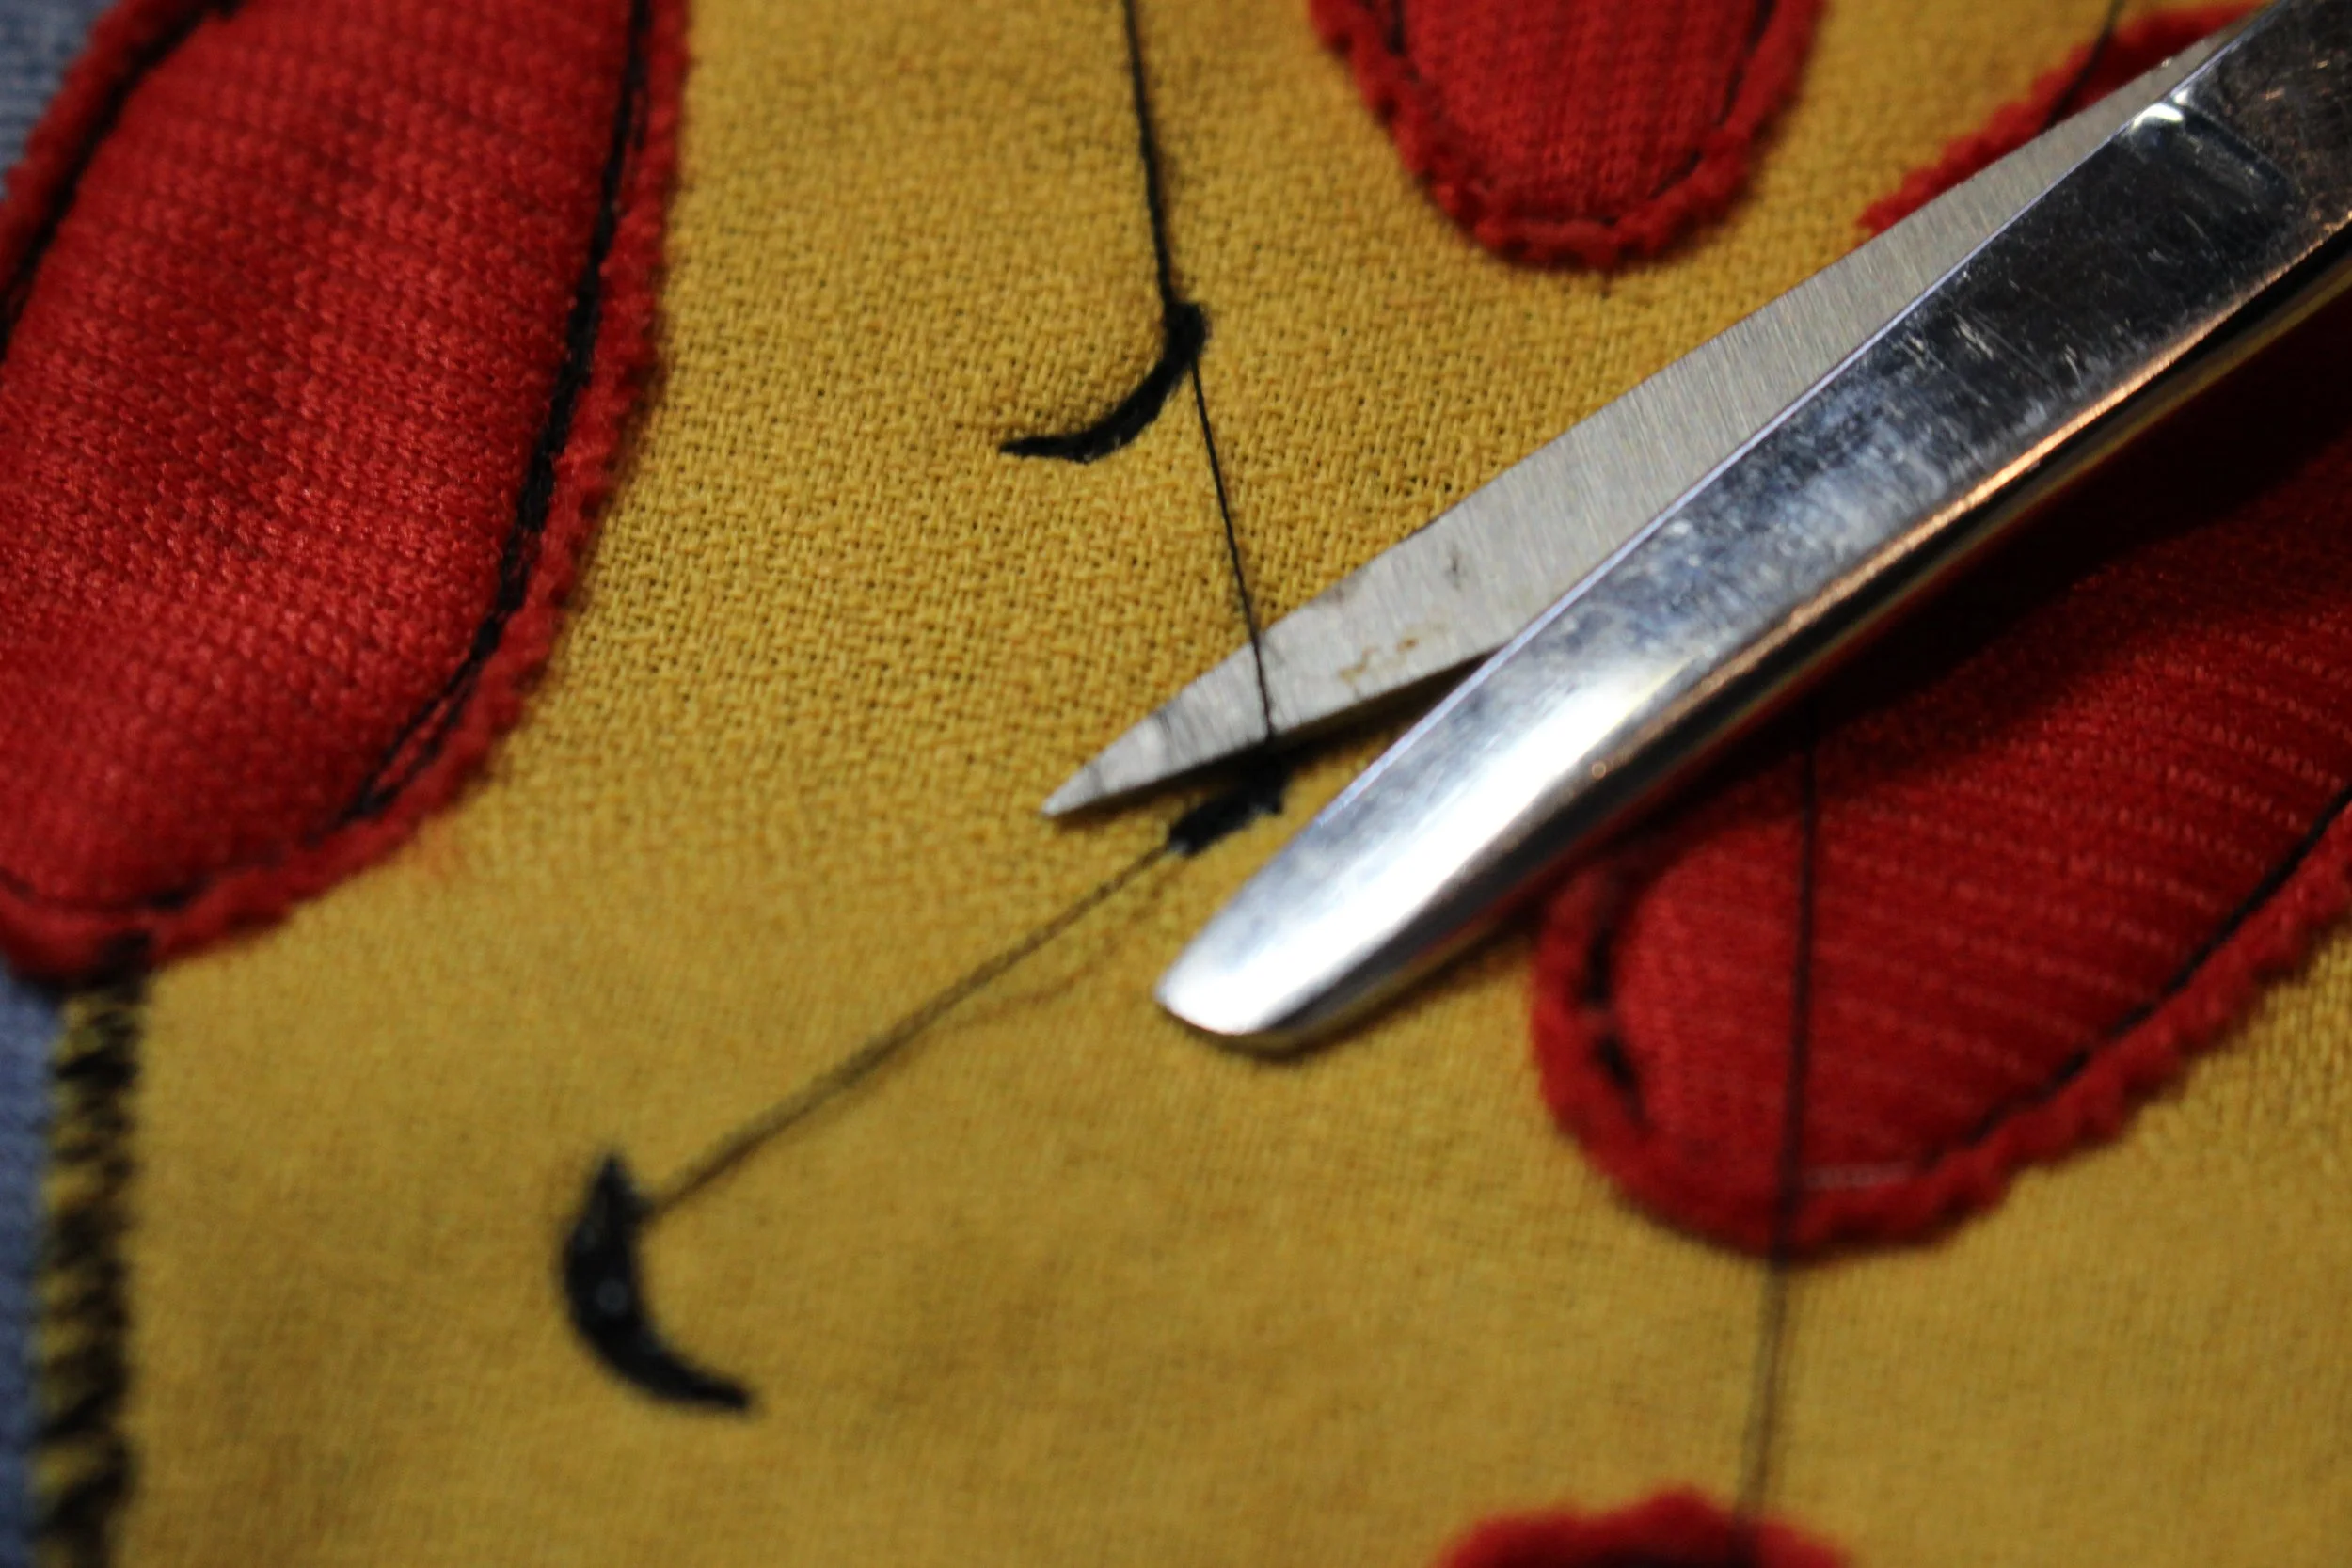
-Use a small amount of fabric glue to help secure places where your thread “stopped”. (Where you stopped stitching, and lifted your needle to another area.
-Snip the excess thread tails on the front and back.
Appliqueing Directly onto Sweatshirts
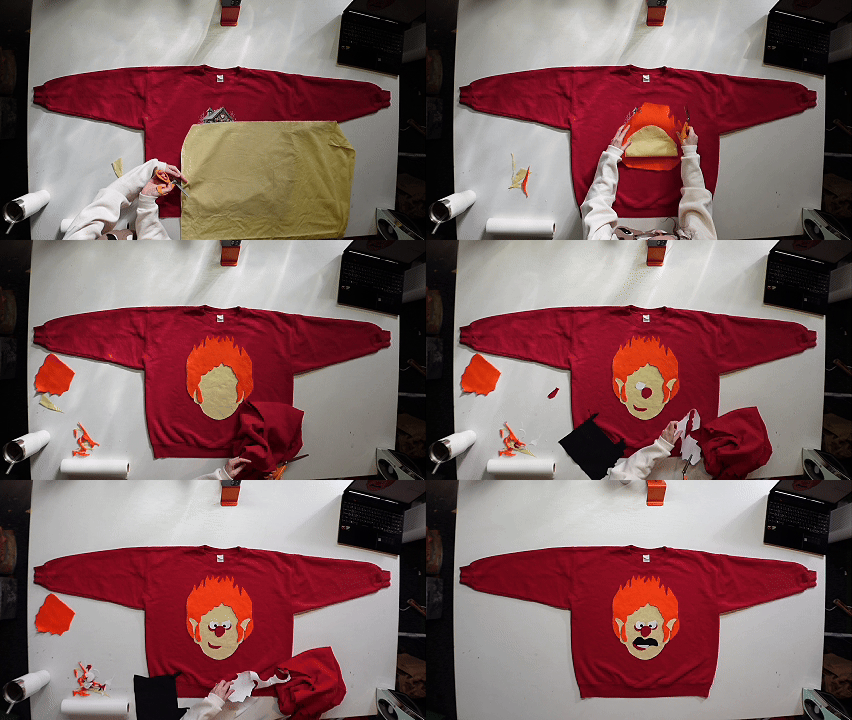
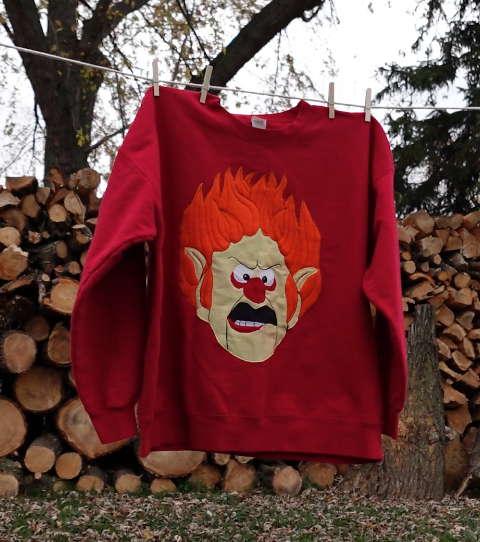
Less detailed designs can sometimes be assembled and sewn directly to the sweatshirt.
Fabric in this design:
Skin (light yellow) - Woven linen
Hair (orange) - Fleece
Nose + Lip (Red) - Sweatshirt fleece
Eyes (White) - Woven cotton + iron on
Pupils (Black) - Jersey/T-shirt + iron on
Arrange the fabric onto the shirt, and glue all the edges down.
Use double sided iron on for smaller shapes.
Trace the fine details (like the eyebrows) with a fabric marker, and going over it with thread. (I used red, white, yellow, orange, and black thread.)
I used a combination of long zig zag, short zig zag, and straight stitch.
Appliqueing Hard-to-Reach Areas
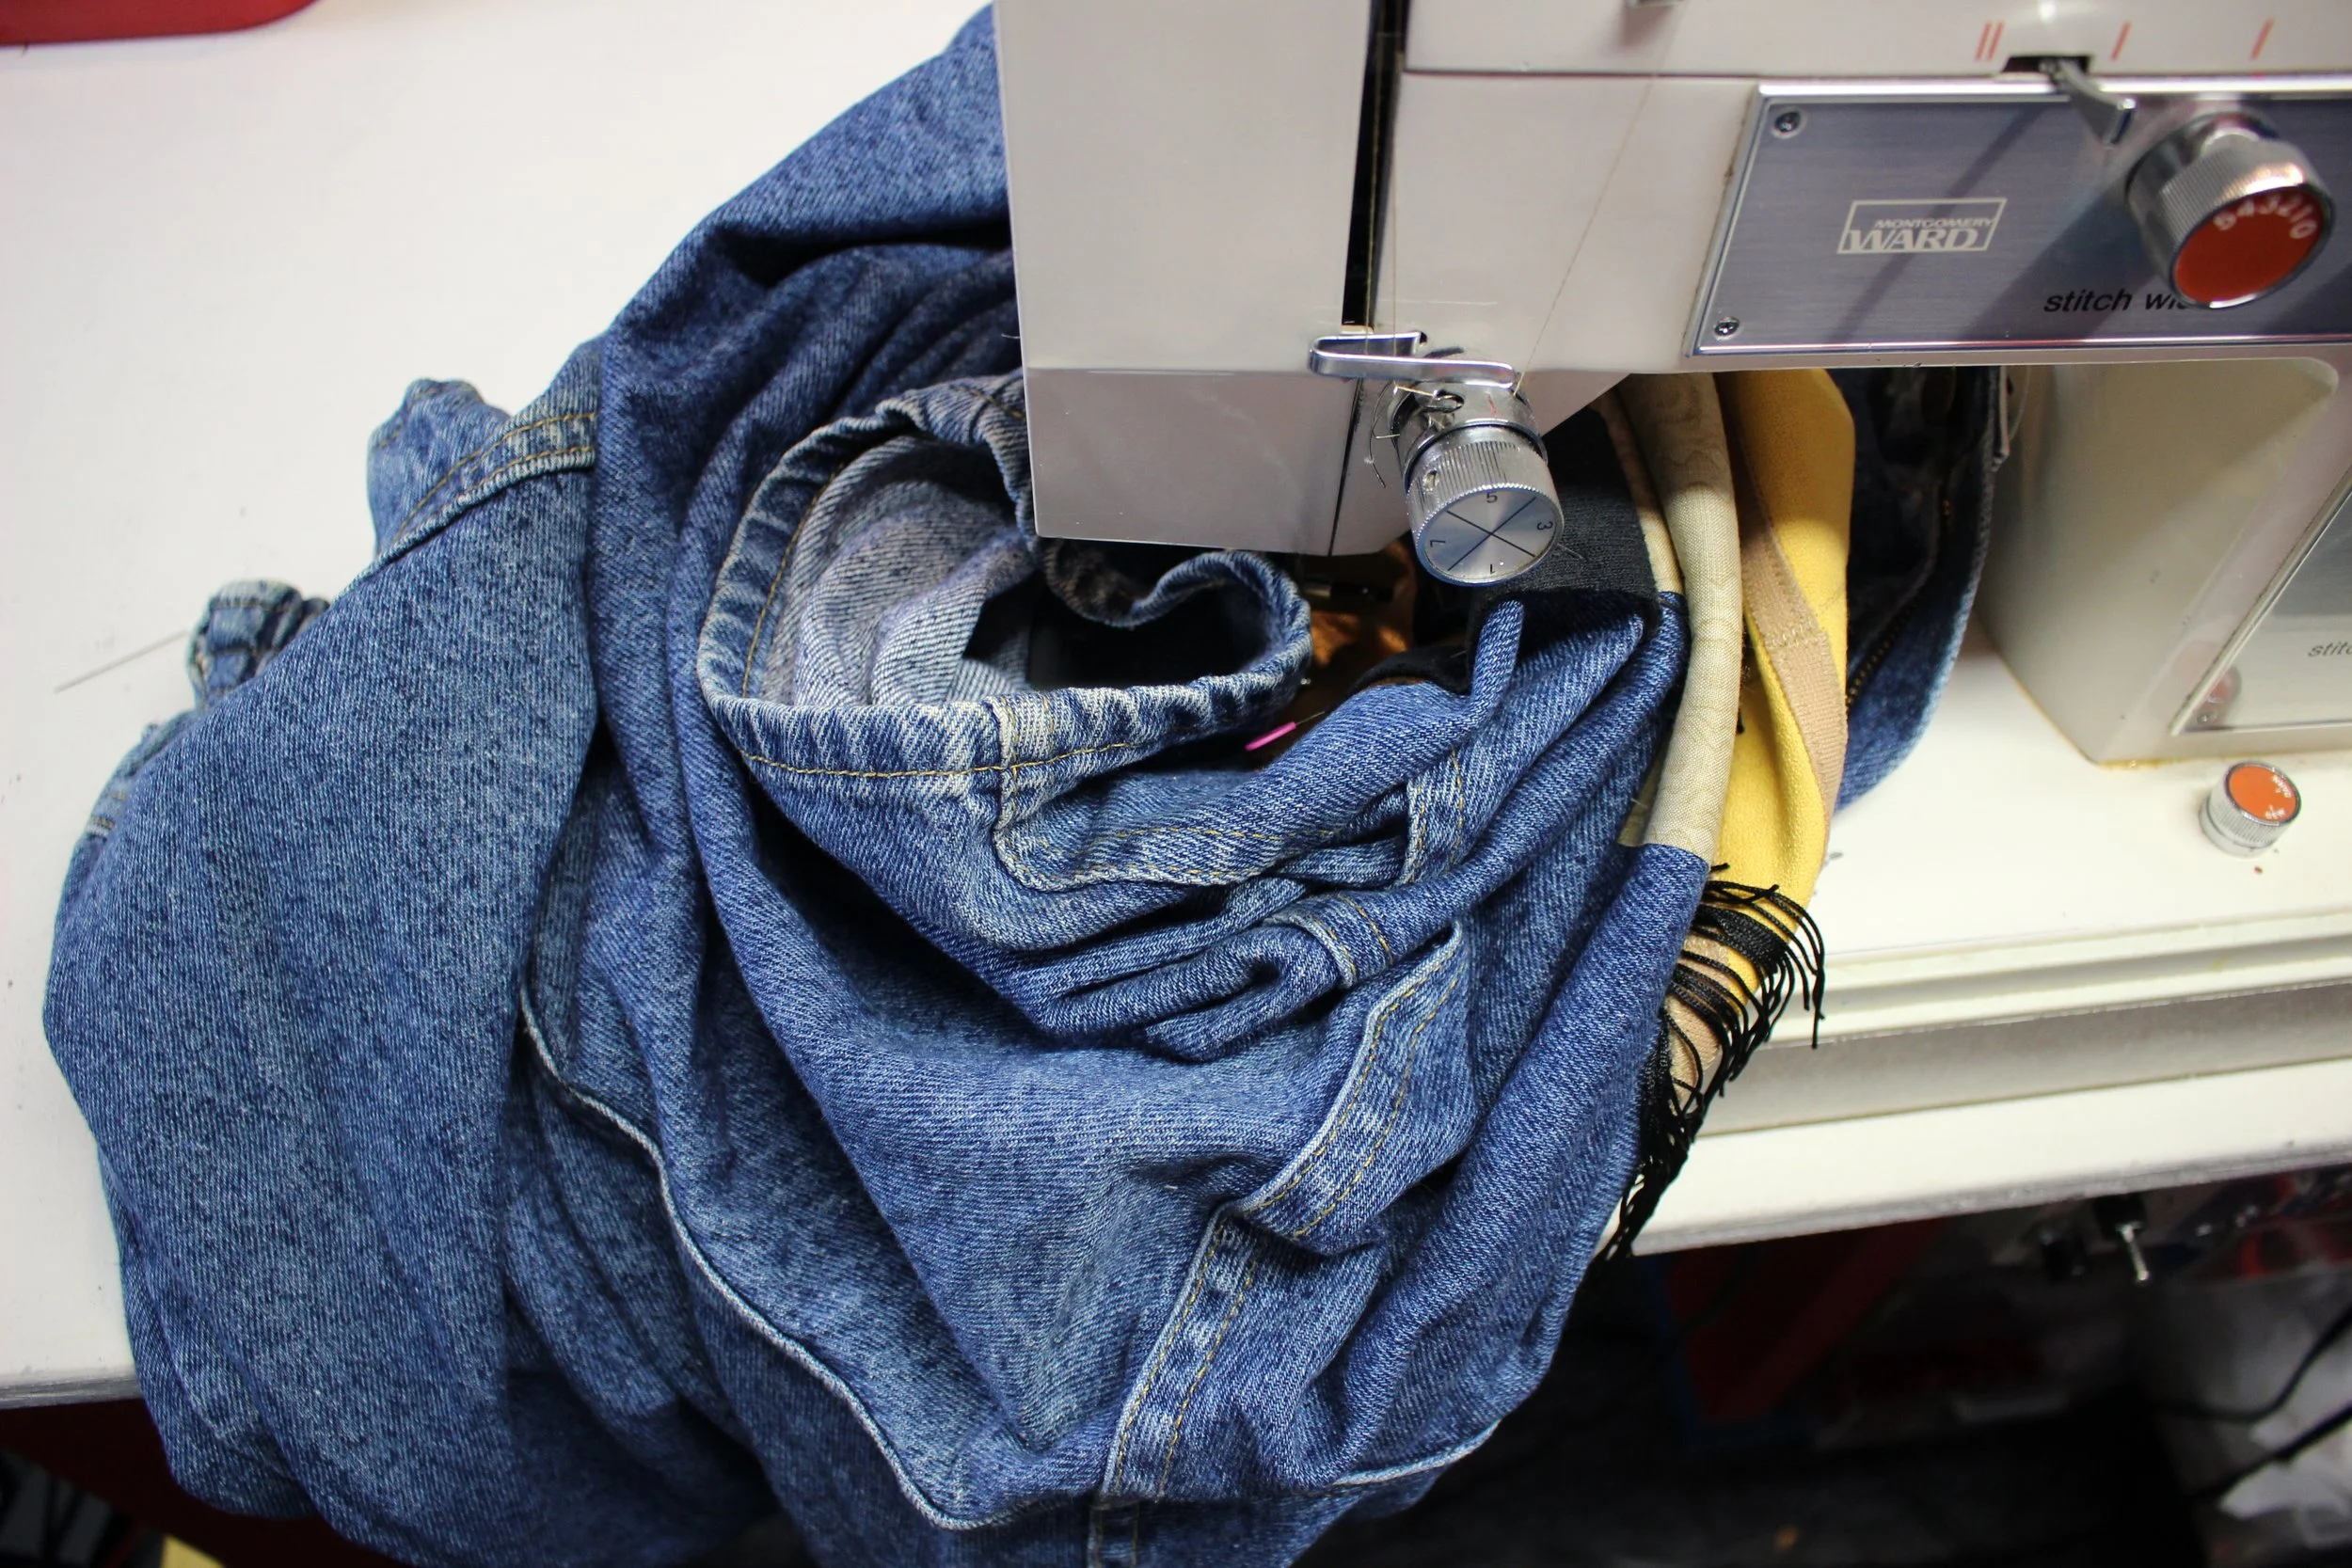
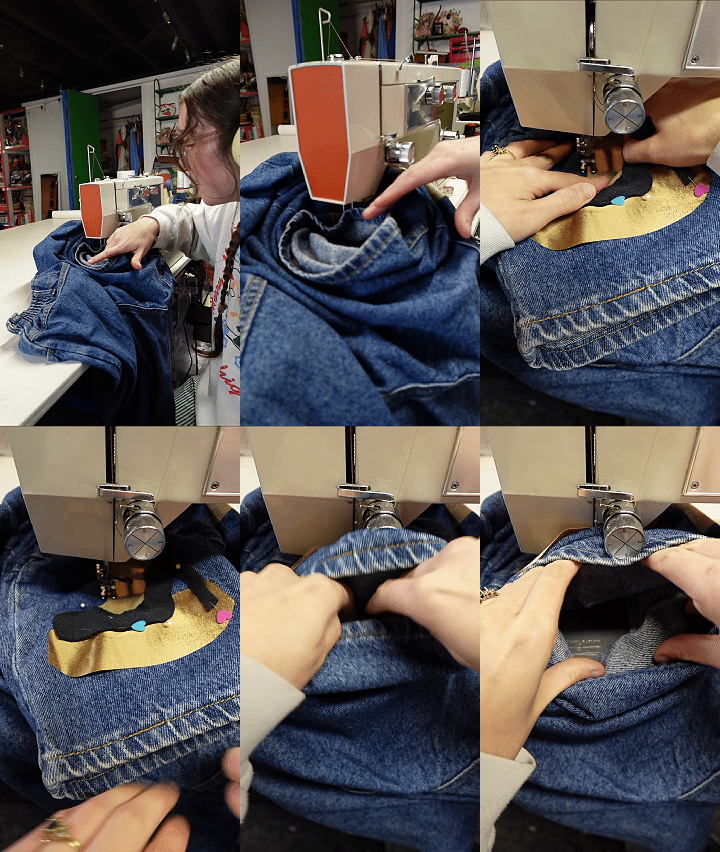
One of the biggest questions you guys ask, is: “How do you sew pant legs and sleeves? Do you seam rip?”
I rarely if ever seam rip my garments. Most of the time, I just scrunch the leg/sleeve as I sew, making sure only the top of the fabric is under the needle at all times.
It is time consuming, and frustrating at times, but I wouldn’t have it any other way.
Make sure the applique is properly glued or ironed down to make sure it doesn’t shift while you sew.
You could choose to seam rip the seams. I see plenty of people doing it!
Your Questions
Sewing Small Details
Depending on your preference, and the size of the detail, I recommend the following:
Tiny pieces of felt, or fleece for details around the size of a pinky nail. Make sure to really sew it in.
Thread aka embroidery, for details very thin and tiny.
Tracing Images
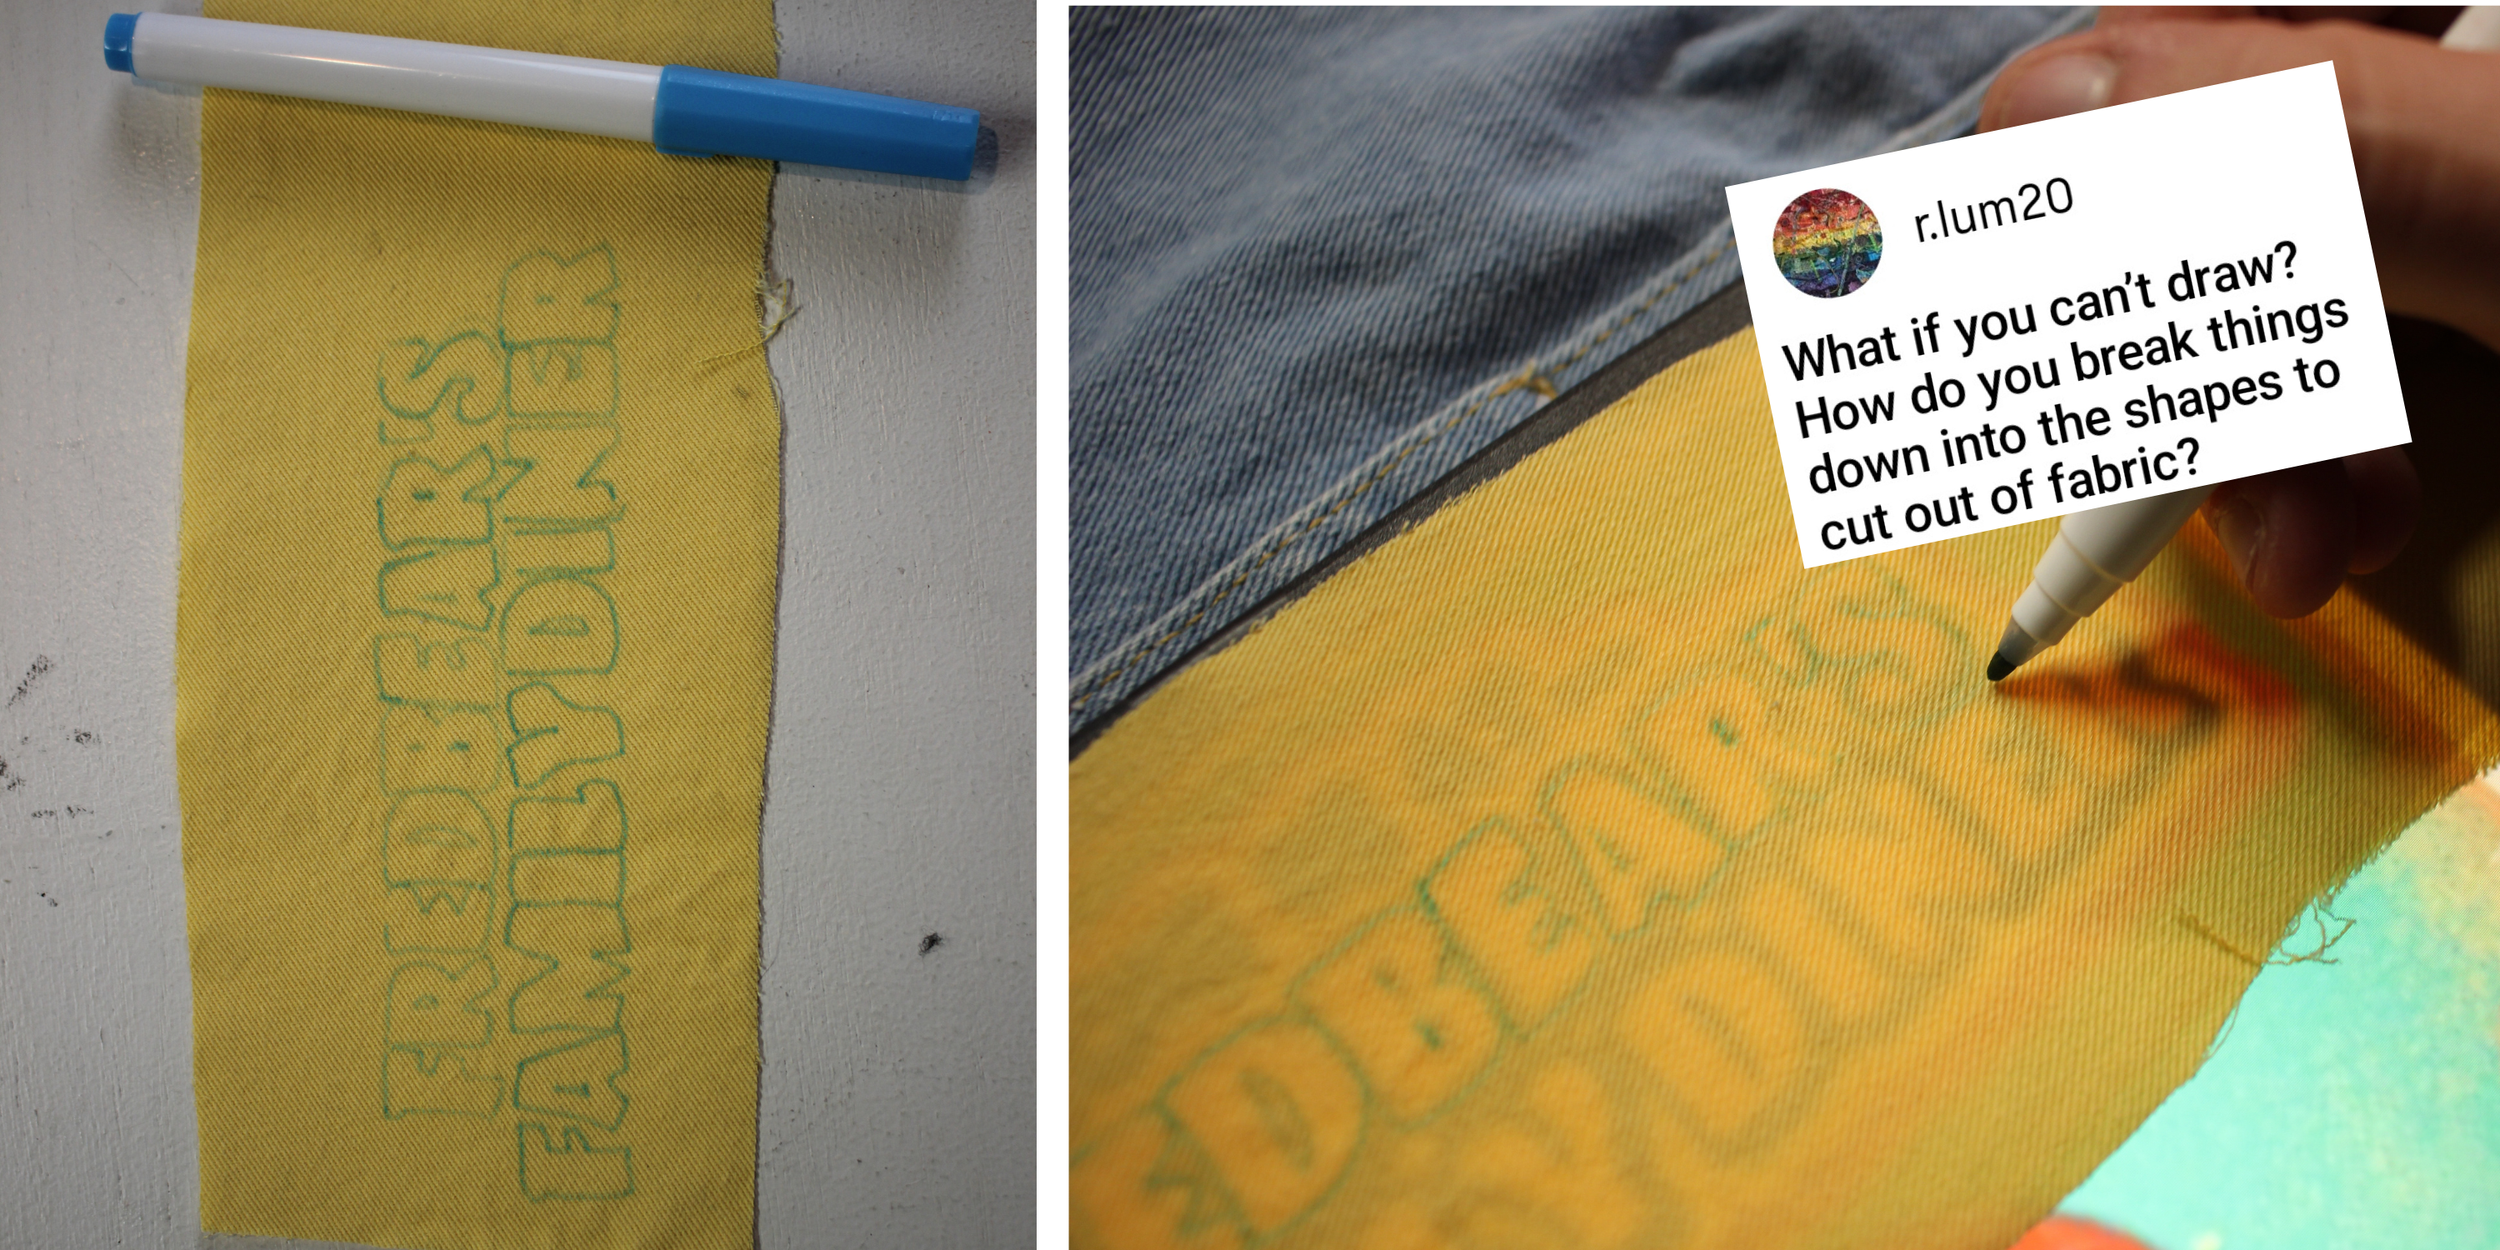
If you aren’t confident in free-handing appliques, I recommend pulling the image up on a computer, set the fabric ontop of the screen, and trace the shapes with a water soluble marker!
For designs with multiple colors, you will have to trace each color, on each different fabric, or onto a paper template to outline and cut out.
Hand Sewing
You guys had a lot of questions regarding hand-sewing appliques!
I’ll be honest, I don’t often hand sew sections.
I will have to work on a separate tutorial regarding needle-turn applique or raw edge hand sewn applique!

Choosing a Stitch
Zig-zag is not always necessary.
You can choose a straight stitch if your applique fabric doesn’t fray, or if you want it to fray. Or you can choose any other edge-binding stitch like overcast, spiral, dotted zigzag, you name it.
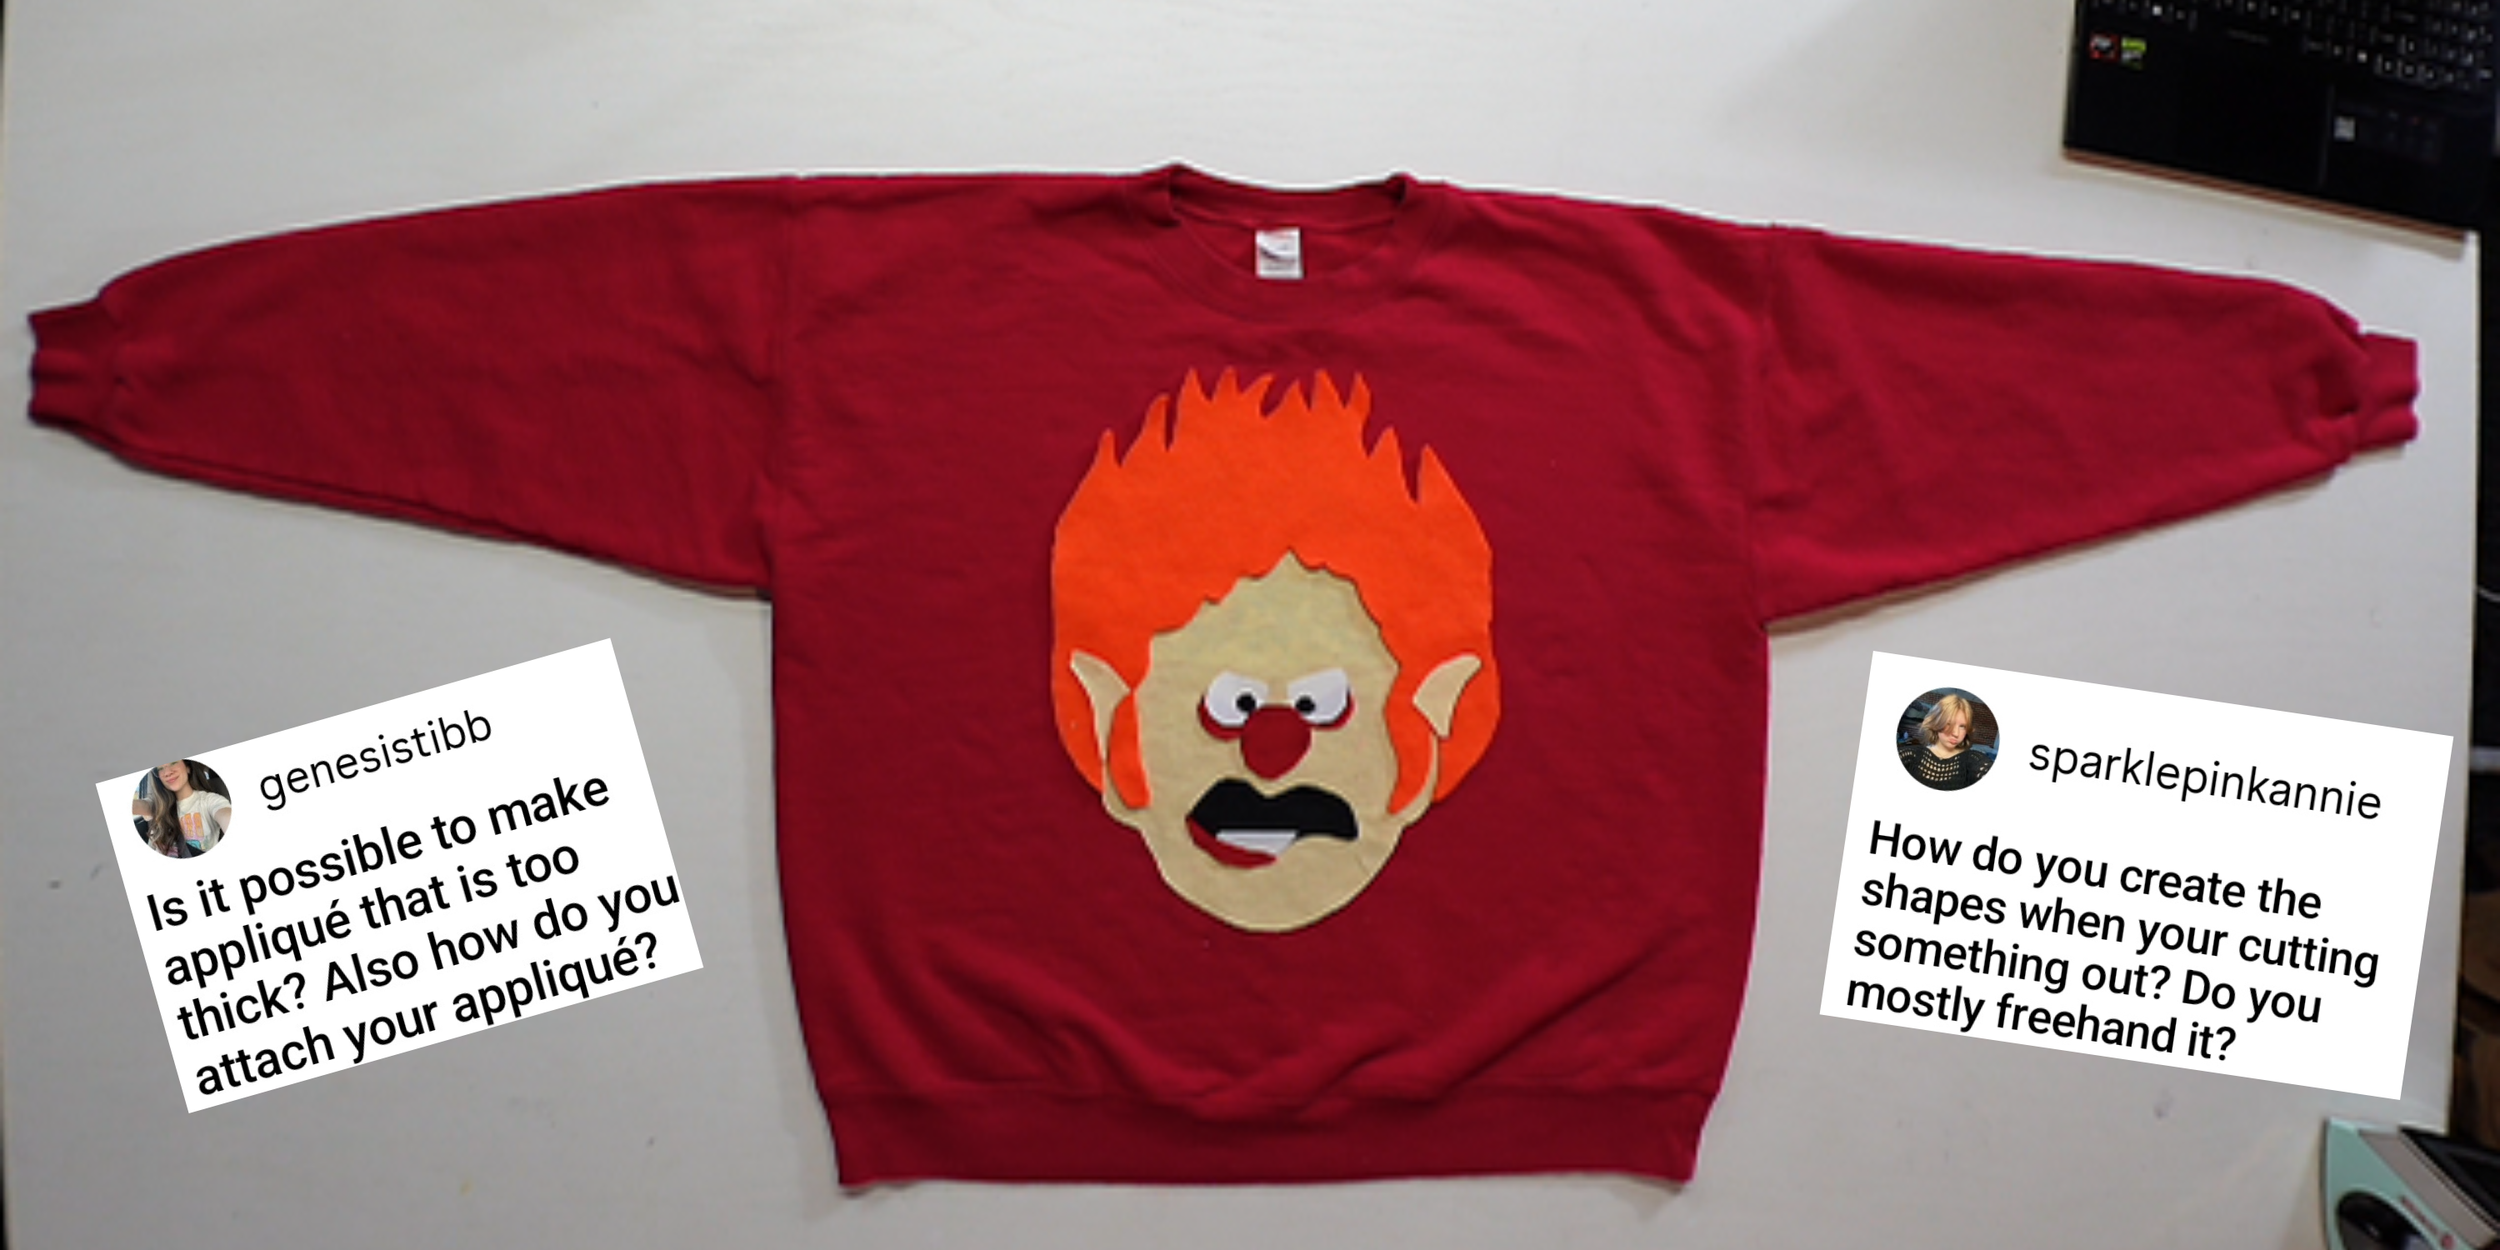
“How do you create the shapes when you’re cutting out?”
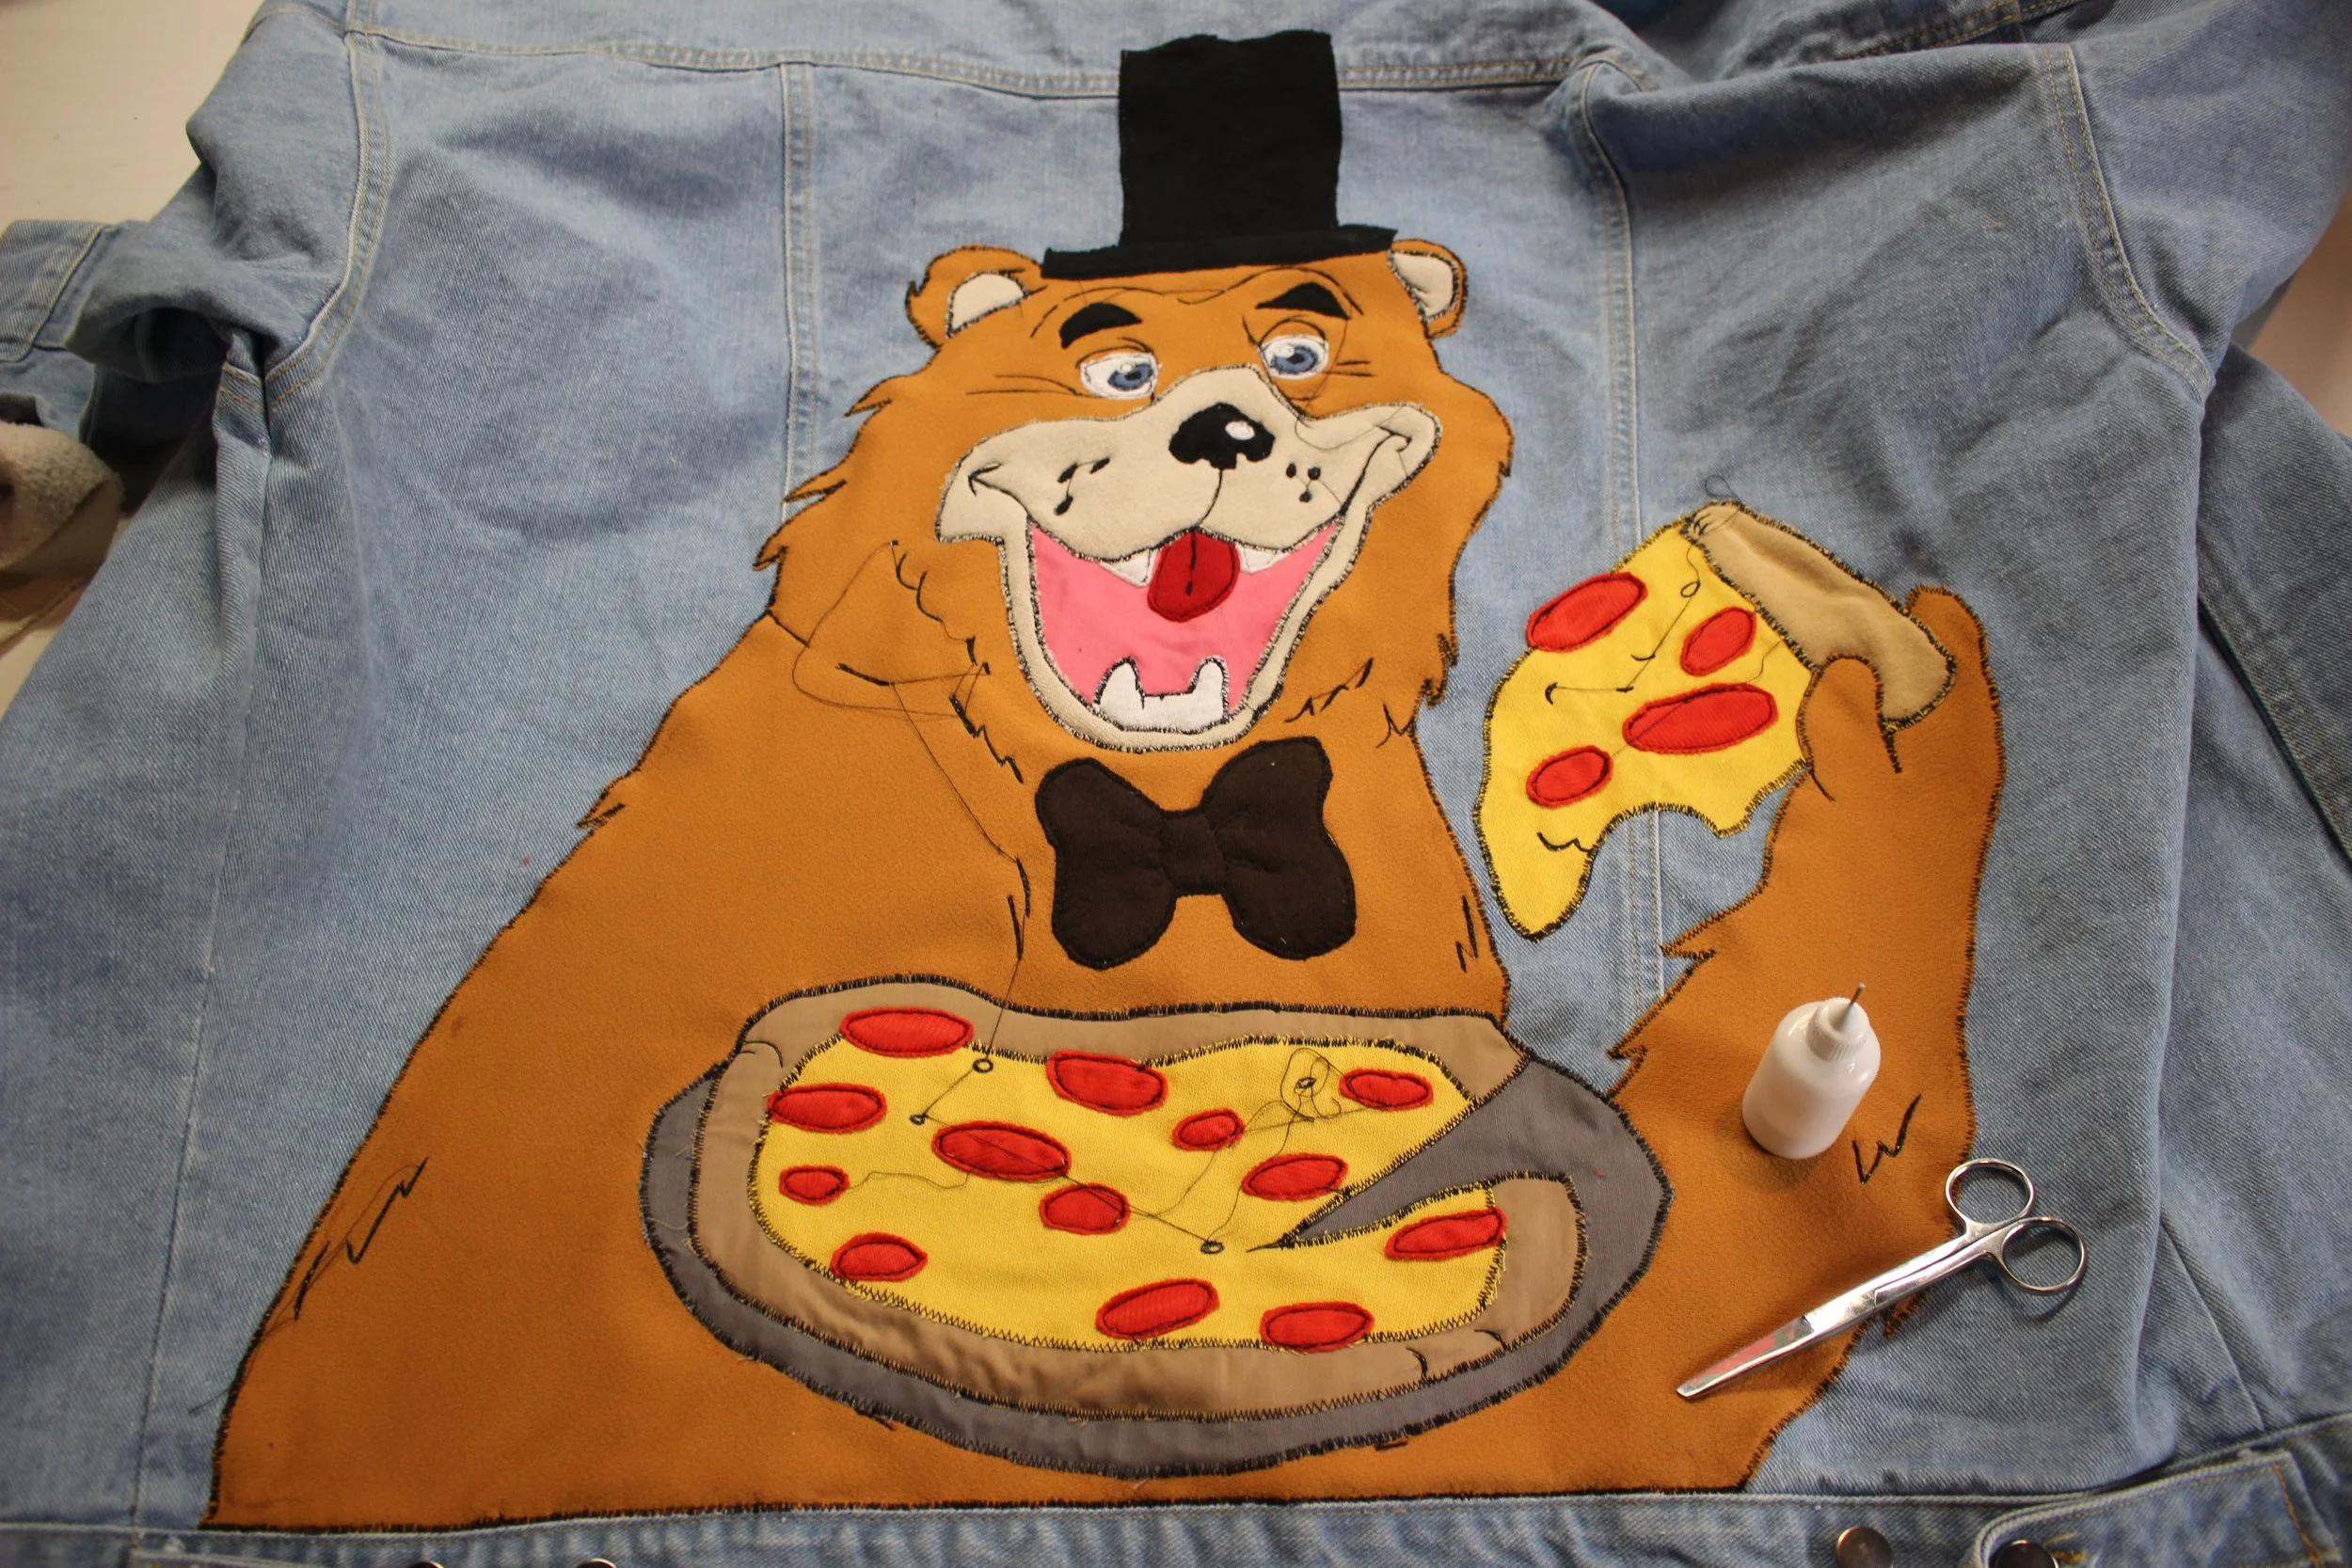
—I freehand 95% of my pieces. Sometimes I trace logos and detailed images onto fabric. (See Fredbears Family Diner image above)
—I have seen people make templates with paper, but I don’t really like doing this.
“Is it possible to make an applique that is too thick?”
—Most certainly! Especially if youre utilyzing already thick fabrics or garments. Try to limit layers and uneccesary bulk. Try using thin fabrics especially on detailed oritented shapes.
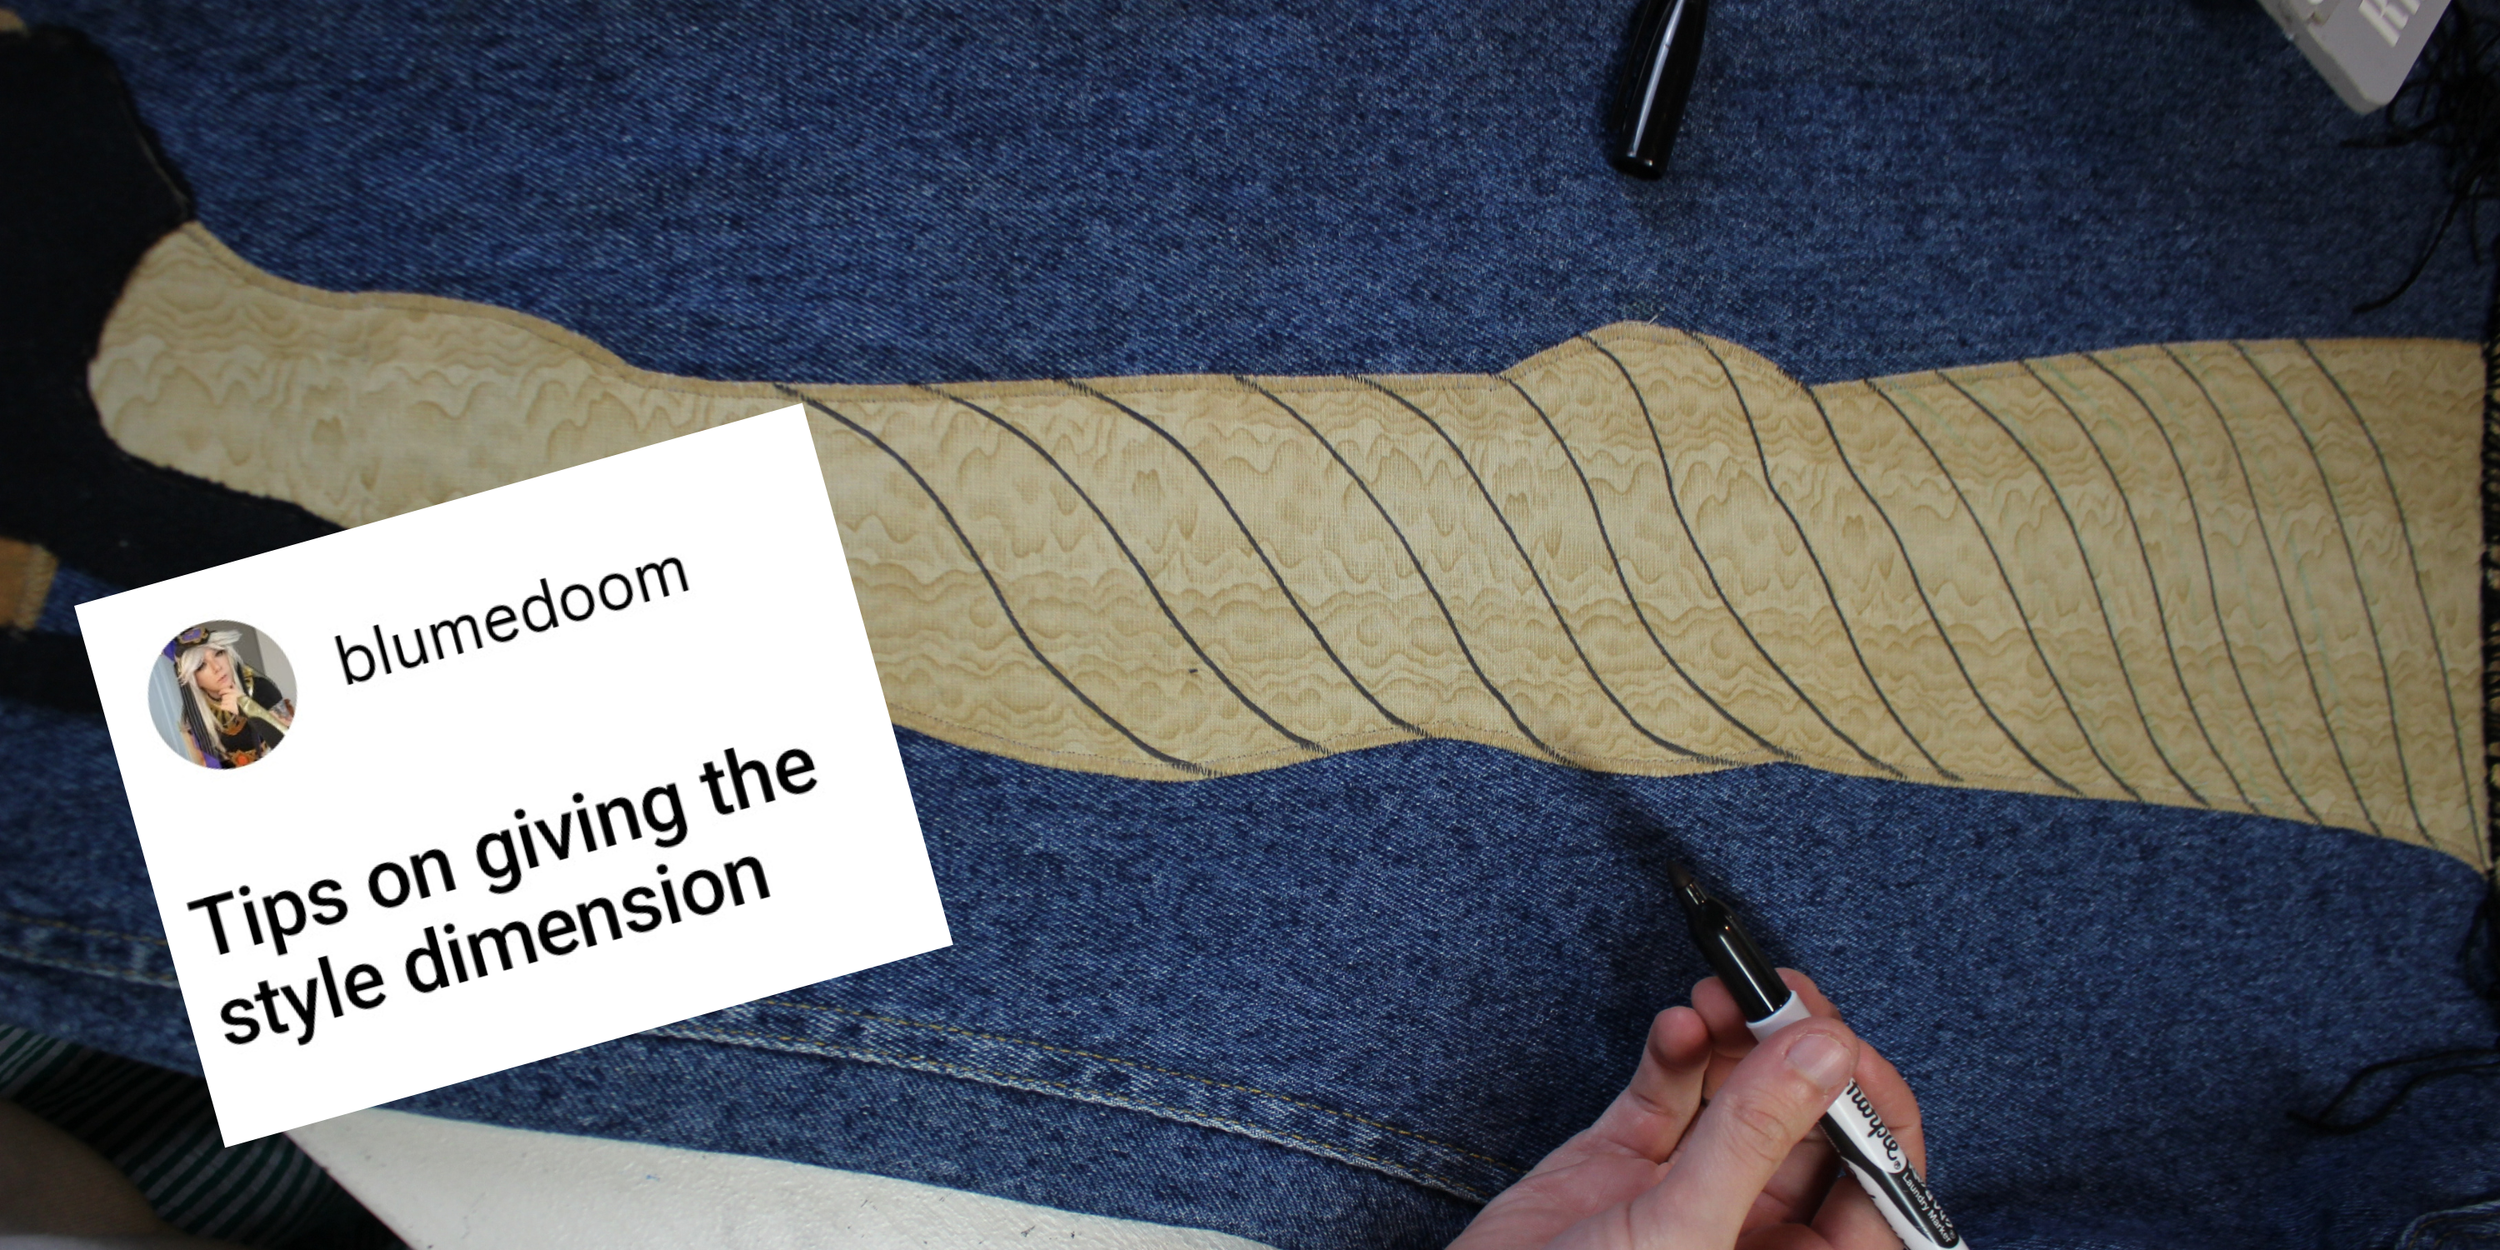
Giving Dimension
Utilize embroidery to create definition, shape, highlights, and contour!
For example on these fish tights, The lines aren’t perfectly straight. They curve around the leg.
When utilizing fabric, the more you add, the more defined it will look. Instead of a red apple, add a highlight or contour lines.
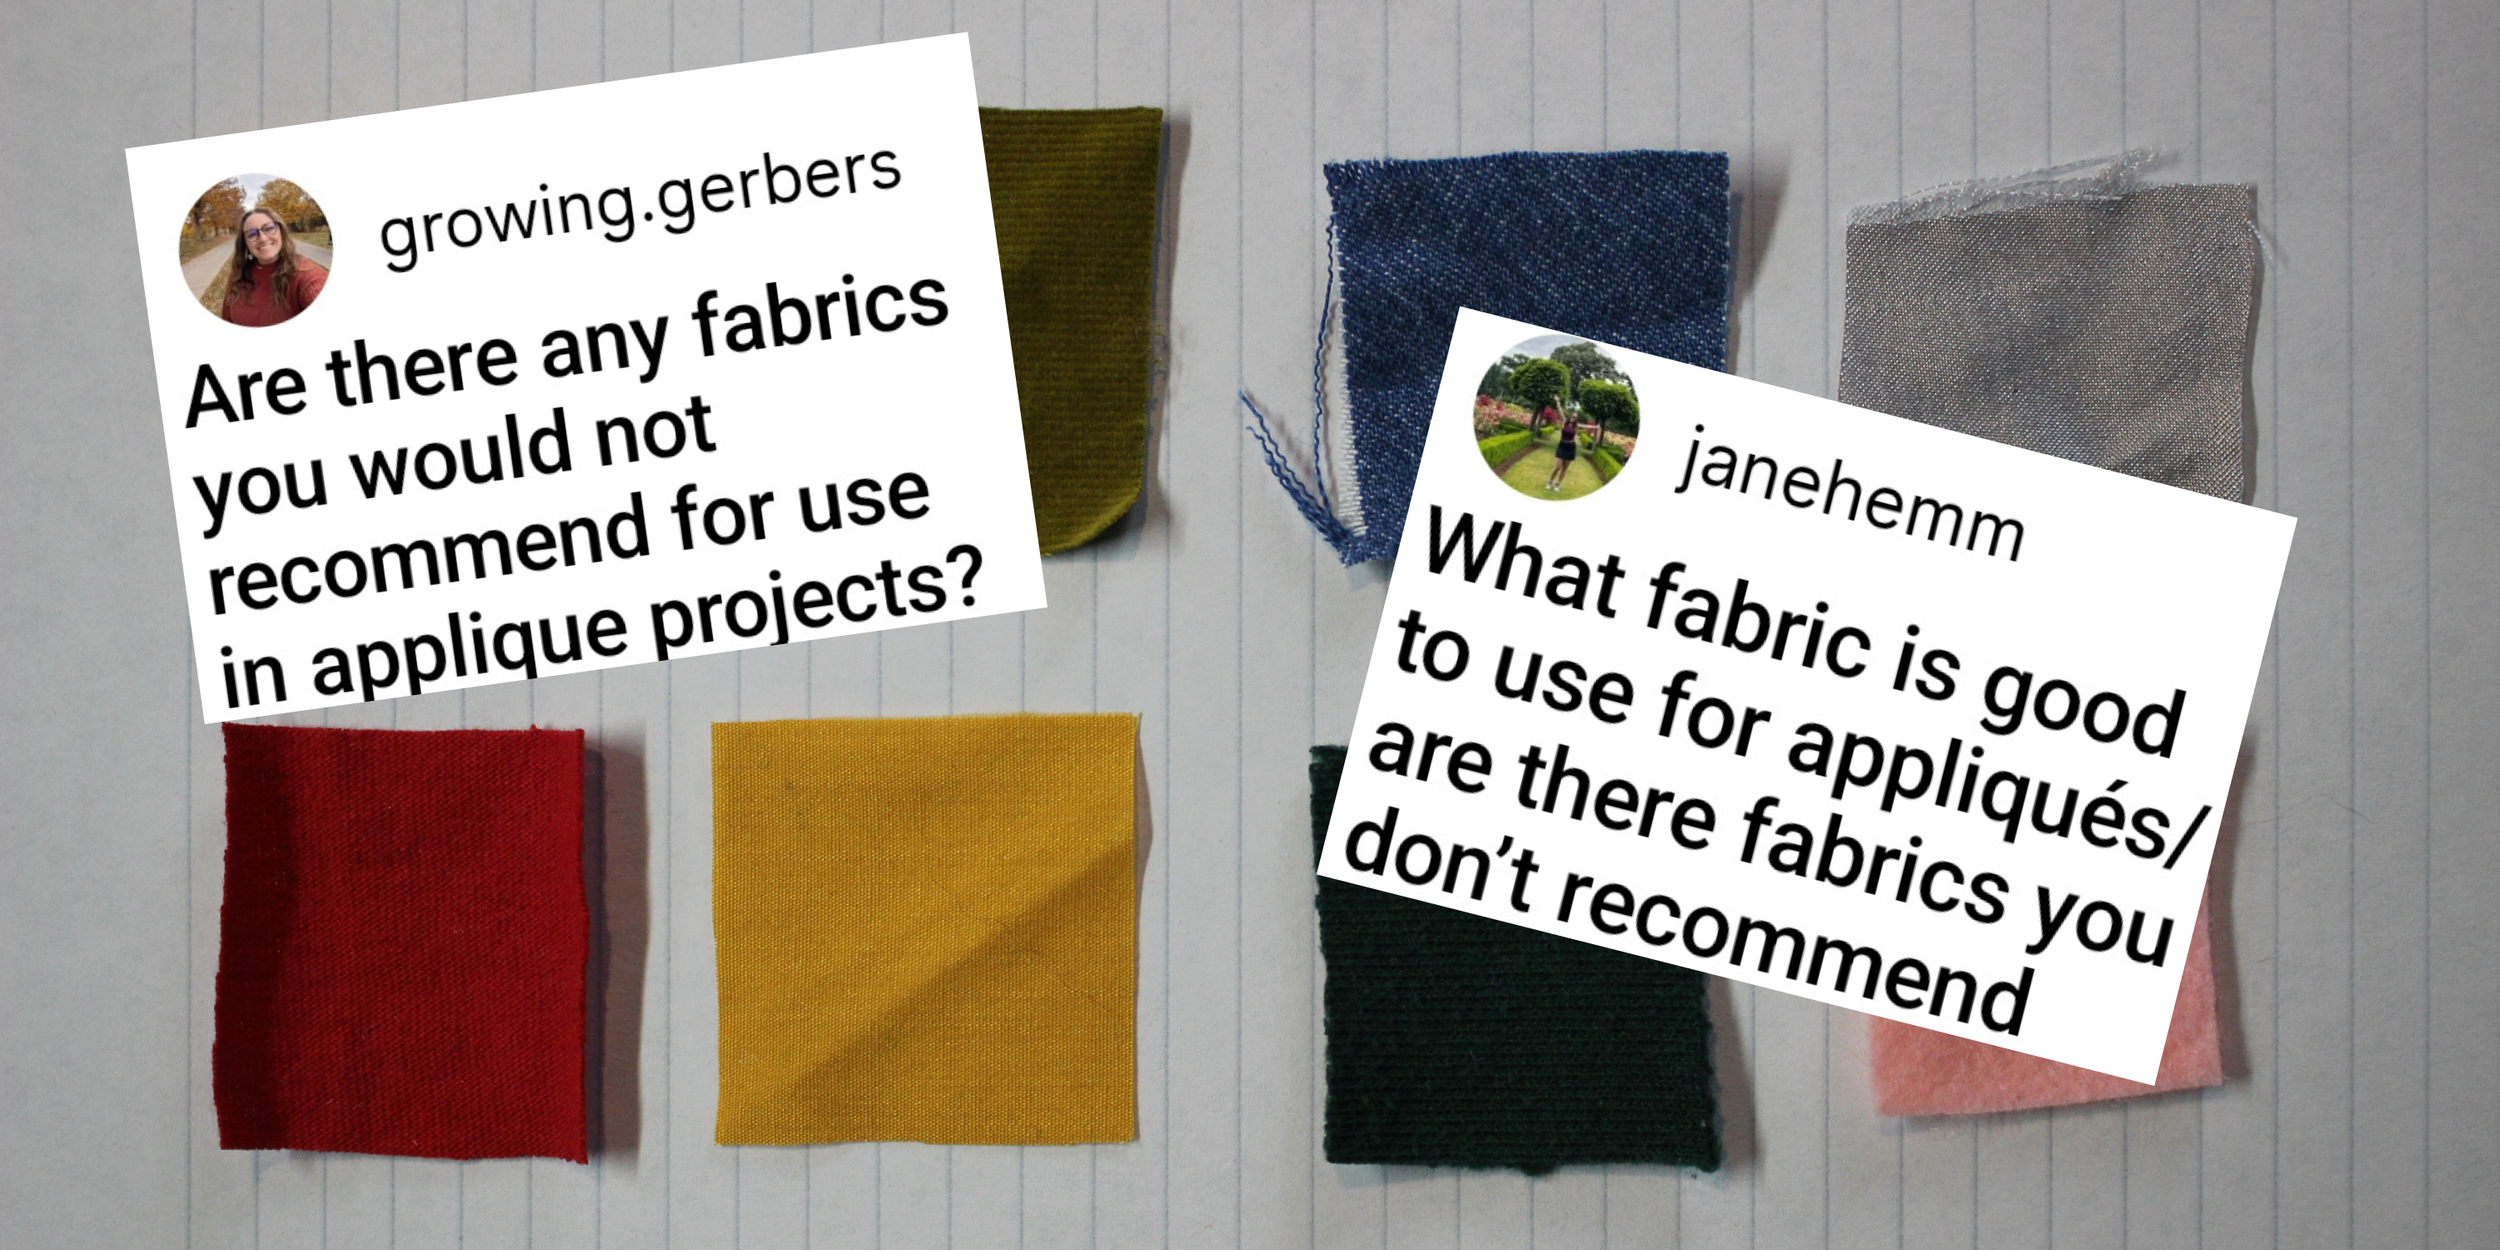
“Fabrics you don’t recommend?”
Most of the time, fabrics can be used with certain interfacing or stabilizers.
I don’t recommend satins, anything super thin or stretchy… unless you use double-sided iron on.
I don’t recommend tapestry blanket fabrics, or crotchet/knit unless…. you are using it for large simple sections and ensuring you properly secure all the edges.
Silk, and organza can sometimes be too thin or fragile for applique. They require softer tipped needles to prevent pulled threads.
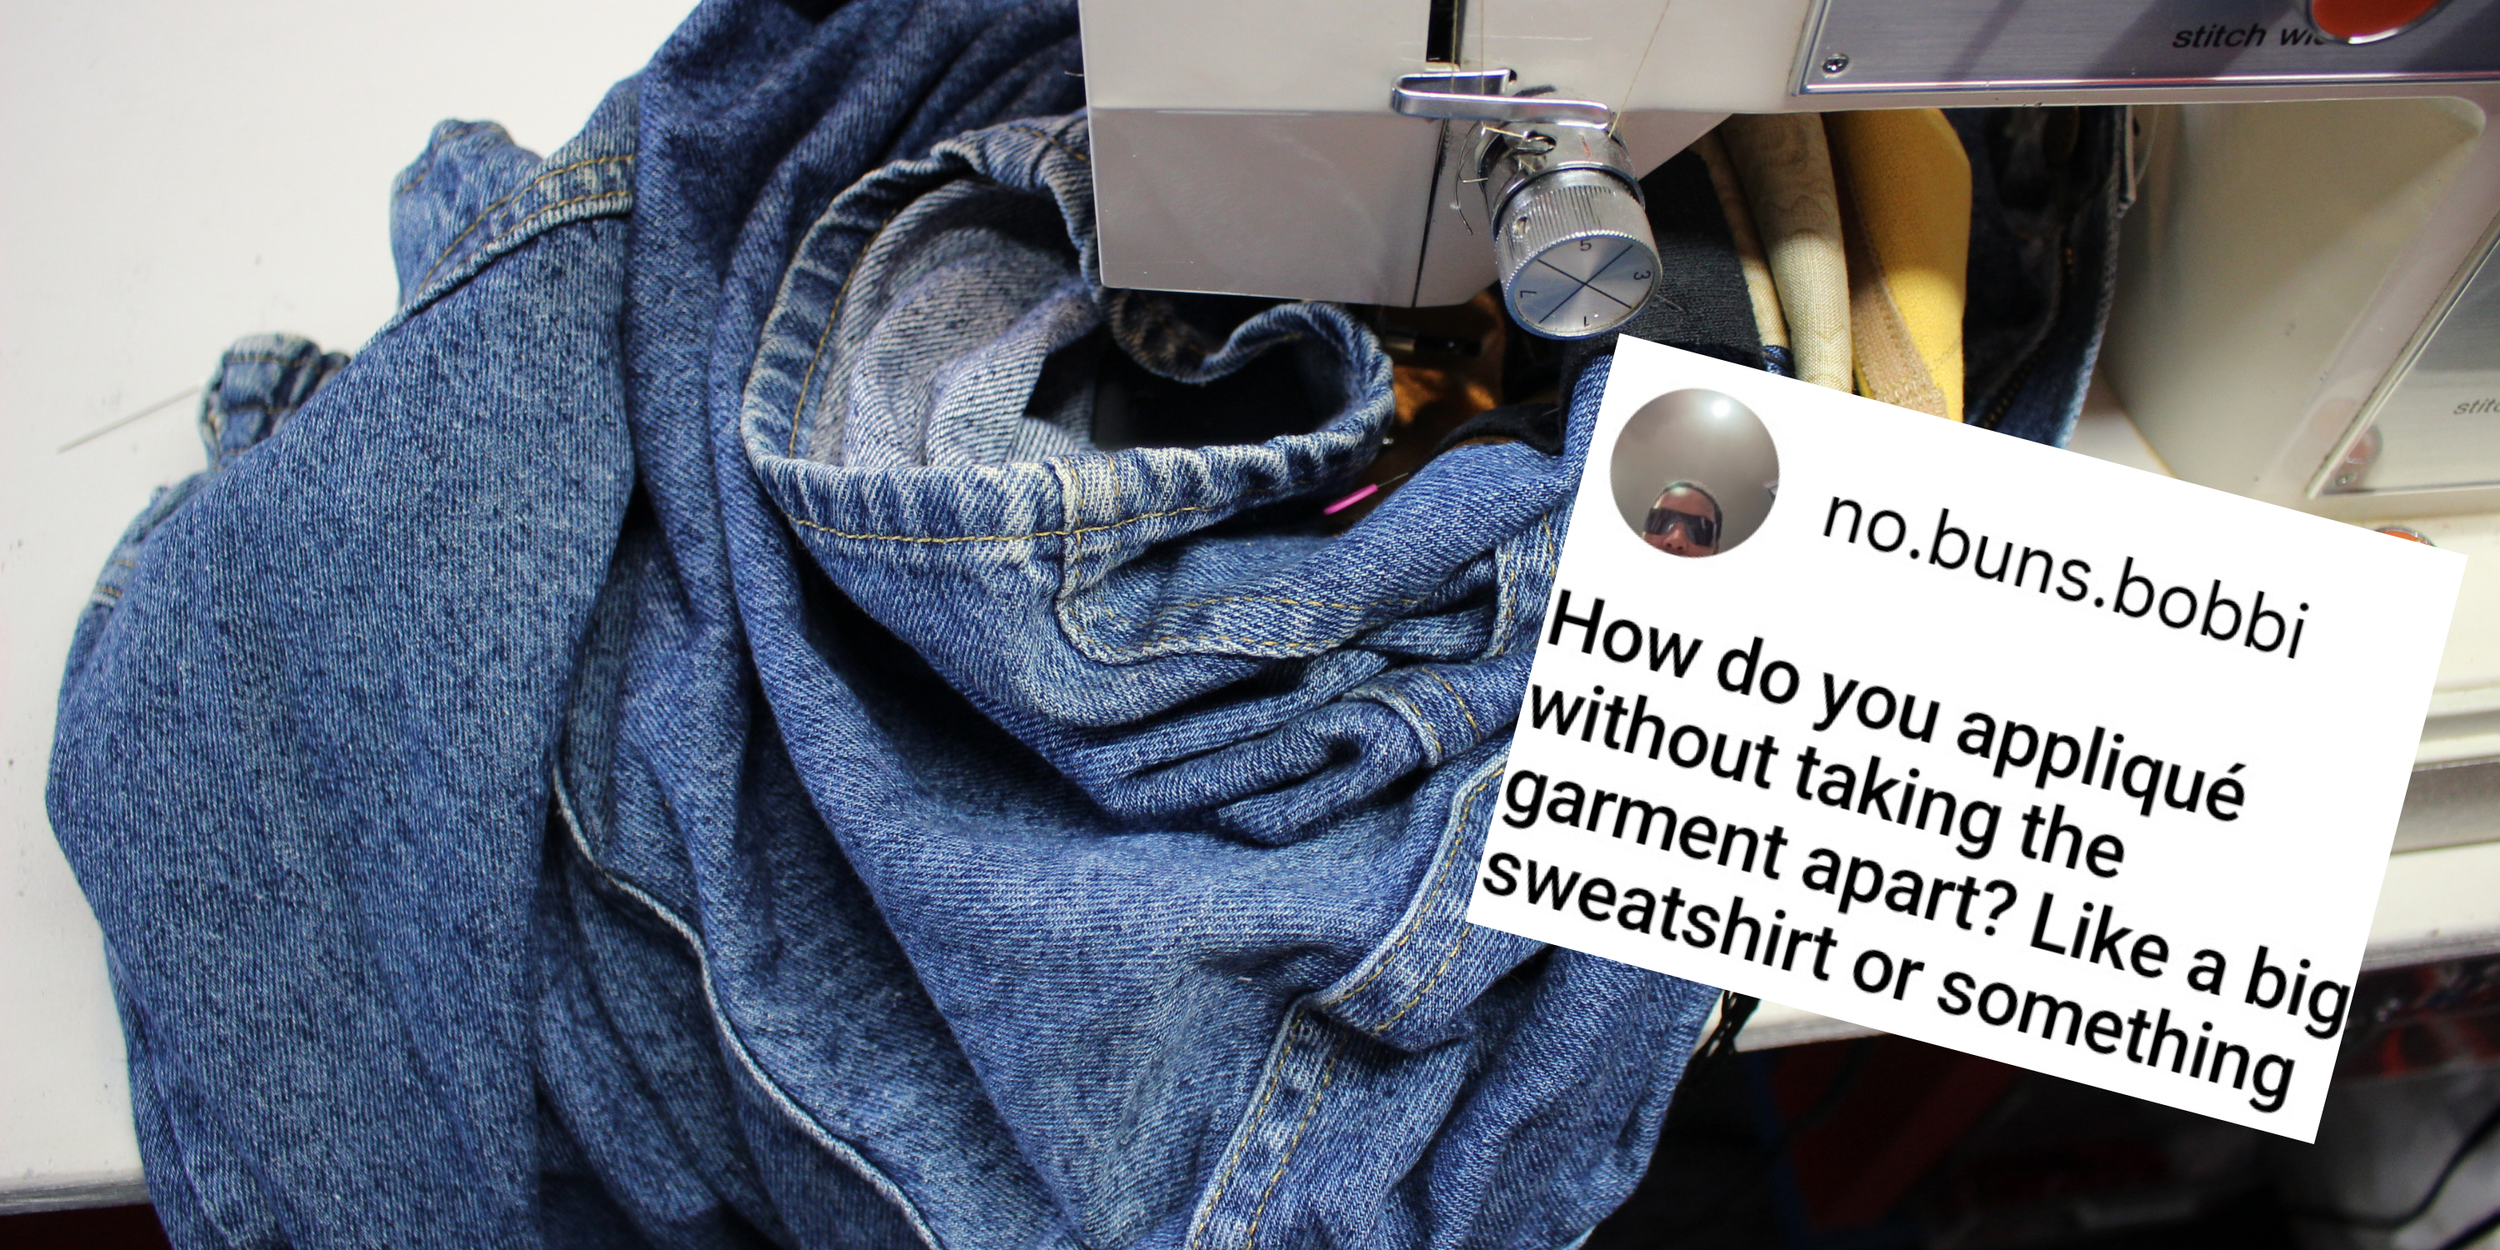
How to sew garments with a front and back
You have to maneuver the garment, so that only the front of the fabric is under the needle at all times.
This sometimes results in scrunching up the legs of pants or sleeves of shirts. It’s a long slow process.
Some people prefer to seam-rip garments, but I don’t do that personally. (Unless I HAVE to)
Troubleshooting
Some problems I’ve experienced… and some possible answers.
Skipped stitches:
-Needle is too thin.
-Fabric is too thick.
-Presser foot isn’t pressing down enough.
-You need stabilizer.
-Too many layers of iron-on.
-Needle is dull.
-Too much glue, or sewing with un-dried glue.
-Needle is off-brand
Broken Needle:
-Needle is too thin.
-Tension is too high/upper thread is getting stuck.
-Fabric is too thick.
-You are moving the fabric too forefully.
-Needle is off-brand
Birds Nests:
-Re-thread the top and bottom thread.
-Tension is too loose
-Bobbin inserted incorrectly.
-Foot isn’t lowered.
-Need stabilizer.
-Too many layers of iron-on.
-Uneven thread thickness (Top or bottom is thinner/thicker)
-Too much glue, or sewing with un-dried glue.
Top thread breaking:
-Thread too thin.
-Needle too thin.
-Fabric too thick.
-Tension too high.
-Bobbin case area has scratches/gashes.
-Dry rot thread (aka old)
-Too much glue, or sewing with un-dried glue.
-Tension is too high/upper thread is getting stuck.
I wish you luck! -xoxo Brit
If you have questions, or comments, don’t hesitate to reach out!
Thank you truly for all your support!