
How to Free Motion Embroider!
A beginner friendly guide to embroidering details and words with a regular sewing machine :)
“Please let me know if anything needs clarification! I am not an expert my any means, but these are my favorite tips and techniques!
Good luck.” -Brittany
Updated: 3/25/2026
You’ll Need
-Sewing machine
-Free motion presser foot
-Stabilizer
-Different colors of thread (I use regular sewing thread)
-Fabric glue
-Fabric marker (I recommend permanent, but you’re welcome to try temporary.)
-Embroidery hoop
-Scissors (smaller embroidery scissors are also helpful)
-Pins
-Iron (parchment paper to cover delicate fabrics)
-Fabric and fabric scraps.

Recommended Tools
Regular Sewing Machine
Most regular sewing machines are capable. As long as the feed dogs can be lowered, or covered, or the stitch length can be set to 0. I also recommend using a machine that can do a zigzag stitch!
Vintage or cheaper/mini machines are a little tricker. Check your machine!
I currently use a 70s Montgomery Ward Machine for “Detailed Embroidery” and the Singer HD’s for “Word Embroidery” and attaching the patches to the garments.
Don’t feel the need to spend incredulous amounts of money on a machine! My favorite one to use was 20 bucks at the thrift store.
Free Motion Presser Foot

Free Motion Presser Foot
Sometimes referred to as a “Darning Foot” or “Quilting Foot”. (But other times those refer to a different foot entirely.)
*They allow you to sew in any direction, which is vital for free motion!
I typically use the LEFT foot for my sewing. I also own the SECOND one, and have seen others use it. I like the smaller foot better.
”Do I even need a foot?”
You might be thinking, “Why do I need a foot at all, can’t I just free motion sew with no feet?” Short answer, no.
The free motion foot presses down on the fabric to allow it to stay still, and not pull up when the needle leaves the fabric. Then it lifts up completely when the needle is up, to move in any direction.
It also gives you a visual guide as to where the needle will hit down, saving your fingers from getting stabbed.
Most modern/regular machines would need a “low shank” foot, versus industrial machines need a “high shank” foot.
Low Shank Machines: AKA your standard home machine. Ideal for lightweight fabrics such as cotton and linens. They are widely used for home sewing projects and are generally more affordable.
High Shank Machines: AKA the industrial ones. Better suited for thicker fabrics like denim and canvas, making them perfect for quilting and heavy-duty projects. They are typically more expensive and found in higher-end models.
I have been able to interchange my current free-motion foot on every single one of my Low-Shank machines. (Singer HD, 70s Montgomery Ward, Brother, and Husqvarna.)
Putting the Foot On
Unscrew and remove the original foot.
Put the foot on, making sure the metal horizontal bar (red) is underneath the perpendicular metal bar on the foot (green).

Image: Free-Motion Foot put on Machine.
Stabilizer (and interfacing)
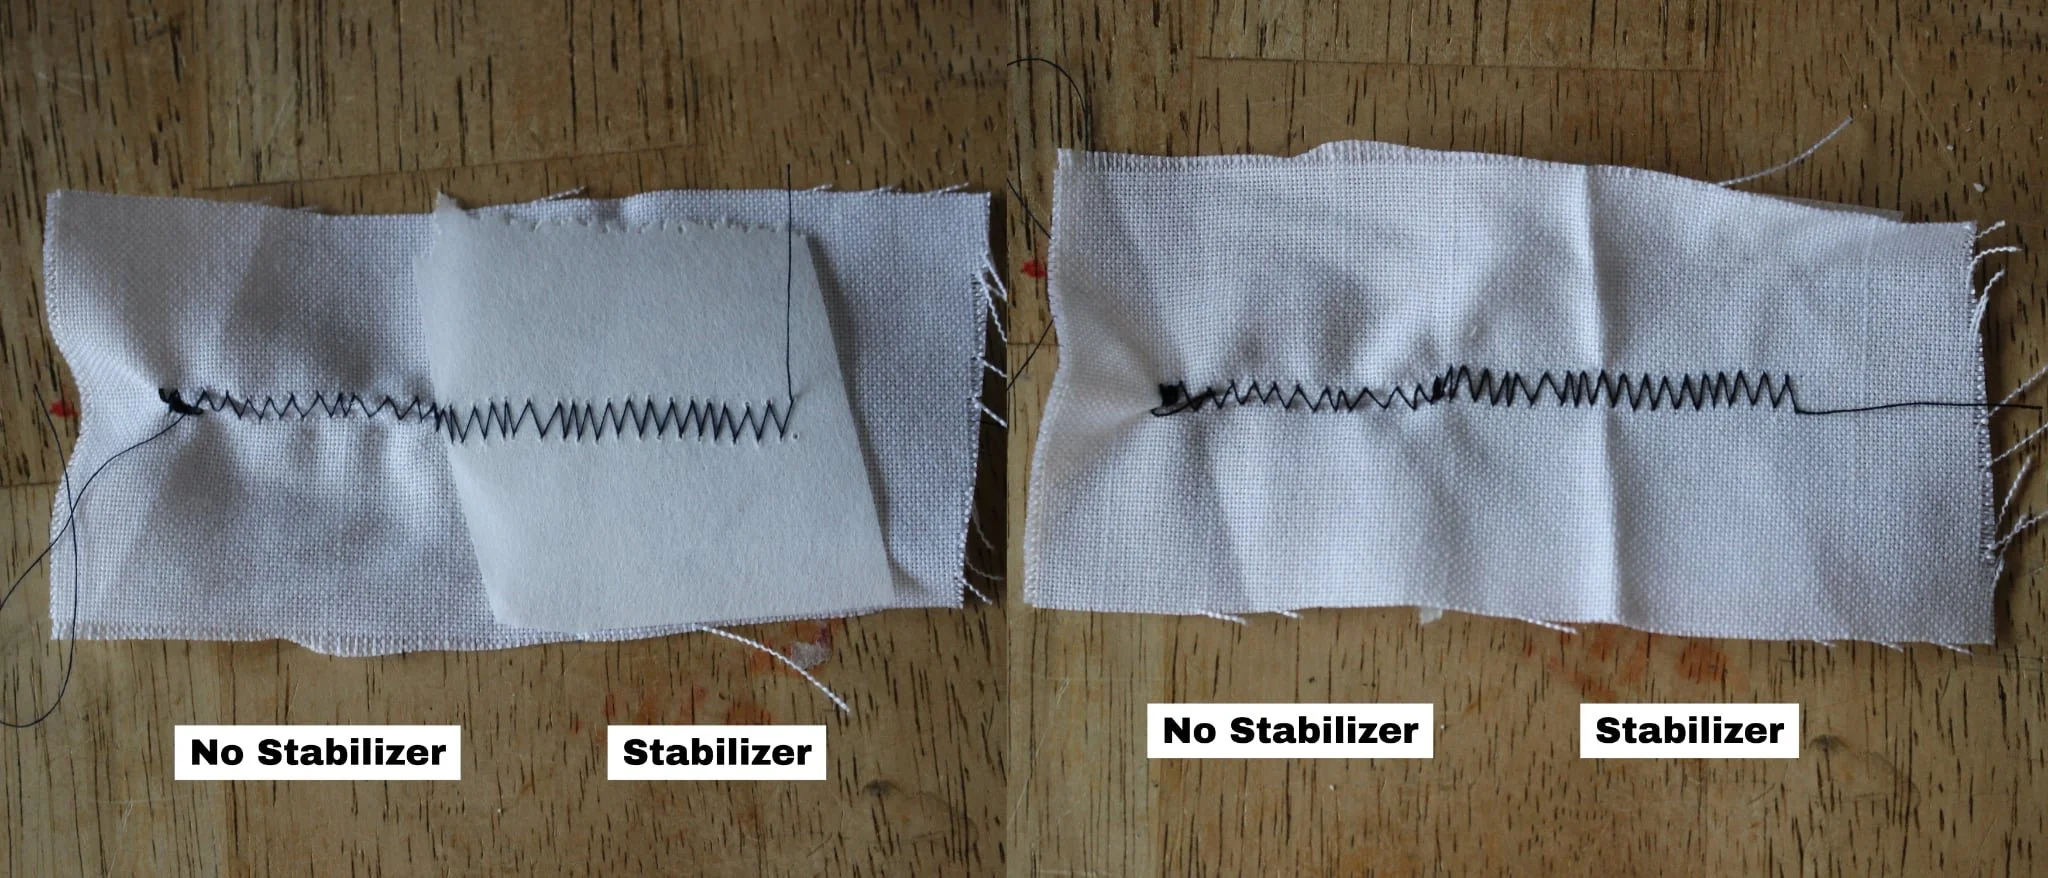
Image: medium weight stabilizer used on cotton tablecloth fabric.
Trust me. This is your best friend.
Stabilizer and Interfacing are materials used to provide extra support to fabric while sewing.They prevent shifting, stretching, or puckering.
There are many different types… each with pro’s, and con’s.
Stabilizer: is referred to the temporary support, that is removed after sewing.
Interfacing: is referred to the permanent support, kept in place.
I use both of these, and honestly I keep referring to them both as stabilizer, so appologies.
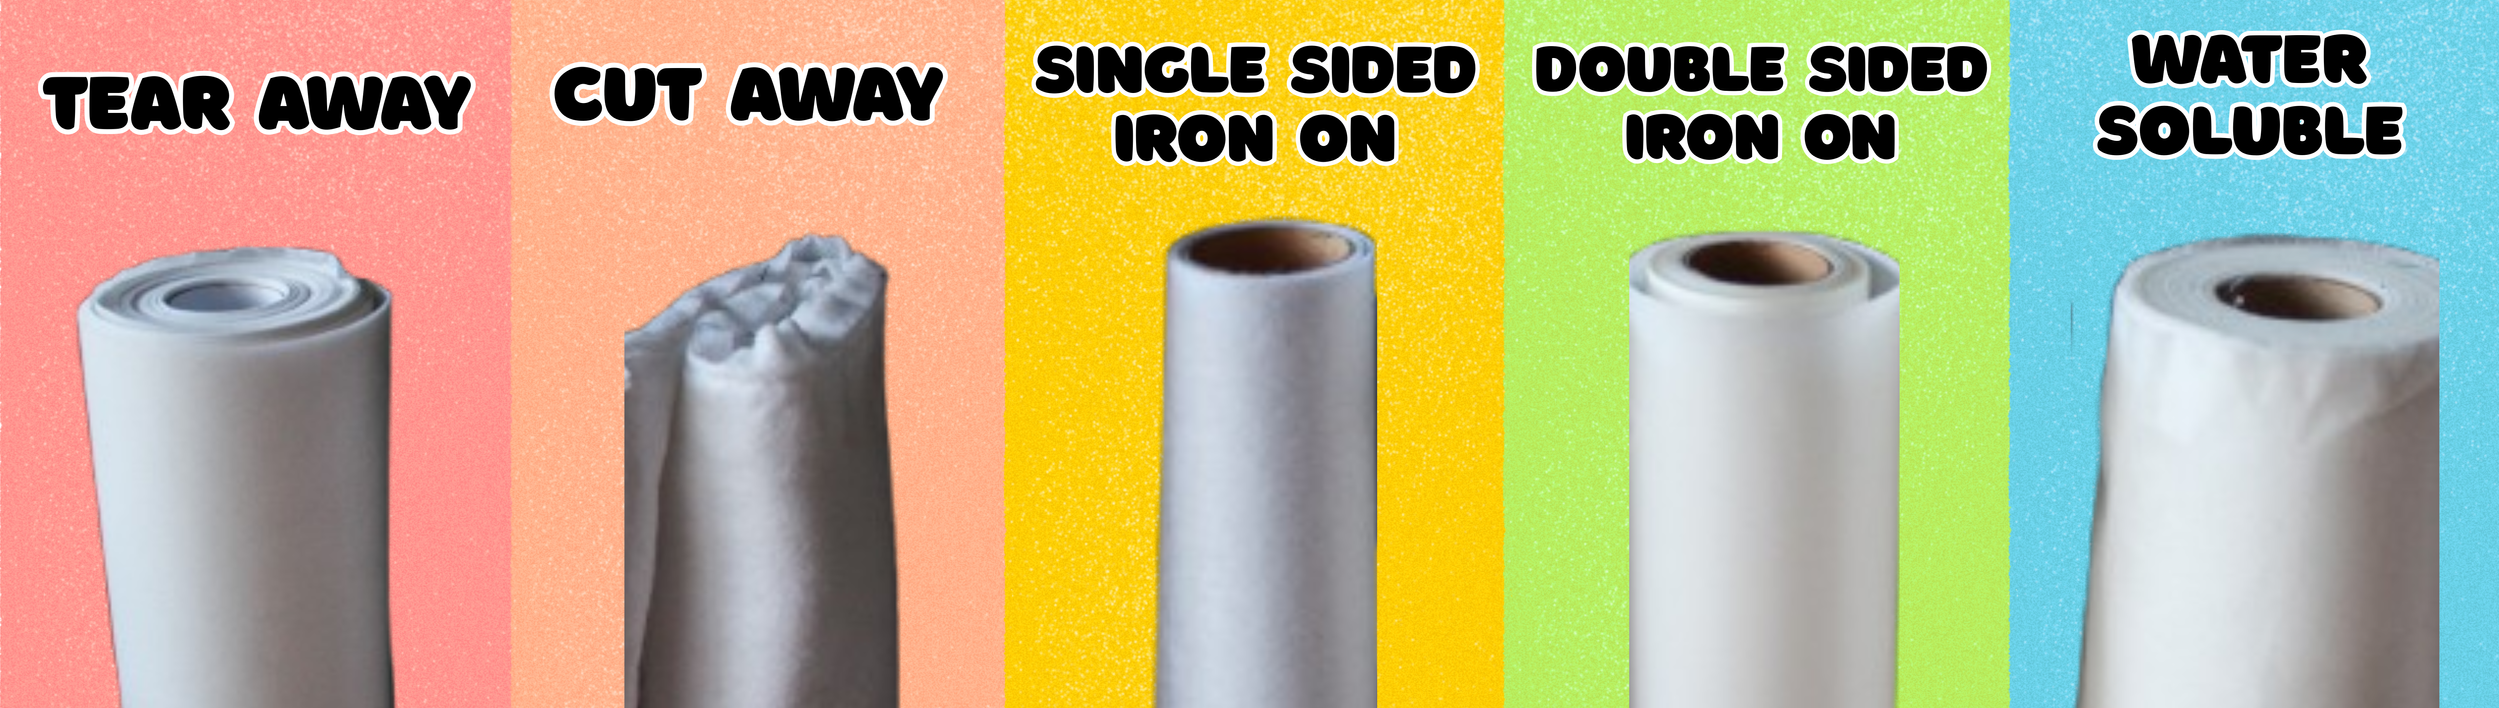
Tear Away - Cut Away - Single Sided Iron-on - Double Sided Iron-on - Water Soluble
Tear Away: This is one of my favorites. I prefer medium-weight.
-Best for building detailed patches and appliques onto.
Cons:
-It should remain hidden and not used underneath garments where it would be visible.
-Requires a lot of sewing around the edges before tearing it off, in order to “score” and make it easy to tear.
-Makes a “crinkling” paper sound so I recommend not leaving large open portions underneath the patch.
Cut Away: Woven style, typically cotton.
-Stays on the garment after sewing. Can be washed.
-Typically used on heavy weight fabrics, and embroidering onto garments like sweatshirts, caps, and denim.
Cons: Not easily removable
Single Sided Iron-on: Can be woven, or non woven. Woven= washable/sturdier, Unwoven= easily rip-able
-Provides additional support for fabrics, to prevent stretch or stiffen thin fabrics.
-Prevent fraying on thinner fabrics
Cons:
-Doesn’t attach well to fleece/fluffier fabrics.
-Typically has “dots” of adhesive versus entire coverage
- May gum up your machine, keep it clean!
Double Sided Iron-on: Adhesive on both sides. Comes in different “weights”
-Secures fabric in place without need for pins or glue
-Best for small and detailed shaped pieces. (like letters)
-Prevents fraying on a lot of fabrics
- May gum up your machine and needles. Keep it clean!
Cons:
-Not recommended for fleece or delicate meltable fabric
-Can get a little gluey for the needle to go through, so don’t use too many layers
-Has an additional sheet to cover one of the adhesive sides, that is eventually thrown away (aka more waste)
Water Soluble: Disintegrates with water.
-Best for thinner delicate fabrics.
-Easily removes when washing.
Cons: Thinner, so it tends to only provide support with thinner fabrics.

Image: Different Stabilizers and Interfacing
Detailed Embroidery
Detailed Embroidery means using thread to create additional details. Usually on top of appliques.
See the below image: The Grinch, starting with basic cutout fabric scraps. Layered with multiple colors of thread until complete. Then I added the additional hat details when sewing it to the garment.
Please note: I prefer to use my 70s machine for this type of detailing, cause it can get bulky and rough on the motor, if you sew like I do.

Image: Step by step detailed embroidery of The Grinch
Applique/Fabric Cutout
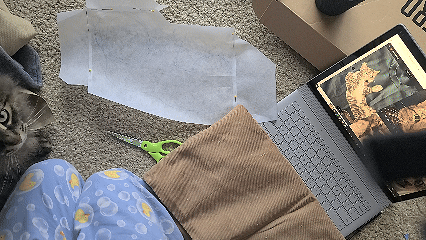
Using medium weight tear away stabilizer, cut and arrange your basic fabric colors and shapes on top. Apply a very small amount of glue to keep them in place. Try not to overlap too much fabric to reduce bulk. (If you have 3 or more fabric layers on top of each other, try to cut away to bottom most pieces you can’t see.)
Video: Creating the “base” of the embroidery patch.
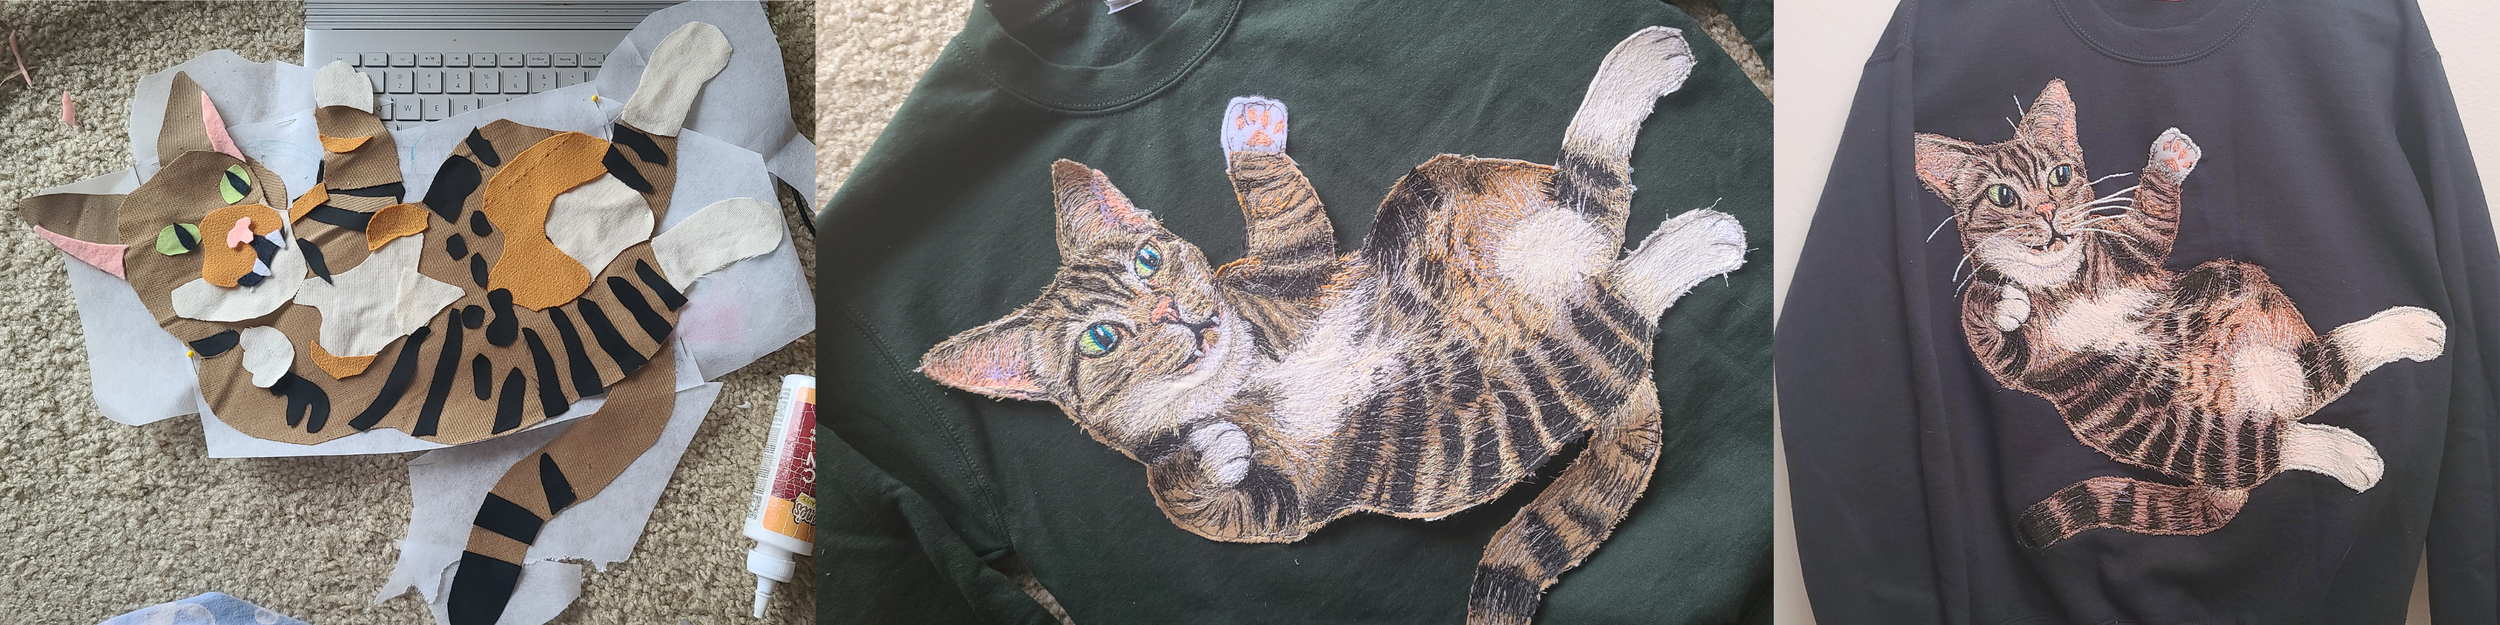
Image: Applique - Embroidery - Attached to Garment
Gather your thread colors. I recommend at least a middle tone, shadow, highlight, black, and white. The more the better.
-In the Grinch example, I used Light Green, Yellow, Bright Green, Dark Green, Black, White, and Pink.
-In the above Cat example, I used medium brown, light brown, dark grey, cream, light grey, white, black, pink, green, blue, and purple.
Once the glue is dry, I like to start with the middle color. In my case I used a bright green to sew down the edges of the fabric pieces, and locate the general shapes like the wrinkles, hair and eyes. Go back and forth multiple times with a straight stitch for more defined edges and lots of detail.
Tip: Think of the thread and needle, like a colored pencil that you can’t lift from the page.
Use black and white sparingly to really make them pop. Like in the pupils or highlights of the eyes!
Tip: Focus on what you SEE not what you think you see. Try zooming in and cropping on each area so you aren’t overwhelmed with the entire image.
Focus on re-creating the shapes that each color creates. Trust the process!

Reference Image and Colors pulled from the image.
Once you’ve embroidered to your heart’s content, flip over the patch and locate any large areas of unused stabilizer. Gently cut them out. This helps reduce bulk and the “paper noise” it makes when sewn to the garment. You might not have unused areas of stabilizer if you sewed over the whole thing.
You can leave the stabilizer on the outside until you sew it to the garment, and then tear if off.
-Or tear it off before. Though the edges may not be as secured so you risk pulling the threads and fraying the fabric.
When sewing it to the garment, I like to start at an edge and work my way to the center of the patch. Then web outwards. Instead of starting at the edge and going around the outside only. This risks the fabric shifting and not staying even by the time you get to the other side.
Keep in mind, practice makes perfect! And the more detail and thread you add, the better the image will look!
Keep the direction of the needle the same as the details in the image. For example, the fur around animals eyes tend to point outwards rather than all down. Follow the motion, the direction, you see. Not what you assume will be there.

Image: examples of detailed embroidery.
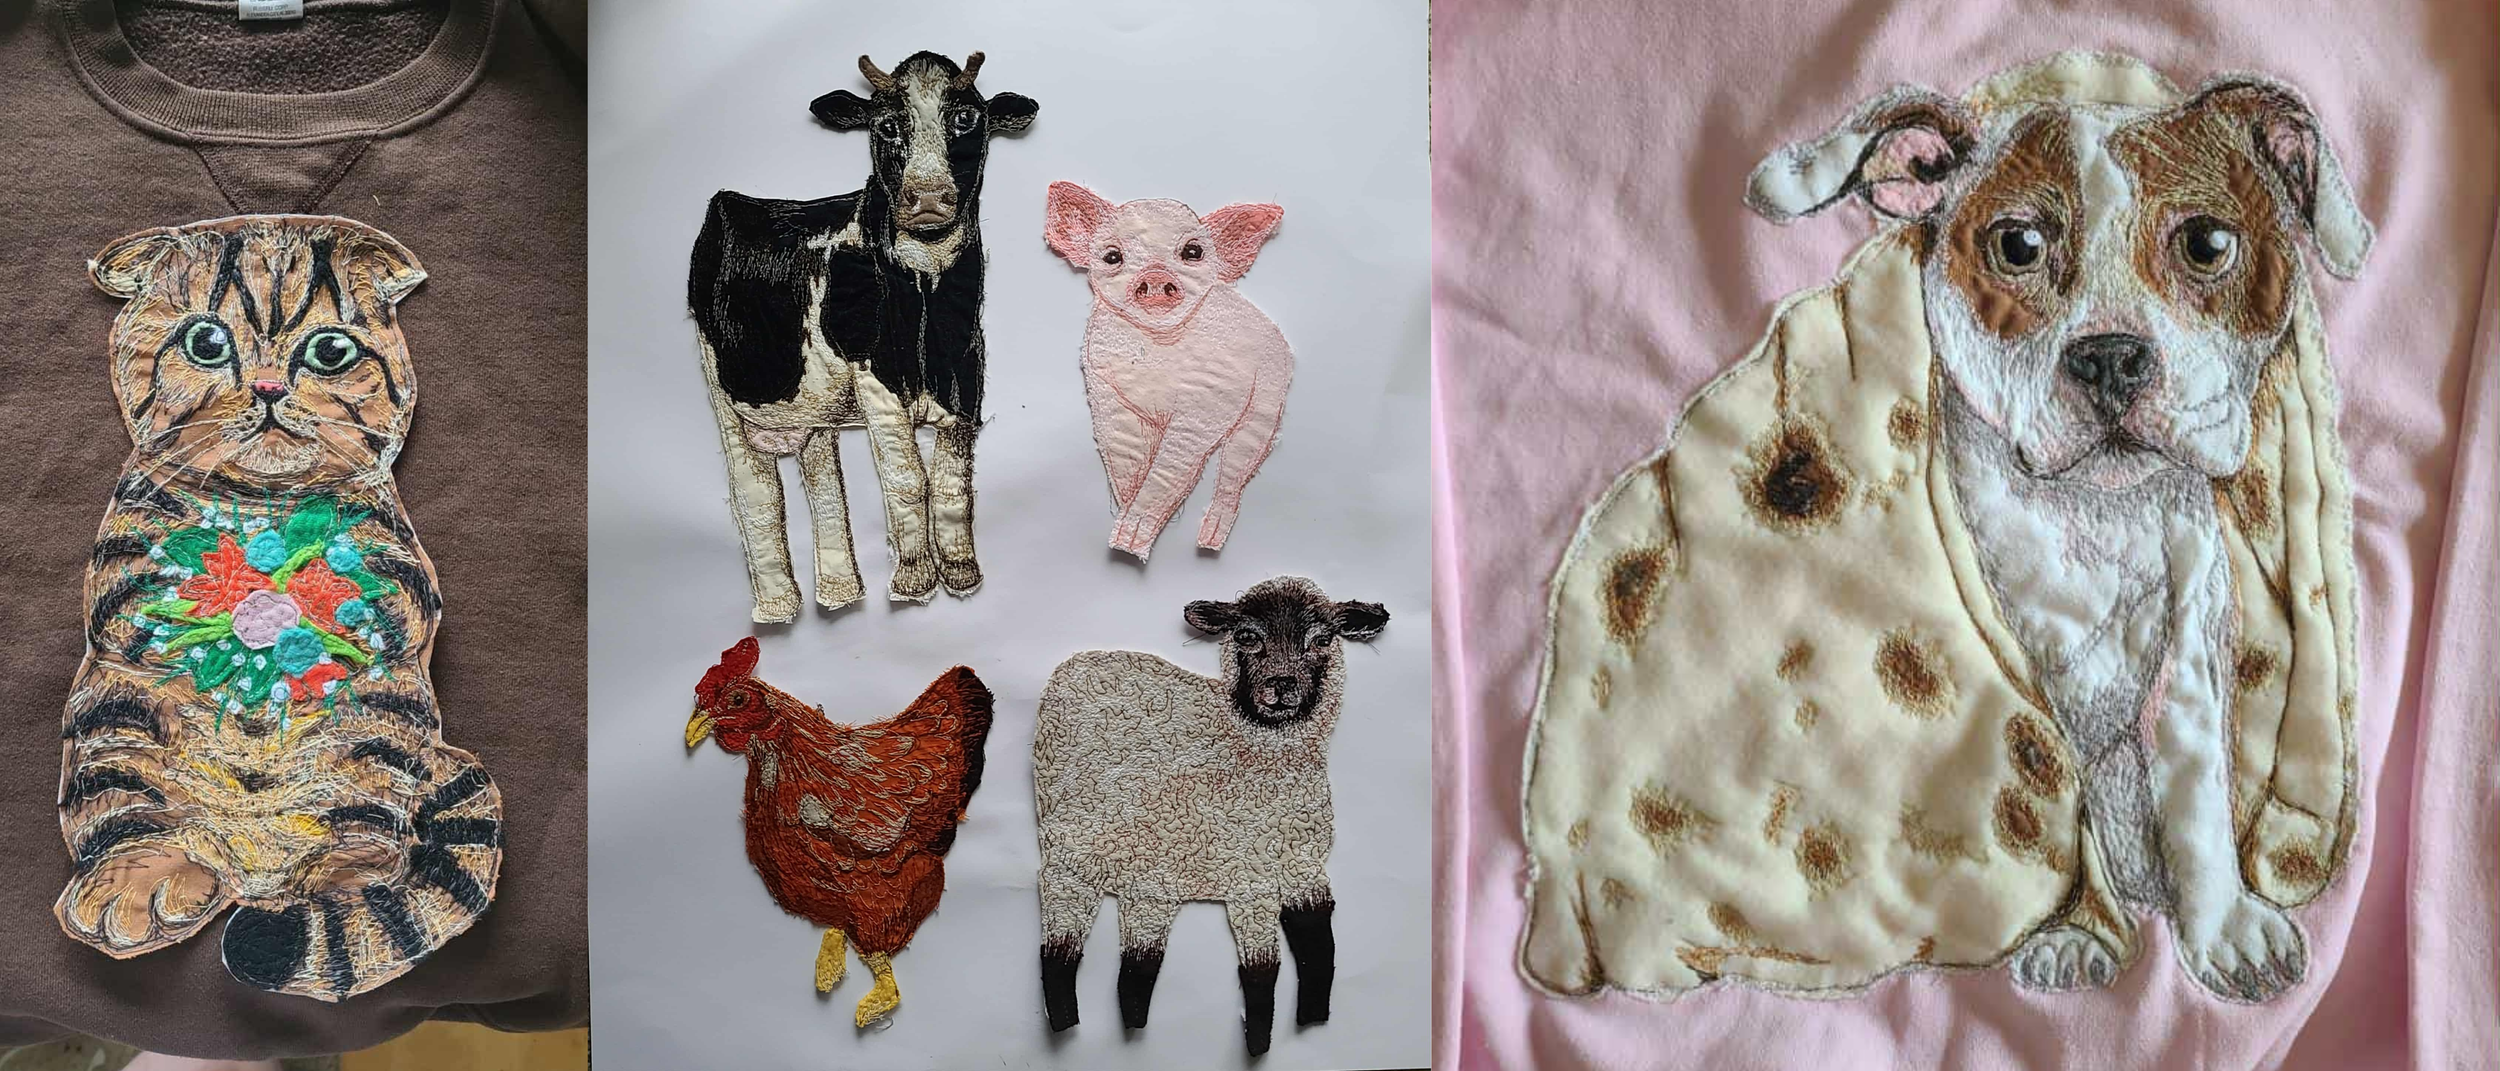
Image: examples of detailed embroidery.
Embroidering Words
There are many techniques and stabilizers depending on the situation.
Embroidering words onto separate patches is always easier than directly onto garments.
*Embroidering words is best for small letters. For thicker/larger ones, try applique instead.
I recommend using a sewing machine that is capable of a zigzag stitch.
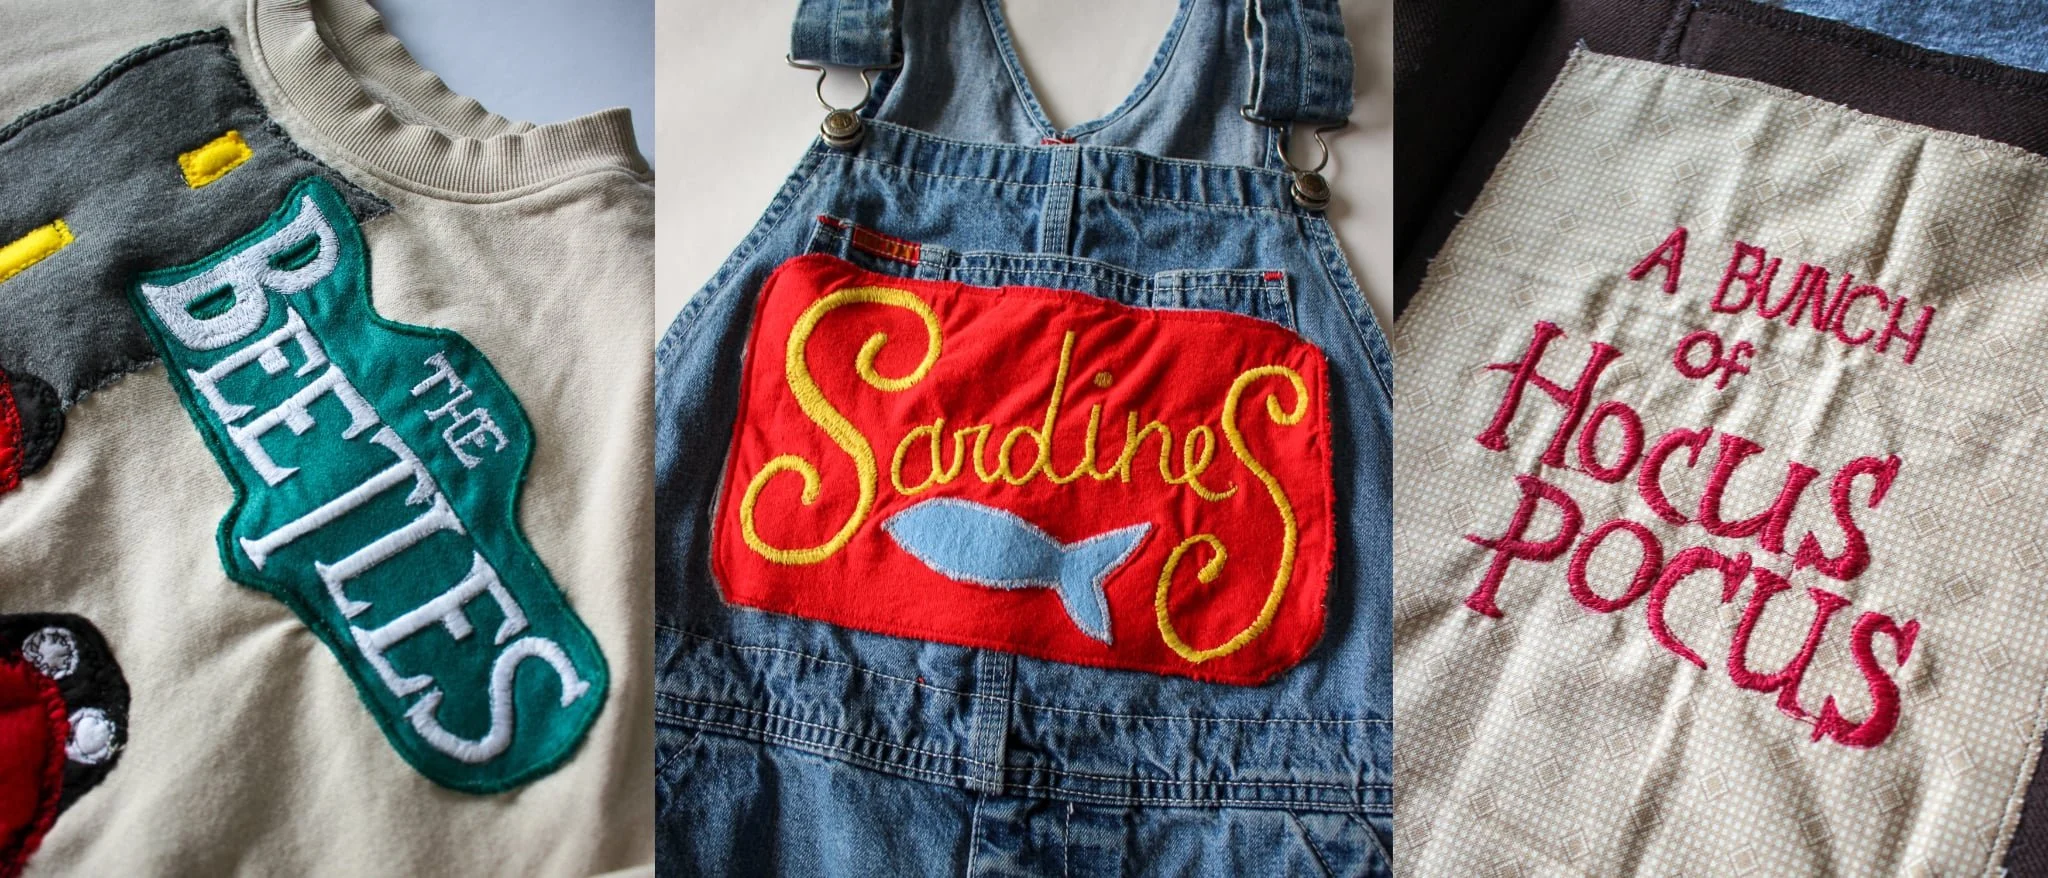
Image: Embroidered Words Examples
To embroider words on a “patch”
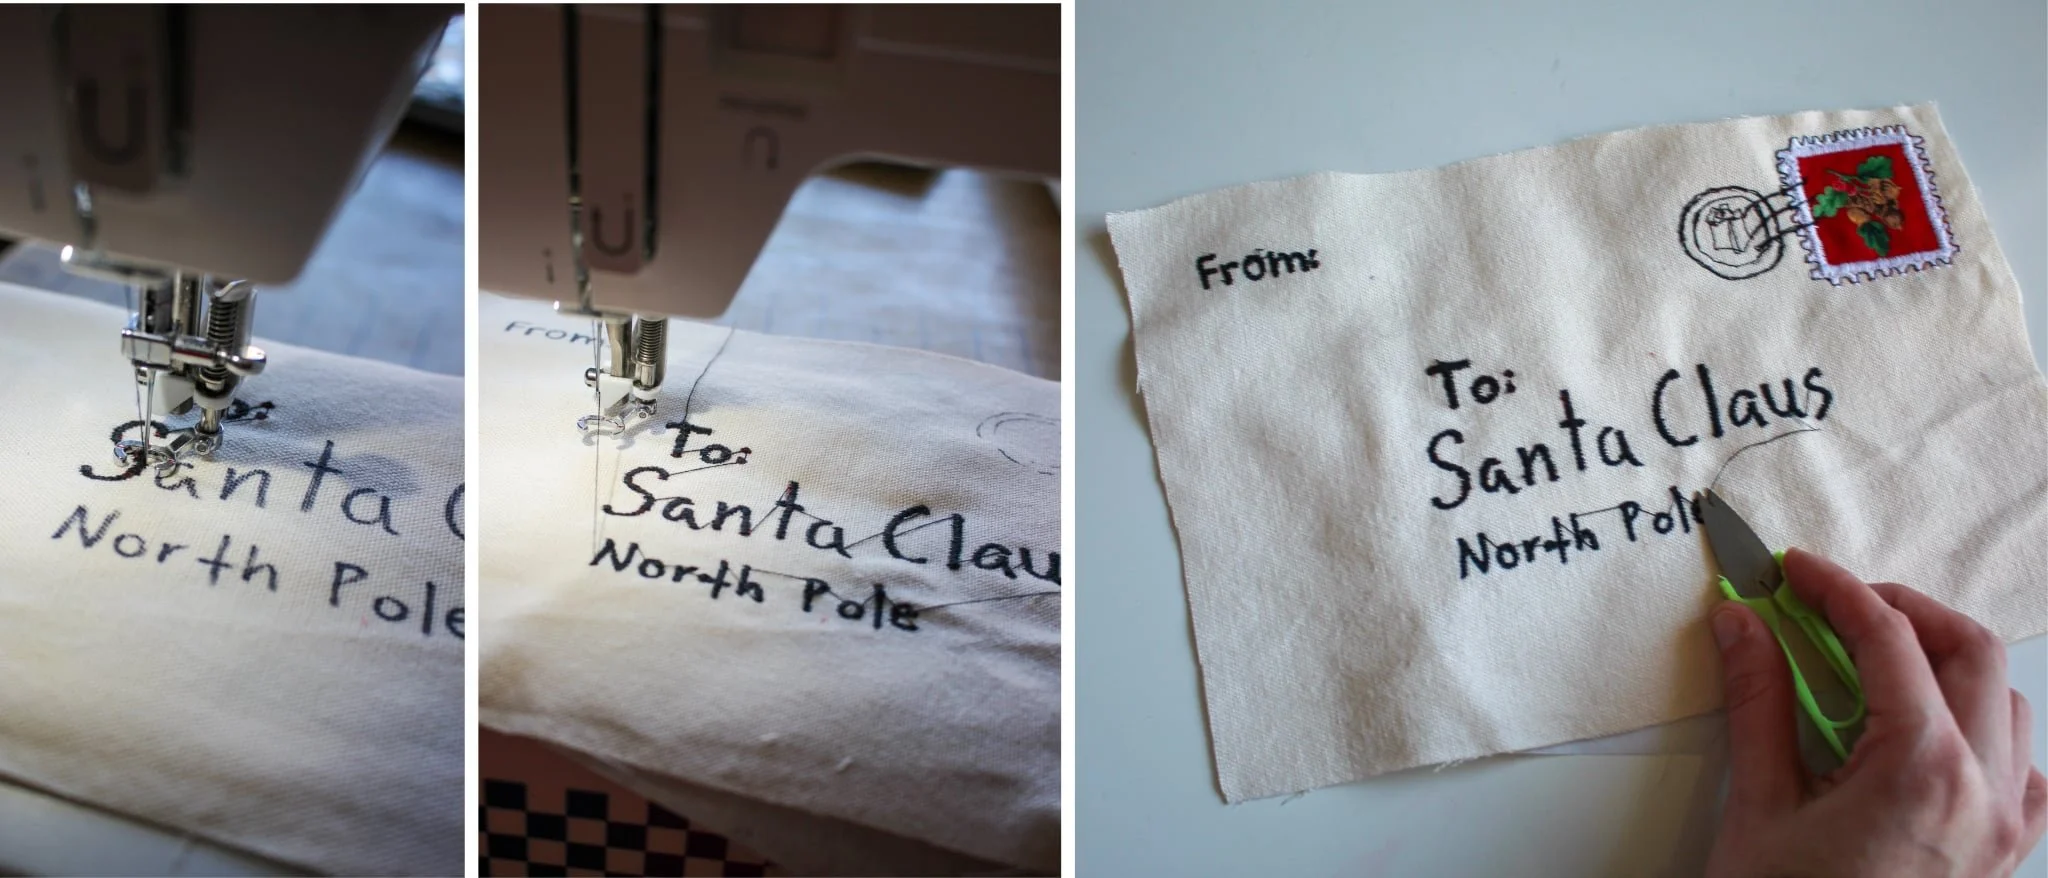
Image: Embroidering onto a “patch” and removing excess thread.
(Patch in this tutorial refers to a separate piece of applique/fabric that the design is built on. It is then added to the garment.)
If the fabric is thin or stretchy, use single sided iron on stabilizer to prevent stretching and warping.
You can use additional tear away stabilizer underneath if you still need a stiffer base.
Tip: zigzag stitched can sometimes pull and stretch thinner fabrics. Use as much stabilizer (especially iron on) to prevent this. Try doing some test pieces first.
Use a fabric marker to trace the words onto the fabric. Use heat away marker if you are worried about mistakes.
Set your zig zag width to the width of your line. Slowly fill out the letter. You can keep the fabric face the same direction, or turn to follow curves/etc. It all depends on your preference.
I typically keep it upright if the letters are small, like in the Sardines example, and I’ll rotate the fabric to follow the letter like on the other 2 examples.
For rounded/bubble letters, switch to a straight stitch at the ends to round it out.
You might have to alternate your zigzag width depending on your font.
Tip: Cursive is a lot faster to create than individual letters.
Make sure to set the stitch down when you start and stop. Especially if you have to pick up your needle and go to each letter.
Once finished, I like to turn the piece over, and apply small drops of fabric glue to the start and stop points of all the thread, to really ensure it won’t unravel in the wash.
Gently tear or cut away any unused stabilizer. Cut away any extra threads running between each letter. Embroidery scissors or really tiny scissors are best.
Embroidering directly onto garments

For thicker fabrics like sweatshirts and denim, I recommend cut away stabilizer underneath the garment. If the design is minimal, like the music notes, you could try water soluble.
For thinner fabrics like t-shirts and cotton shirts, you might have a harder time.
Embroidery hoops can help keep the fabric in place. Make sure the stabilizer is secured with the embroidery hoop as well. Cut the excess after.
Thinner cut away stabilizers, are probably best. Though I’ll admit I don’t personally embroider like this, so my knowledge is limited.
For delicate fabrics like satin, water soluble is best.
Make sure to backstitch your finishing stitches well. I don’t recommend glueing the thread if it is visible on the underside of the garment. Glue can stain/alter the colors of thinner fabric.
See below for an example of embroidery done on a sweatshirt.
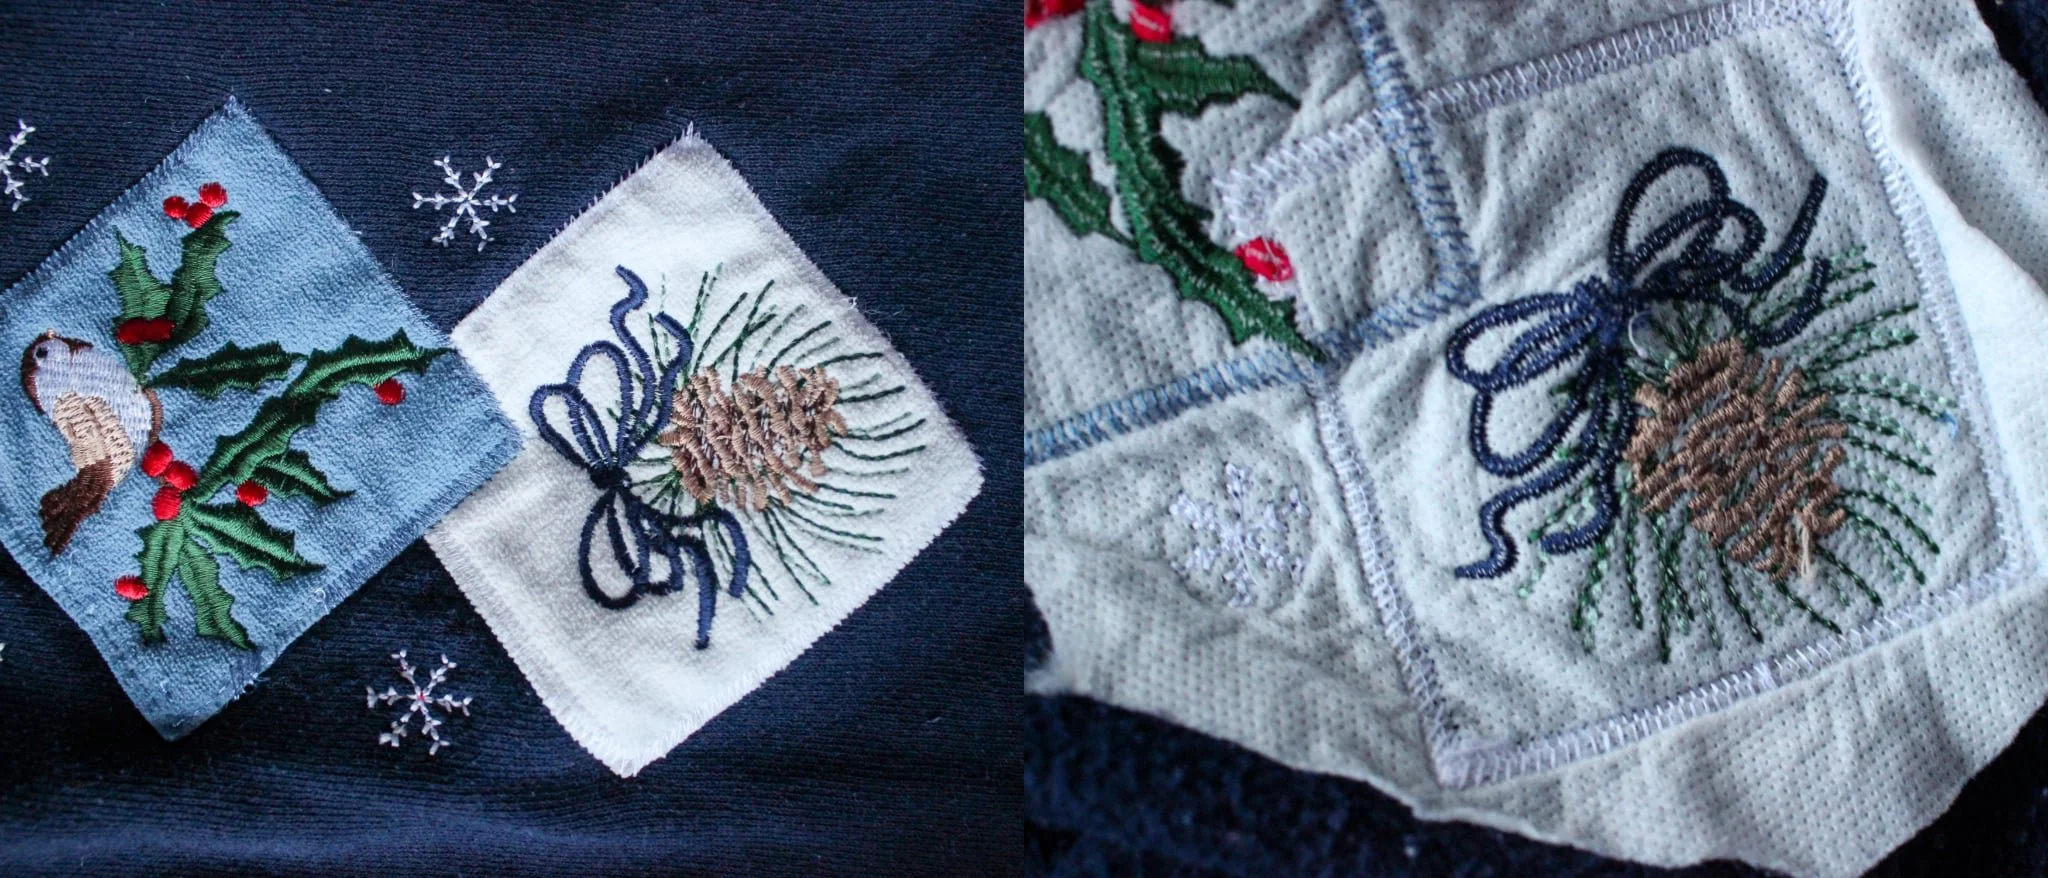
Image: Embroidery and the underside on a sweatshirt to show the stabilizer.
Appliqued versus Embroidered Words
If your words are larger than the width of your zigzag stitch, I recommend doing applique instead of embroidery.
Applique mean Sewing fabric on top of other fabric. For example, these letters below are all made from cut out fabric, and the edges are sewn down onto the garment.
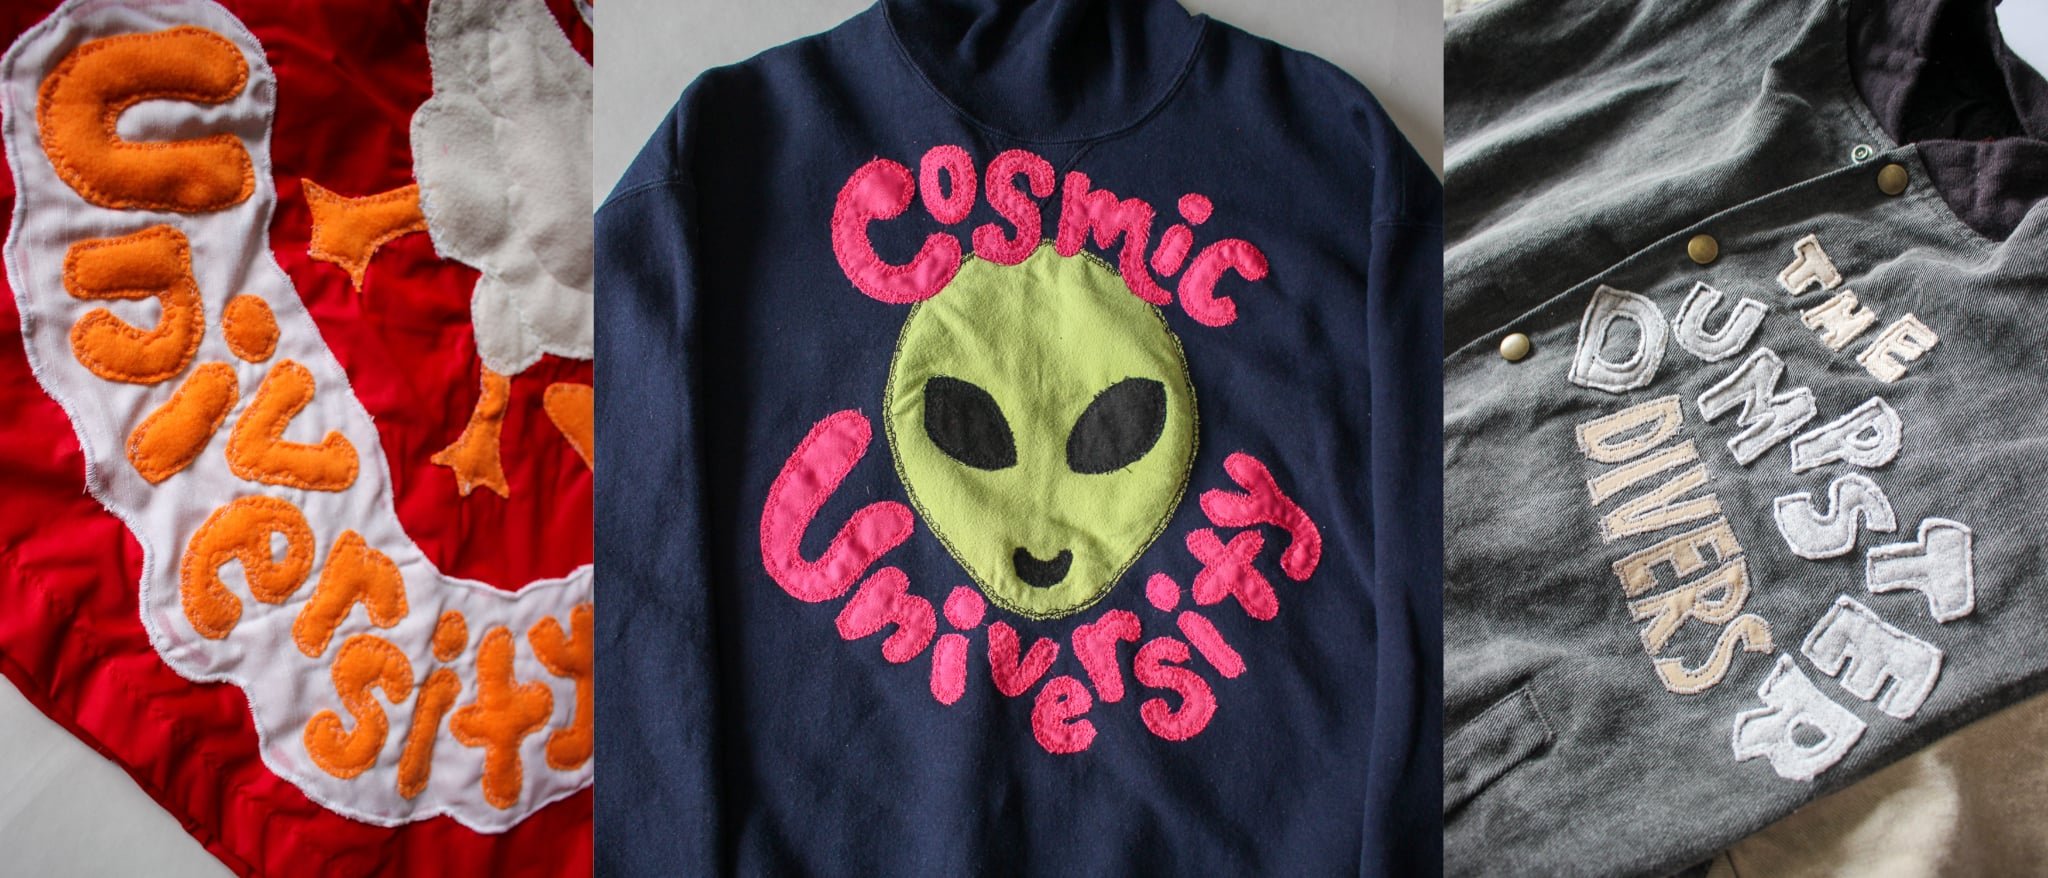
Image: Appliqued Words Examples
I have another tutorial specifically for Applique.
I recommend using double sided iron on to neatly cut out letters from thinner fabrics.
Fleece and sweatshirt scraps of fabric are also my favorite to use, because they don’t fray.
The fabric below (not the same project as the image above) is made from thicker canvas material (orange) and sweatshirt scraps (white).
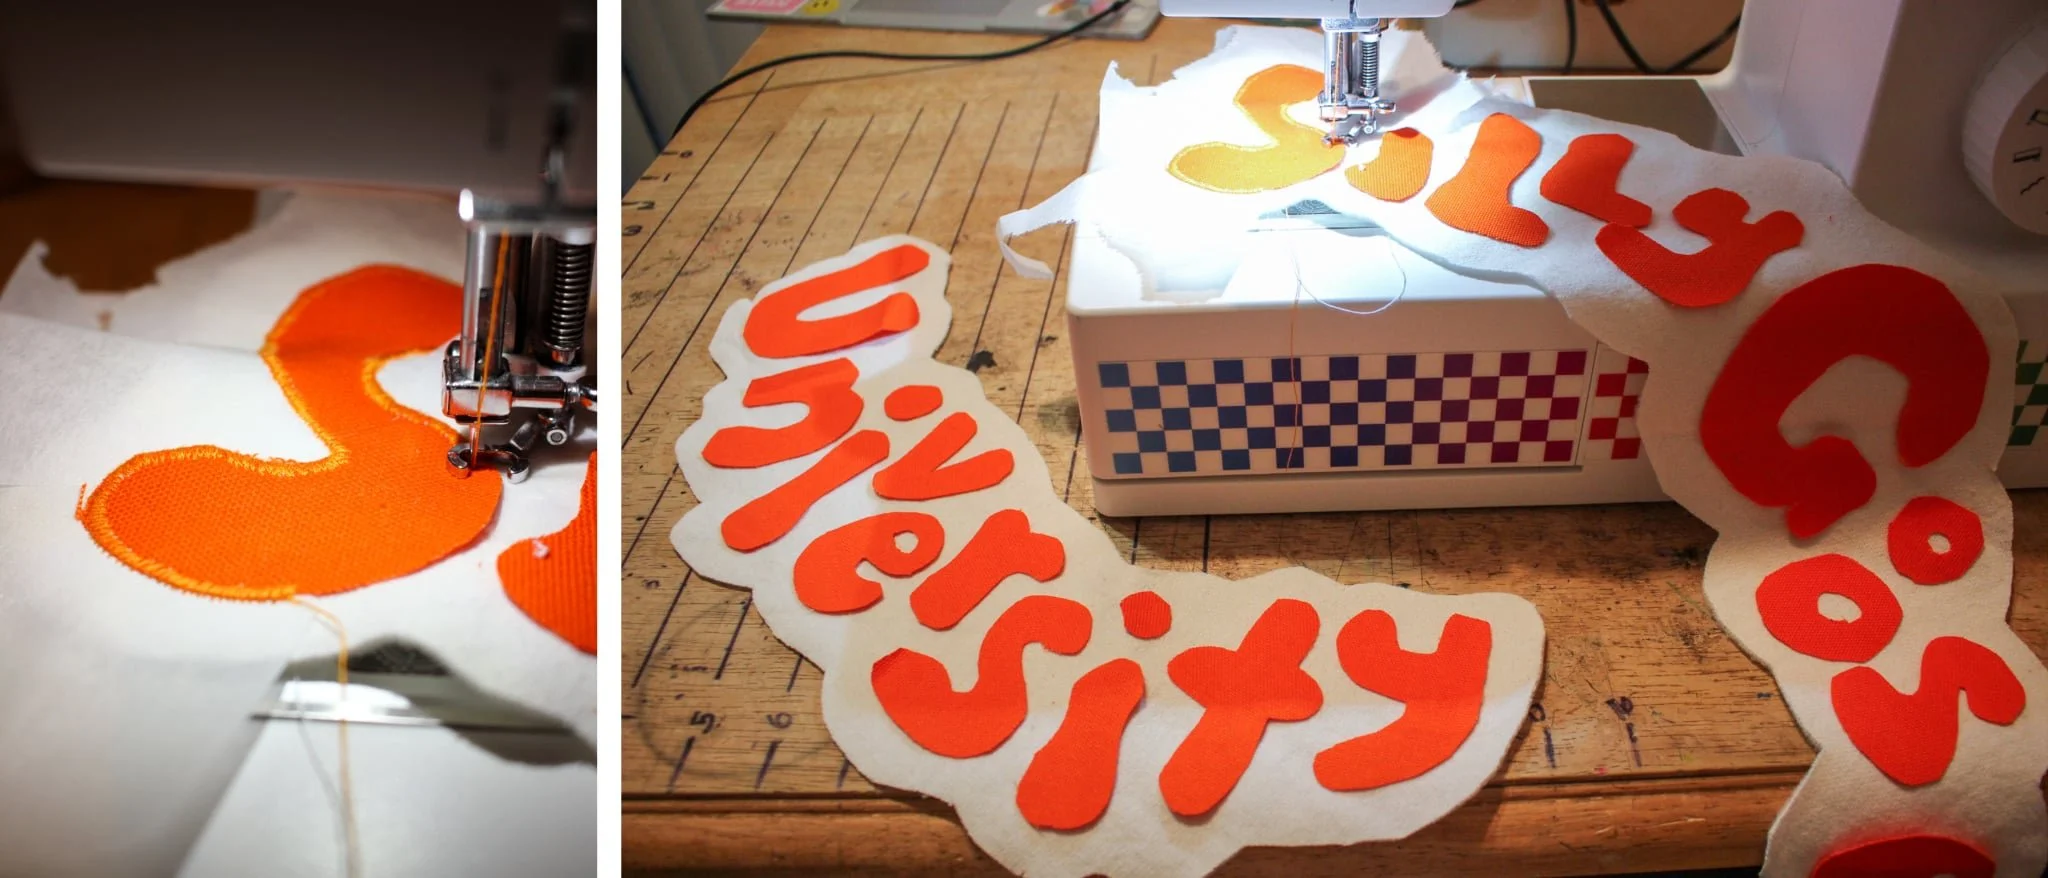
Image: the process of appliqueing words.
Fabric Still Puckering?
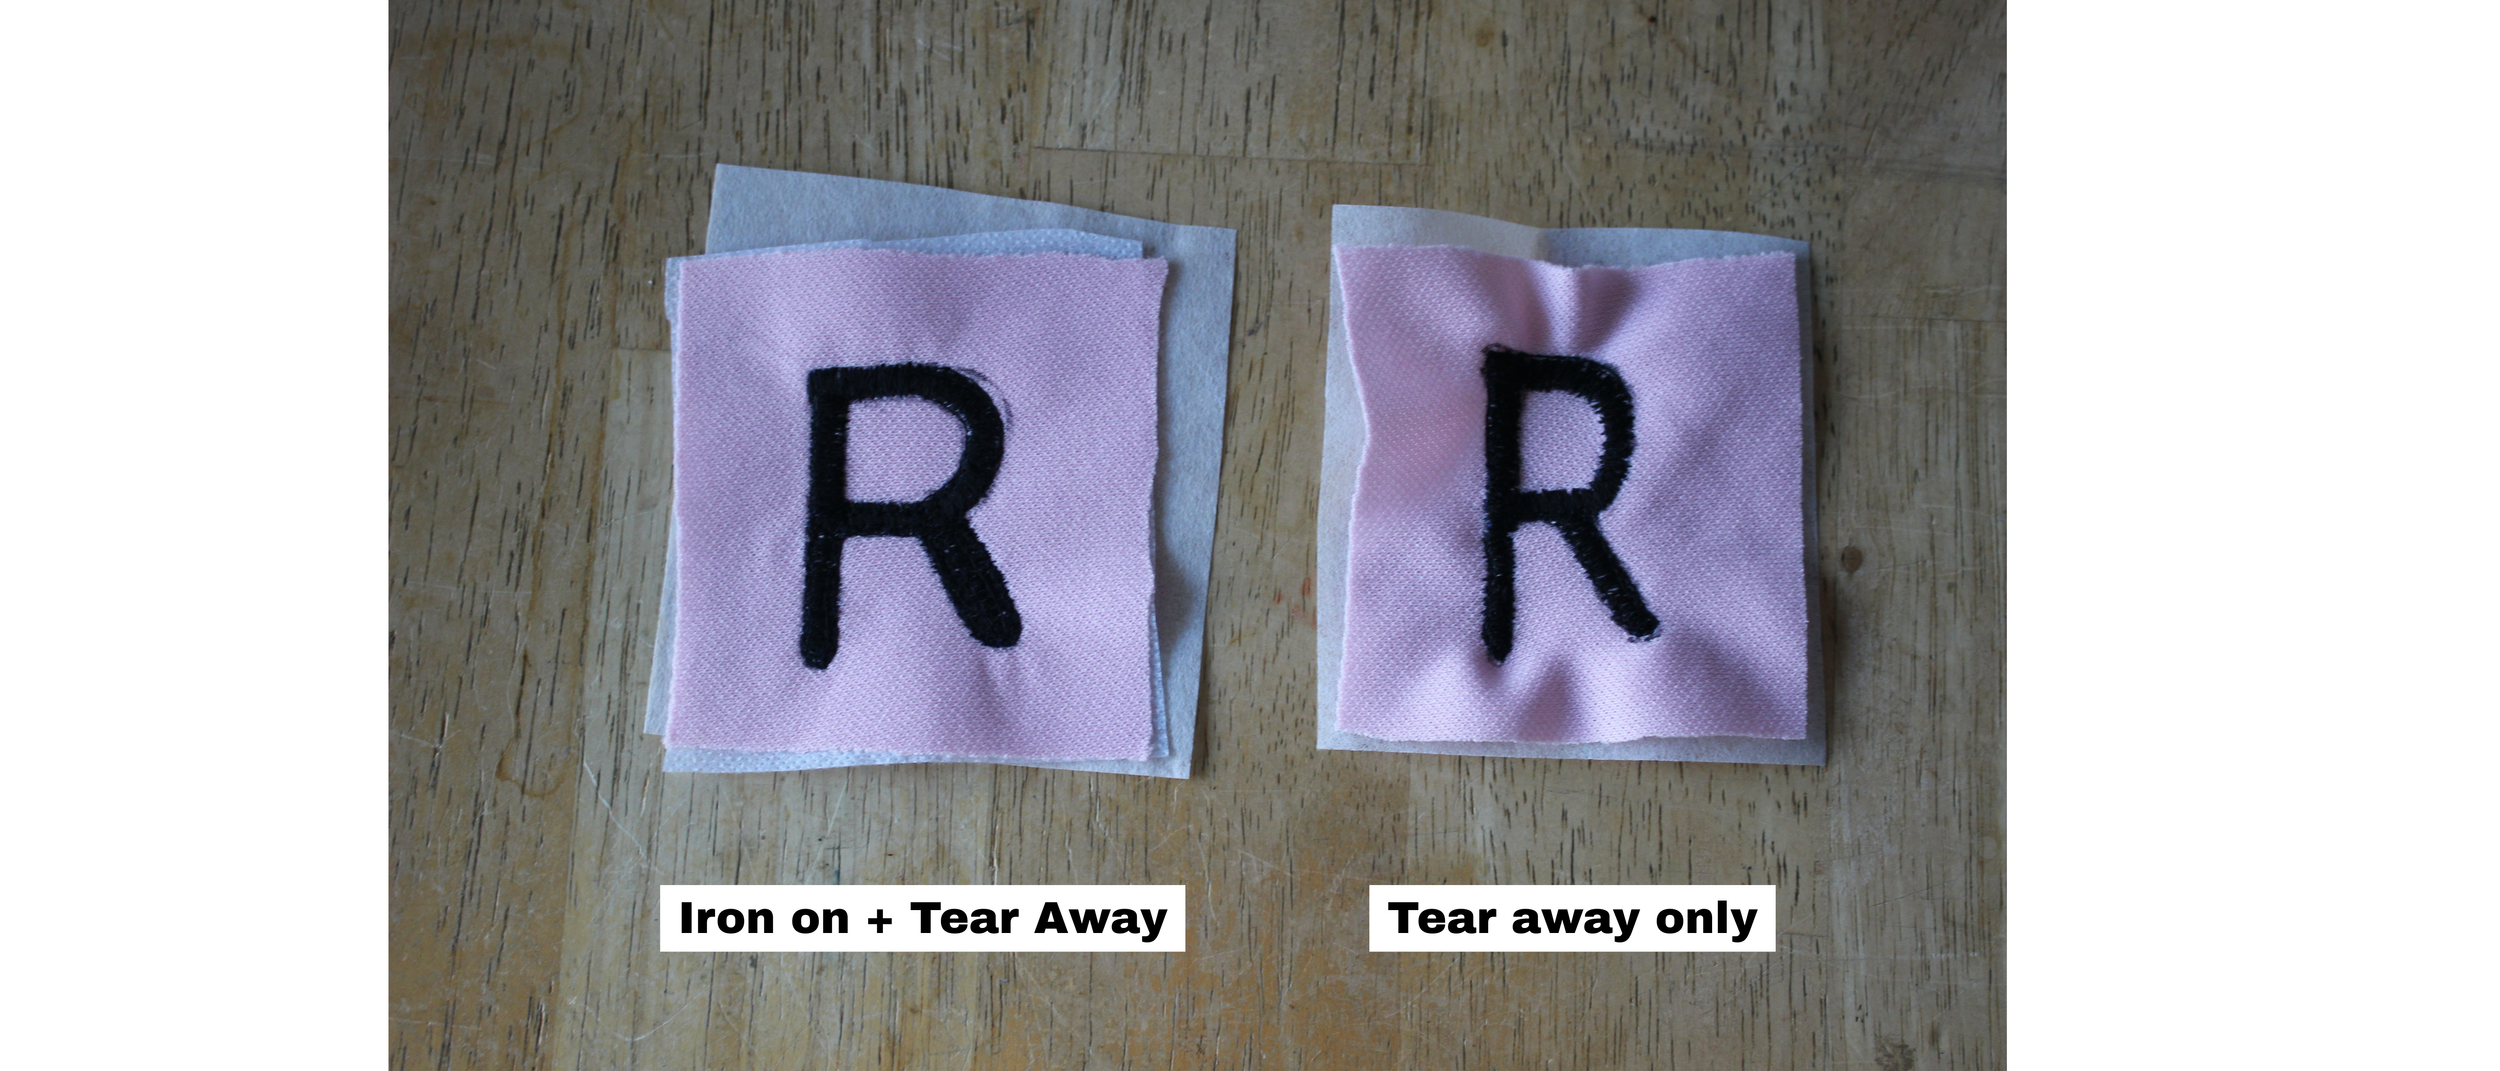
Image: embroidery still puckering?
If you are using stabilizer, and it’s still puckering, you might need a different kind, or extra stabilizer. For example, the “R” on the right only has tear-away stabilizer, versus the one on the left has single-sided iron-on and tear away. It still has a little bit of pulling, but it’s not as dramatic!
Whew! That was a lot!
As always, please let me know if you need anything clarified or explained!
There is no “right” or “wrong” way to make your art! Just a way that works best for YOU.
Practice, practice, and send me pics of your progress!
xoxo brit
Purchase some stickers to help support my Small Business!