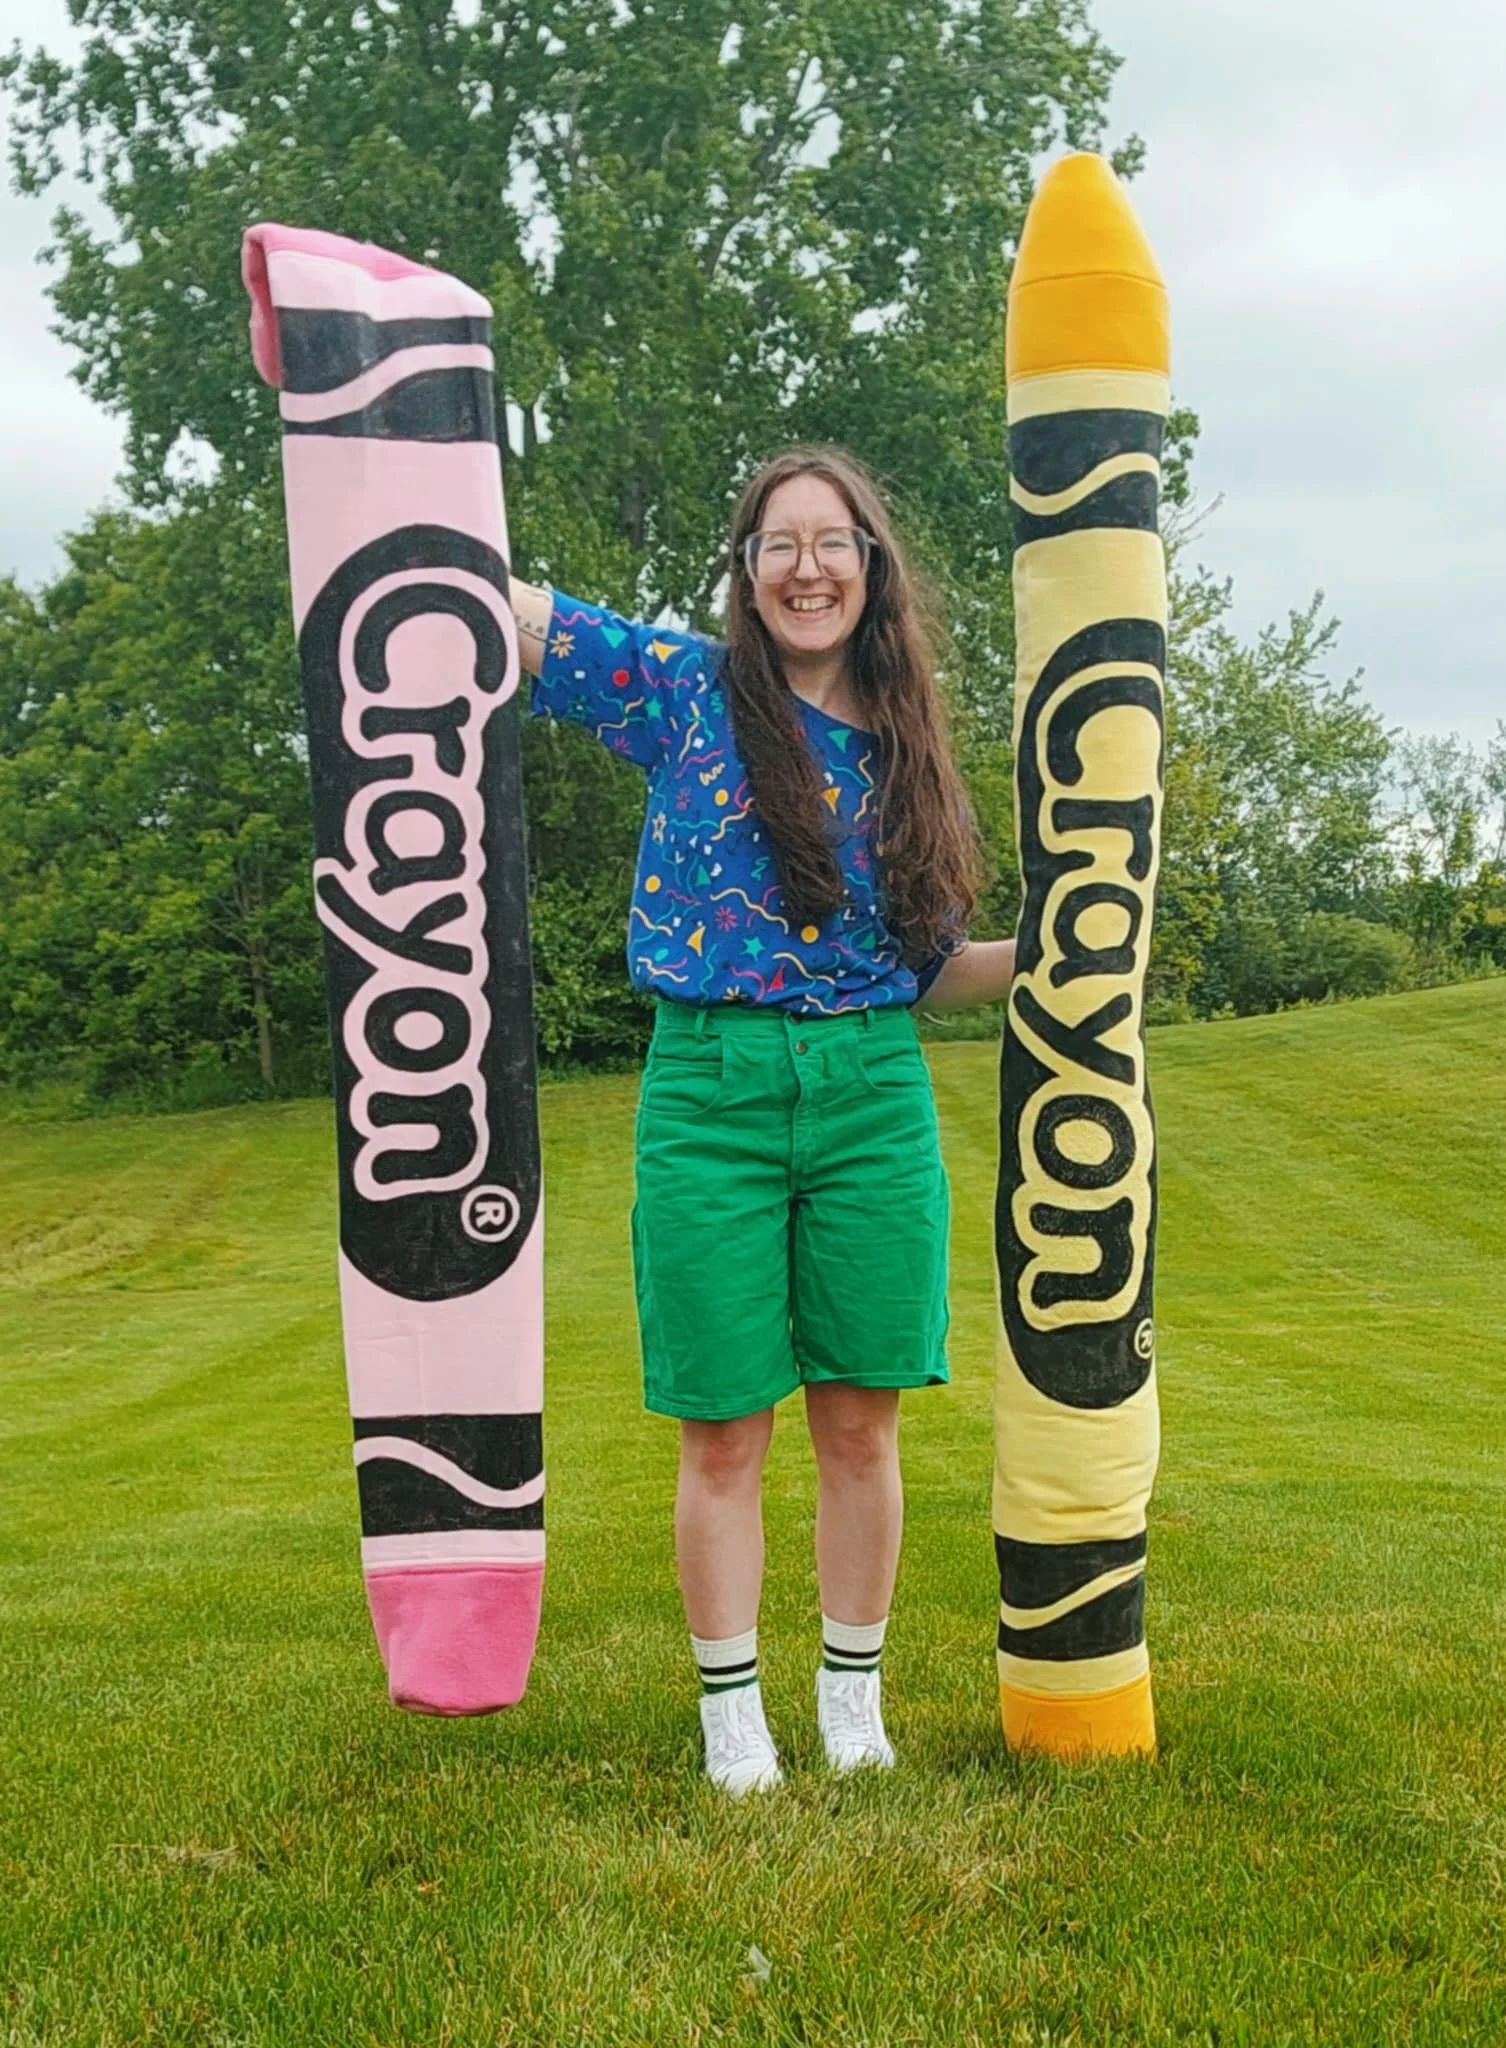
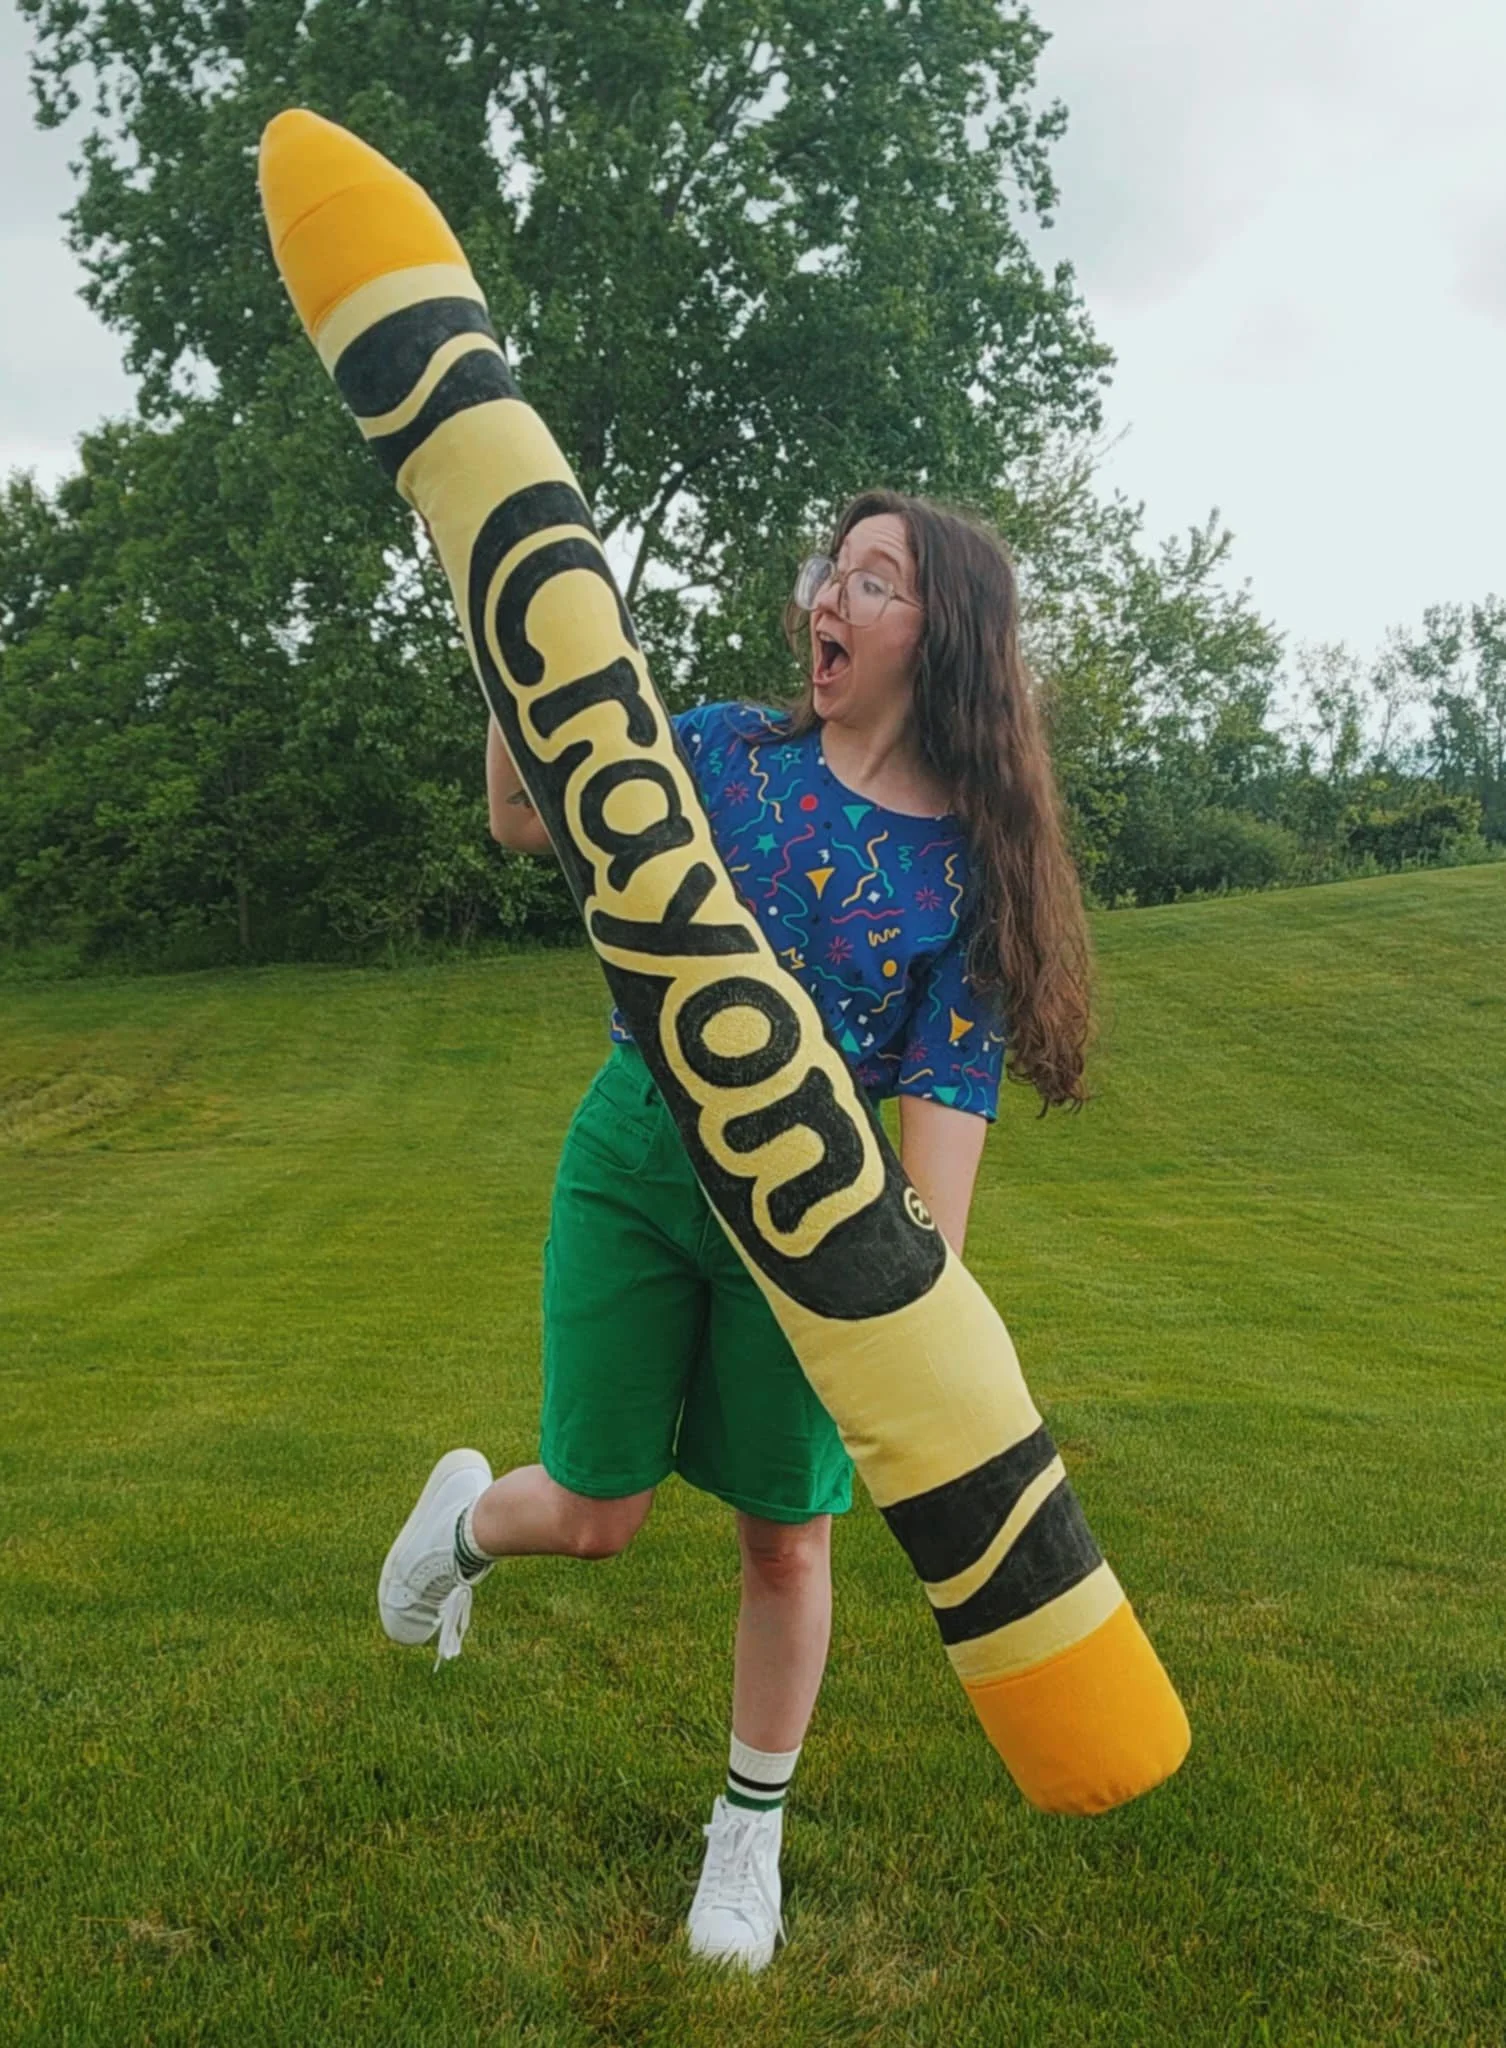
How to make a giant crayon!
Here is a written version of the tutorial, with diagrams and measurements! Be sure to watch the full tutorial on my Instagram! (@riskthrift)
Feel free to make any changes you need! With the same techniques you could make giant pencils, markers, the list is endless!
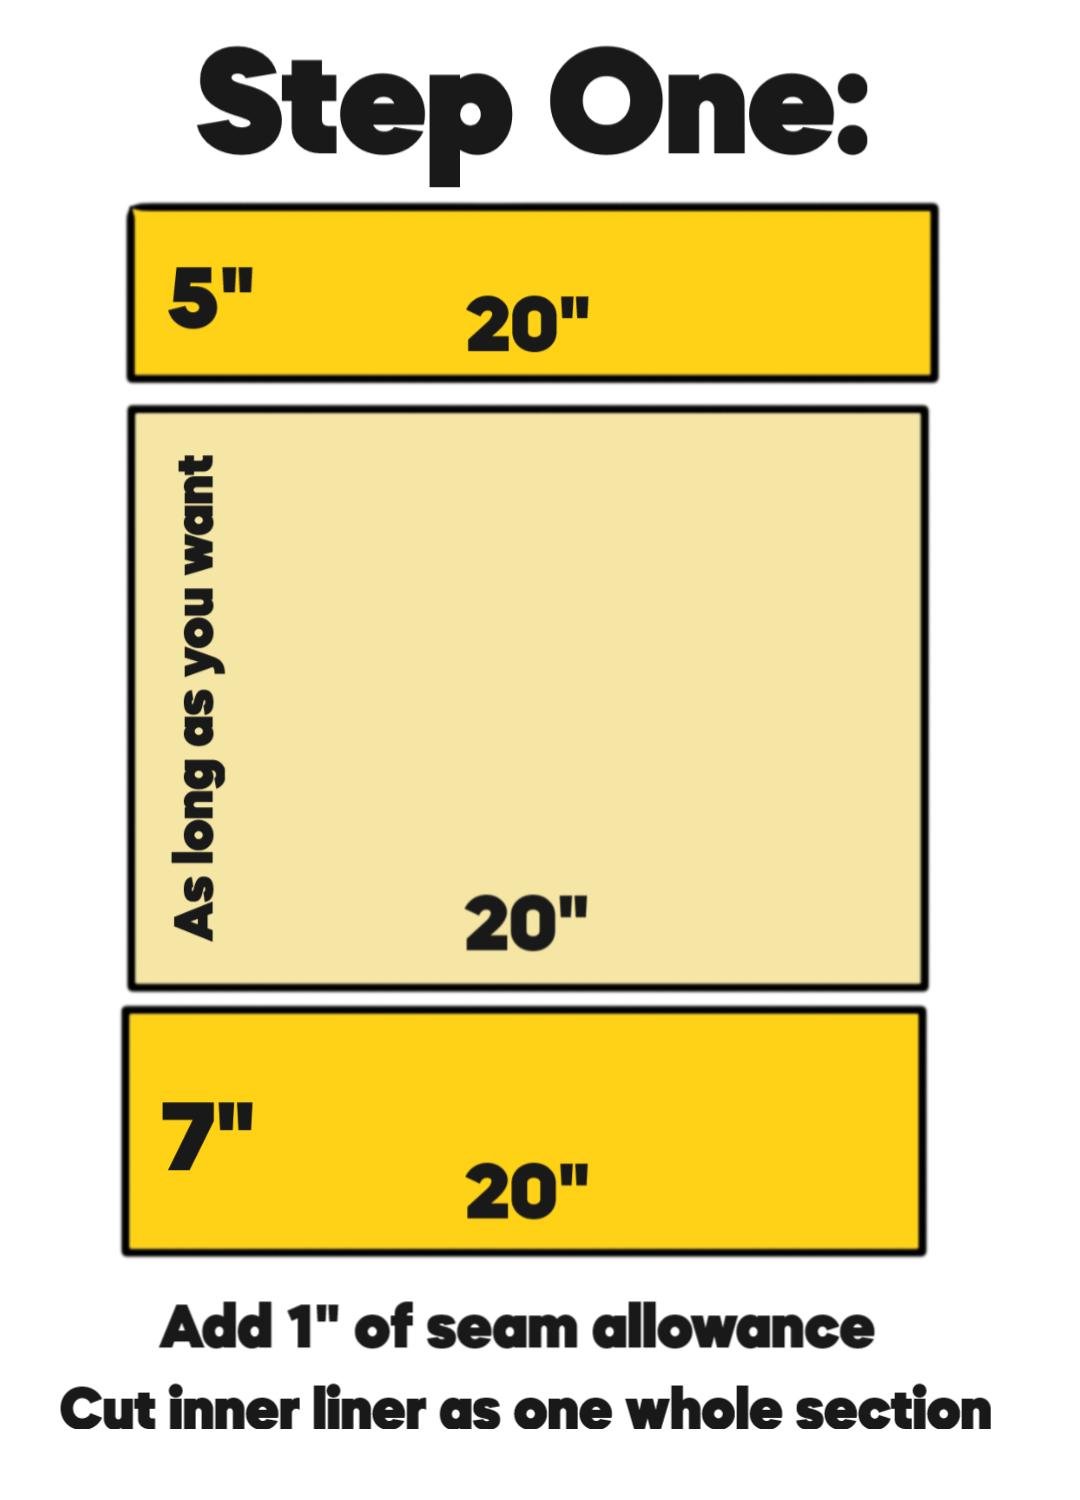
Cut the fabric
You’ll need any color fabric you want for the crayon, and a slightly lighter version to go with it! This will mimic the crayon and paper details.

For my design, I chose a 20” circumference crayon. The length of the light yellow “paper” portion was 56”, but you can make yours as short as you like!
For the inside liner make sure the fabric is not stretchy.
Cut the same shapes, but cut one whole center rectangle versus 3 separate panels. (To save time)
I added an additional 1” of seam allowance around this pattern.

I like to sew each section of the liner with the corresponding outer section as I go.
You can use a serger/overlocker machine, or a zigzag/overlock sewing machine stitch on the edges.
When sewing the center rectangle part, sew the outer 3 colors together, then attach to the single large liner.
Once the center part is completely sewn, fold in half hotdog style.
Pin the edges down, making sure to make the seam allowance.
Mark and leave a gap for the zipper. Sew everything but that gap. I like to go over the seams at least twice to make sure its secure.

With the tube inside out, pin and sew the zipper down, making sure it’s facing the right way. (Aka right side facing down)
I recommend sewing the zipper close to the bottom, if you intend to add a dowel inside for support.
After the zipper is sewn, open it, leaving a gap for you to be able to turn it right side out later in the tutorial.

Sew the bottom circle to the corresponding liner.
Pin and sew the bottom circle to the bottom of the “tube”. Make sure the right sides are together.
You can trace the pattern onto the inside liner if you need a helpful guide.

Sew the cone together, pin and add the top smaller circle section.

Turn the cone right side out, flip it upside-down, and put it inside the tube, so edges are together,
Pin it until it’s even… the cone may peak out higher than the tube due to seam allowance.

Once it’s all sewn together, flip it right side out! This is why leaving the zipper open is helpful.
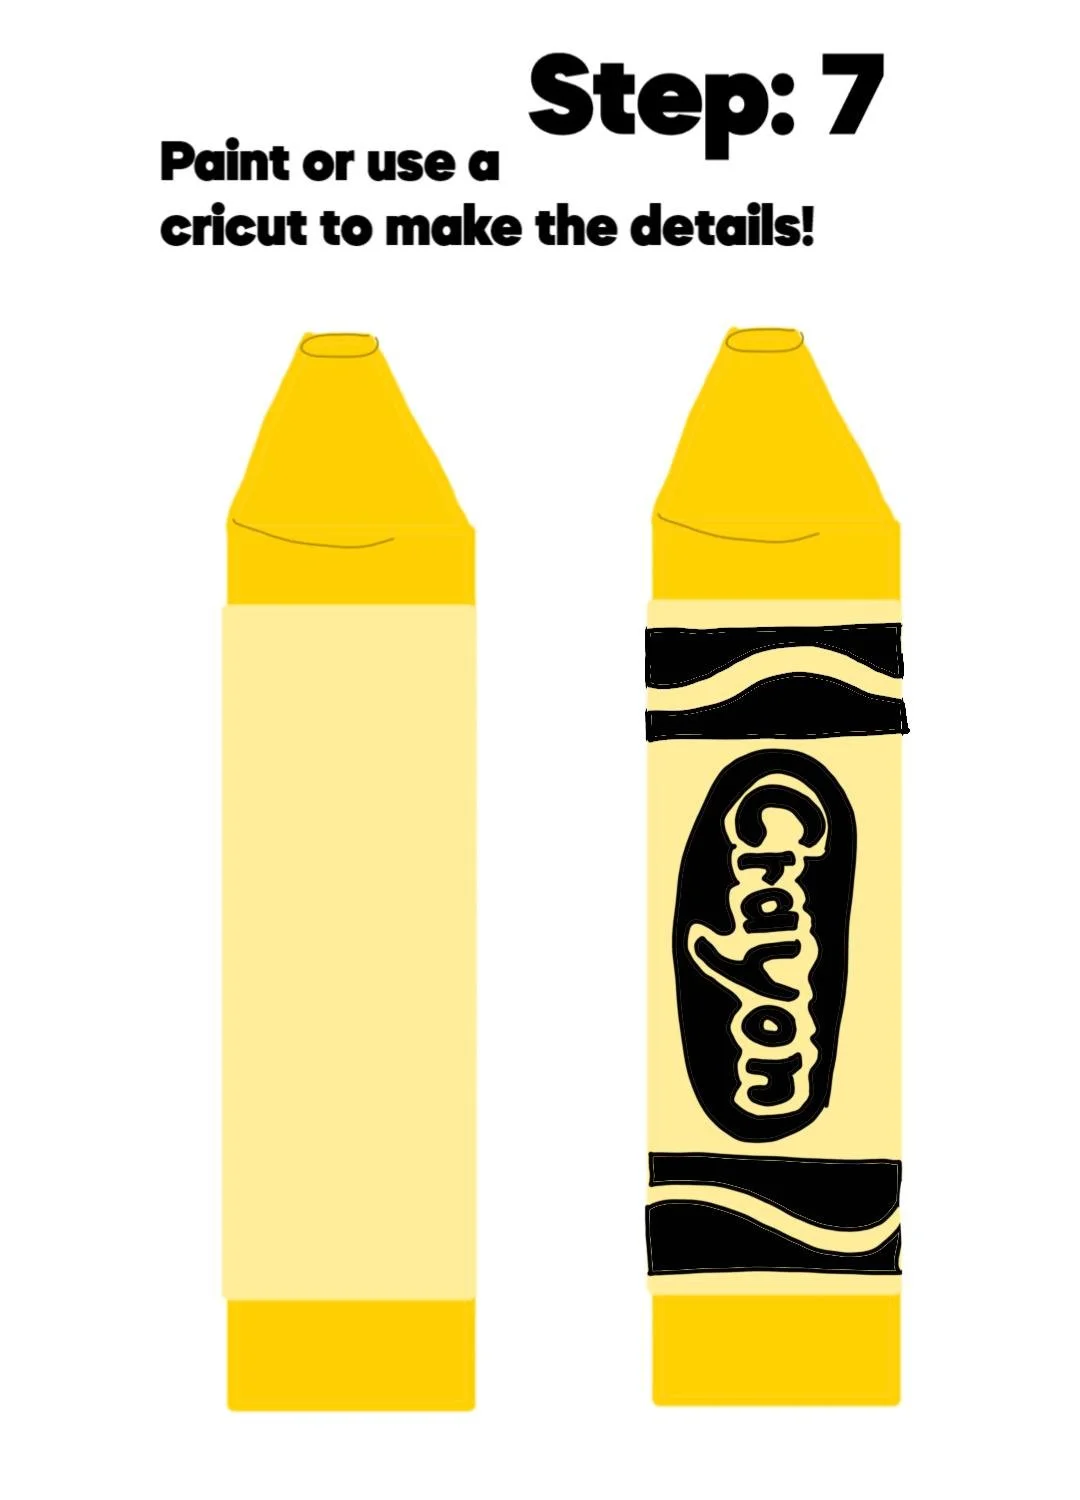
Then sketch and paint the design you want!
Alternatively, you could use a cricut and vinyl iron-on lettering.
Make sure to iron the design if using fabric paint!
When I painted mine on fleece, the paint did not 100% dry until ironed, so be careful you don’t get it on anything!
Usually this is not the case, if painting on 100% cotton, but it still needs to be ironed.
I used ~280 degrees Fahrenheit/ or medium-low (non steam) setting on the fleece, for at least 1 minute. Be careful not to melt the fabric!
Do a test swab of the paint and iron on a scrap fabric.

Stuff it with all your random scraps and stuff!
-Fabric Scraps, paper shreds, grocery bags, newspaper, old pillows + clothes, stuffing, you name it!
P.s. to make emptying it out easier, try putting the loose stuffing contents into a grocery bags before putting inside!
For the least amount of flexibility, stuff it really well!
You can also run a dowel through the back of the inside to reduce flexibility/bending!

And you’re all done!
Make sure to send all of your project pictures so I can see the fun things you create!
xoxo Brit