How to Paint Your Clothes!
Tips and advice for painting your clothes with screen printing ink.
“Thank you so much for all your support! Let me know if you need clarification on anything.” -Brittany
A few people have asked if they can donate as a way to say thank you for this tutorial!
While I am so appreciative of the offer, here are some places you could donate to instead :)
Proper Help Foundation Helps tackle school lunch debt.
My Sister Susan’s House Houses pregnant and parenting youth in North Carolina. They are no longer receiving federal funding.
Immigrant Defense Network (IDN) is a network of over 90 immigrant, labor, legal, faith, and community organizations dedicated to protecting and advancing the constitutional rights of immigrant communities across Minnesota.
Screenprinting?
You aren’t going to technically be screen printing, but you will be using screenprinting ink.
You can just paint it on with a paintbrush! It’s washable, flexible, and durable if done correctly.
You’ll Need:
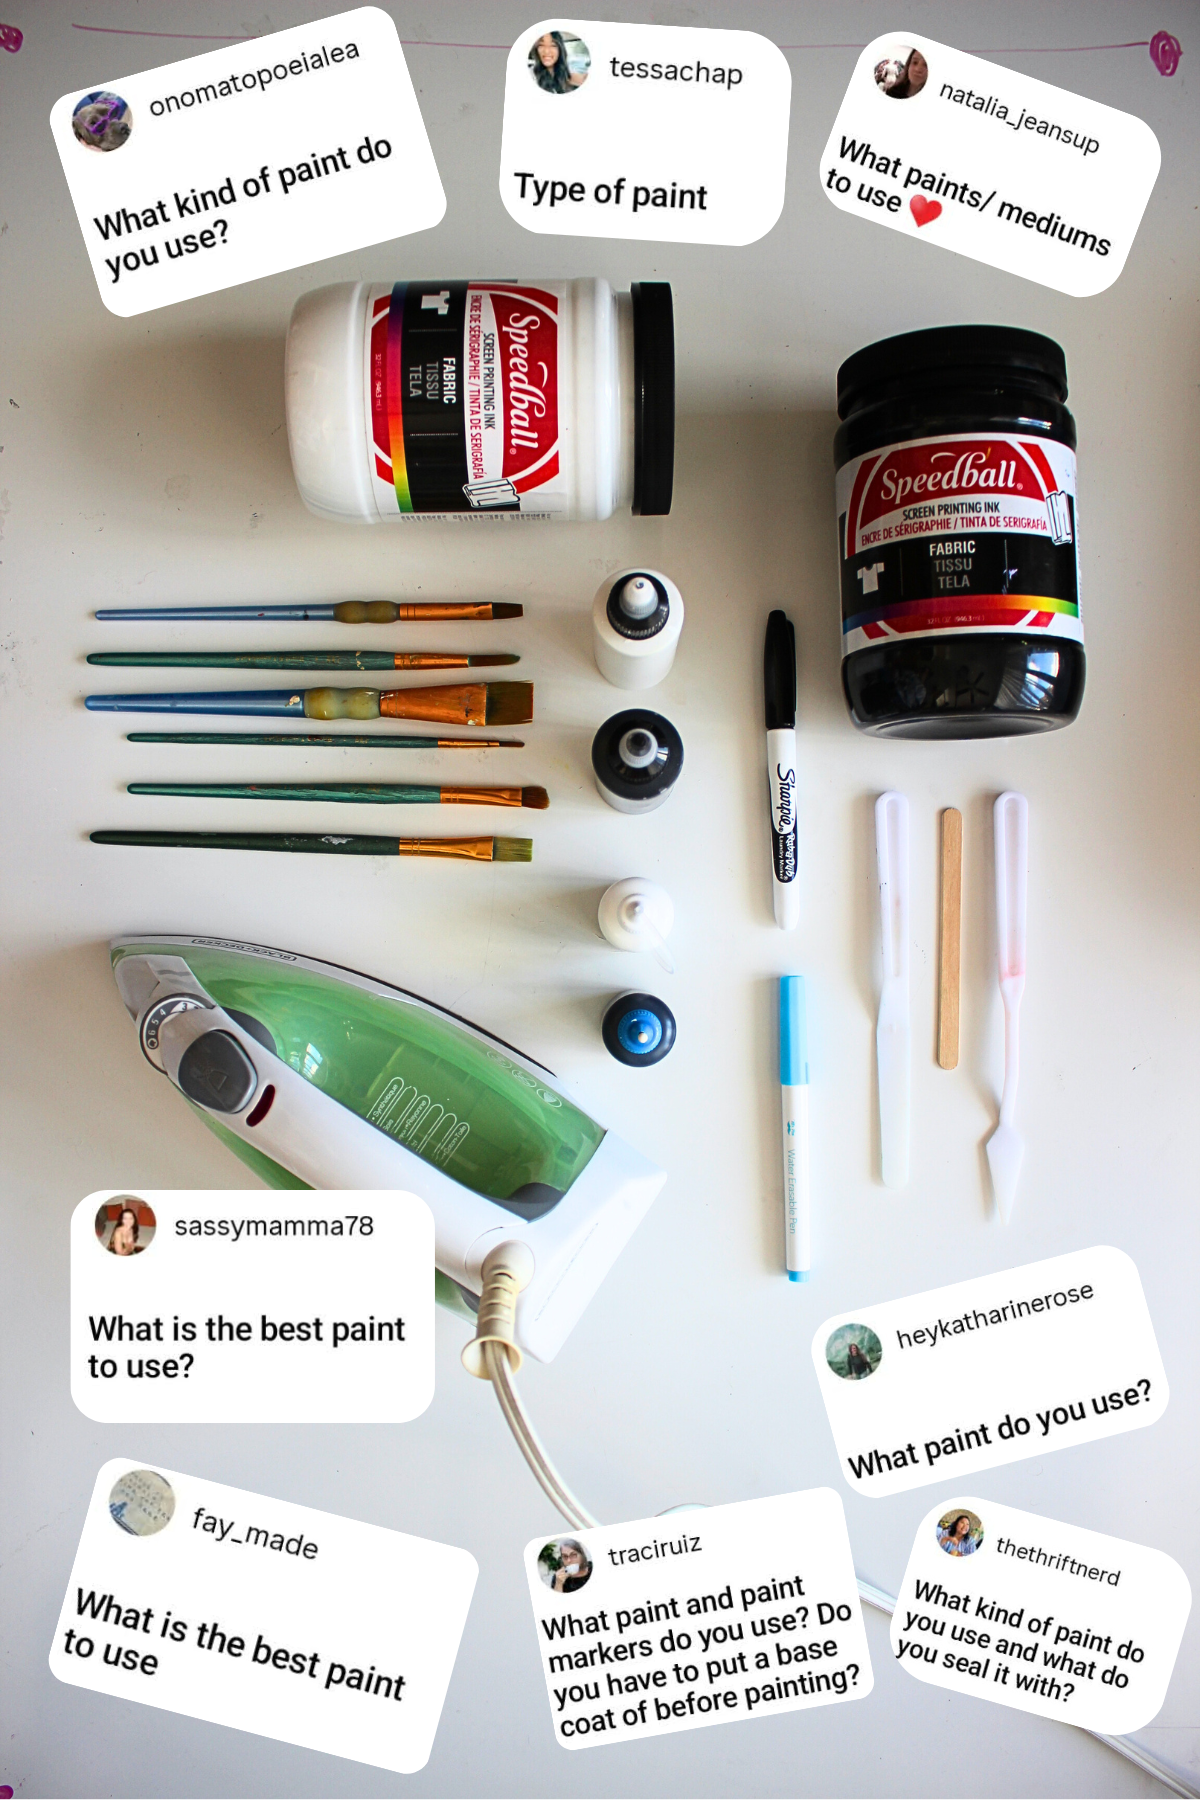
Image: Tools you’ll need
-Screen Printing Ink
I use Speedball Fabric Screen Printing Ink. I recommend the “FLEX” version as it’s more flexible and resitant to cracking.
It can get kinda pricey, so just get what you need and mix colors when you can.
I have yet to try other paint types like “Plastisol” or acrylic paint mediums.
Thank you to everyone who mentioned the use of “Fabric Medium” mixed with acrylic paint, and Jacquard textile paint! As I’ve said, I’m no expert, so I’m always open to more tips and tricks to add here! :)

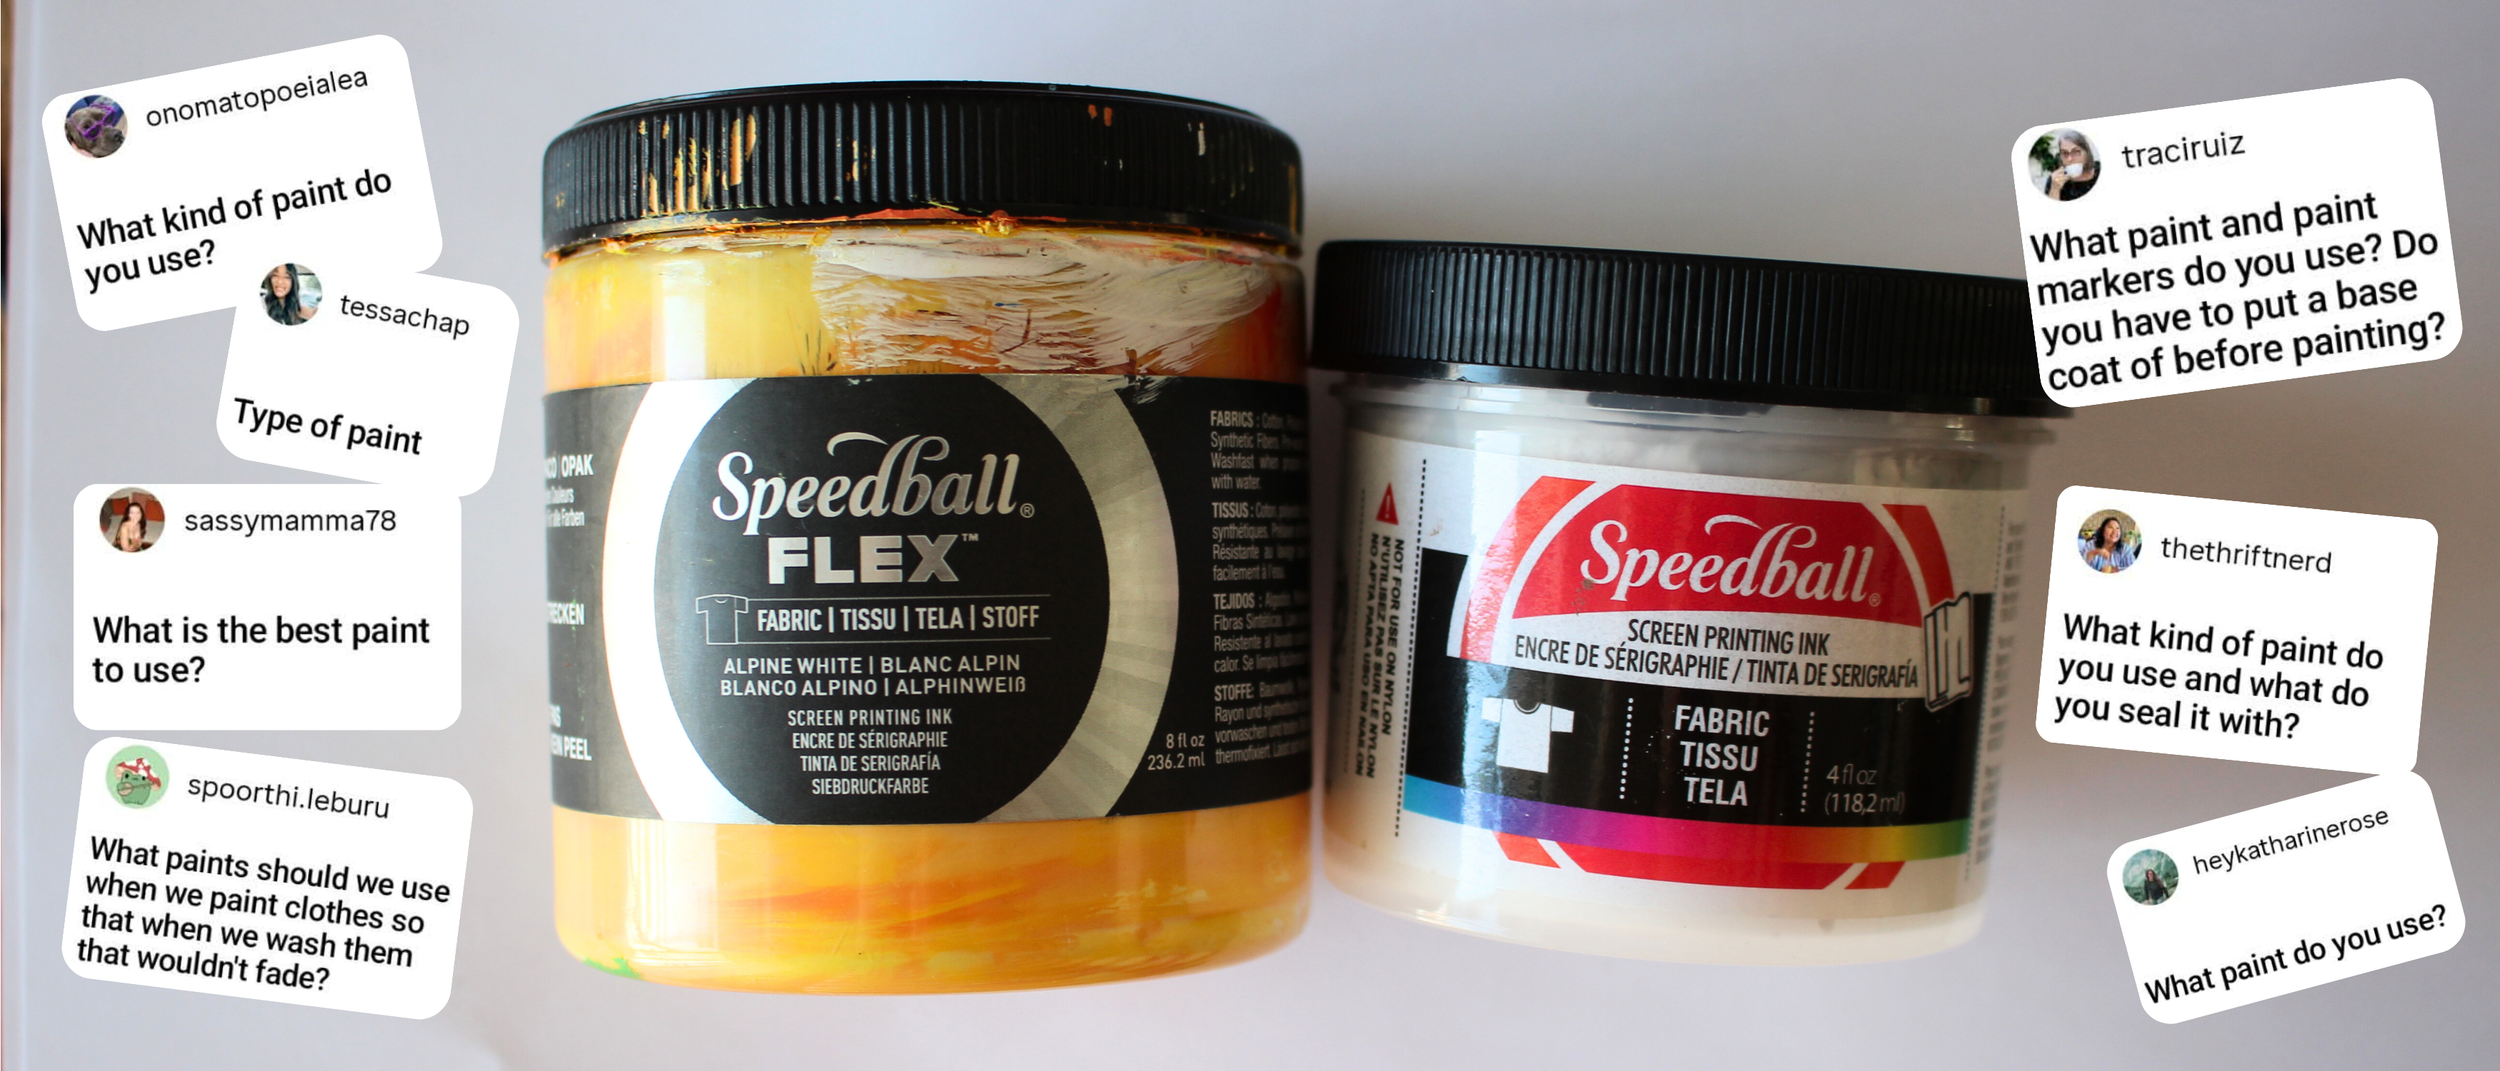
Image: Speedball FLEX and Regular Screen Printing Ink
-Paint Brushes and Palette Knife / Mixer
The paint brushes are self explanatory. The palette knives (or popsicle sticks/etc.) are great for mixing paints and filling the squeeze bottles.
-Water Eraser Pen
This is pretty essential for sketching rough designs. It disapears on contact with water.
-Fabric Marker
Something permanent and washable. I like the Sharpie “rub-a-dub”. DO NOT use regular sharpies.
-Needle Tip Squeeze Bottle
You might be thinking “I don’t need this… right?”
Yes. Yes you do. “This squeeze bottle is essential for creating super fine lines neater and thinner than any paintbrush.
-Larger Squeeze Bottle
Yes this is great too. I typically re-use old glue bottles and random squeeze bottles around the house. Something with a larger opening than the needle tip ones. I use these squeeze bottles to fill the smaller bottles. Trust me, I’ve been doing this a while, you don’t want to try to fill the other ones without it.
-Iron or Iron Press
This is essential to ensure the paint is “set”. A regular iron is fine, don’t use steam. I personally bought a large “cricut” press because it irons a larger area.
-Water Cup, Rag, Water
I thought this was obvious, but just in case. You’ll need these to clean your brushes, and remove the water pen.
-Clothing to Paint
I’ll explain it more below. Essentially something natural like cotton or linen is best.
-Parchment Paper
You can use parchment paper to protect your iron from the paint. Simply cover the design and iron on top.
Choosing the Right Fabric
Natural non-stretchy fabrics are ideal for the best results.
Must be iron-able at high temperatures.
The BEST
100% Cotton Denim
Depends on the design
Cotton Polyester Blend Sweatshirts
100% Cotton T-shirts
Linen
Rayon
Not at all
Nylon
Satin
Silk
Spandex
Felt
Fleece
Textured or super stretchy
Anything non-ironable at high temps.
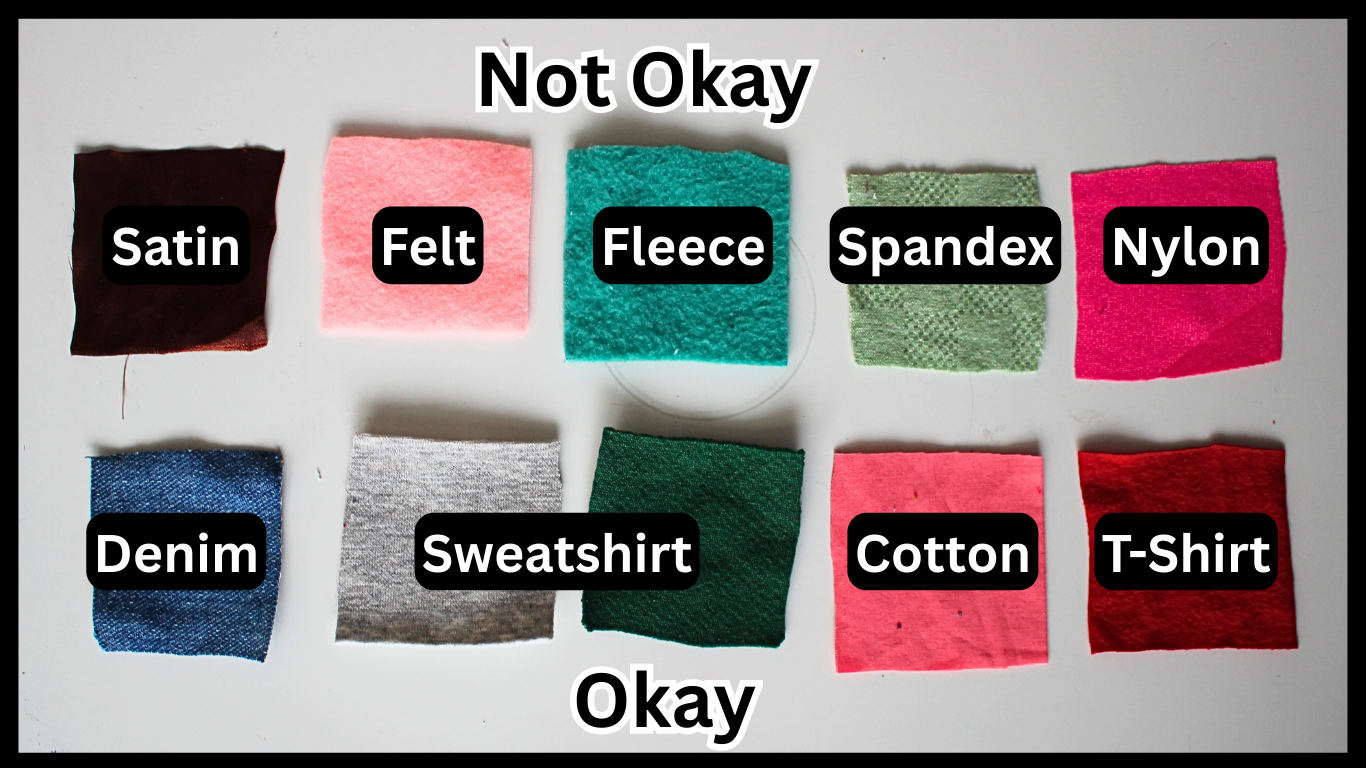
Image: Fabrics that are and aren’t okay to paint on.
Make sure the Fabric is properly washed!
You don’t need to wash your clothes with a lot of detergent. It sounds crazy, but you only need a few tablespoons for a regular load.
And please don’t use fabric softener!
This stuff can buildup residue and ruin your clothes in general; but also make the surface bad to paint.
What designs can you do on what fabric?
The rule of thumb: Thinner fabric = thinner design. Thicker fabric = thin or thick design.
If you want to paint characters, or anything with lots of layers or large designs, DENIM is your best option.
Why? The paint does get stiff, the more layers and surface area you paint.
Denim makes it less noticeable.
Thinner fabrics like T-shirts, Linen, Sweatshirts, Rayon, or Cotton really only do well with thinner designs.
By that, I mean both thin layers (aka 1 is best) and small designs versus large ones. To help minimize the bulk.
For example, I used a stamp on this thin cotton shirt. And I painted stripes on these cotton pants.
Overall I don’t recommend painting on anything super stretchy.
The paint is the same as the screenprinted graphics that may be in your closet. Notice how those look on different garments. The paint is flexible, but it may crack over time, especially if you don’t care for it properly. (Care instructions will be further down in the tutorial)
Examples for lighter weight fabric designs
-Stripes or simple shapes
-Stamps and tiny shapes
-Very detailed portrait on fabric that won’t be washed
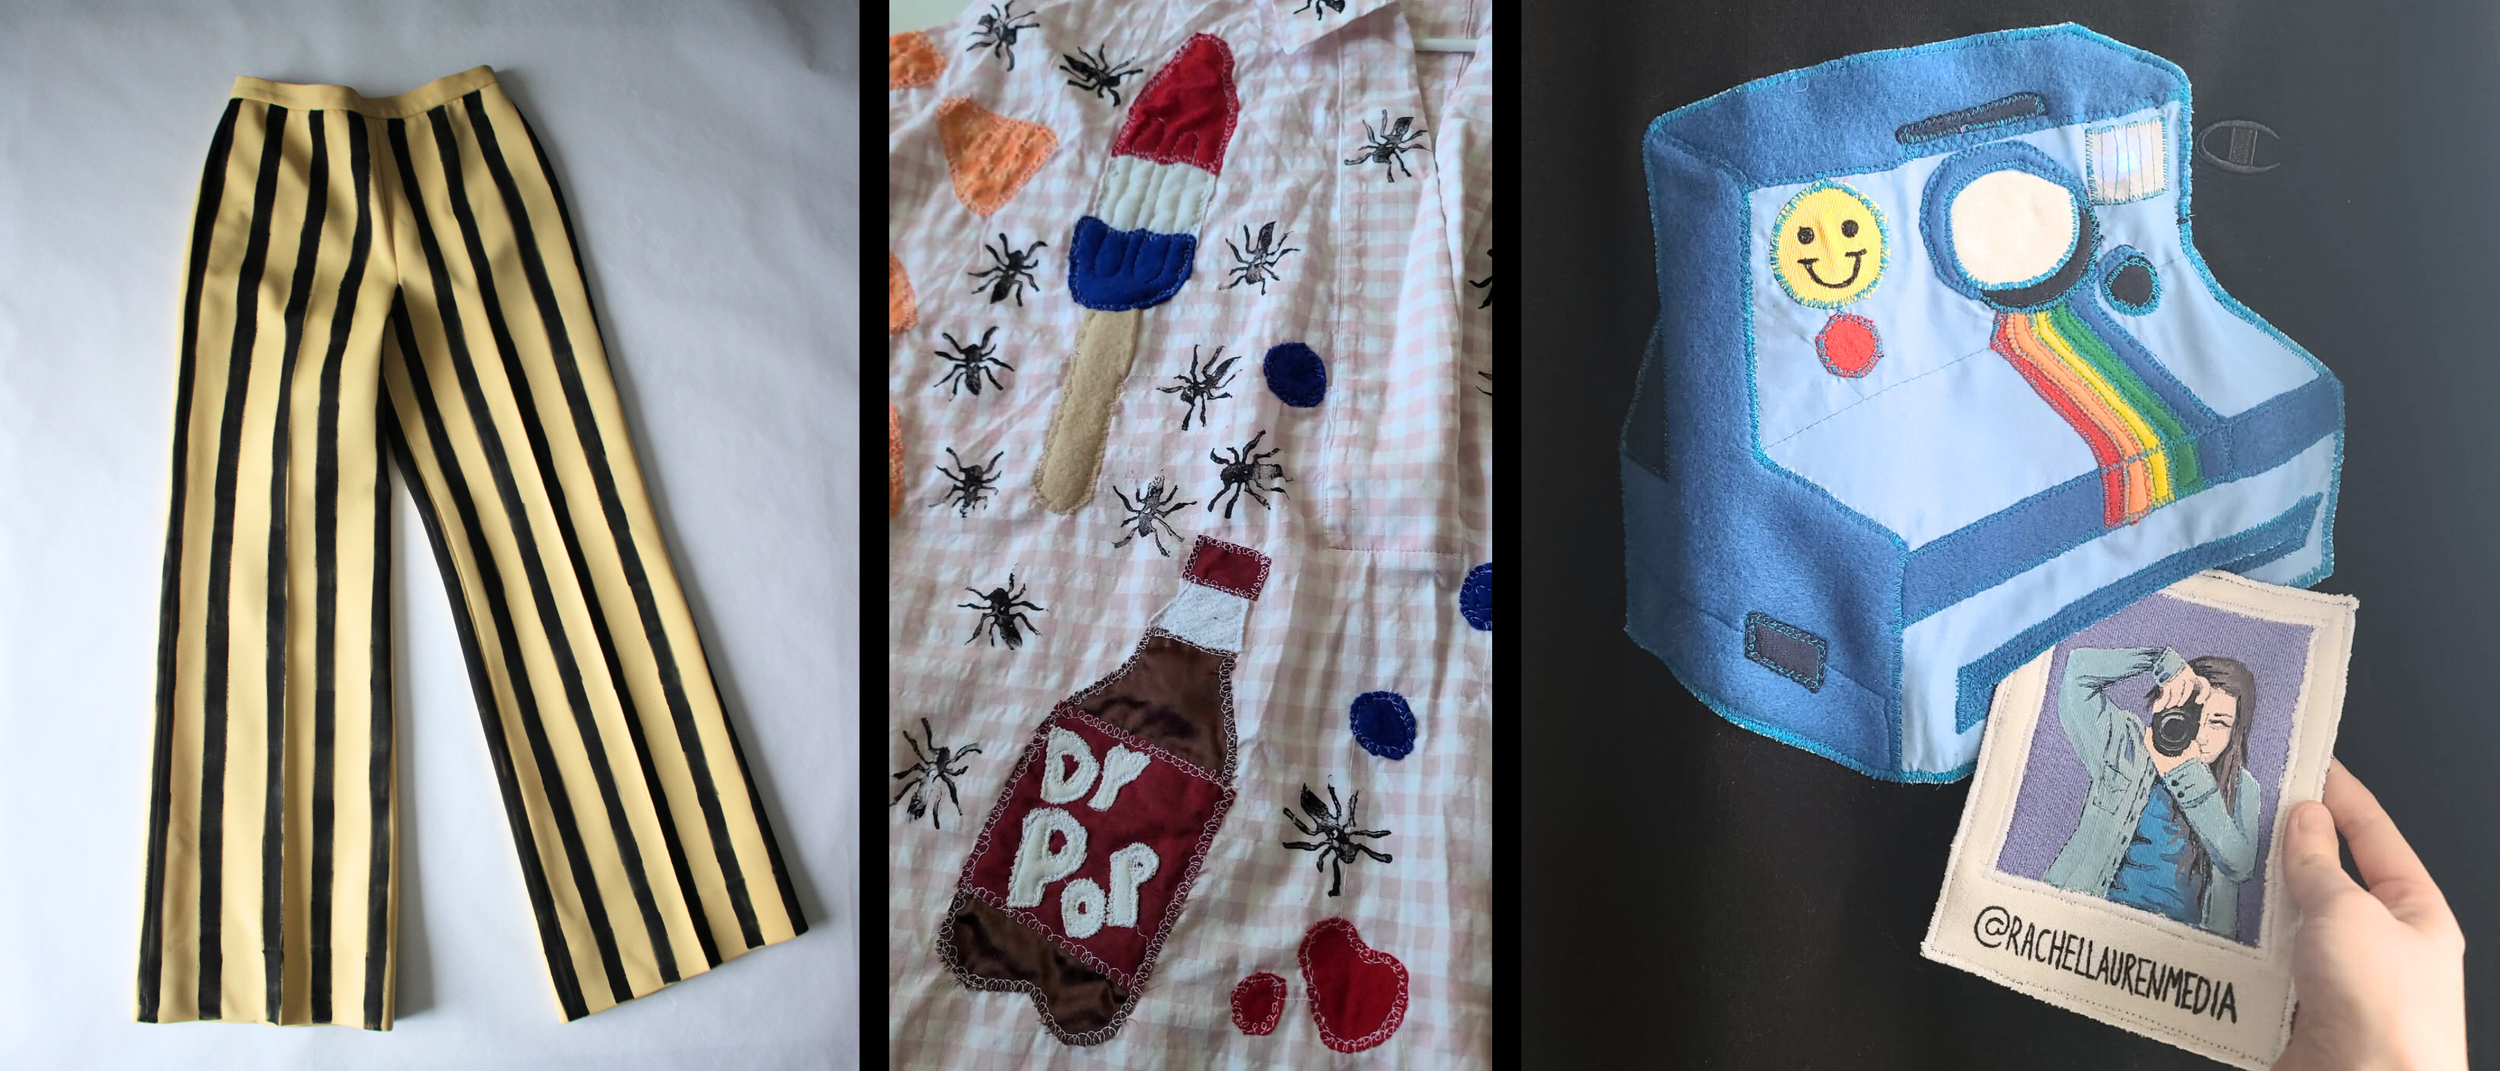
Image: Painted examples for lighter weight materials.
The “FLEX” version is definitely recommended if you plan on painting T-Shirts especially.
I wanted to show what it also looked like on spandex/super stretchy textured fabric (this fabric is not recommended for painting, but just to show that none of the paints will stretch crazy.)
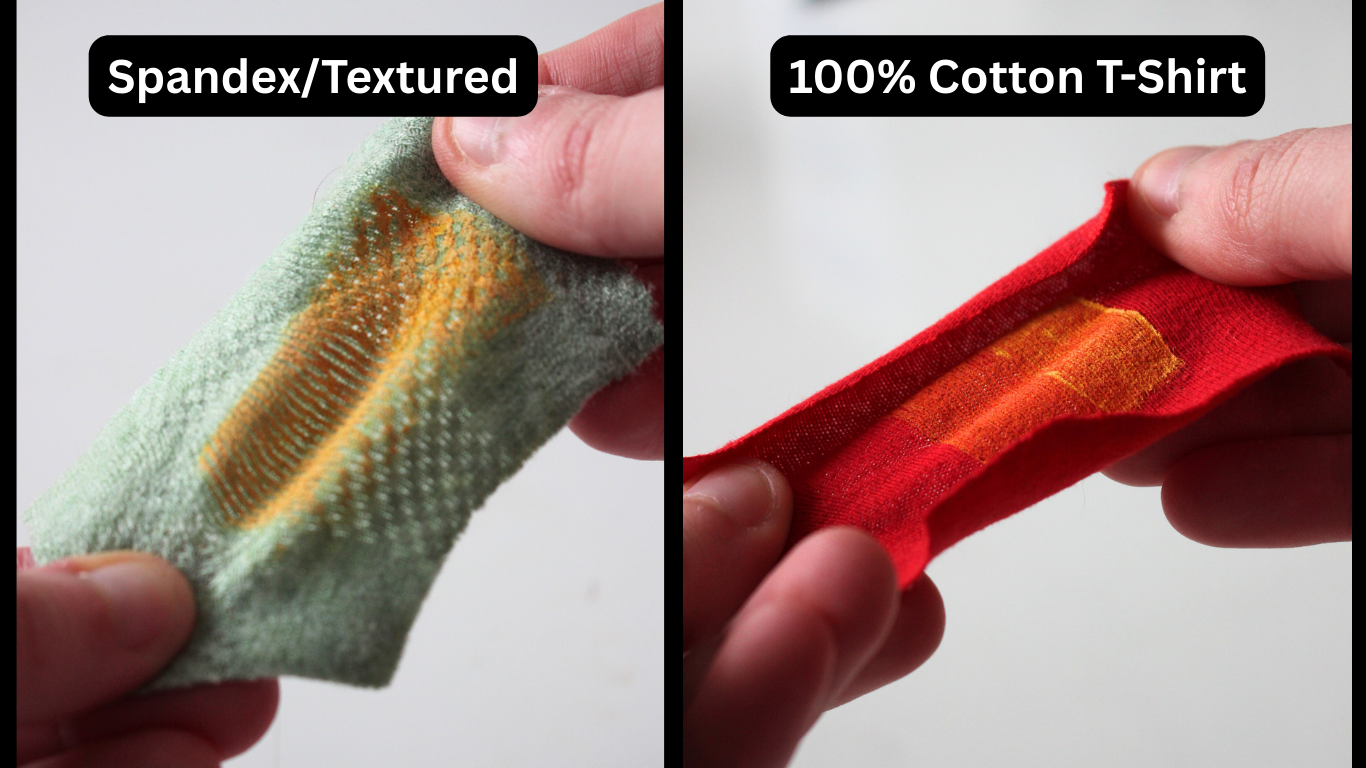
Image: Stretching the paint on spandex versus t-shirt fabric.
Getting Started:
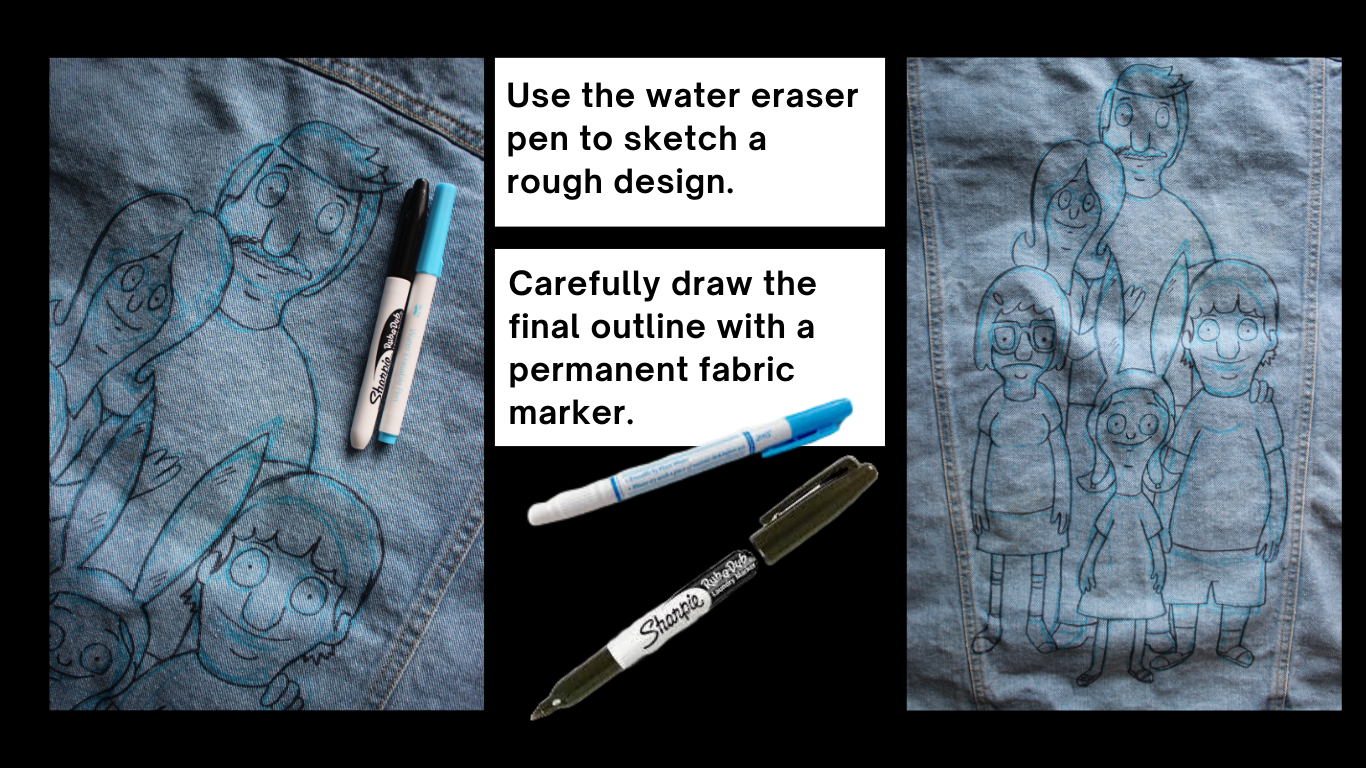
Image: Sketching and Outlining the Design
To sketch a character or design, use a water soluble pen first!
Then use the fabric marker to make the final permanent outlines. Be careful! This is hard to get off if you make a mistake.
I do this because it allows me to see the full design while I paint. Some colors of paint will still show this through it.
I used to use tailors chalk before I discovered these pens. I like these a heck of a lot better. Though tailors chalk might be better for super dark fabrics. (Always remove tailors chalk before painting.)
Take a damp cloth and pat the marker until the blue disappears.
Don’t skip this step. I did, and the blue mixed with some of my paint.
This pen should disapear on contact with water.
NOTE: Try doing a test swab somewhere unnoticeable on the fabric just in case.
Wait until it’s completely dry before you continue.
Light Versus Dark Fabric
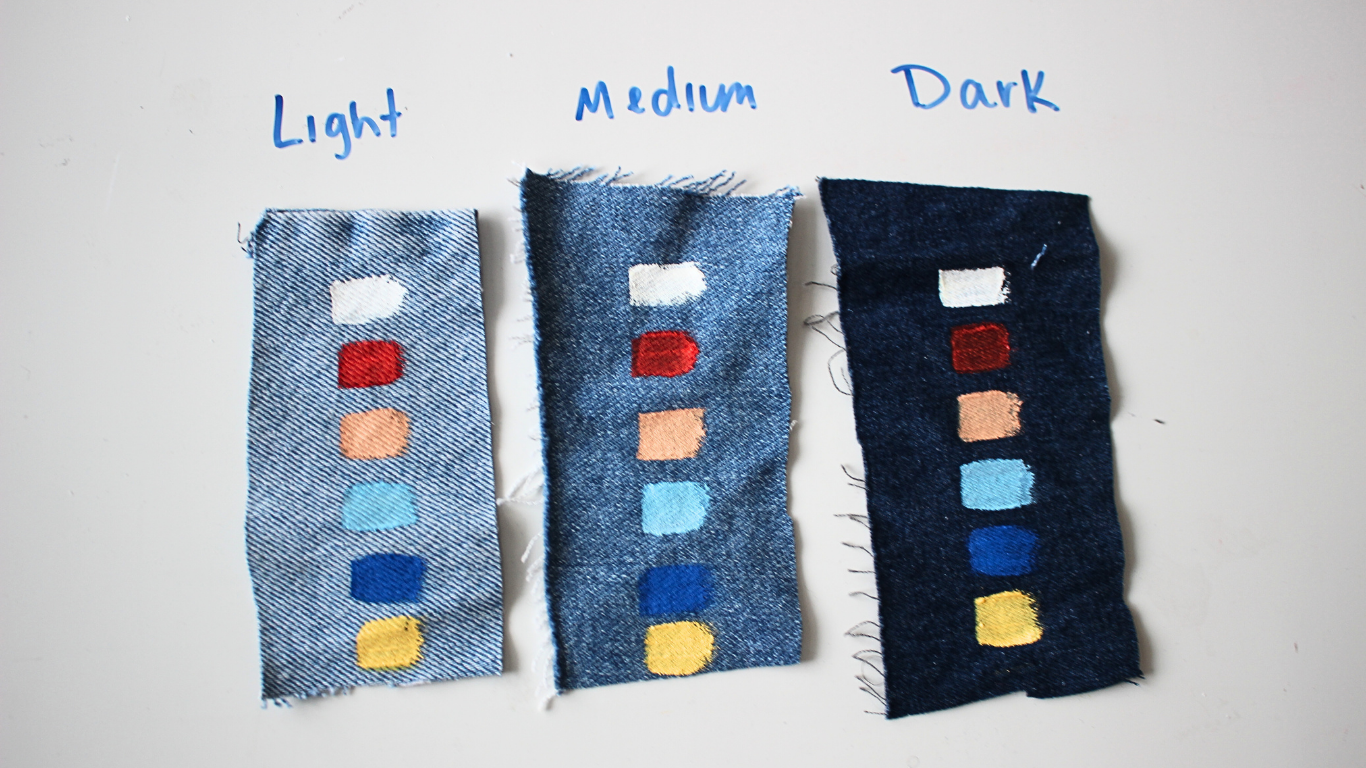
Image: Light, Medium, Dark Fabric Comparison
Some paints don’t show as well on darker fabrics. Paints mixed with white tend to show better after 2 coats, or you can paint a white base first (see part below).
The red paint is an example not mixed with white. Keep in mind, mixing white directly into paints will make them more pastel.
Or try painting a base of white first.
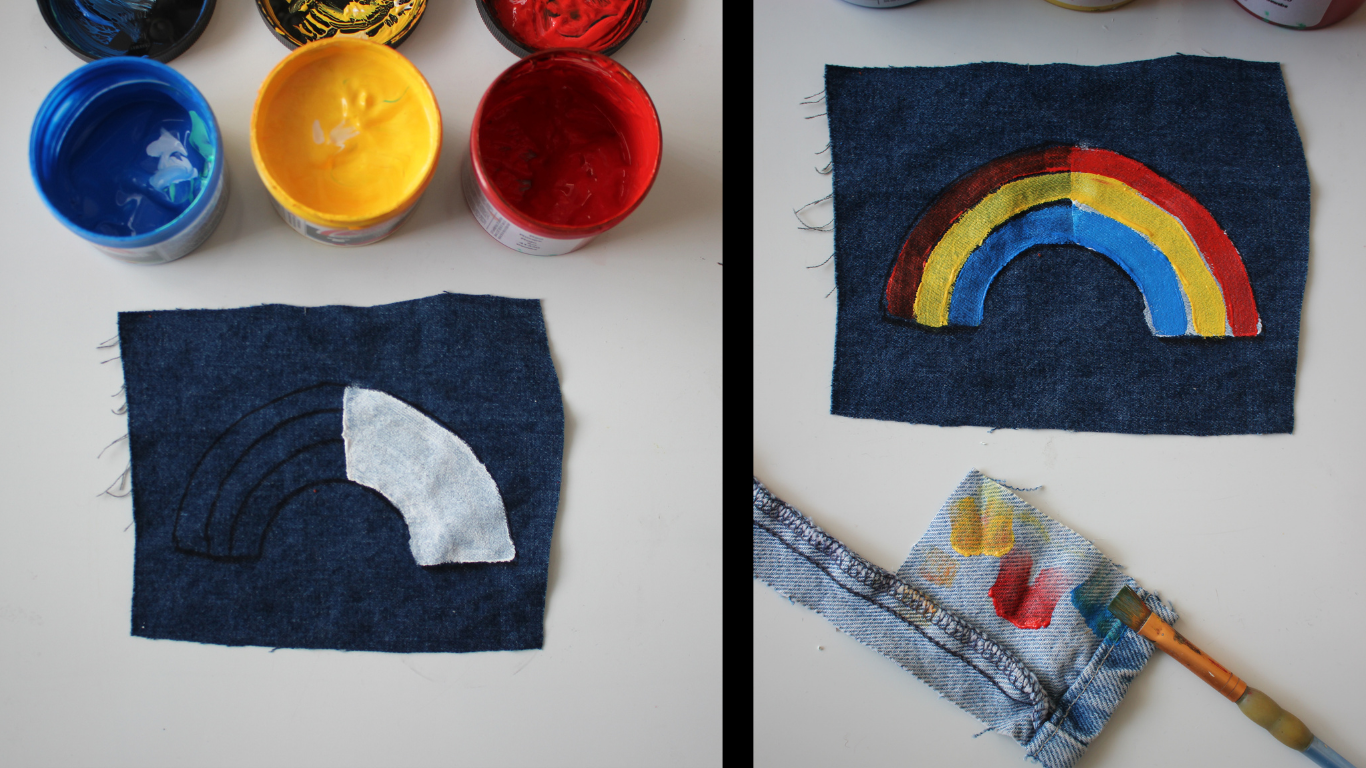
Image: Painting on dark fabric, comparing no base versus white base.
If you want the vibrant colors without having to dilute with white, paint a white base on the fabric first!
*Some paints are specially made for dark fabrics, check yours.
In the image, I painted half a rainbow with no white base, and the other with a white base. This is after two coats of color.
Adding a white base will increase the thickness/amount of layers.
Mixing Paint
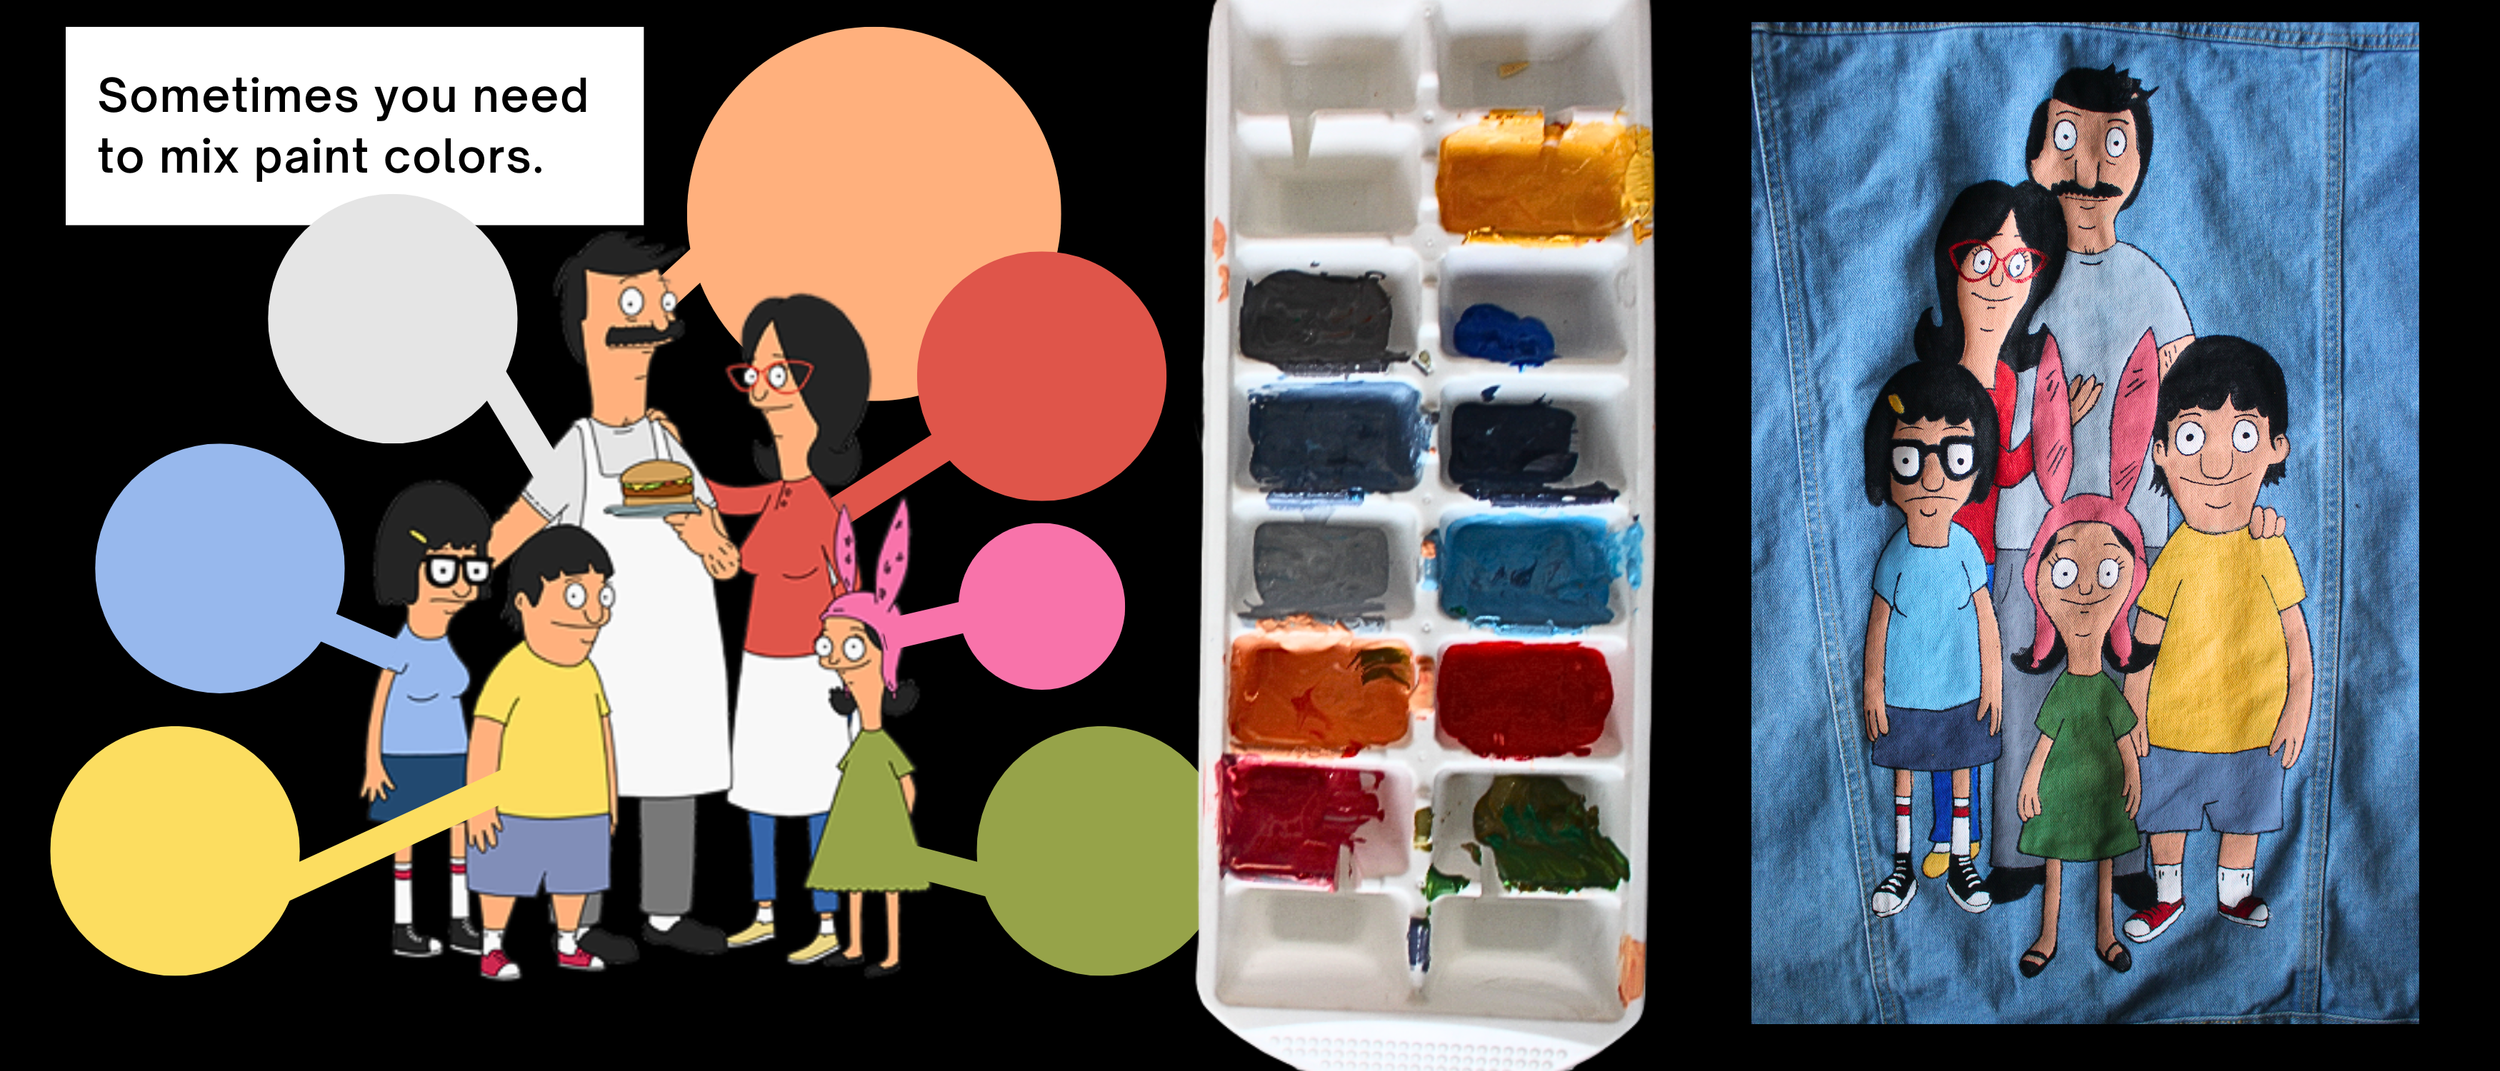
Image: Color palette for my design
Sometimes you need specific colors.
I like to re-use sealable containers to mix paint in. I used a palette (ice tray) for this tutorial, but I dont recommend it for your projects cause it allows the paint to dry out.
Note: The paint might dry a little bit darker than the wet paint.
You can also blend paint on the “canvas” itself if your design has a gradient!
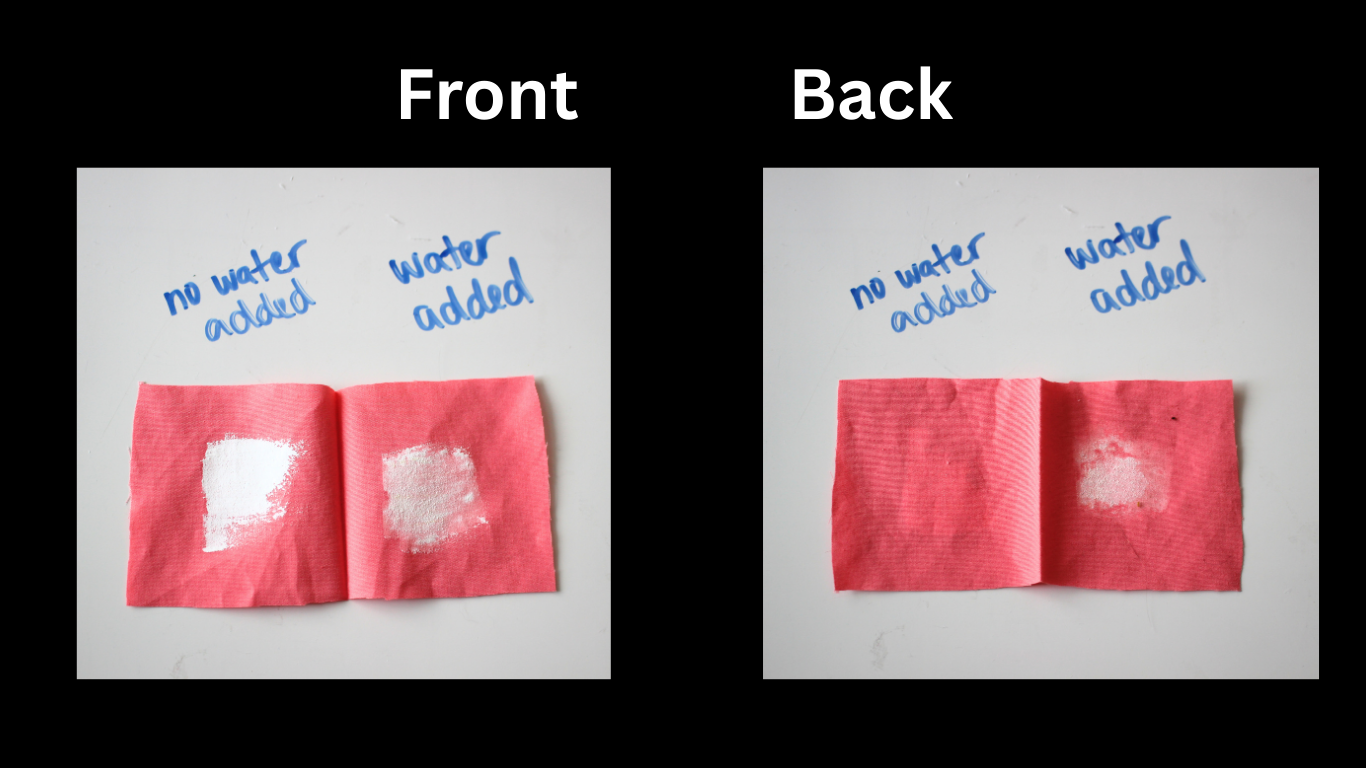
Image: White Screenprinting Ink as is, versus water added.
Do not mix water into your paint unless it is too thick. The paint is meant to be viscous to prevent bleeding and have the best coverage, but not too thick that it doesn’t bond to the fabric.
(Do not mix water into the paint if it isn’t water based either. Mine is water based, check your paint beforehand)
First Layers
If you are doing a more detailed design:
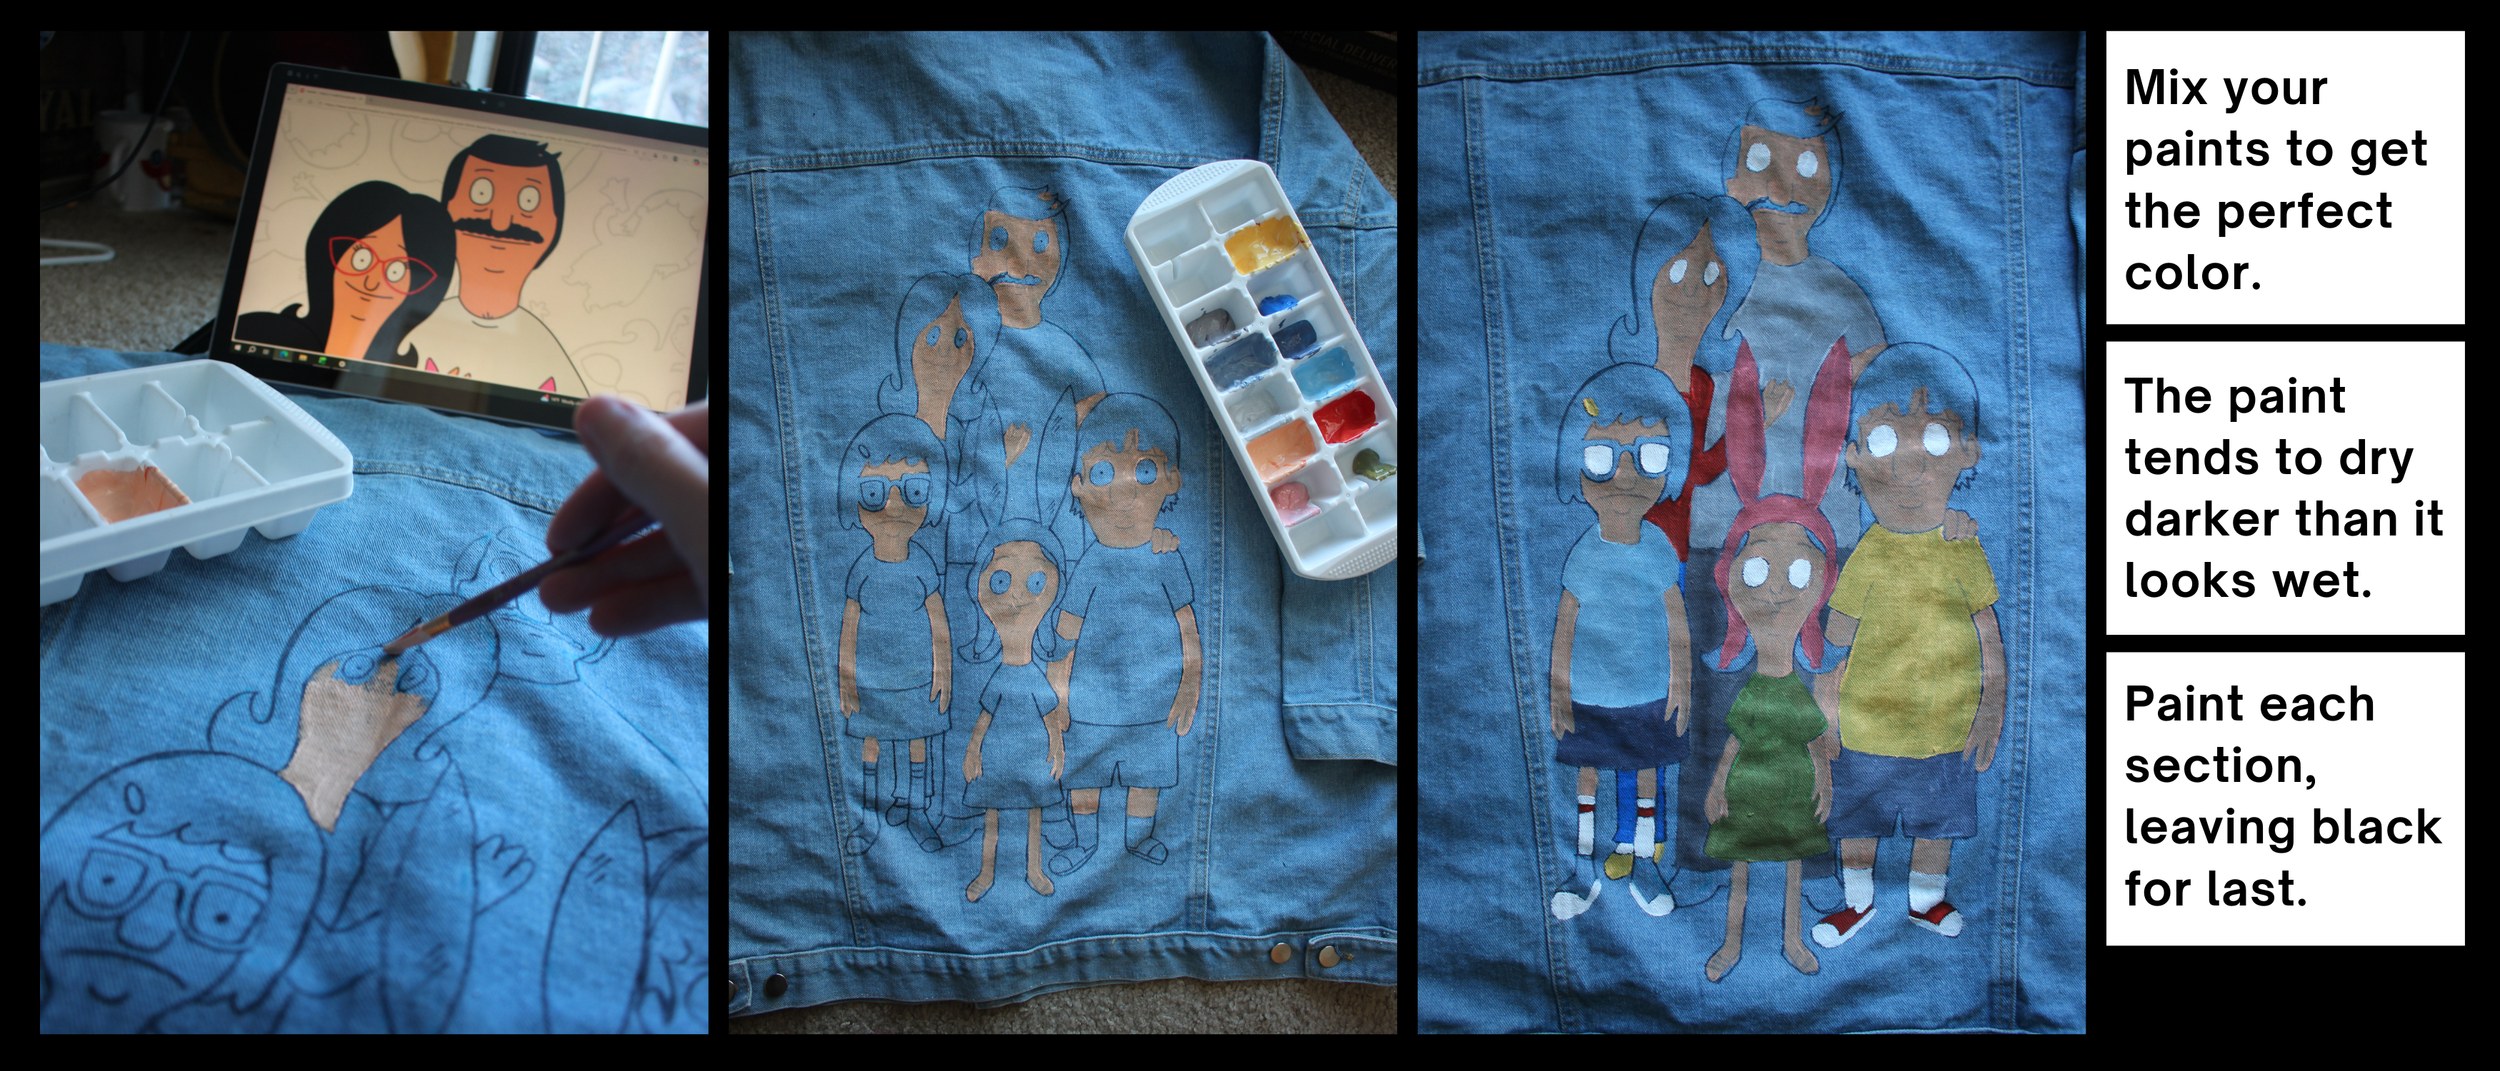
Image: Painting the first layer
Carefully paint each section. Try not to make mistakes, cause it can get hard to fix. I’ll go over tips to prevent and correct mistakes below.
I like to save black for the very end.
The first layer will most likely not be very vibrant. This is normal.
Don’t paint too thick, just enough to get full coverage.
Painting the Second Layer
You can do a second layer if the paint needs more coverage.

Image: Second layer painted
Outlining and Fine Details
The needle tip squeeze bottle allows you to create very fine lines with a lot more control.
I discovered outlining while the other paint is still wet creates a better hold. (This jacket was outlined after the base was completely dry, versus the pokemon that were outlined while wet. You’ll see some of the black came off this jacket in the wash below. )
Caution, it may hurt your hand after a while of squeezing. Still worth it.
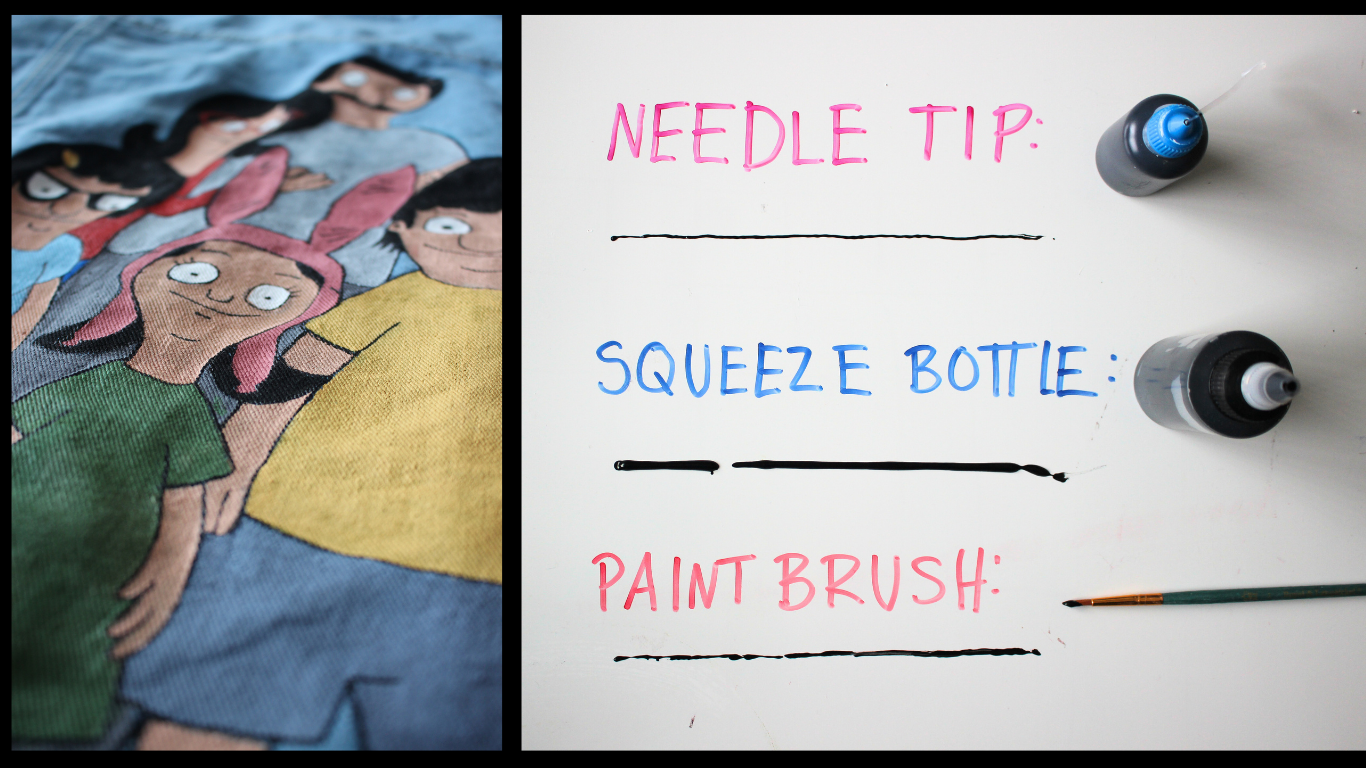
Image: Needle Tip, Squeeze Bottle, Paint Brush comparison
Filling the Bottle
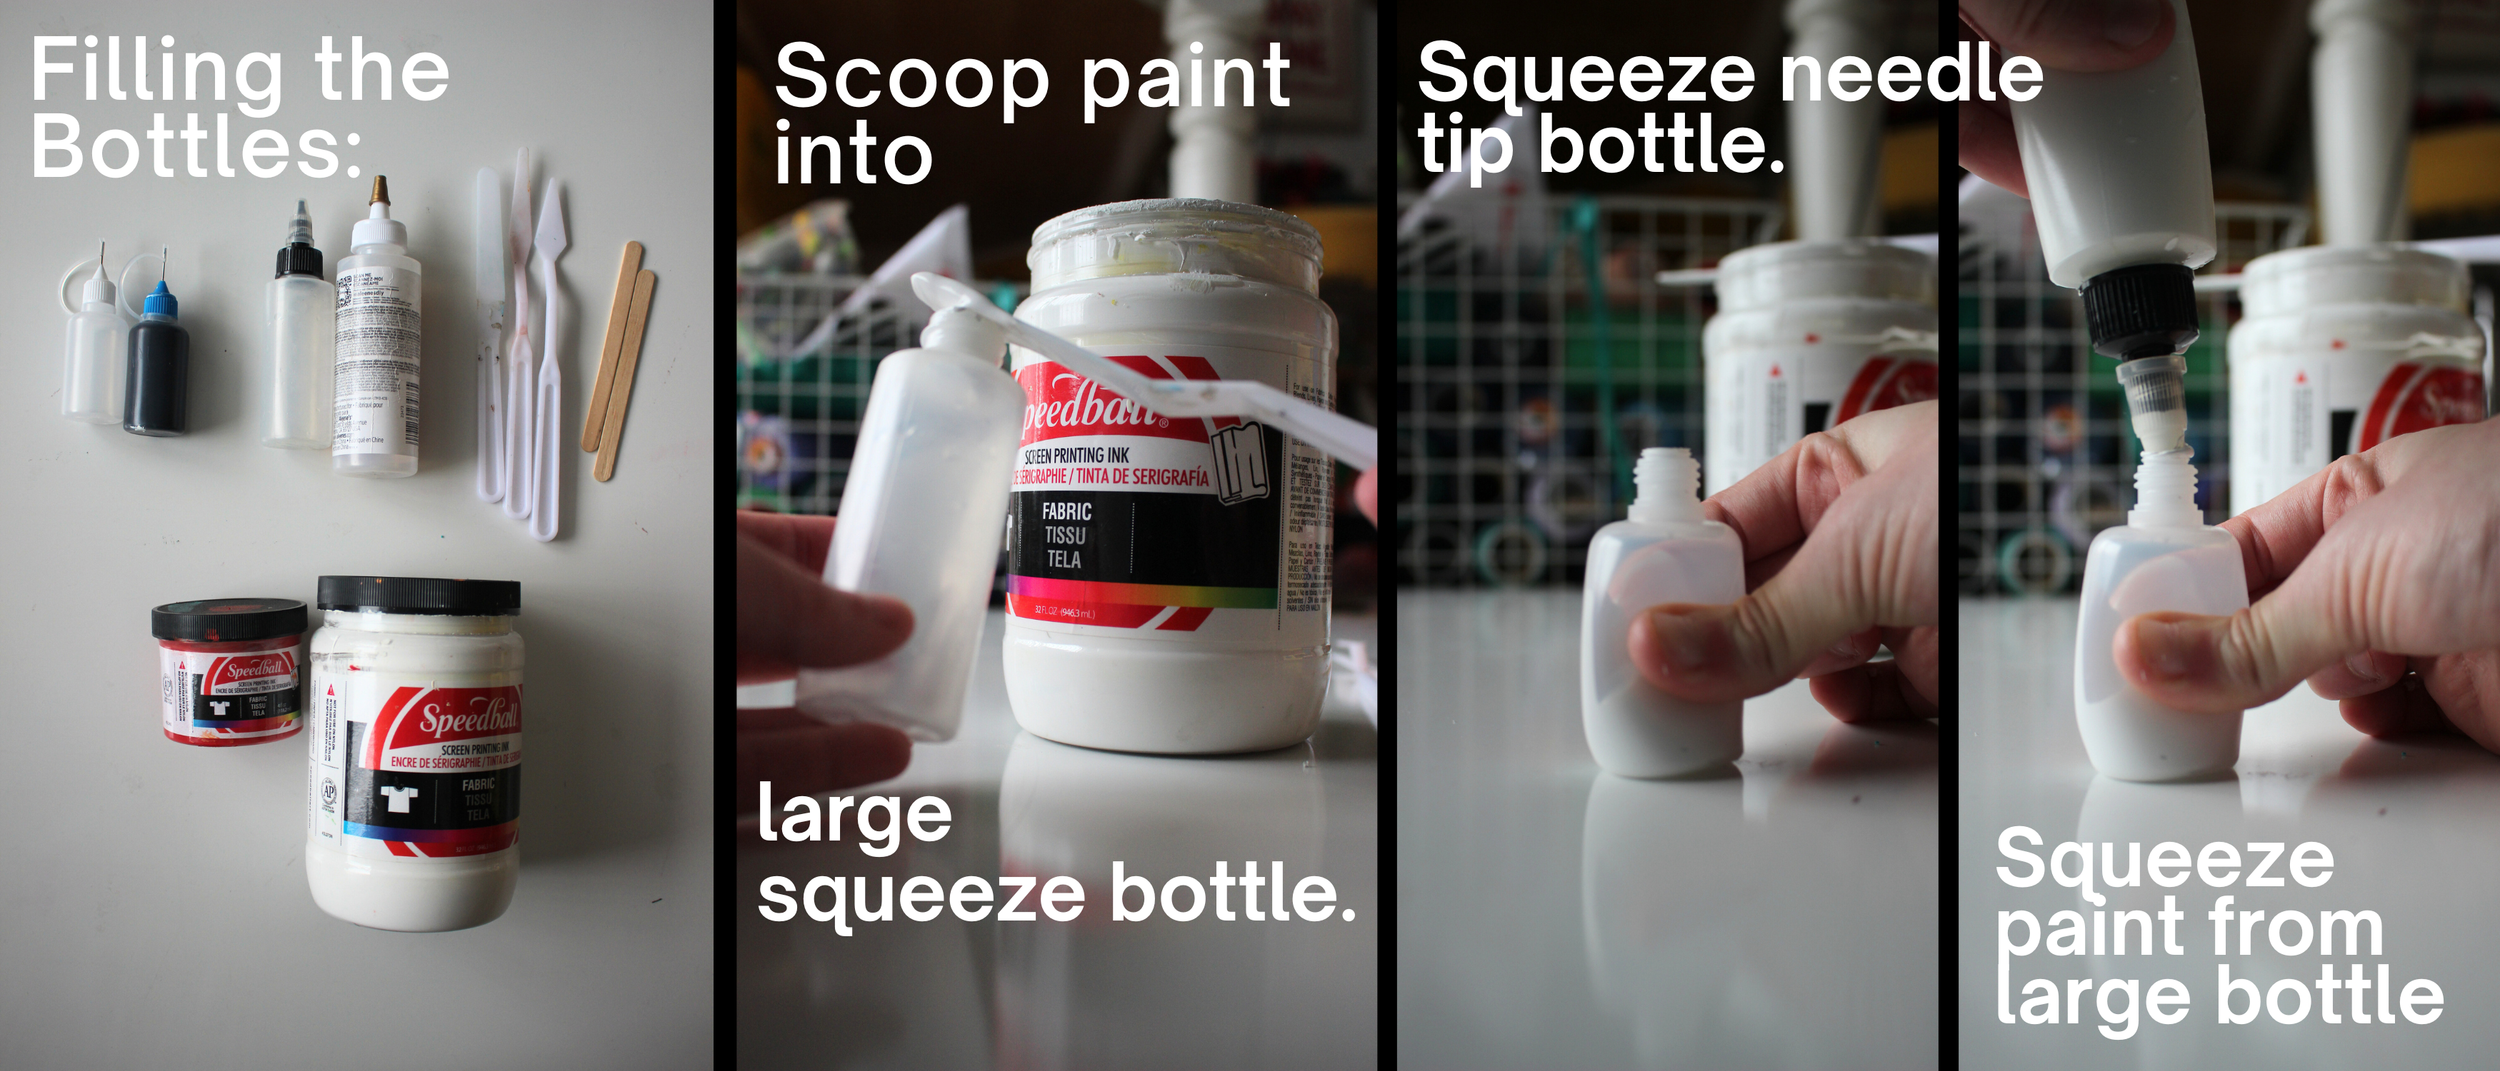
Image: Filling the large and small squeeze bottles.
Filling the bottle is a little difficult, but DEFINITELY worth it.
Step One: Fill a larger squeeze bottle first.
You can re-use an empty glue bottle, or random squeeze bottle with a larger opening for easier filling. Make sure the tip of it can fit into the hole of the needle squeeze bottle.
You can use a palette knife, popsicle stick, or paintbrush to fill the larger bottle.
Step Two: Fill the Smaller Needle Tip Bottle.
-Squeeze the Needle Tip Bottle first, then insert the large bottle into the opening and squeeze the paint into it. You should feel the small bottle wanting to expand. Allow it to expand naturally, and stop squeezeing the paint in once it’s fully expanded.
-Repeat this process until full to your liking.
-This step is important, because it allows the paint to freely pour in without spraying out.
( You could attempt to fill just the tiny bottle alone, but its a lot harder cause of the size of the opening. )
Made a Mistake?
There are a couple ways to fix mistakes, and prevent them or make them easier to fix.
Paint slowly and surely
Seems easy enough, but truly if you take your time and double check details before painting, you can save yourself the hassle.
When painting along a lot of edges, try holding the paintbrush perpendicular to the edge, instead of parallel. This gives you more control and reduces buildup of paint on the edges.
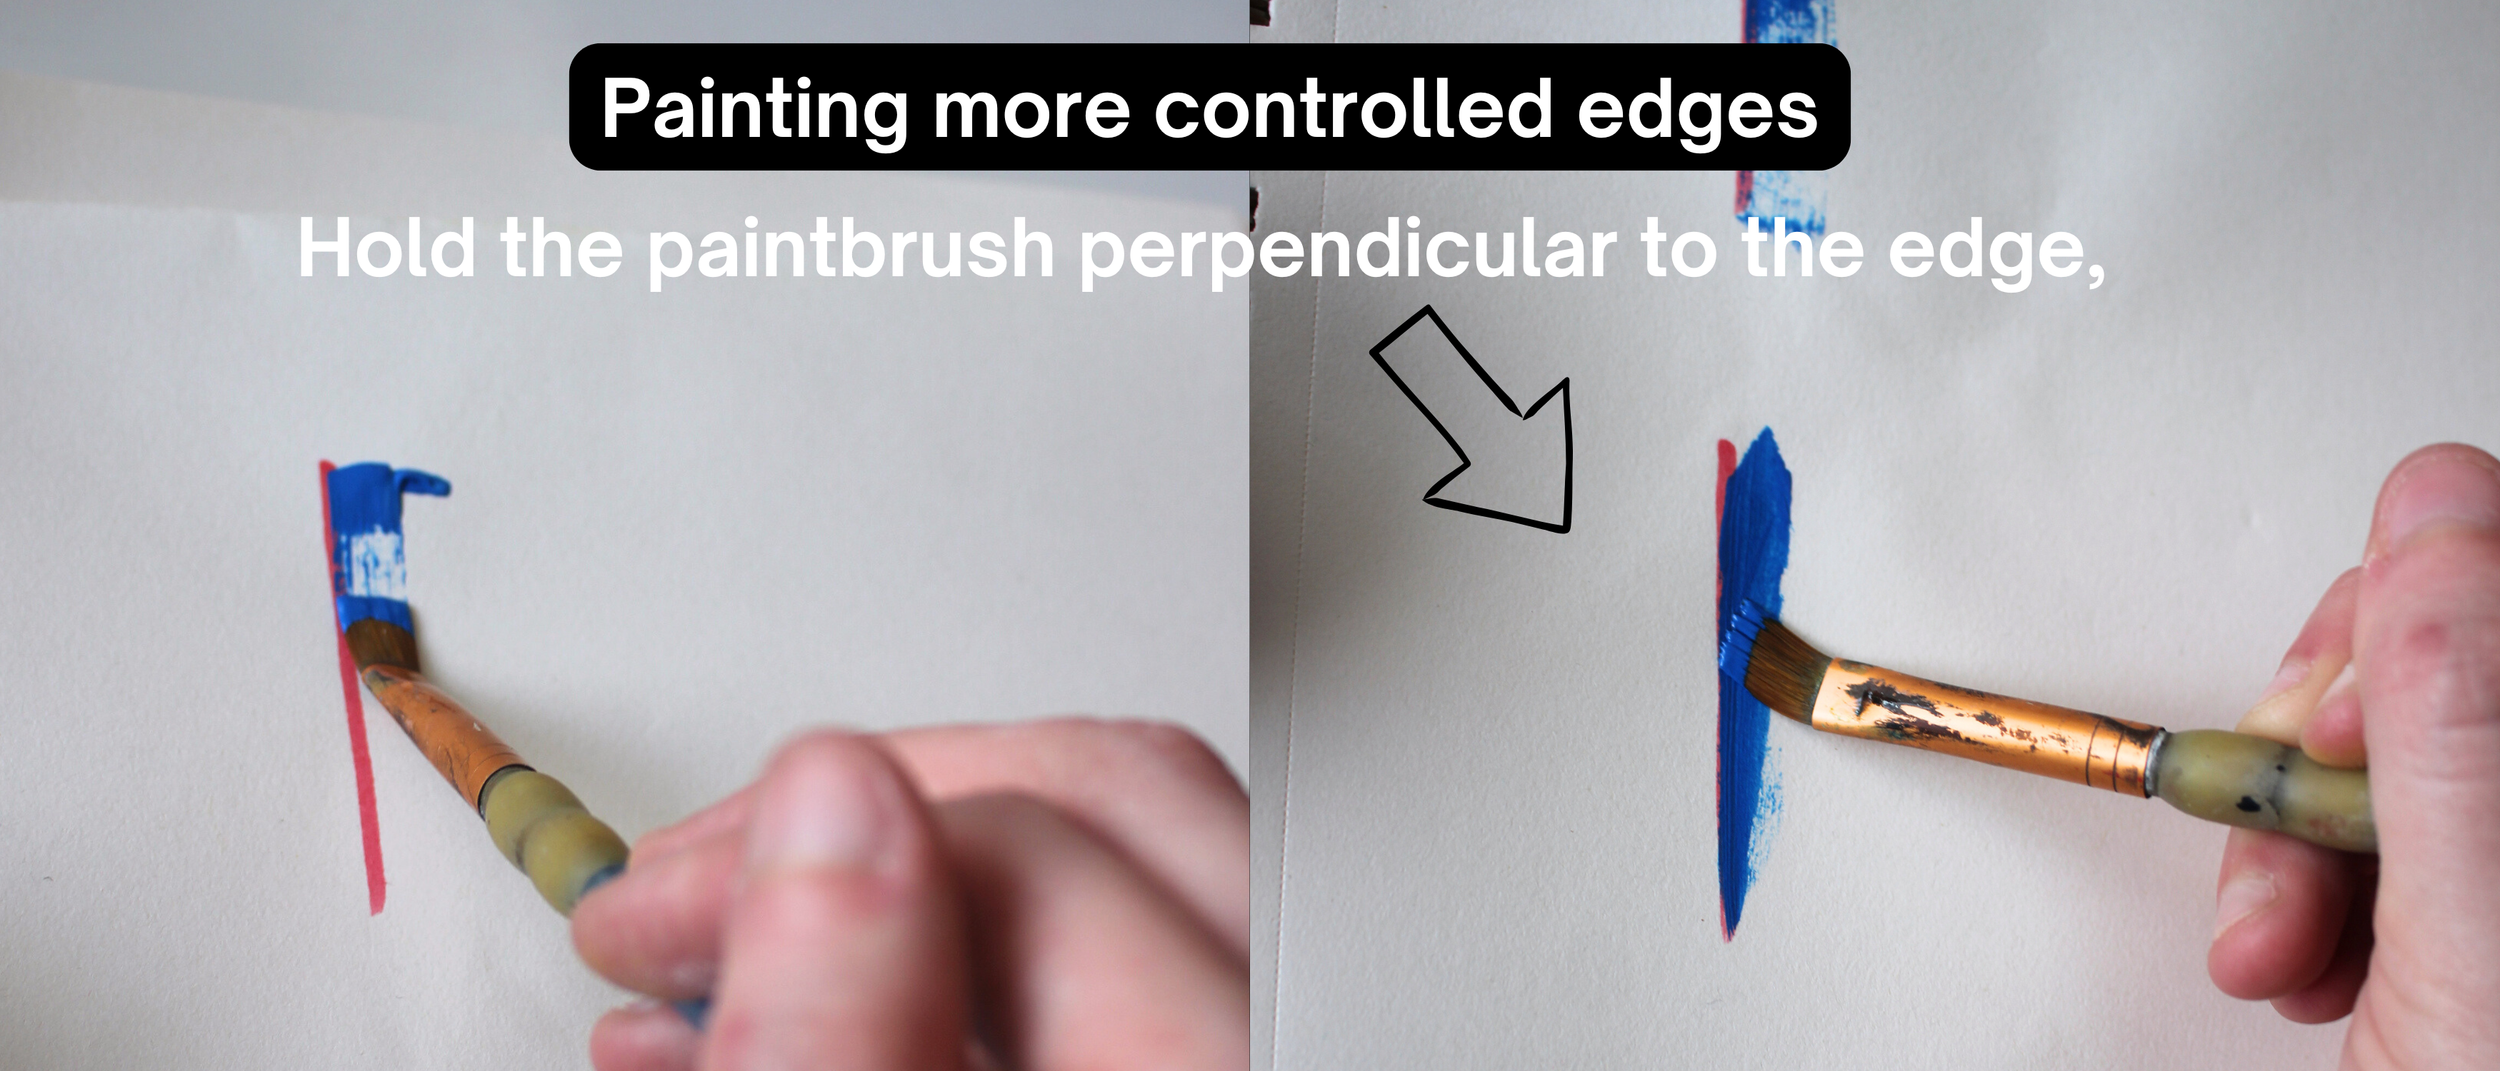
Image: Painting a more controlled edge
Watch where your arms are!
One of the biggest ways I smear paint, is by accidently rubbing a wet part with my hand/arm.
Make sure to start painting at the top left/right and work your way down.
Use a little bit of Water
-Water based paints will come off if you scrub them with water (before curing).
-Use a little bit of water and a clean paintbrush to scrub mistakes.
-Don’t use too much or it’ll bleed.
*Don’t use alchohol or soap to remove messed up paint. It will mess with the curing process.
The other paint will come off too, so you might have to re-apply.
Keep in mind, it might not perfectly come off, especially darker colors. So try not to make mistakes.
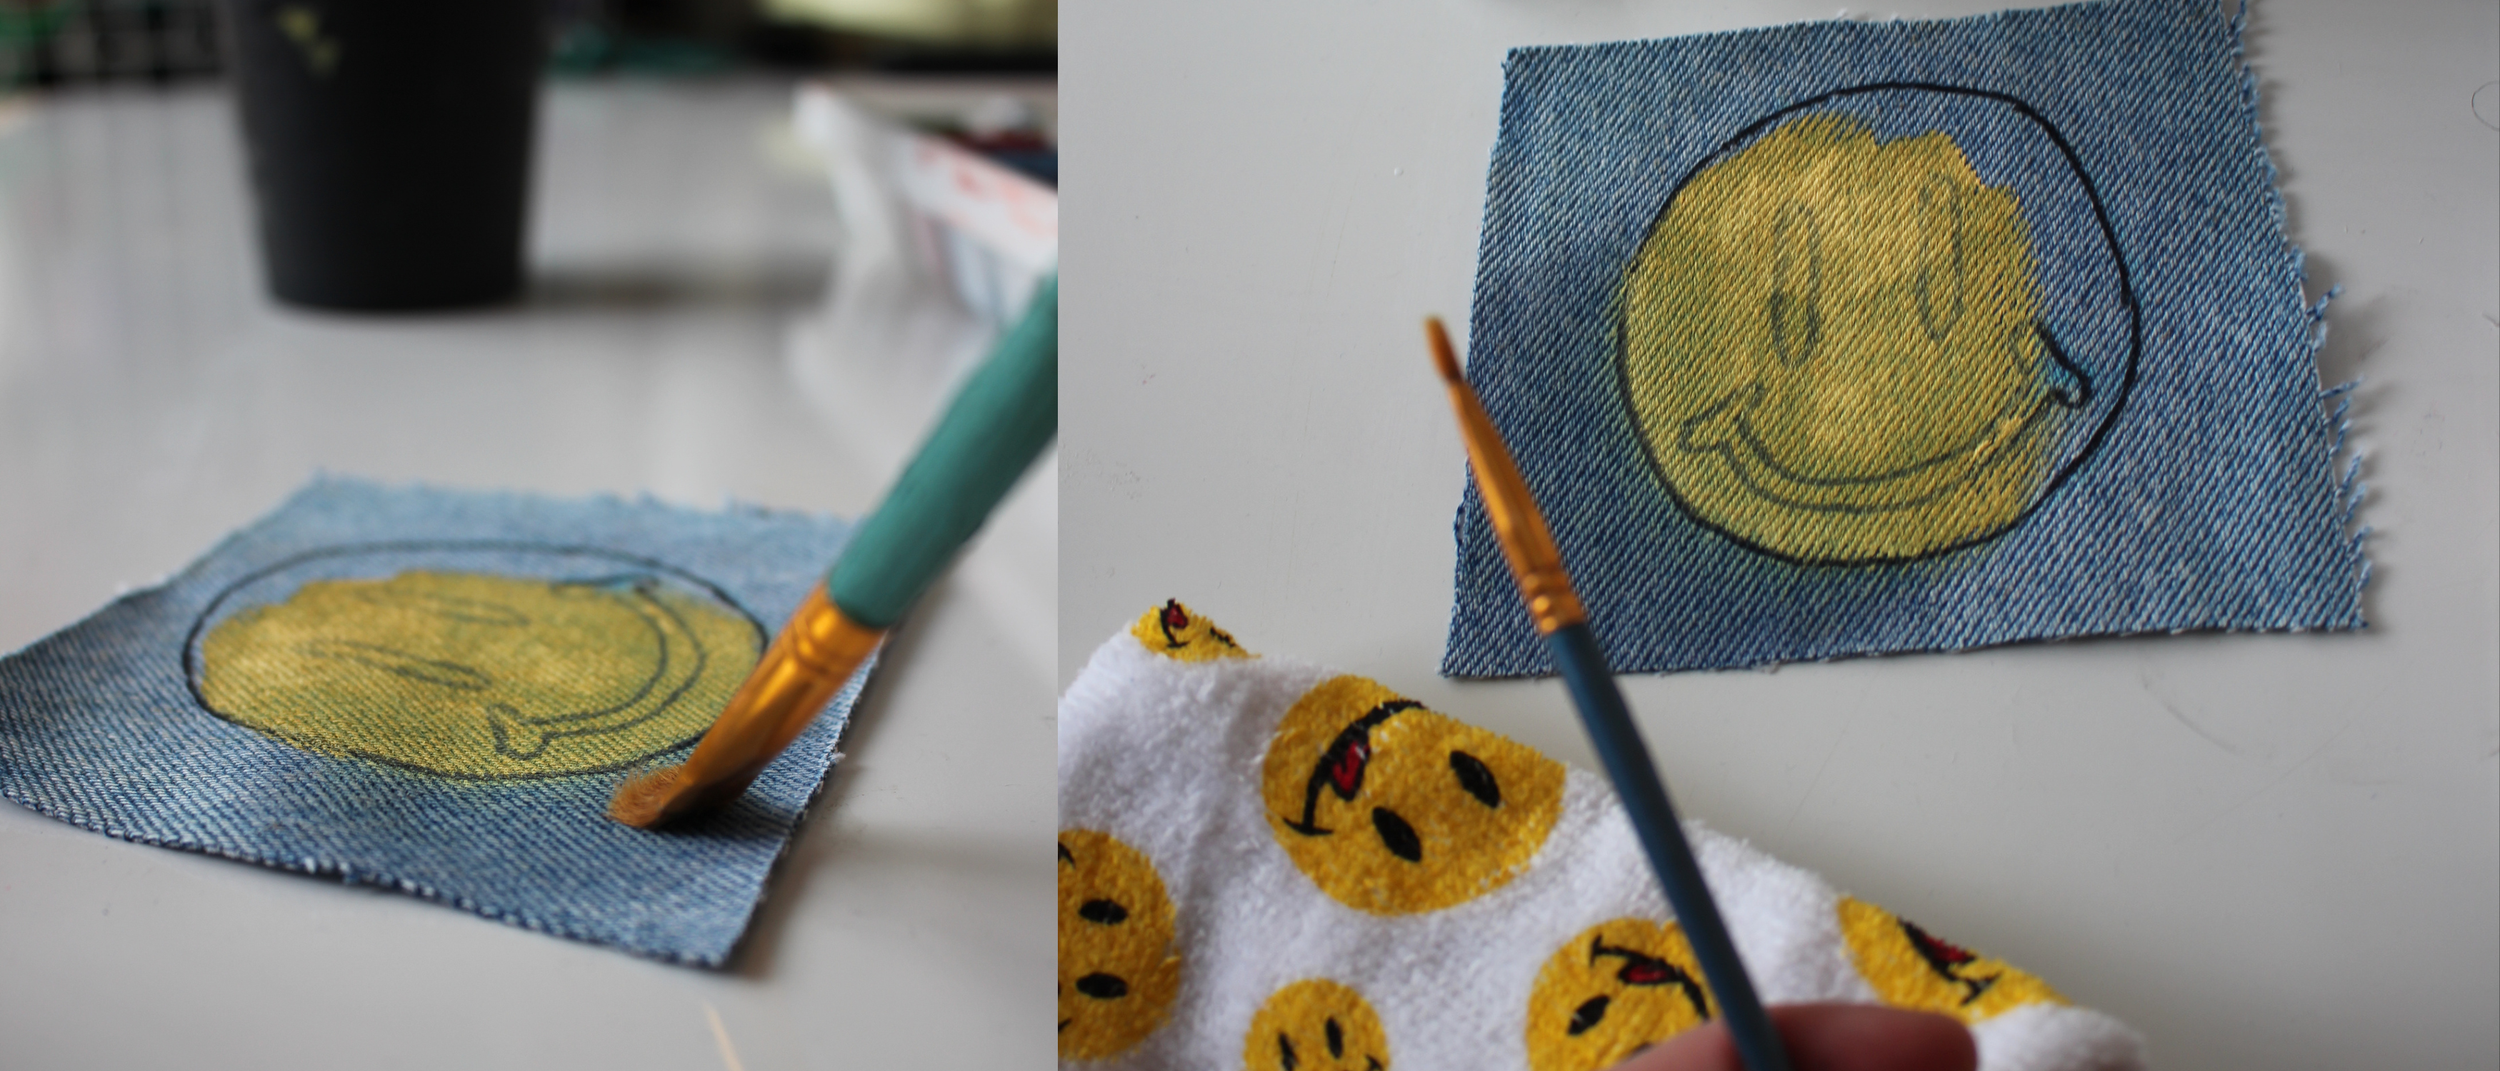
Image: Using water to fix mistake
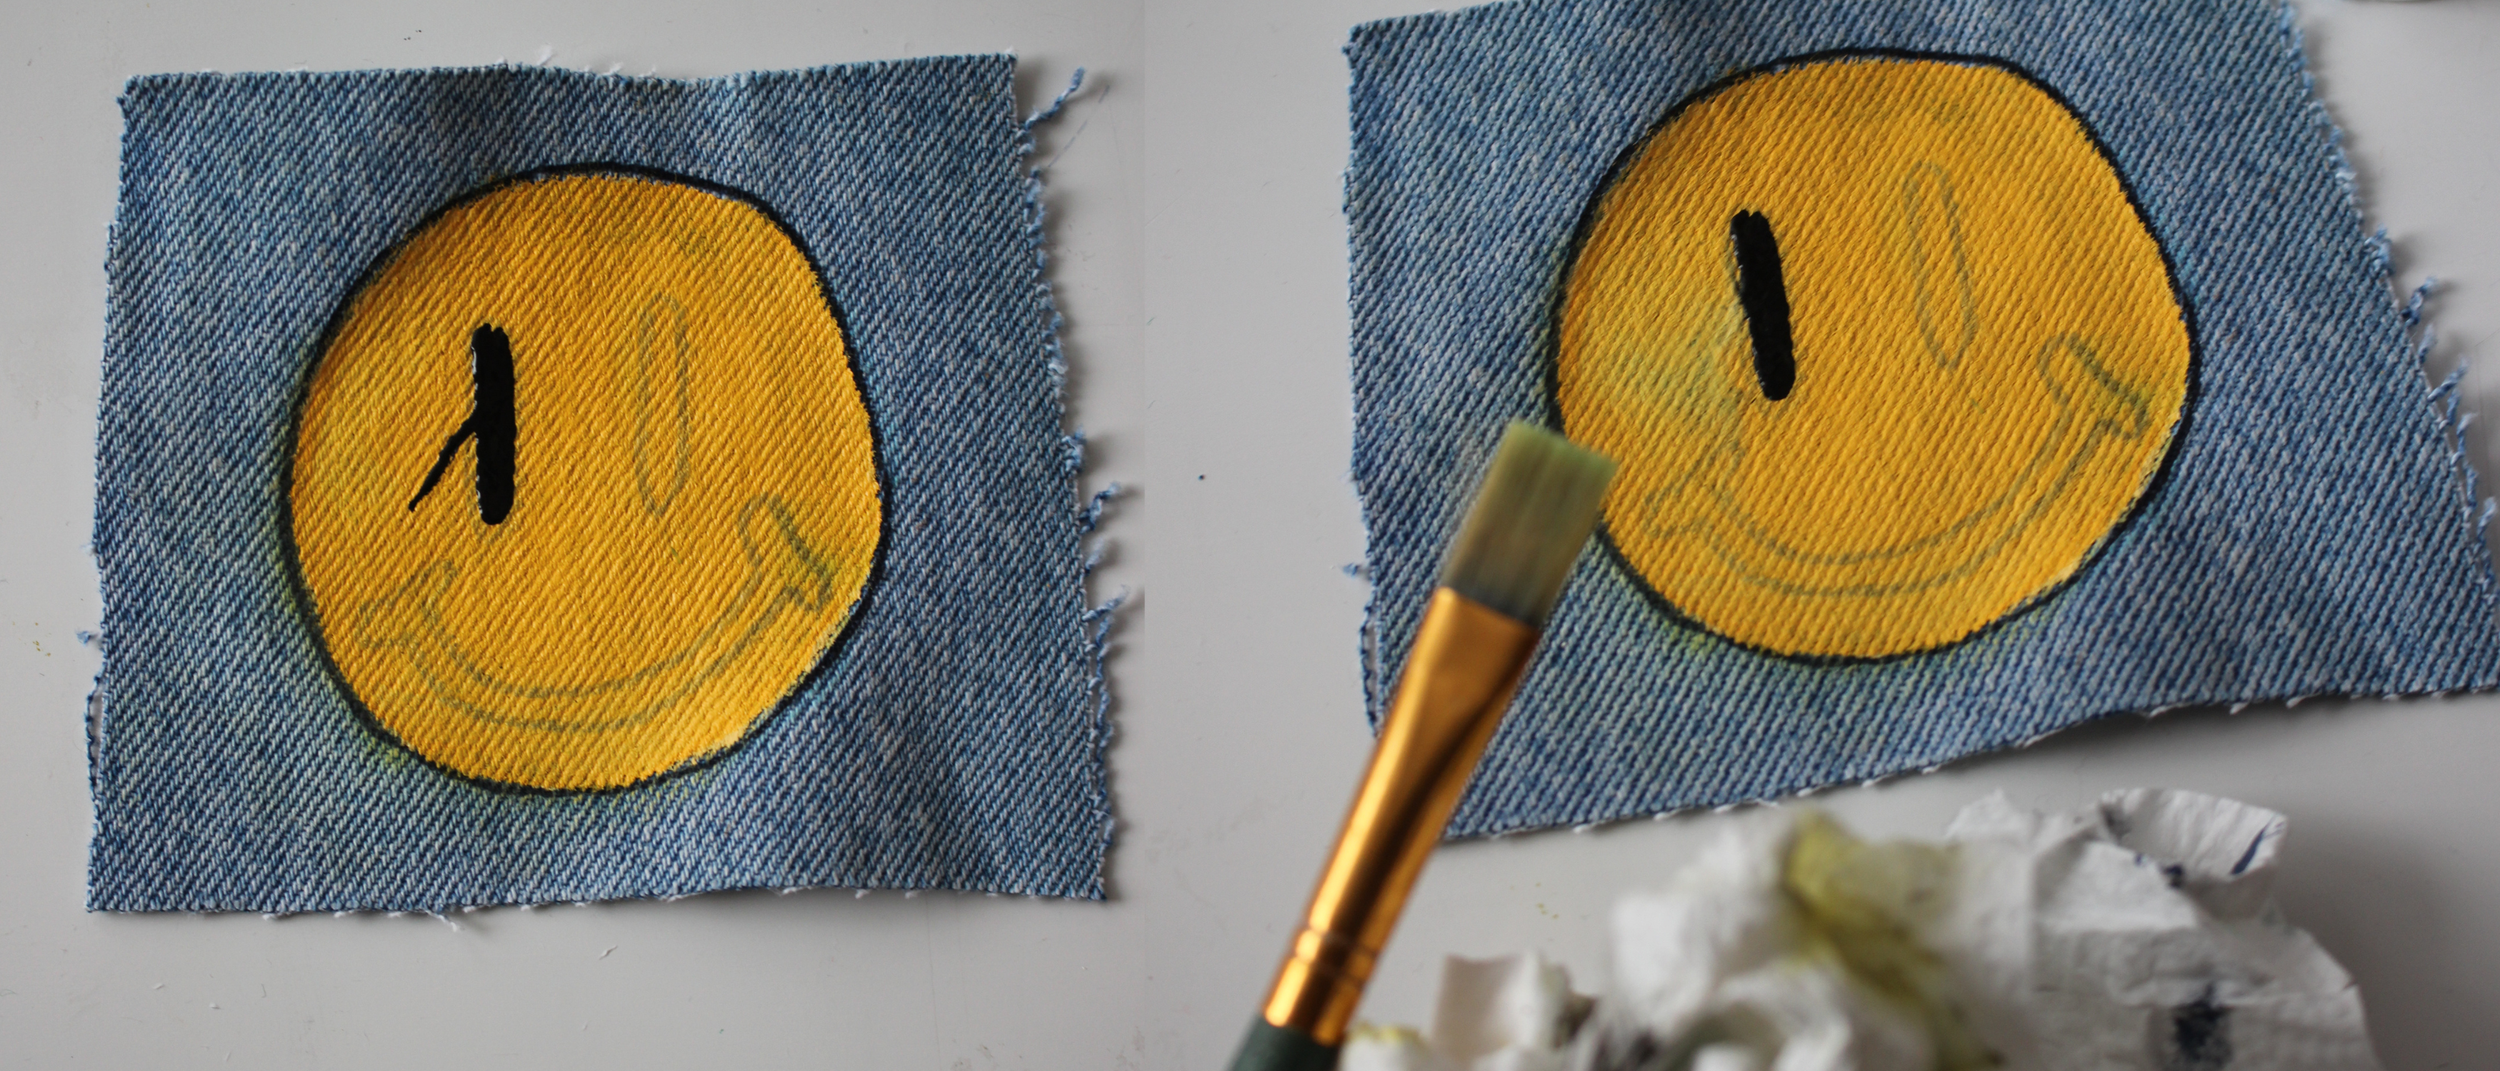
Image: Using water to fix mistake
Ironing the Design
Do not skip this step!
Ironing the paint allows it to cure, and prevents rubbing/washing off.
”CURING: Water based inks chemically change from alkaline to acidic, to activate crosslinking and adhesion.”
I typically set the iron to around 300 degrees farenheit (149 degrees Celcius)
Iron every spot for 2-3 Minutes
*This temp. and time frame varies based on your paint, fabric, and thickness.
You can use a Heat Press (typically made for Cricuts) for a larger surface area, and more precise temperature/timer.
Or just use a household iron for a cheaper option. This takes more time because it has a much smaller surface area and the weird shape can be difficult to keep track of what you’ve ironed and haven’t. Check your user manual for settings and temperature. Typically the “cotton” or “linen” setting on most irons should be good.
Don’t use steam on the iron.
Use parchment paper on top of the paint to protect your iron/garment.
Some sources have said to first iron the area for ~10 seconds and lift up. Steam might come up. This might help with removing excess water.
Important Notes:
-Try testing the fabric on the heat setting you want to use before leaving it on for the full time.
-The parchment paper can get yellow and stain the fabric, so be careful reusing the same piece too much.
-Do not move the iron around on the design, unless using parchment paper.
-Do not iron over the elastic on pants/clothes or it’ll get brittle.
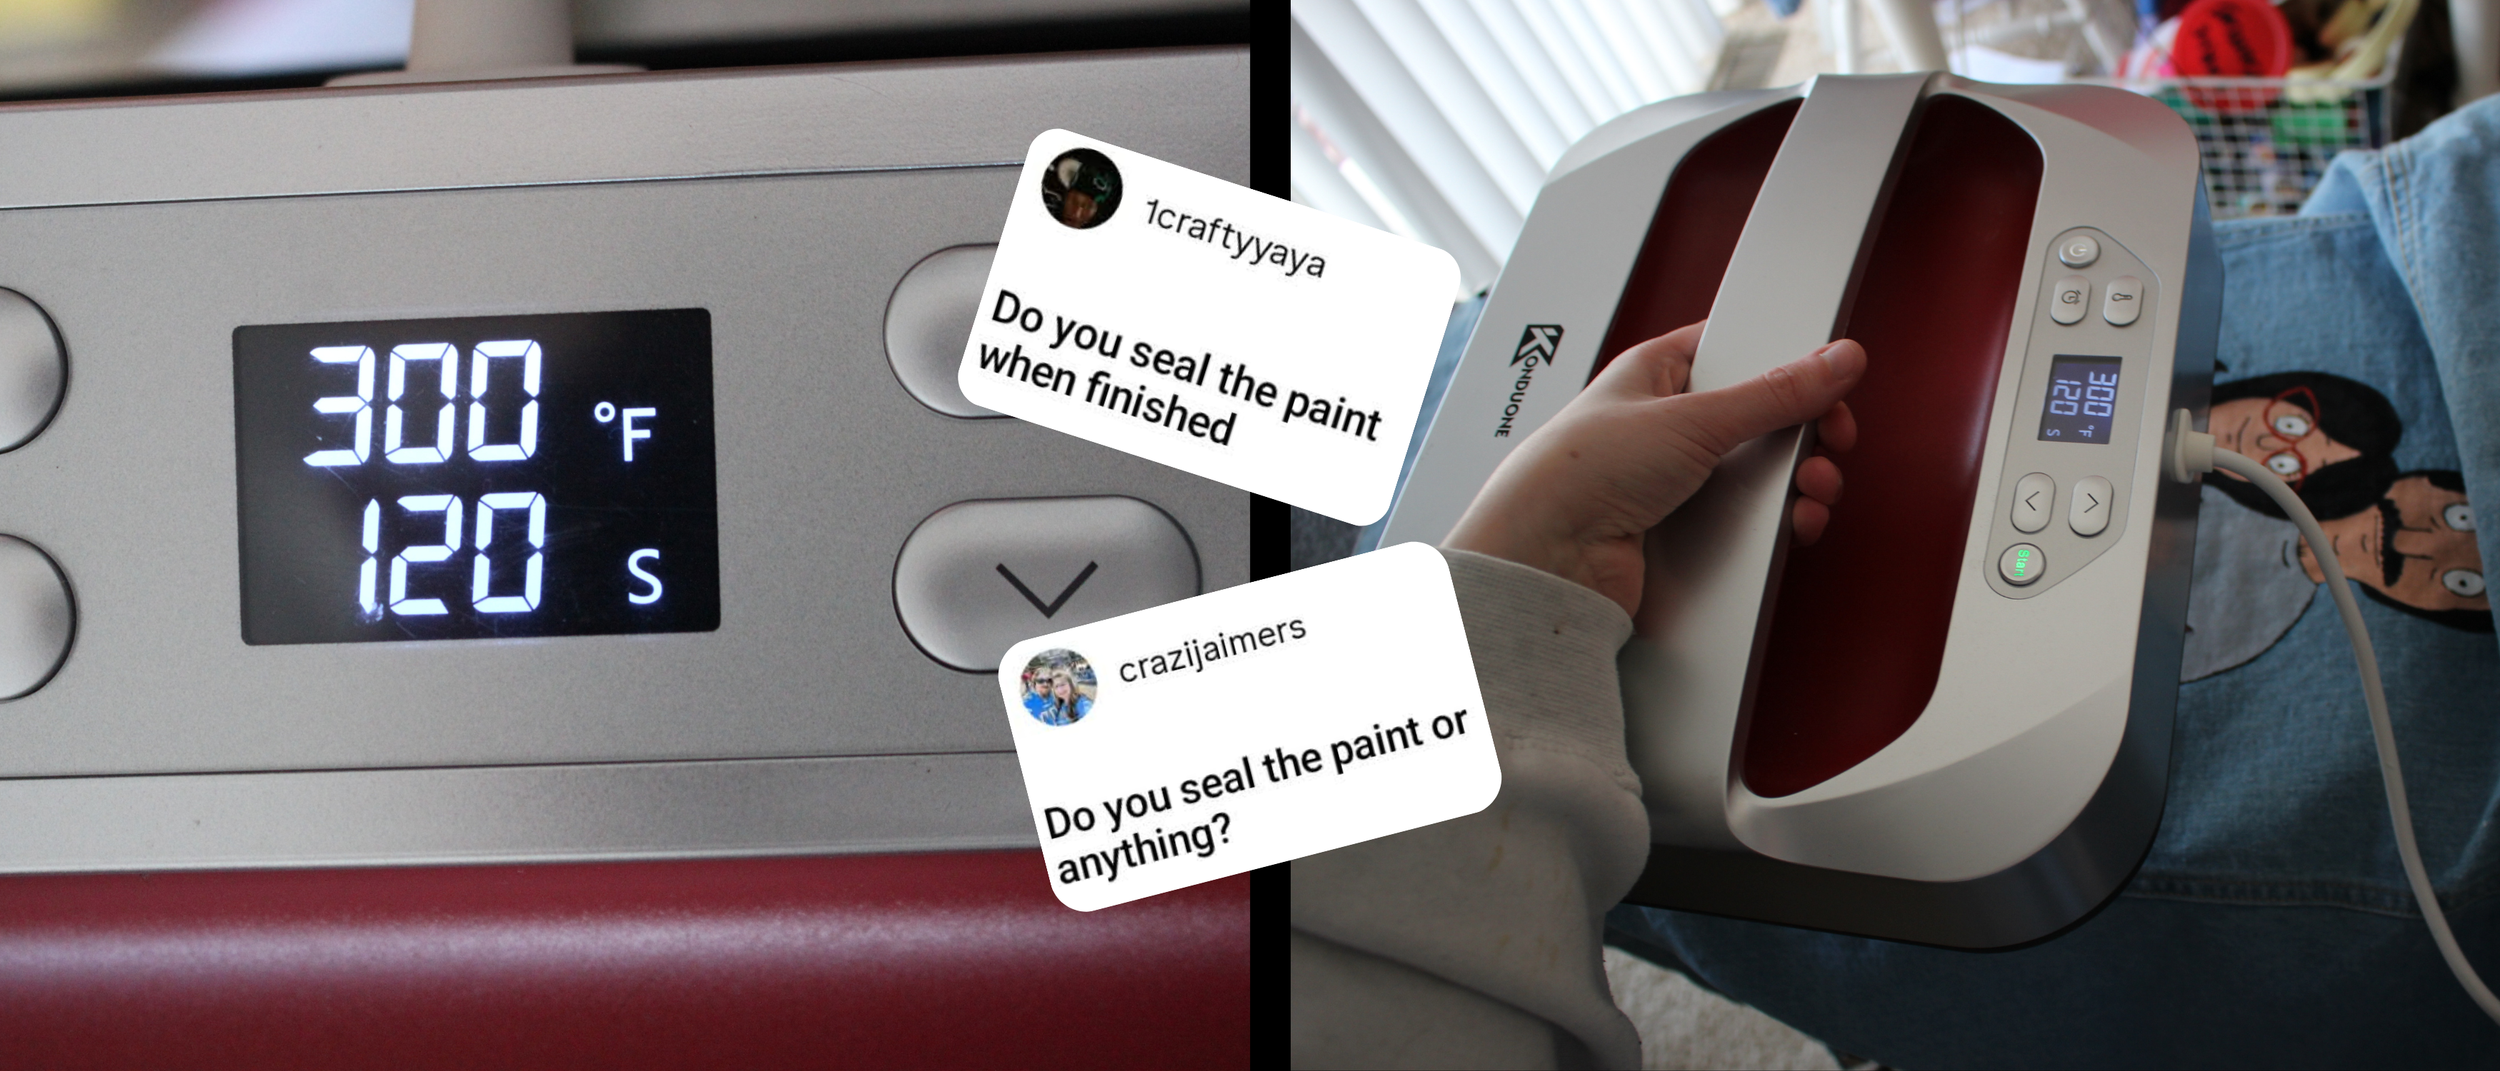
Image: Using heat press to iron design
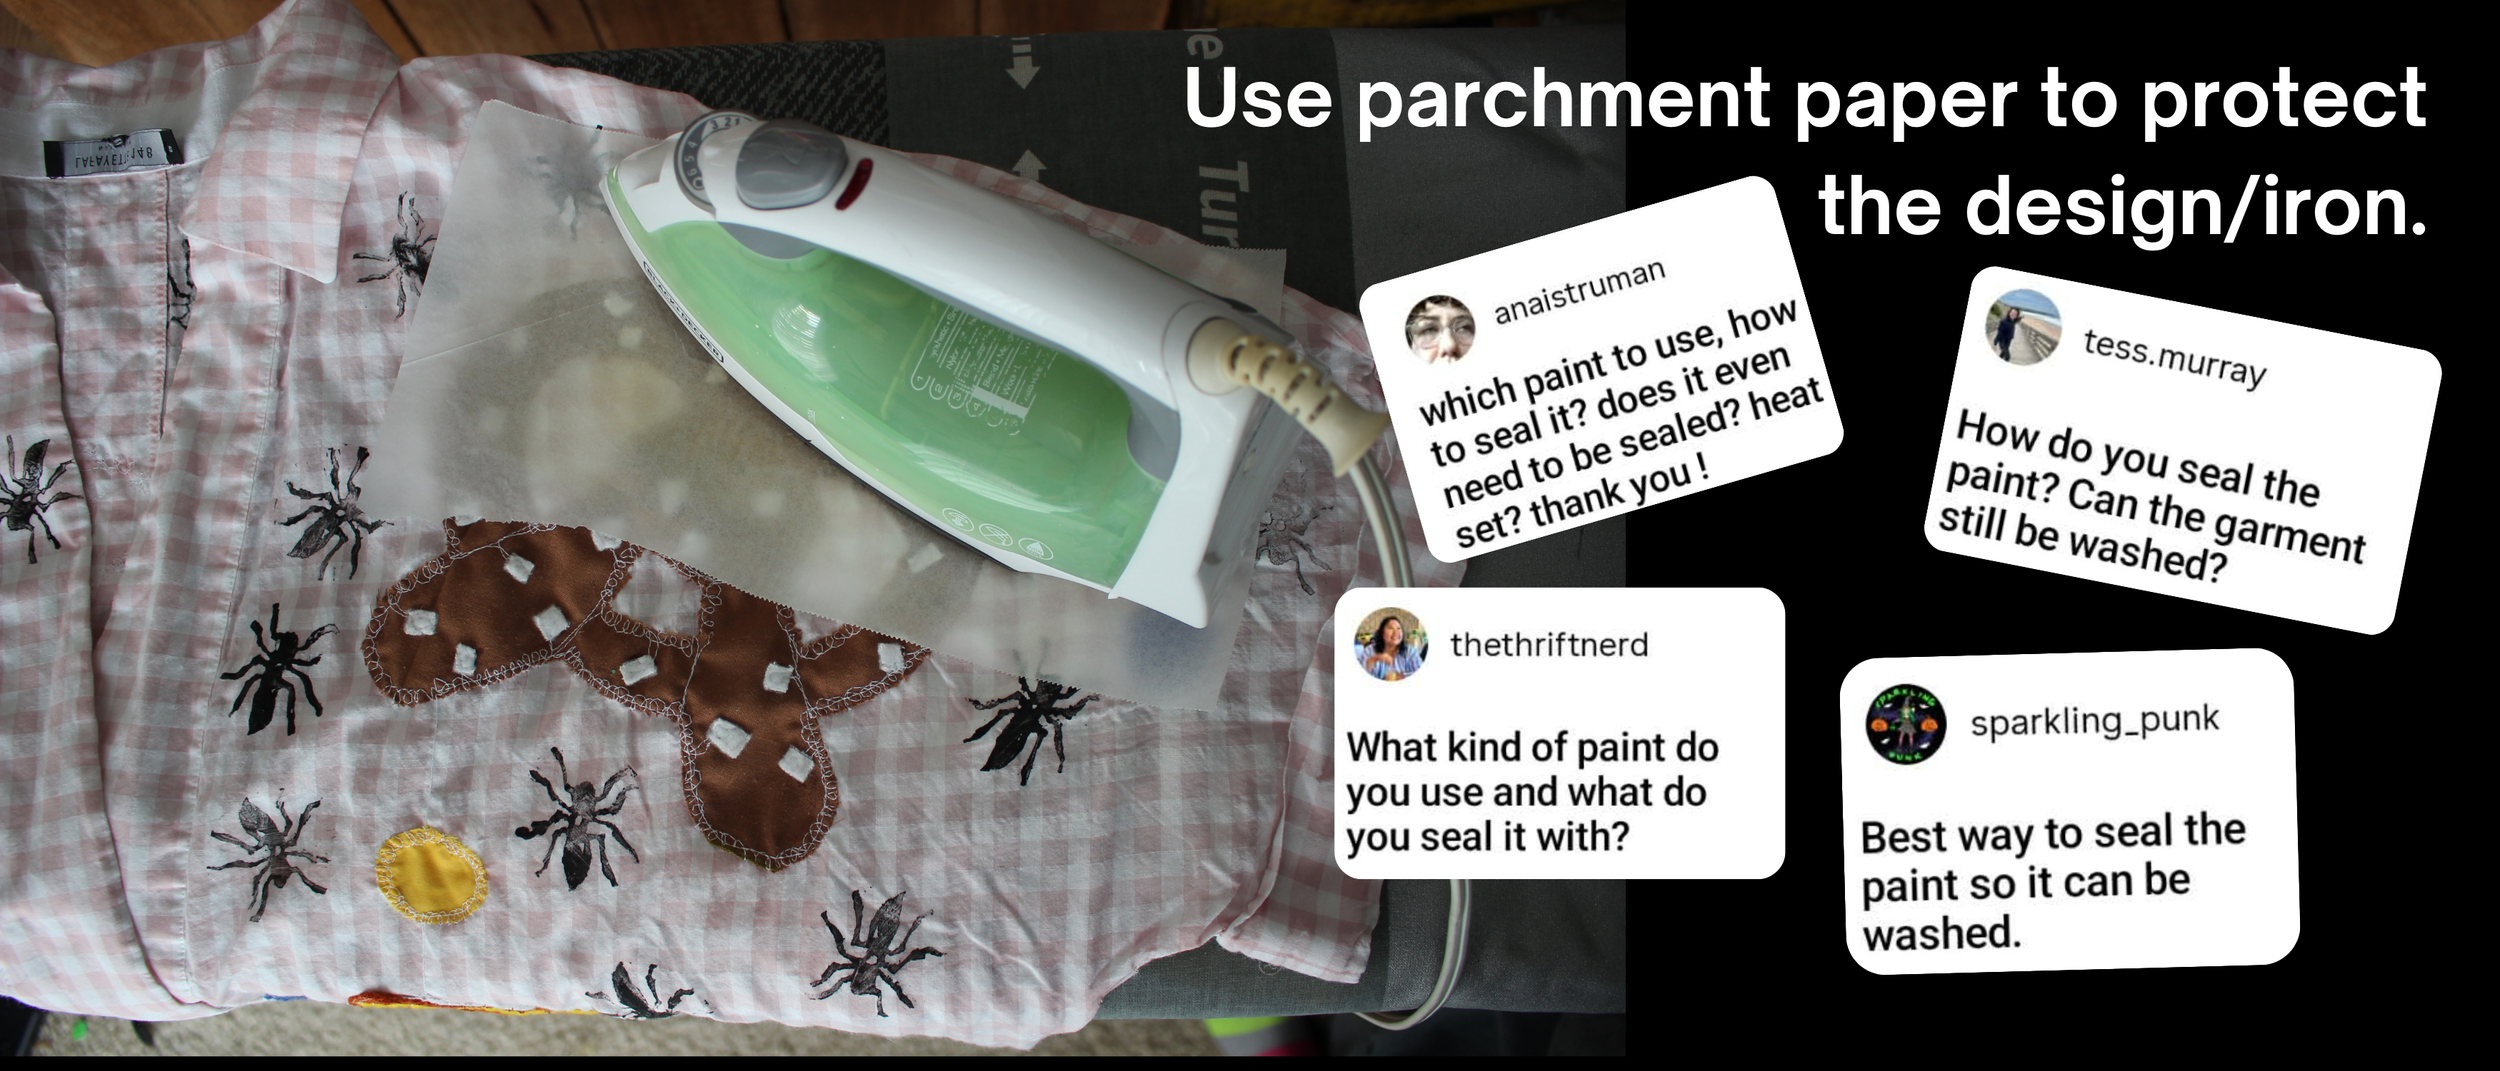
Image: Ironing design with a regular iron and parchment paper
Washing the Design
Turn the garment inside out to protect other clothes in the wash.
Wash with cold water,
Check to make sure the paint stayed on!
I typically air dry for best longevity. You can machine dry your pieces on low temperature, but the paint will not last as long.
Just hang it on your shower curtain, door frame, or my favorite: a long wooden dowel from Joann’s when they were closing.
Notes:
My Bob’s Burgers jacket rubbed off a little, I am going to use embroidery to fix the black parts, because you can’t apply new paint over cured paint.
The other designs turned out fine :)
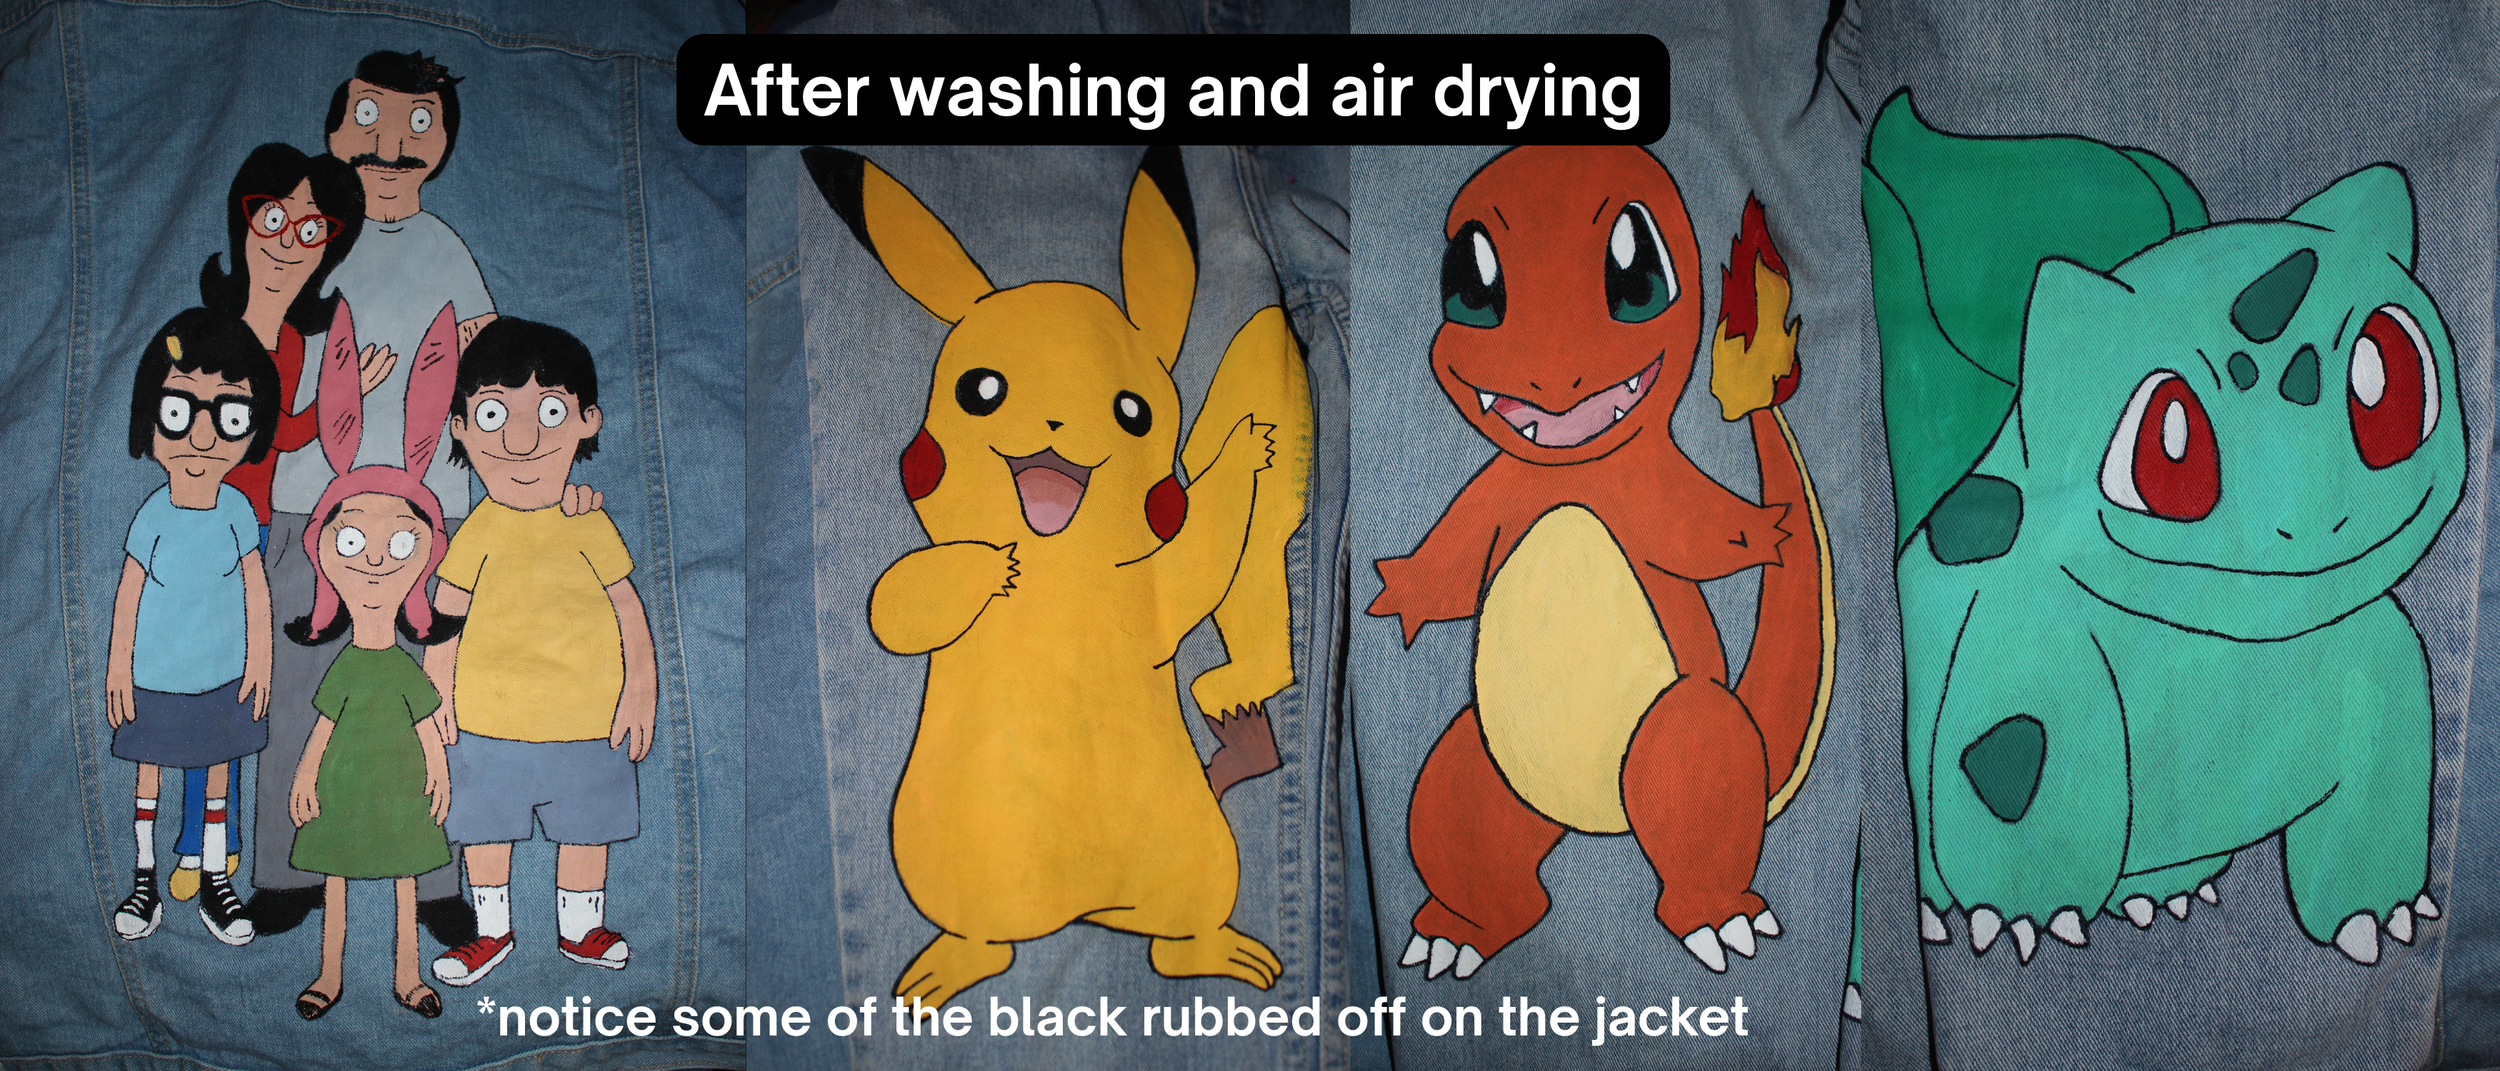
Image: Results after washing and drying
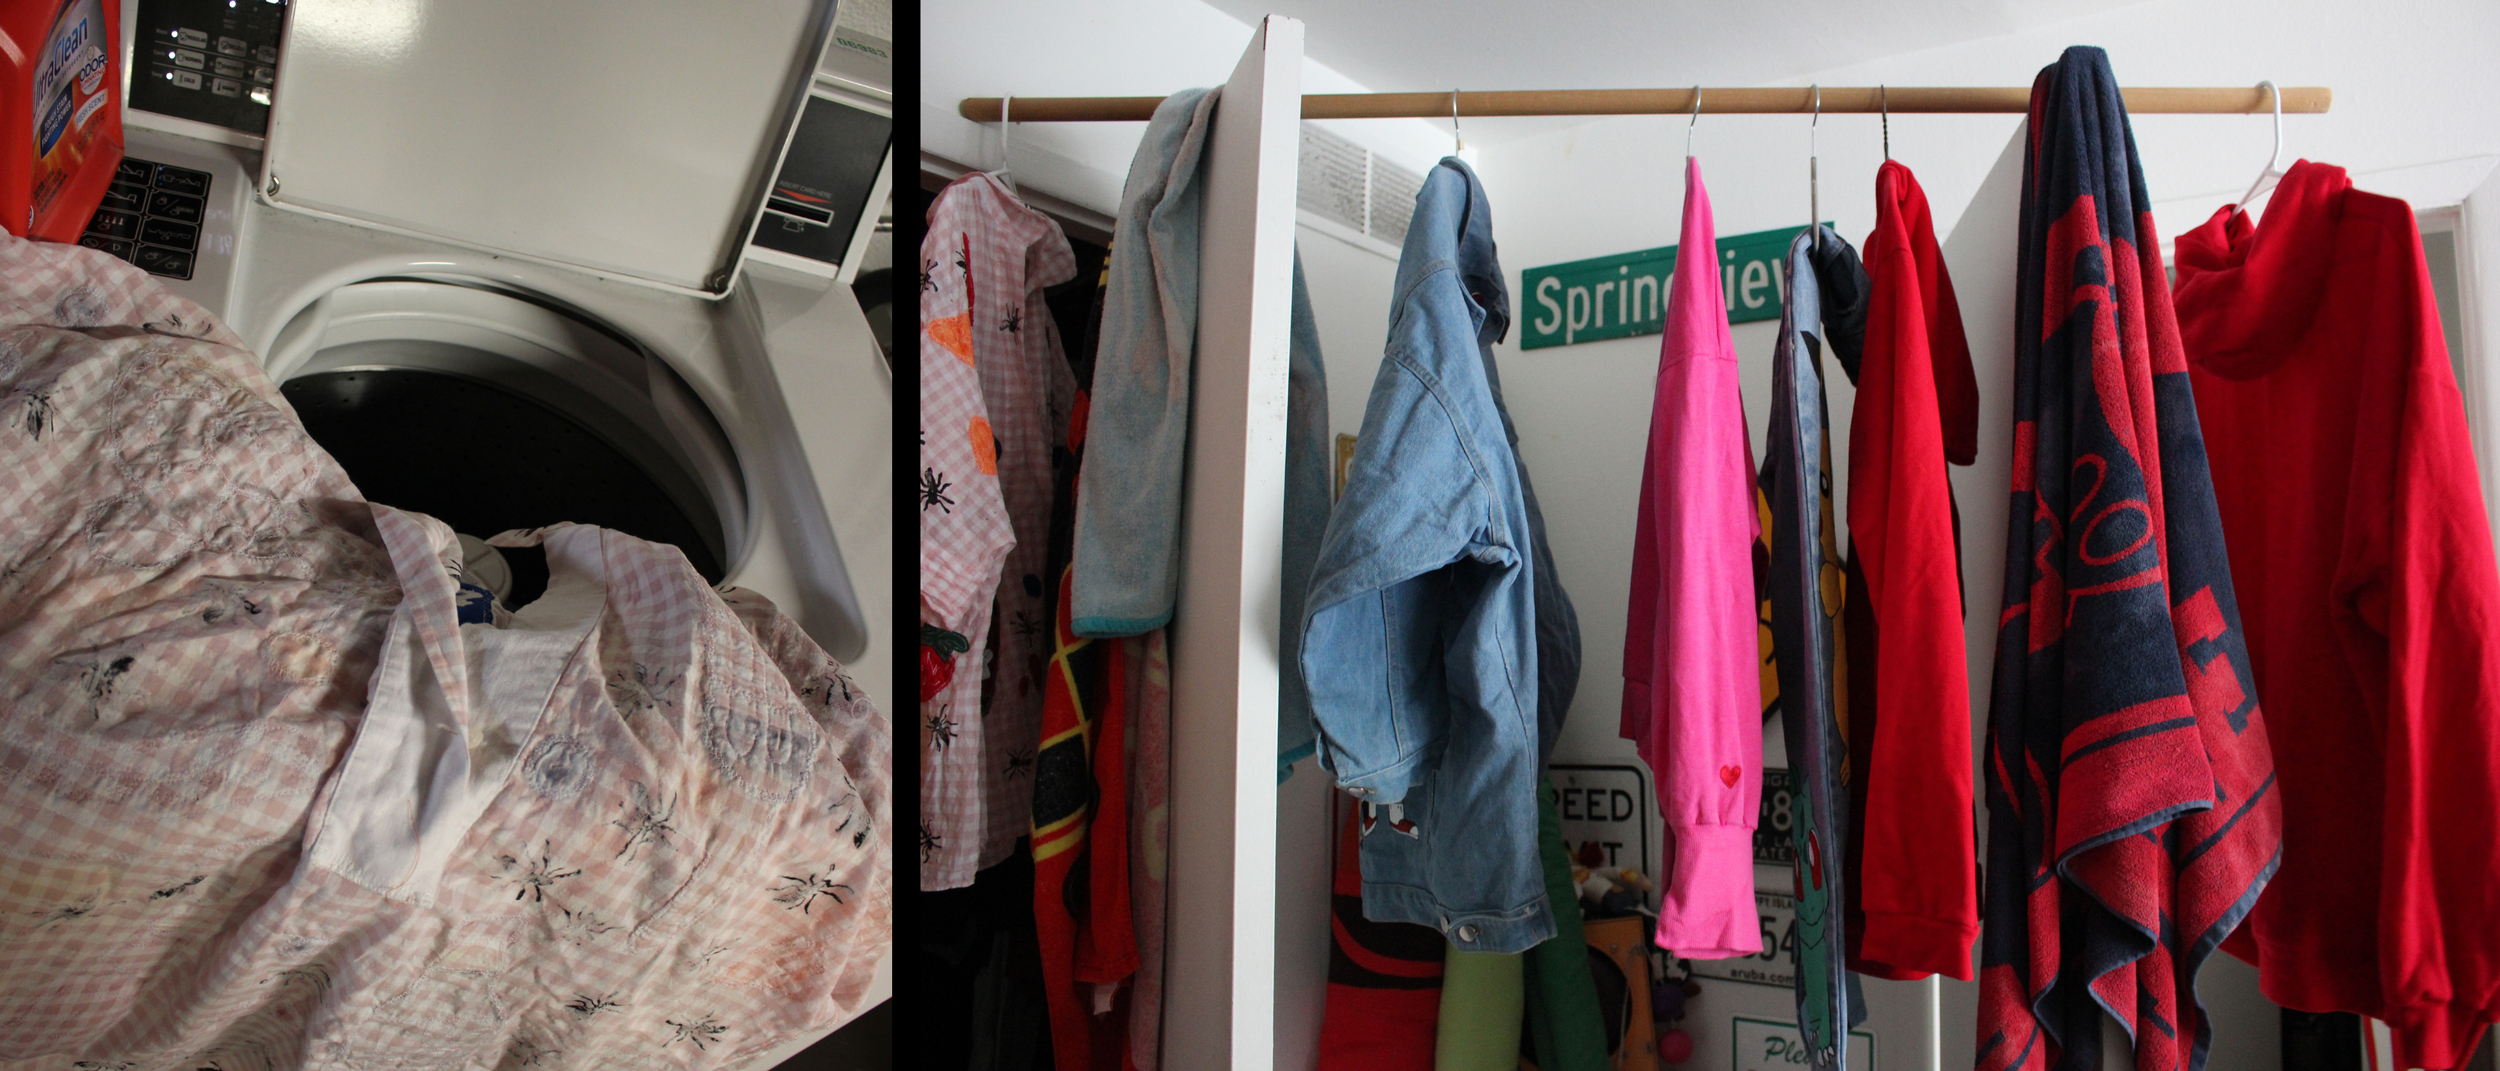
Image: Machine washing, air drying garments.
Paint Cracking?
There are many reasons why paint might crack. I still find myself learning new problems and techniques to this day.
Wrong fabric type: Perhaps there were other blends of fabric in the garment? Natural fibers are best, or check your paint container for info.
Wrong paint type: Not all paints are created equal. I found I like the “FLEX” version of Speedball Screen Printing Ink, cause it has better usability, and flexibility. If you’re using a different brand, check their website for info. I have yet to try Plastisol Inks, which are oil based rather than water based.
Fabric was dirty/coated: The fabric might have residue buildup from improper washing. There might be debri you cant see, like special coatings.
Layers were too thick: Painting layers too thick can result in improper drying and curing.
Paint was too thick: If the paint was too thick as is… dried out/lack of water content.
Improper curing: You might be under-curing the paint, either with too low of temperature, or too little of time. On the other hand you could also be over-curing, with too high temperature/ too long of time. (The first option is most common)
Check your paint manufacturer for guidelines, check your iron settings, and make sure you’re adjusting for fabric type and thickness.
Paint Washing Off?
This is another common problem I’ve had in the past.
Under curing: You might need to increase iron temperature, or increase ironing time.
Something mixed in with the paint: Don’t use soap or alchohol to fix mistakes. Anything other than water (with water based paints) can mess with curing.
Don’t mix paints from different brands.
Wrong Paint: I made this mistake, so I figured I’d share. I accidentally bought a container of “Acrylic” Speedball Paint, cause the containers looks the same. This version is not for fabric.
Improper drying: Perhaps the paint wasn’t fully dry before you cured it.
Or try ironing the area for 10 seconds, lifting the iron to release steam, and then ironing the rest of the way.
Using steam? Make sure you don’t use the steam settings on your iron when curing.
GOOD LUCK!
It might seem daunting, but if you’re willing to make mistakes and learn as you go, I truly hope you try it out.
With much love and appreciation,
-Brit